BMW M3 CONVERTIBLE 2011 Owners Manual
M3 CONVERTIBLE 2011
BMW
BMW
https://www.carmanualsonline.info/img/1/94673/w960_94673-0.png
BMW M3 CONVERTIBLE 2011 Owners Manual
Trending: check oil, transmission, ESP, tire type, tires, warning, stop start
Page 131 of 174
131
Have your BMW center perform
maintenance and repair.
Be sure that all maintenance work is
recorded in the Service and Warranty
Information Booklet for US models, or
in the Warranty and Service Guide
Booklet for Canadian models. These
entries are your verification for the reg-
ular maintenance of your vehicle and
are required for the performance of
warranty repairs.<
CareYou can find everything you need to
know on this topic by consulting the
separate Caring for your vehicle bro-
chure.BMW Maintenance System
OverviewControlsMaintenanceRepairsDataIndex
Page 132 of 174
132Laws and regulations
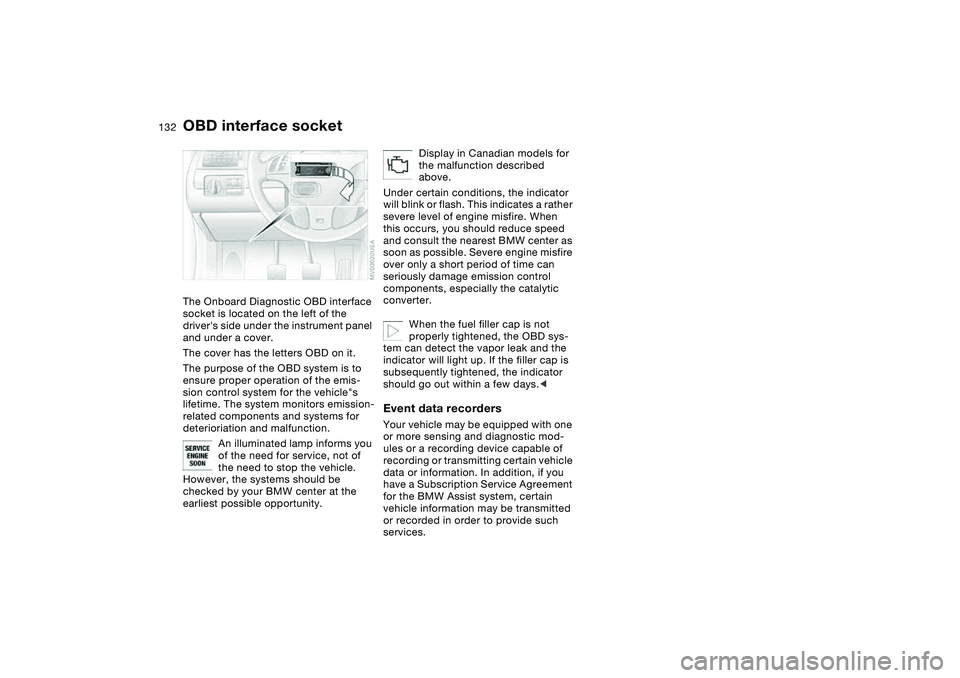
OBD interface socketThe Onboard Diagnostic OBD interface
socket is located on the left of the
driver's side under the instrument panel
and under a cover.
The cover has the letters OBD on it.
The purpose of the OBD system is to
ensure proper operation of the emis-
sion control system for the vehicle"s
lifetime. The system monitors emission-
related components and systems for
deterioriation and malfunction.
An illuminated lamp informs you
of the need for service, not of
the need to stop the vehicle.
However, the systems should be
checked by your BMW center at the
earliest possible opportunity.
Display in Canadian models for
the malfunction described
above.
Under certain conditions, the indicator
will blink or flash. This indicates a rather
severe level of engine misfire. When
this occurs, you should reduce speed
and consult the nearest BMW center as
soon as possible. Severe engine misfire
over only a short period of time can
seriously damage emission control
components, especially the catalytic
converter.
When the fuel filler cap is not
properly tightened, the OBD sys-
tem can detect the vapor leak and the
indicator will light up. If the filler cap is
subsequently tightened, the indicator
should go out within a few days.<
Event data recordersYour vehicle may be equipped with one
or more sensing and diagnostic mod-
ules or a recording device capable of
recording or transmitting certain vehicle
data or information. In addition, if you
have a Subscription Service Agreement
for the BMW Assist system, certain
vehicle information may be transmitted
or recorded in order to provide such
services.
Page 133 of 174
133
OverviewControlsMaintenanceRepairsDataIndex
Page 134 of 174
Page 135 of 174
135
Overview
Controls and features
Operation, maintenance
Owner service procedures
Technical data
Index
OverviewControlsMaintenanceRepairsDataIndex
Page 136 of 174
136Replacement procedures
Onboard tool kitThe onboard tool kit is located in the
luggage compartment lid.
To open, loosen the wing nut. For stor-
age place of towing eyelet, refer to
page 149.
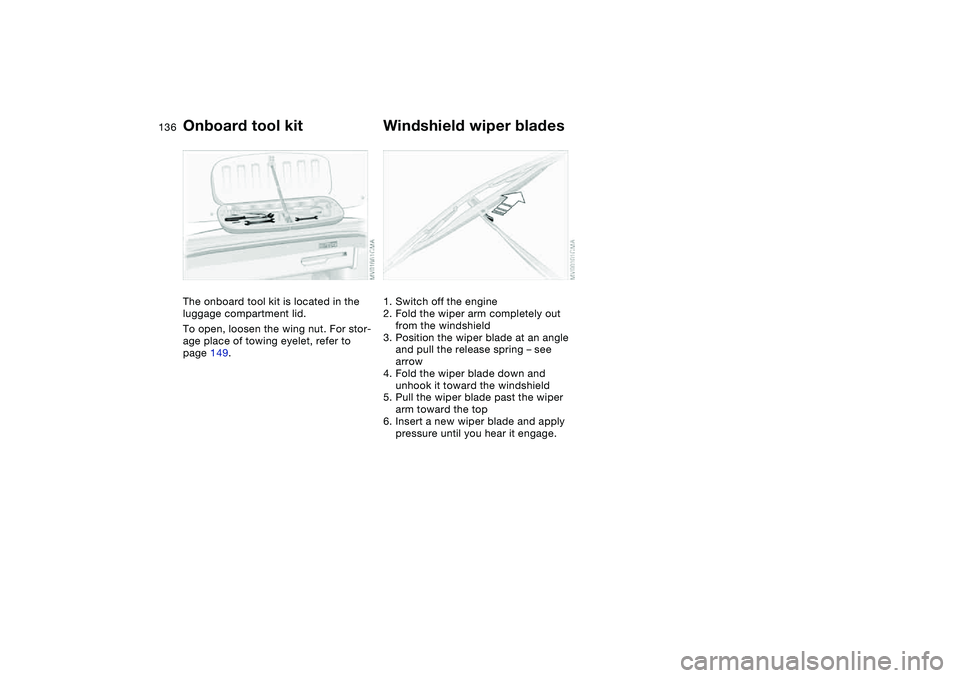
Windshield wiper blades1. Switch off the engine
2. Fold the wiper arm completely out
from the windshield
3. Position the wiper blade at an angle
and pull the release spring – see
arrow
4. Fold the wiper blade down and
unhook it toward the windshield
5. Pull the wiper blade past the wiper
arm toward the top
6. Insert a new wiper blade and apply
pressure until you hear it engage.
Page 137 of 174
137
Lamps and bulbsThe lamps and bulbs make essential
contributions to the safety of your vehi-
cle. Therefore, proceed carefully when
handling bulbs. BMW recommends that
you have such work performed by your
BMW center if you are not familiar with
the procedures.
Do not touch the glass portion of
a new bulb with your bare hands
since even small amounts of impurities
burn in to the surface and reduce the
service life of the bulb. Use a clean
cloth, paper napkin, or a similar mate-
rial, or hold the bulb by its metallic
base.<
A replacement bulb set is available from
your BMW center.
Before working on the electrical
system, switch off the electrical
accessory you are working on or dis-
connect the cable from the negative
terminal of the battery. Failure to
observe this precaution could result in
short circuits.
To prevent injuries and damage when
changing a bulb, be sure to comply with
any instructions provided by the bulb
manufacturer.<
Low beams and high beams>Low beams: H7 bulb, 55 watts
>High beams: H7 bulb, 55 watts
The H7 bulb is pressurized. There-
fore, wear safety glasses and pro-
tective gloves. Failure to comply with
this precaution could lead to injury if the
bulb is damaged.<
Please contact a BMW center in case of
a malfunction.Parking lamps5 watt bulb
Please contact a BMW center in case of
a malfunction.
When cleaning the headlamps, please
follow the instructions in the Caring for
your vehicle brochure.Xenon lamps*The service life of these bulbs is very
long and the probability of a failure is
very low, provided that they are not
switched on and off an unusual number
of times. If one of these bulbs should
nevertheless fail, it is possible to con-
tinue driving with great caution using
the fog lamps, provided traffic laws in
your area do not prohibit this.
Because of the extremely high
voltages involved, any work on the
xenon lighting system, including bulb-
changing, should be carried out by
technically qualified personnel only.
Otherwise, there is a risk of fatal
injury.<
OverviewControlsMaintenanceRepairsDataIndex
Page 138 of 174
138
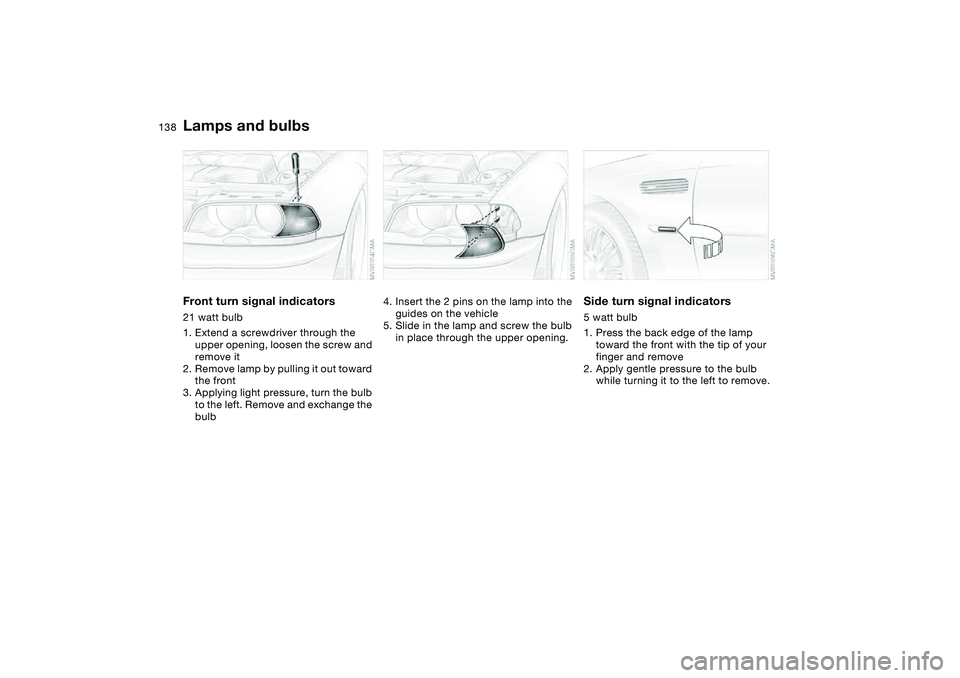
Front turn signal indicators21 watt bulb
1. Extend a screwdriver through the
upper opening, loosen the screw and
remove it
2. Remove lamp by pulling it out toward
the front
3. Applying light pressure, turn the bulb
to the left. Remove and exchange the
bulb
4. Insert the 2 pins on the lamp into the
guides on the vehicle
5. Slide in the lamp and screw the bulb
in place through the upper opening.
Side turn signal indicators5 watt bulb
1. Press the back edge of the lamp
toward the front with the tip of your
finger and remove
2. Apply gentle pressure to the bulb
while turning it to the left to remove.
Lamps and bulbs
Page 139 of 174
139
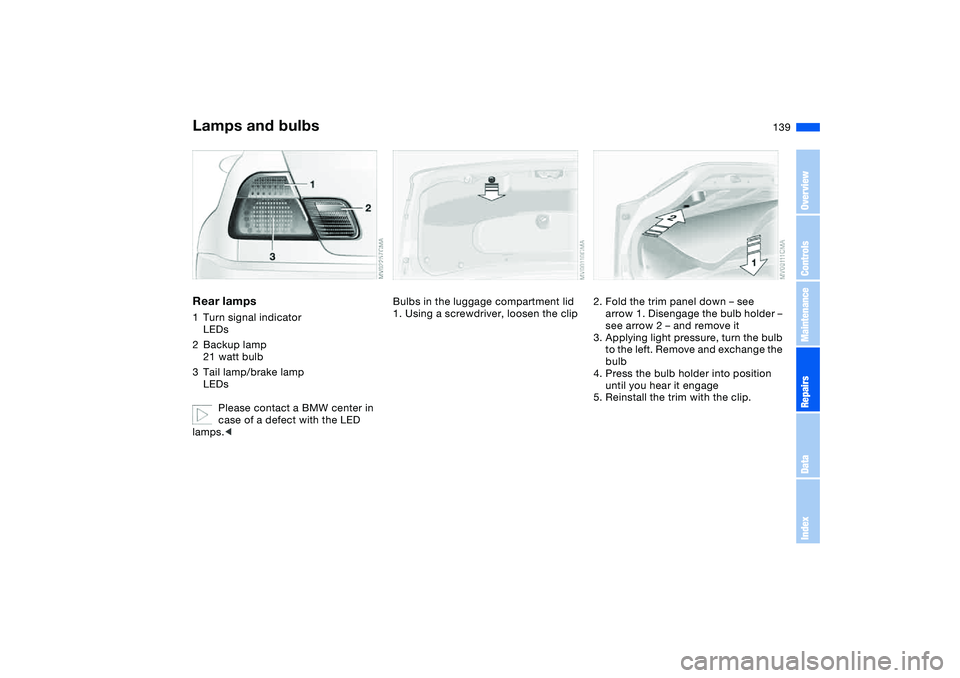
Rear lamps1Turn signal indicator
LEDs
2Backup lamp
21 watt bulb
3Tail lamp/brake lamp
LEDs
Please contact a BMW center in
case of a defect with the LED
lamps.<
Bulbs in the luggage compartment lid
1. Using a screwdriver, loosen the clip
2. Fold the trim panel down – see
arrow 1. Disengage the bulb holder –
see arrow 2 – and remove it
3. Applying light pressure, turn the bulb
to the left. Remove and exchange the
bulb
4. Press the bulb holder into position
until you hear it engage
5. Reinstall the trim with the clip.
Lamps and bulbs
OverviewControlsMaintenanceRepairsDataIndex
Page 140 of 174
140
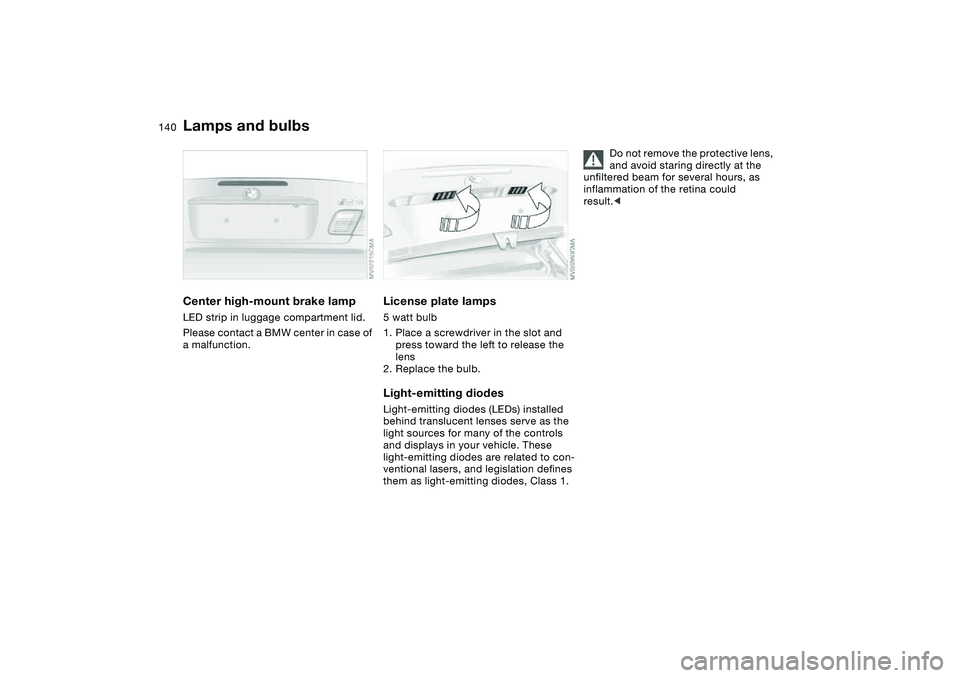
Center high-mount brake lampLED strip in luggage compartment lid.
Please contact a BMW center in case of
a malfunction.
License plate lamps5 watt bulb
1. Place a screwdriver in the slot and
press toward the left to release the
lens
2. Replace the bulb.Light-emitting diodesLight-emitting diodes (LEDs) installed
behind translucent lenses serve as the
light sources for many of the controls
and displays in your vehicle. These
light-emitting diodes are related to con-
ventional lasers, and legislation defines
them as light-emitting diodes, Class 1.
Do not remove the protective lens,
and avoid staring directly at the
unfiltered beam for several hours, as
inflammation of the retina could
result.<
Lamps and bulbs
Trending: oil capacity, oil level, fuel filter, wiper blades, climate control, inflation pressure, check engine light
