wheel torque BMW MOTORRAD G 650 GS 2010 Rider's Manual (in English)
[x] Cancel search | Manufacturer: BMW MOTORRAD, Model Year: 2010, Model line: G 650 GS, Model: BMW MOTORRAD G 650 GS 2010Pages: 136, PDF Size: 1.73 MB
Page 37 of 136
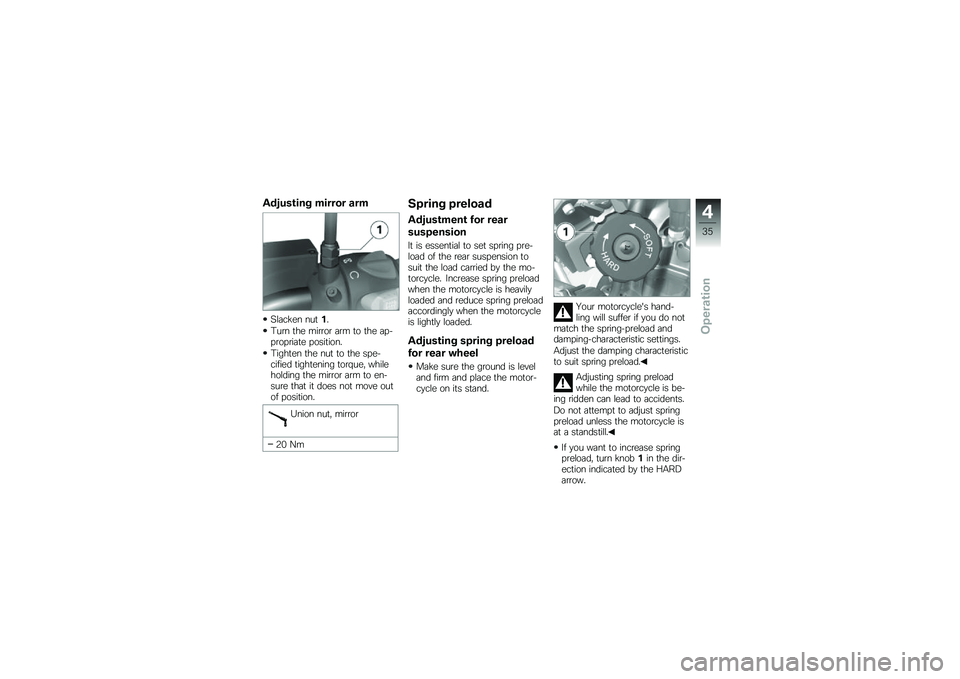
Adjusting mirror arm
Slacken nut1.
Turn the mirror arm to the ap-propriate position.
Tighten the nut to the spe-cified tightening torque, whileholding the mirror arm to en-sure that it does not move outof position.
Union nut, mirror
20 Nm
Spring preload
Adjustment for rear
suspension
It is essential to set spring pre-load of the rear suspension tosuit the load carried by the mo-torcycle. Increase spring preloadwhen the motorcycle is heavilyloaded and reduce spring preloadaccordingly when the motorcycleis lightly loaded.
Adjusting spring preload
for rear wheel
Make sure the ground is leveland firm and place the motor-cycle on its stand.
Your motorcycle's hand-ling will suffer if you do notmatch the spring-preload anddamping-characteristic settings.
Adjust the damping characteristicto suit spring preload.
Adjusting spring preloadwhile the motorcycle is be-ing ridden can lead to accidents.
Do not attempt to adjust springpreload unless the motorcycle isat a standstill.
If you want to increase springpreload, turn knob1in the dir-ection indicated by the HARDarrow.
4
35
zOperation
Page 78 of 136
Adjust the chain sag
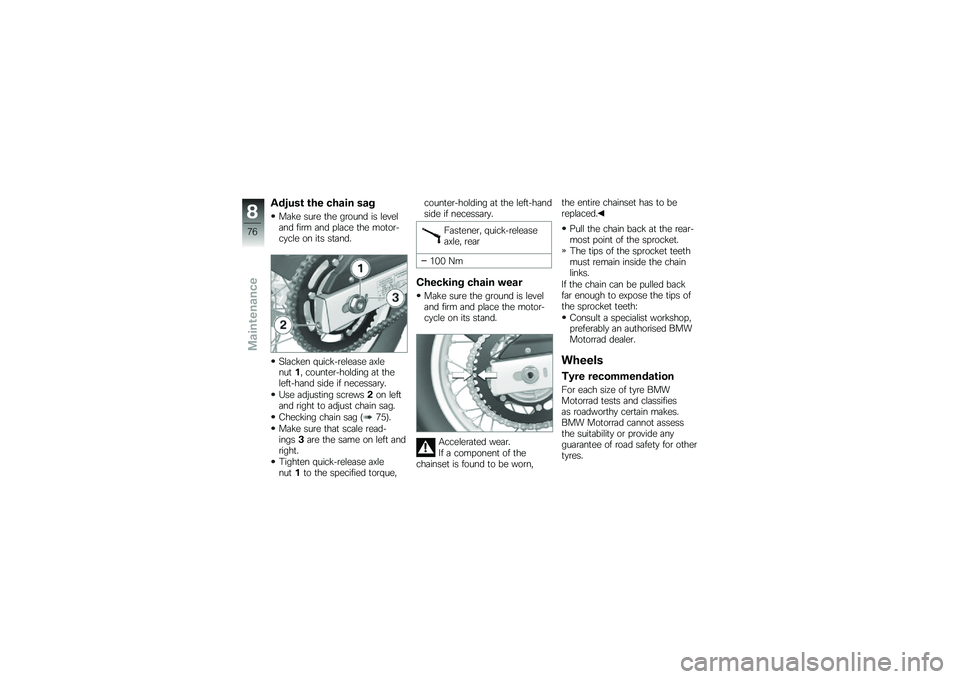
Make sure the ground is leveland firm and place the motor-cycle on its stand.
Slacken quick-release axlenut1, counter-holding at theleft-hand side if necessary.
Use adjusting screws2on leftand right to adjust chain sag.
Checking chain sag (75).
Make sure that scale read-ings3are the same on left andright.
Tighten quick-release axlenut1to the specified torque,
counter-holding at the left-handside if necessary.
Fastener, quick-releaseaxle, rear
100 Nm
Checking chain wear
Make sure the ground is leveland firm and place the motor-cycle on its stand.
Accelerated wear.
If a component of thechainset is found to be worn,
the entire chainset has to bereplaced.
Pull the chain back at the rear-most point of the sprocket.
The tips of the sprocket teethmust remain inside the chainlinks.
If the chain can be pulled backfar enough to expose the tips ofthe sprocket teeth:
Consult a specialist workshop,preferably an authorised BMWMotorrad dealer.
Wheels
Tyre recommendation
For each size of tyre BMWMotorrad tests and classifiesas roadworthy certain makes.BMW Motorrad cannot assessthe suitability or provide anyguarantee of road safety for othertyres.
8
76
zMaintenance
Page 80 of 136
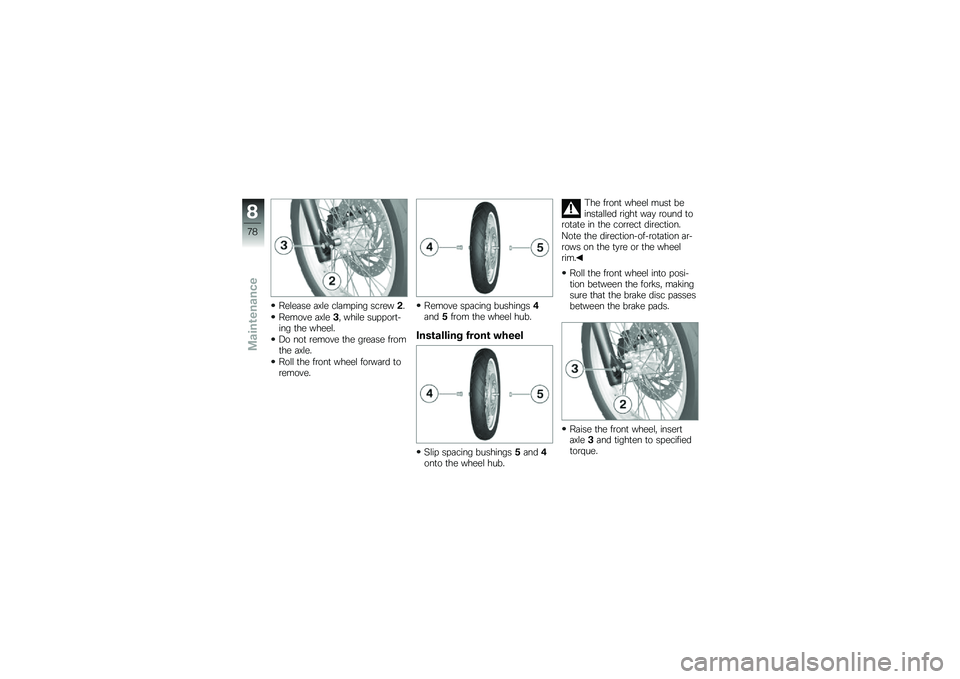
Release axle clamping screw2.
Remove axle3, while support-ing the wheel.
Do not remove the grease fromthe axle.
Roll the front wheel forward toremove.
Remove spacing bushings4and5from the wheel hub.
Installing front wheel
Slip spacing bushings5and4onto the wheel hub.
The front wheel must beinstalled right way round torotate in the correct direction.
Note the direction-of-rotation ar-rows on the tyre or the wheelrim.
Roll the front wheel into posi-tion between the forks, makingsure that the brake disc passesbetween the brake pads.
Raise the front wheel, insertaxle3and tighten to specifiedtorque.
8
78
zMaintenance
Page 81 of 136
Fastener, quick-releaseaxle, front
45 Nm
Remove the front-wheel stand.
Apply the front brake and firmlycompress the front forks sever-al times
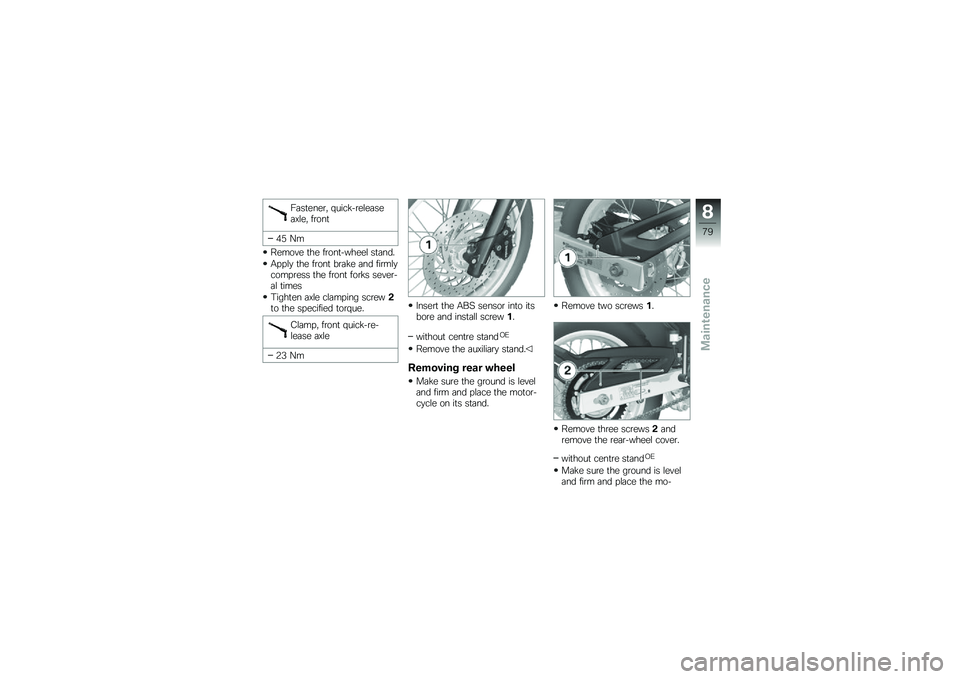
Tighten axle clamping screw2to the specified torque.
Clamp, front quick-re-lease axle
23 Nm
Insert the ABS sensor into itsbore and install screw1.
without centre standOE
Remove the auxiliary stand.
Removing rear wheel
Make sure the ground is leveland firm and place the motor-cycle on its stand.
Remove two screws1.
Remove three screws2andremove the rear-wheel cover.
without centre standOE
Make sure the ground is leveland firm and place the mo-
8
79
zMaintenance
Page 83 of 136
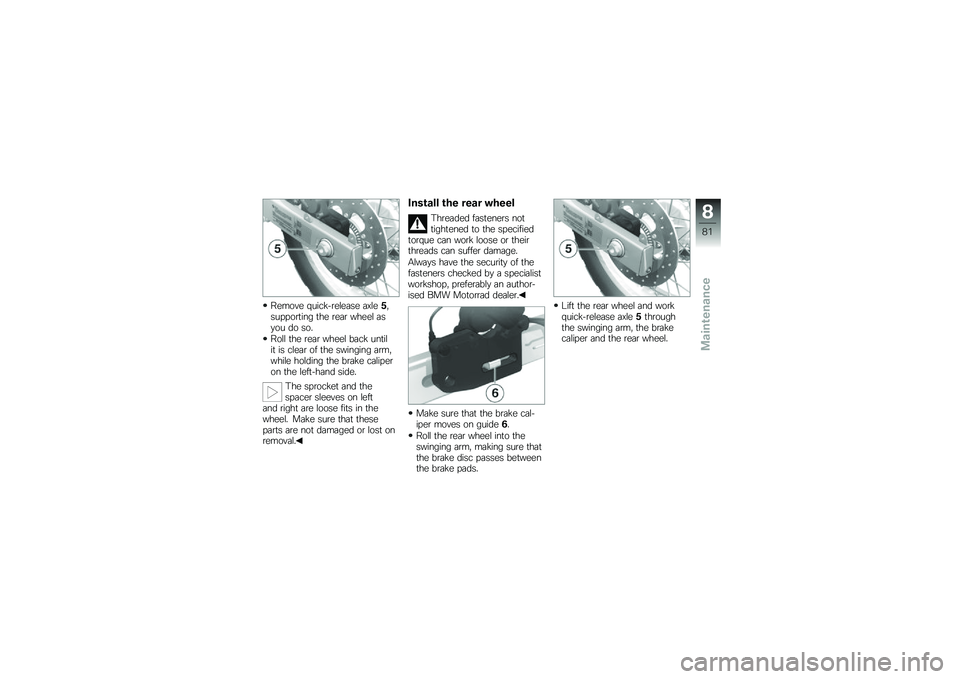
Remove quick-release axle5,supporting the rear wheel asyou do so.
Roll the rear wheel back untilit is clear of the swinging arm,while holding the brake caliperon the left-hand side.
The sprocket and thespacer sleeves on leftand right are loose fits in thewheel. Make sure that theseparts are not damaged or lost onremoval.
Install the rear wheel
Threaded fasteners nottightened to the specifiedtorque can work loose or theirthreads can suffer damage.
Always have the security of thefasteners checked by a specialistworkshop, preferably an author-ised BMW Motorrad dealer.
Make sure that the brake cal-iper moves on guide6.
Roll the rear wheel into theswinging arm, making sure thatthe brake disc passes betweenthe brake pads.
Lift the rear wheel and workquick-release axle5throughthe swinging arm, the brakecaliper and the rear wheel.
8
81
zMaintenance
Page 134 of 136

Spring preloadAdjuster, rear, 13
Adjusting, 35
Standards, 7
Starter, 17
Starting, 44
Status indicatorsSee also warnings, 20
Standard status indicators, 20
Warnings, 20
Steering lock, 28
TTechnical dataBrakes, 113
Bulbs, 115
Clutch, 111
Dimensions, 117
Electrics, 114
Engine, 109
Engine oil, 110
Frame, 116
Fuel, 110
Rear-wheel drive, 112
Running gear, 112
Spark plugs, 114
Standards, 7
Transmission, 111
Tyres, 113
Weights, 117
Wheels, 113
Telltale lights, 15Overview, 20
ToolkitContents, 66
Stowage, 14
TopcaseOperation, 61
Torques, 107
TransmissionTechnical data, 111
TransportationLashing, 50
Troubleshooting chart, 106
Turn indicatorsOperate, 16
Telltale light, 20
Type platePosition on the motorcycle, 13
TyresBMW recommendations, 113
Inflation pressure, 37
Pressures, 114
Recommendations, 76
Running in, 46
Table of tyre pressures, 13, 14
Technical data, 113
VVehicle identification numberPosition on the motorcycle, 13
WWarnings, 20With ABS, 23
Warnings, overview, 21, 24
Weights, 117Payload table, 14
WheelsChange of size, 77
Checking rims, 74
Install the rear wheel, 81
Removing rear wheel, 79
Technical data, 113
12
132
zIndex