BMW MOTORRAD G650 XMOTO 2007 Rider's Manual (in English)
G650 XMOTO 2007
BMW MOTORRAD
BMW MOTORRAD
https://www.carmanualsonline.info/img/47/37982/w960_37982-0.png
BMW MOTORRAD G650 XMOTO 2007 Rider's Manual (in English)
Trending: power steering fluid, oil filter, engine, brake pads replacement, auxiliary battery, check oil, low oil pressure
Page 81 of 132
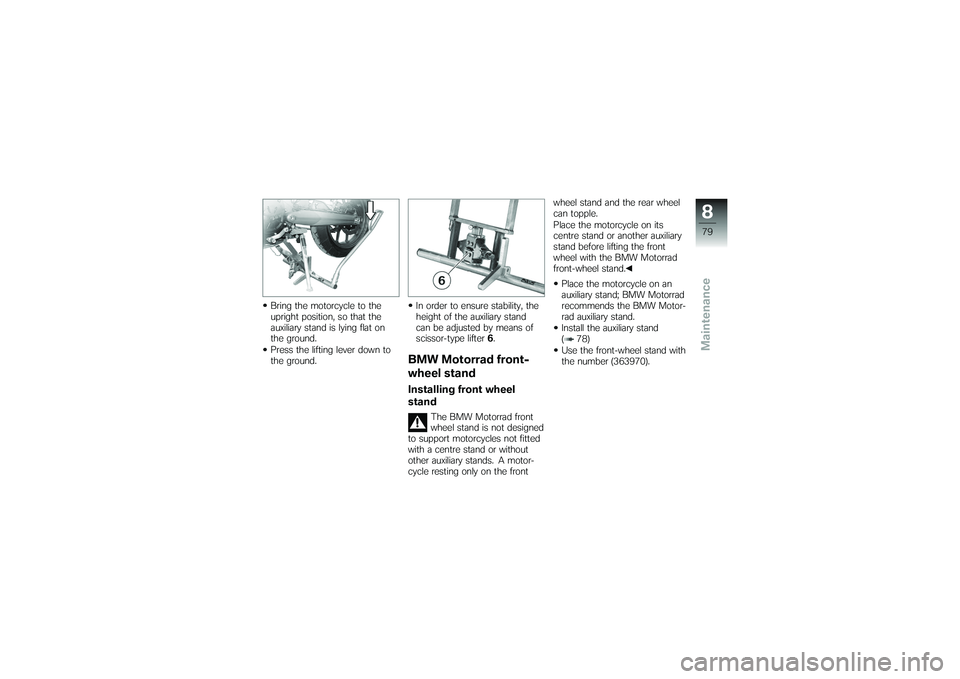
Bring the motorcycle to the
upright position, so that the
auxiliary stand is lying flat on
the ground.
Press the lifting lever down to
the ground.In order to ensure stability, the
height of the auxiliary stand
can be adjusted by means of
scissor-type lifter 6.
BMW Motorrad front-
wheel standInstalling front wheel
stand
The BMW Motorrad front
wheel stand is not designed
to support motorcycles not fitted
with a centre stand or without
other auxiliary stands. A motor-
cycle resting only on the front wheel stand and the rear wheel
can topple.
Place the motorcycle on its
centre stand or another auxiliary
stand before lifting the front
wheel with the BMW Motorrad
front-wheel stand.
Place the motorcycle on an
auxiliary stand; BMW Motorrad
recommends the BMW Motor-
rad auxiliary stand.
Install the auxiliary stand
( 78)
Use the front-wheel stand with
the number (363970).
879zMaintenance
Page 82 of 132
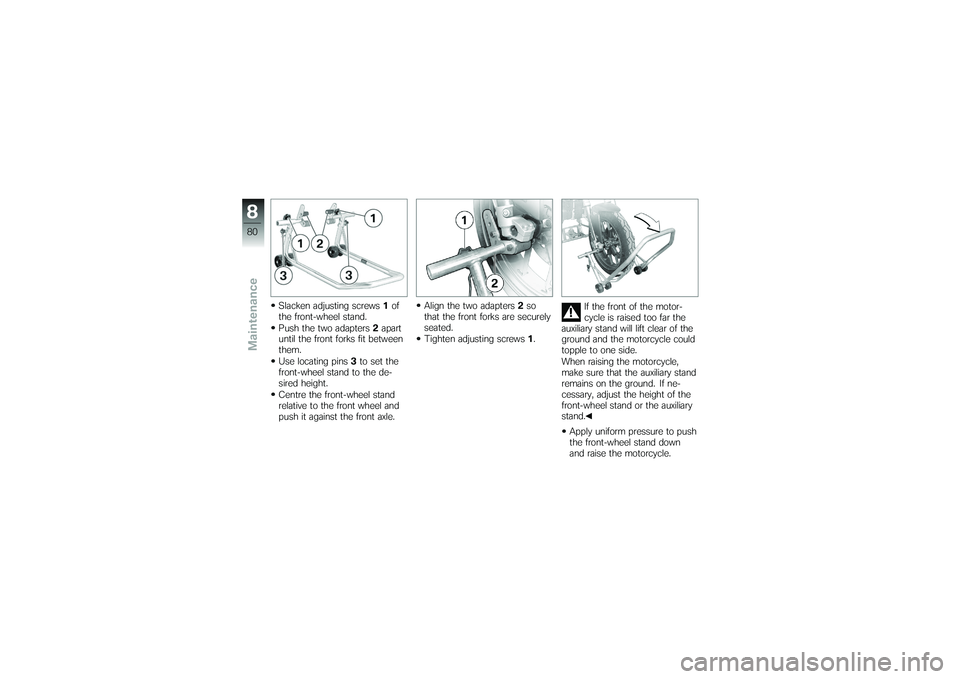
Slacken adjusting screws1of
the front-wheel stand.
Push the two adapters 2apart
until the front forks fit between
them.
Use locating pins 3to set the
front-wheel stand to the de-
sired height.
Centre the front-wheel stand
relative to the front wheel and
push it against the front axle. Align the two adapters
2so
that the front forks are securely
seated.
Tighten adjusting screws 1. If the front of the motor-
cycle is raised too far the
auxiliary stand will lift clear of the
ground and the motorcycle could
topple to one side.
When raising the motorcycle,
make sure that the auxiliary stand
remains on the ground. If ne-
cessary, adjust the height of the
front-wheel stand or the auxiliary
stand.
Apply uniform pressure to push
the front-wheel stand down
and raise the motorcycle.
880zMaintenance
Page 83 of 132
FusesRemoving fuse
Risk of fire if an attempt is
made to jumper defective
fuse.
Always replace defective fuses
with new fuses of the correct
amperage rating.
Switch off the ignition.
Remove the seat ( 38)
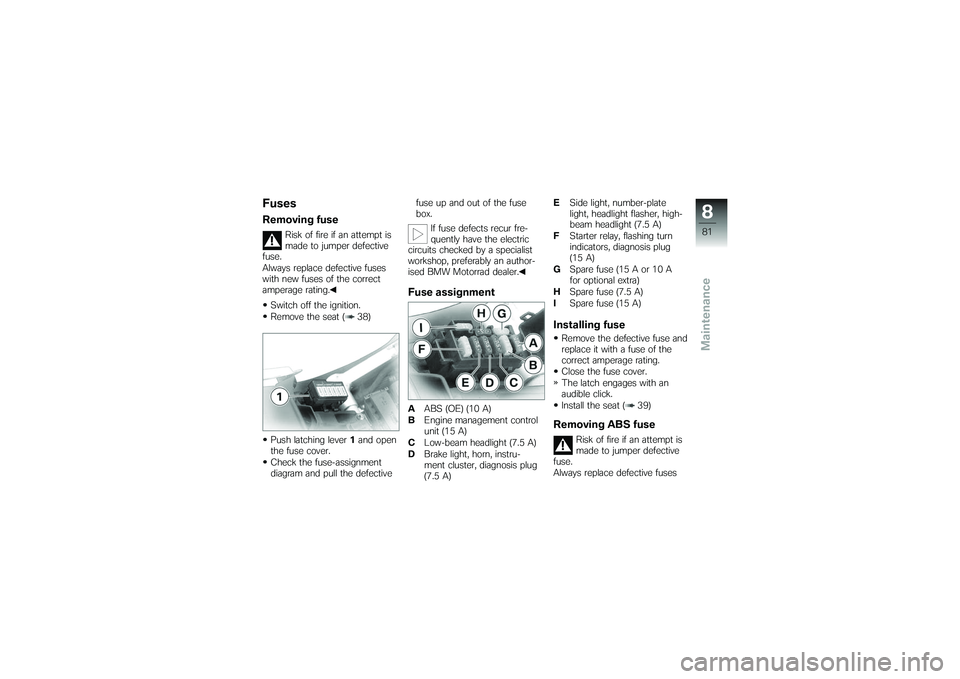
Push latching lever 1and open
the fuse cover.
Check the fuse-assignment
diagram and pull the defective fuse up and out of the fuse
box.
If fuse defects recur fre-
quently have the electric
circuits checked by a specialist
workshop, preferably an author-
ised BMW Motorrad dealer.
Fuse assignmentA ABS (OE) (10 A)
B Engine management control
unit (15 A)
C Low-beam headlight (7.5 A)
D Brake light, horn, instru-
ment cluster, diagnosis plug
(7.5 A) E
Side light, number-plate
light, headlight flasher, high-
beam headlight (7.5 A)
F Starter relay, flashing turn
indicators, diagnosis plug
(15 A)
G Spare fuse (15 A or 10 A
for optional extra)
H Spare fuse (7.5 A)
I Spare fuse (15 A)
Installing fuseRemove the defective fuse and
replace it with a fuse of the
correct amperage rating.
Close the fuse cover.
The latch engages with an
audible click.
Install the seat ( 39)Removing ABS fuse
Risk of fire if an attempt is
made to jumper defective
fuse.
Always replace defective fuses
881zMaintenance
Page 84 of 132
with new fuses of the correct
amperage rating.Switch off the ignition.
Remove the right side panel
( 93)
Check the fuse-assignment
diagram and pull the defective
fuse up and out of the fuse
box. If fuse defects recur fre-
quently have the electric
circuits checked by a specialist
workshop, preferably an author-
ised BMW Motorrad dealer.
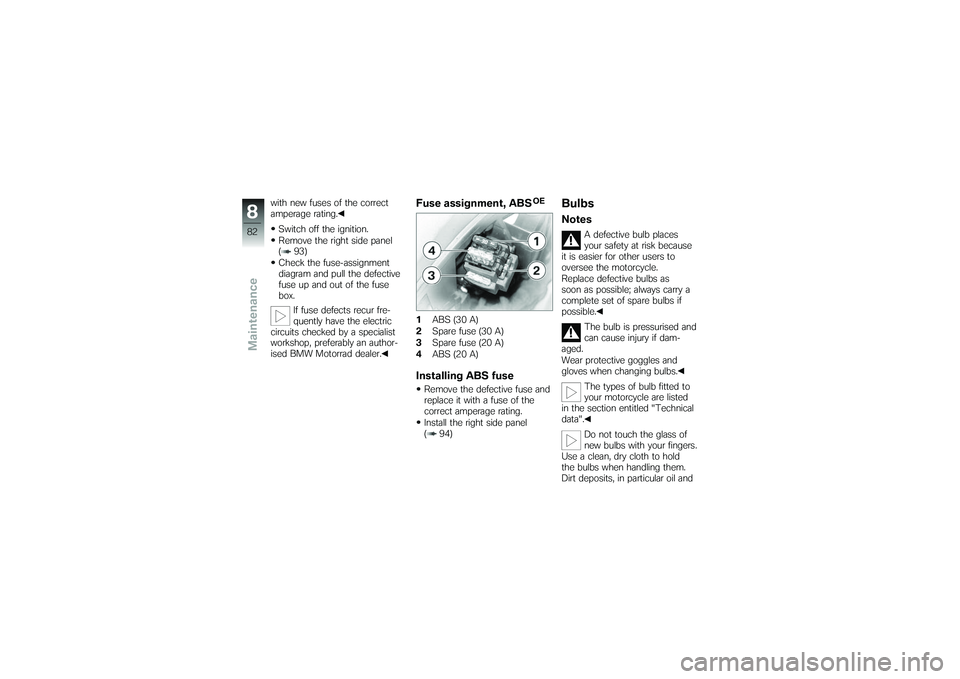
Fuse assignment, ABS
OE
1 ABS (30 A)
2 Spare fuse (30 A)
3 Spare fuse (20 A)
4 ABS (20 A)Installing ABS fuseRemove the defective fuse and
replace it with a fuse of the
correct amperage rating.
Install the right side panel
( 94)
BulbsNotes
A defective bulb places
your safety at risk because
it is easier for other users to
oversee the motorcycle.
Replace defective bulbs as
soon as possible; always carry a
complete set of spare bulbs if
possible.
The bulb is pressurised and
can cause injury if dam-
aged.
Wear protective goggles and
gloves when changing bulbs.
The types of bulb fitted to
your motorcycle are listed
in the section entitled "Technical
data".
Do not touch the glass of
new bulbs with your fingers.
Use a clean, dry cloth to hold
the bulbs when handling them.
Dirt deposits, in particular oil and
882zMaintenance
Page 85 of 132
grease, interfere with heat radi-
ation from the bulb. This leads
to overheating and shortens the
bulb's operating life.Removing headlight
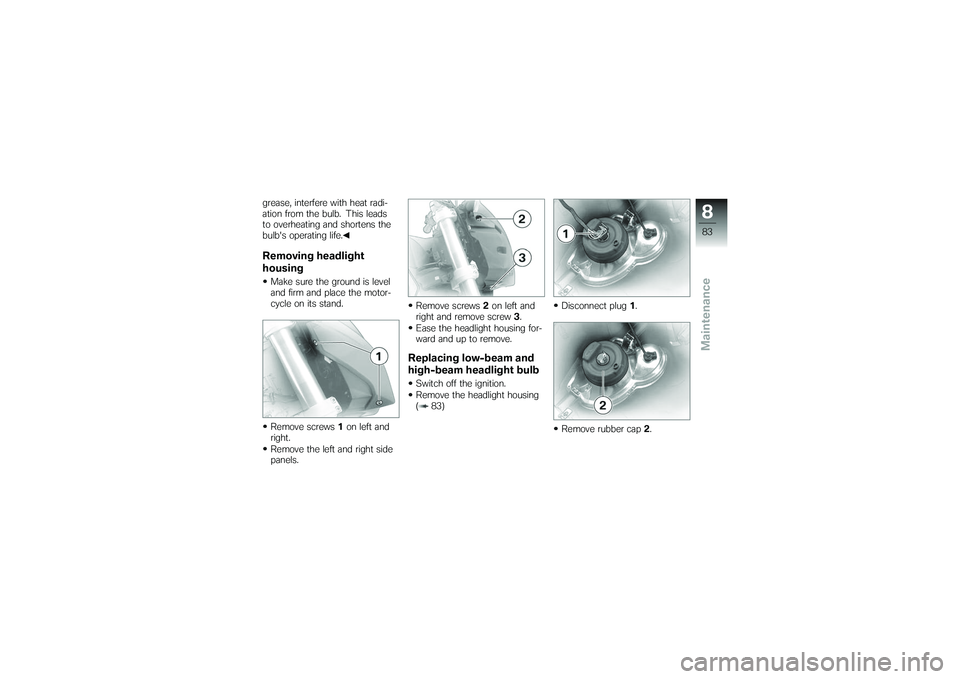
housingMake sure the ground is level
and firm and place the motor-
cycle on its stand.
Remove screws1on left and
right.
Remove the left and right side
panels. Remove screws
2on left and
right and remove screw 3.
Ease the headlight housing for-
ward and up to remove.
Replacing low-beam and
high-beam headlight bulbSwitch off the ignition.
Remove the headlight housing
( 83) Disconnect plug
1.
Remove rubber cap 2.
883zMaintenance
Page 86 of 132
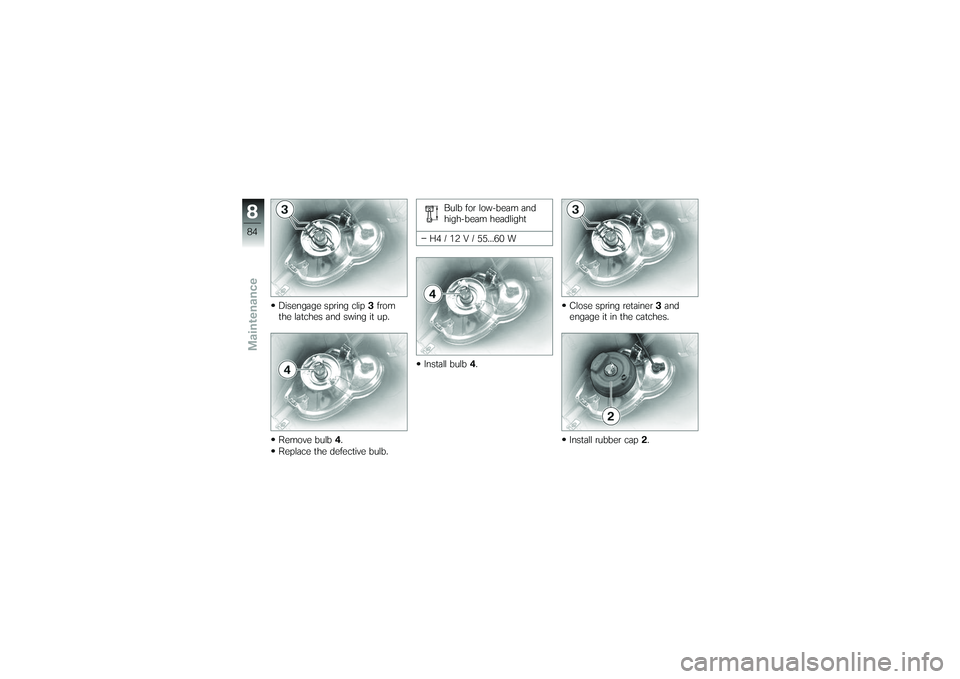
Disengage spring clip3from
the latches and swing it up.
Remove bulb 4.
Replace the defective bulb. Bulb for low-beam and
high-beam headlight
H4 / 12 V / 55...60 W
Install bulb 4. Close spring retainer
3and
engage it in the catches.
Install rubber cap 2.
884zMaintenance
Page 87 of 132
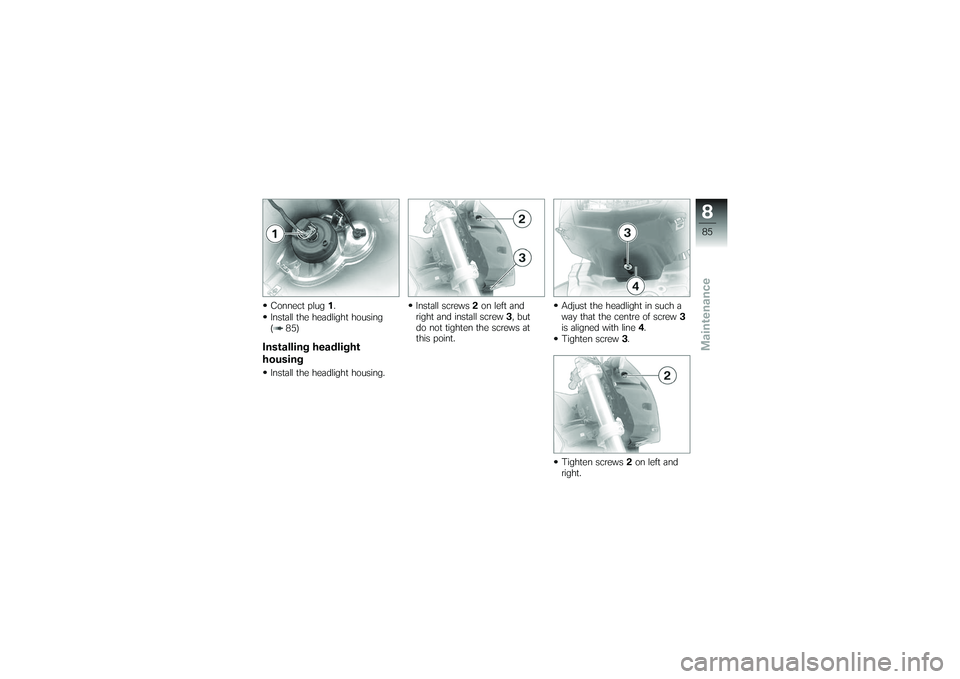
Connect plug1.
Install the headlight housing
( 85)Installing headlight
housingInstall the headlight housing. Install screws
2on left and
right and install screw 3, but
do not tighten the screws at
this point. Adjust the headlight in such a
way that the centre of screw
3
is aligned with line 4.
Tighten screw 3.
Tighten screws 2on left and
right.
885zMaintenance
Page 88 of 132
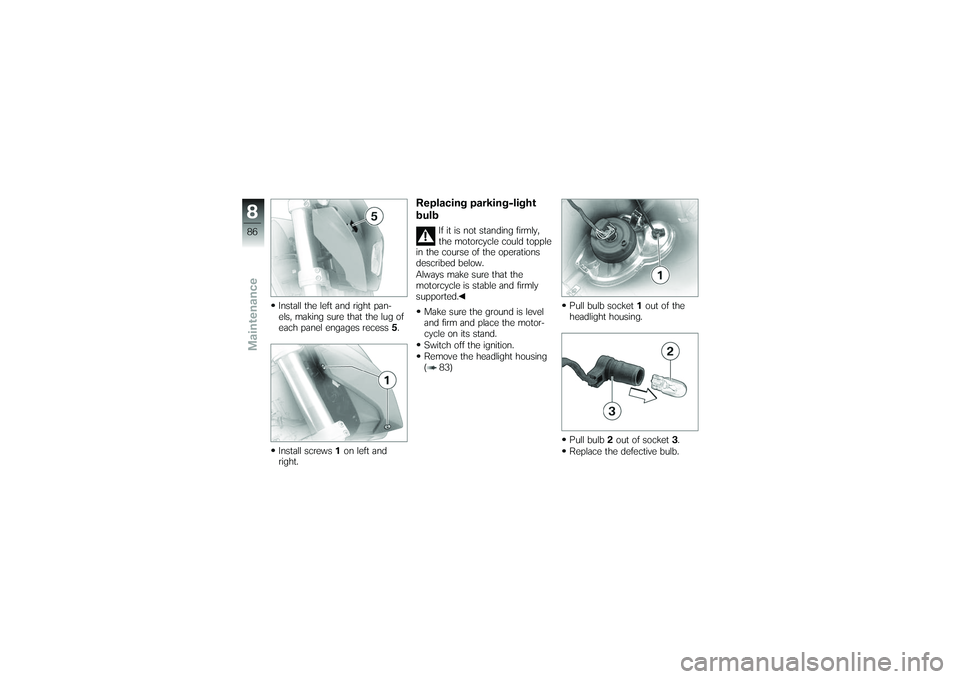
Install the left and right pan-
els, making sure that the lug of
each panel engages recess5.
Install screws 1on left and
right.
Replacing parking-light
bulb
If it is not standing firmly,
the motorcycle could topple
in the course of the operations
described below.
Always make sure that the
motorcycle is stable and firmly
supported.
Make sure the ground is level
and firm and place the motor-
cycle on its stand.
Switch off the ignition.
Remove the headlight housing
( 83) Pull bulb socket
1out of the
headlight housing.
Pull bulb 2out of socket 3.
Replace the defective bulb.
886zMaintenance
Page 89 of 132
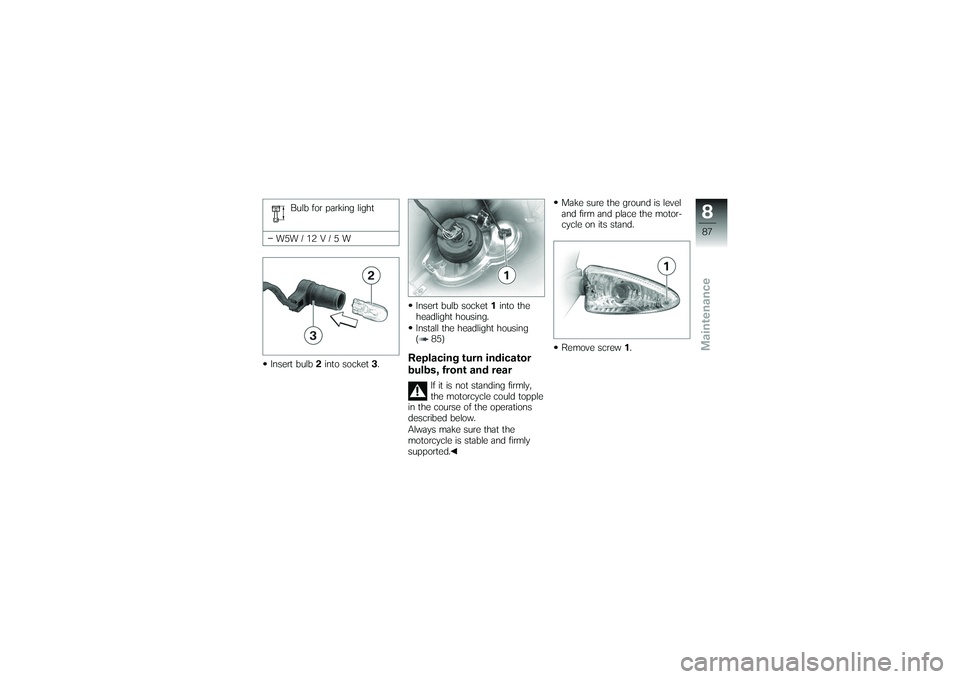
Bulb for parking light
W5W / 12 V / 5 W
Insert bulb 2into socket 3. Insert bulb socket
1into the
headlight housing.
Install the headlight housing
( 85)
Replacing turn indicator
bulbs, front and rear
If it is not standing firmly,
the motorcycle could topple
in the course of the operations
described below.
Always make sure that the
motorcycle is stable and firmly
supported. Make sure the ground is level
and firm and place the motor-
cycle on its stand.
Remove screw
1.
887zMaintenance
Page 90 of 132
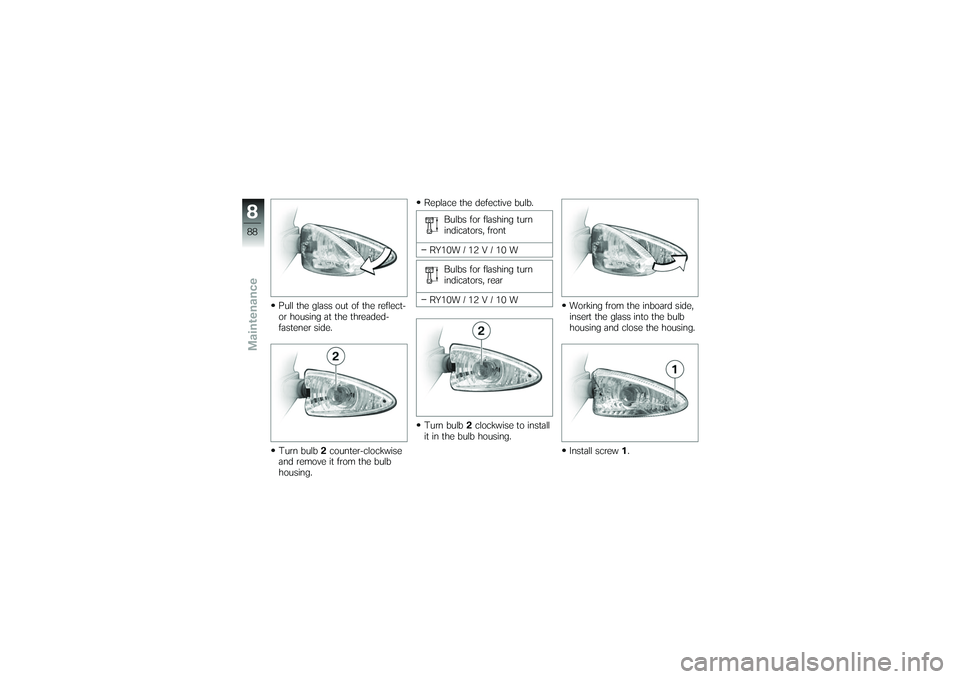
Pull the glass out of the reflect-
or housing at the threaded-
fastener side.
Turn bulb2counter-clockwise
and remove it from the bulb
housing. Replace the defective bulb.
Bulbs for flashing turn
indicators, front
RY10W / 12 V / 10 W Bulbs for flashing turn
indicators, rear
RY10W / 12 V / 10 W
Turn bulb 2clockwise to install
it in the bulb housing. Working from the inboard side,
insert the glass into the bulb
housing and close the housing.
Install screw
1.
888zMaintenance
Trending: steering, fuel tank capacity, power steering fluid, key, wheel size, brake fluid, battery capacity
