handbrake BMW MOTORRAD K 1200 LT 2005 Rider's Manual (in English)
[x] Cancel search | Manufacturer: BMW MOTORRAD, Model Year: 2005, Model line: K 1200 LT, Model: BMW MOTORRAD K 1200 LT 2005Pages: 108, PDF Size: 8.48 MB
Page 49 of 108
22
47
Safety check
d Warning:
To prevent air from entering
the brake circuit: do not turn
the fitting on the handlebar.
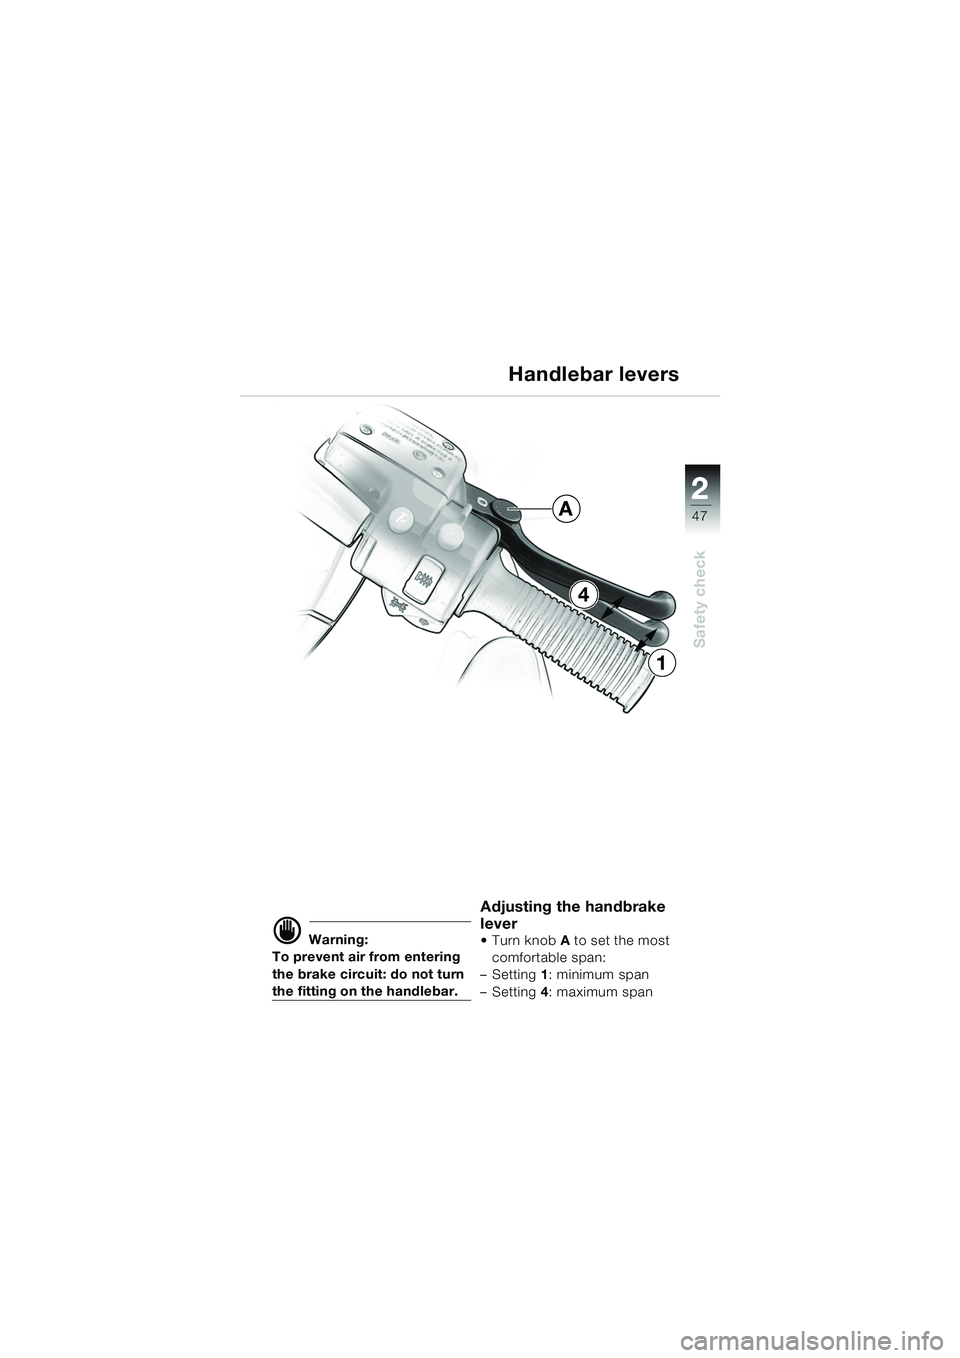
Adjusting the handbrake
lever
Turn knob A to set the most
comfortable span:
–Setting 1: minimum span
–Setting 4: maximum span
Handlebar levers
4
1
A
10LTbkg6.book Seite 47 Freitag, 1. Juli 2005 8:53 08
Page 70 of 108
68
Starting – Riding – Parking
3
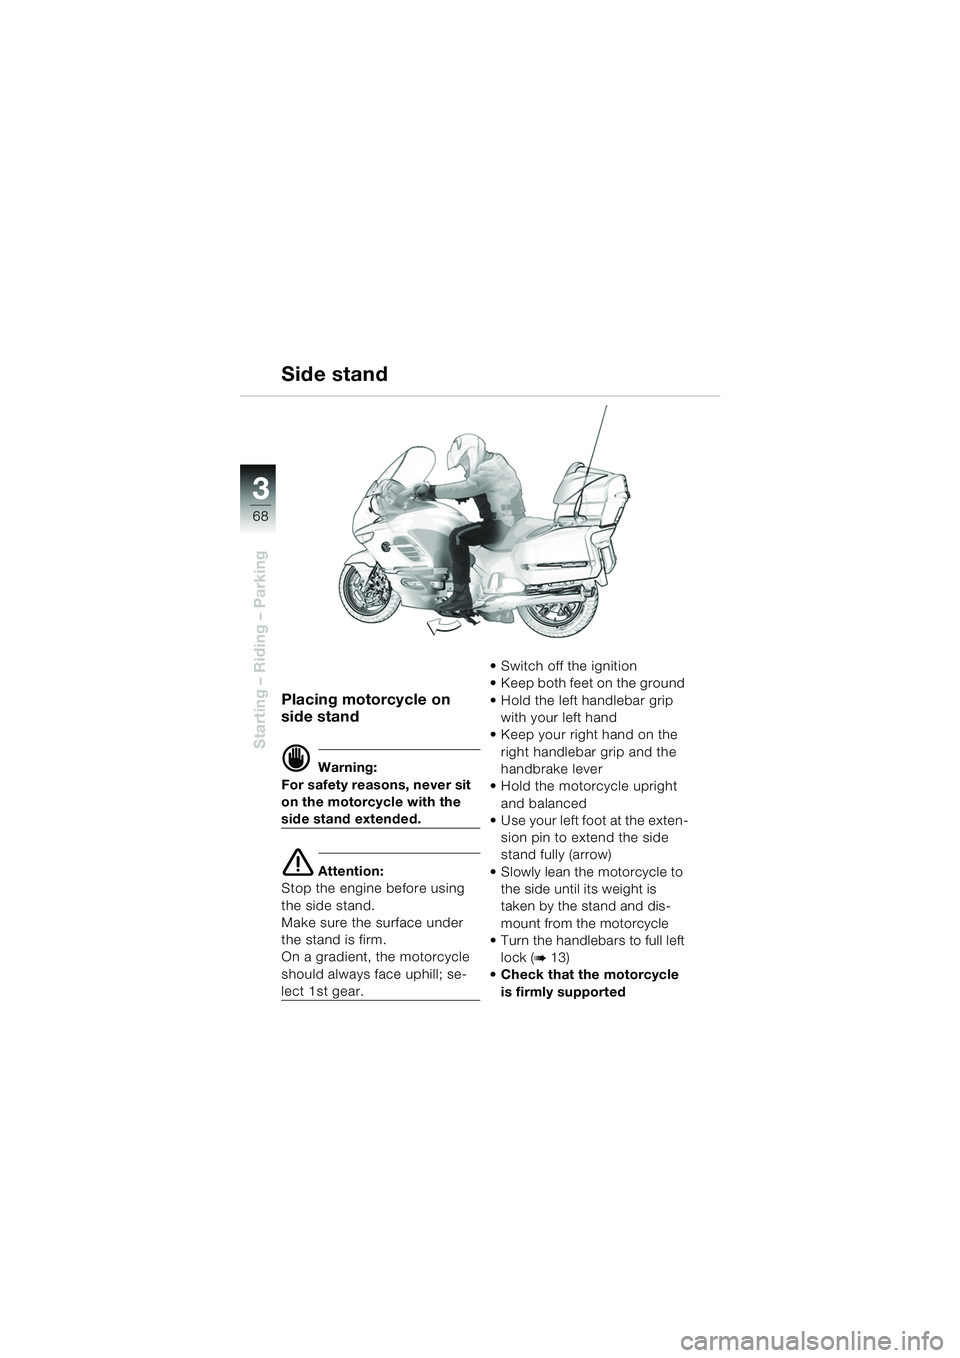
Placing motorcycle on
side stand
d Warning:
For safety reasons, never sit
on the motorcycle with the
side stand extended.
e Attention:
Stop the engine before using
the side stand.
Make sure the surface under
the stand is firm.
On a gradient, the motorcycle
should always face uphill; se-
lect 1st gear. Switch off the ignition
Keep both feet on the ground
Hold the left handlebar grip
with your left hand
Keep your right hand on the
right handlebar grip and the
handbrake lever
Hold the motorcycle upright and balanced
U s e y o u r le f t f o o t a t t h e e x t e n -
sion pin to extend the side
stand fully (arrow)
Slowly lean the motorcycle to the side until its weight is
taken by the stand and dis-
mount from the motorcycle
Turn the handlebars to full left
lock (
b13)
Check that the motorcycle
is firmly supported
Side stand
10LTbkg6.book Seite 68 Freitag, 1. Juli 2005 8:53 08
Page 71 of 108
3
69
Starting – Riding – Parking
Side stand
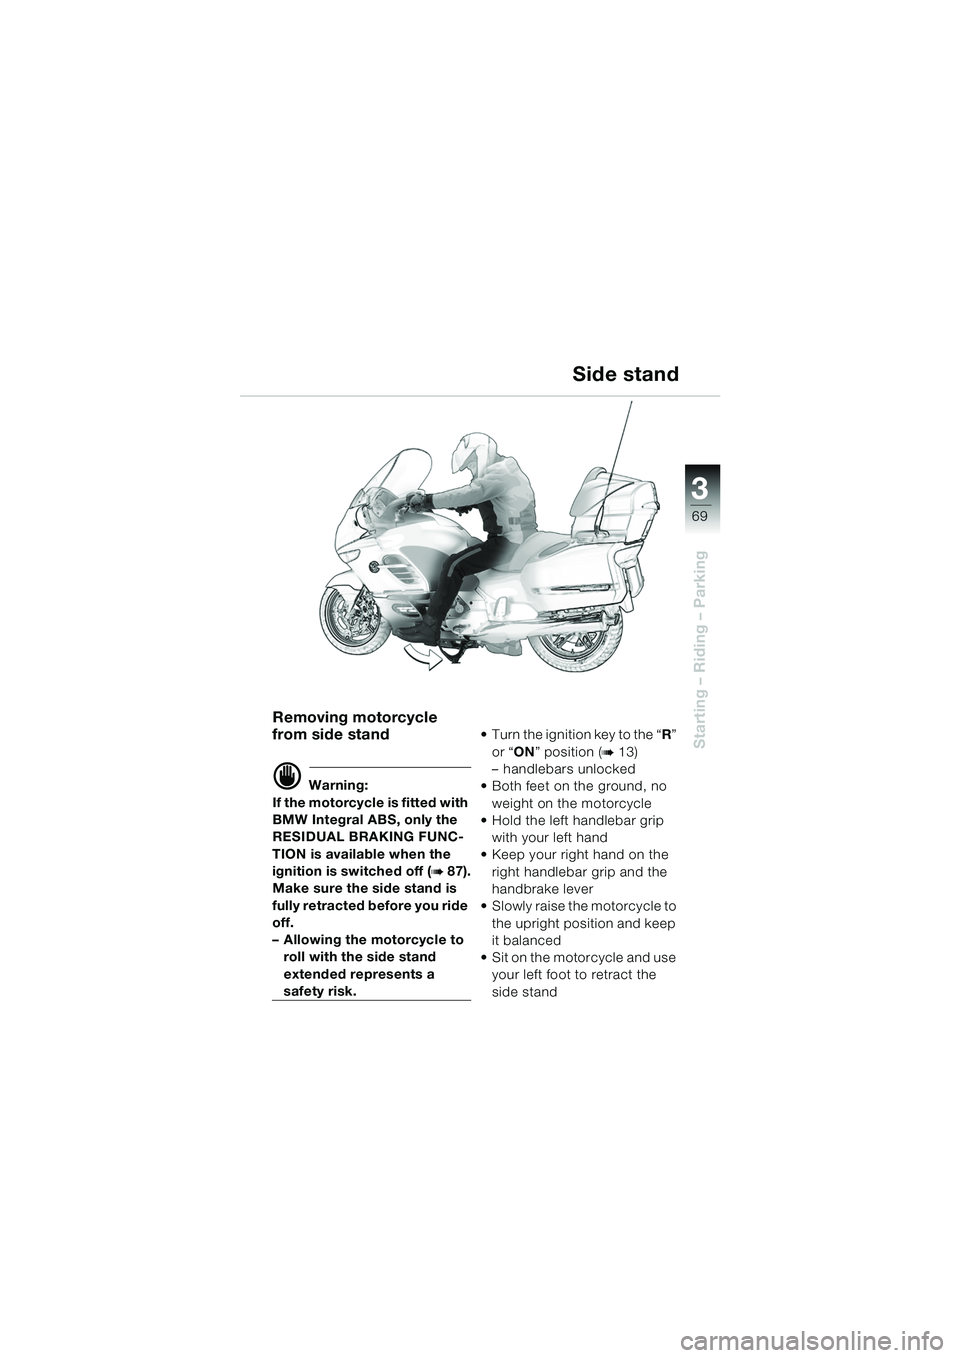
Removing motorcycle
from side stand
d Warning:
If the motorcycle is fitted with
BMW Integral ABS, only the
RESIDUAL BRAKING FUNC-
TION is available when the
ignition is switched off (
b87).
Make sure the side stand is
fully retracted before you ride
off.
– Allowing the motorcycle to roll with the side stand
extended represents a
safety risk. Turn the ignition key to the “
R”
or “ ON” position (
b13)
– handlebars unlocked
Both feet on the ground, no weight on the motorcycle
Hold the left handlebar grip
with your left hand
Keep your right hand on the
right handlebar grip and the
handbrake lever
Slowly raise the motorcycle to
the upright position and keep
it balanced
Sit on the motorcycle and use your left foot to retract the
side stand
10LTbkg6.book Seite 69 Freitag, 1. Juli 2005 8:53 08
Page 72 of 108
70
Starting – Riding – Parking
3
Main (centre) stand
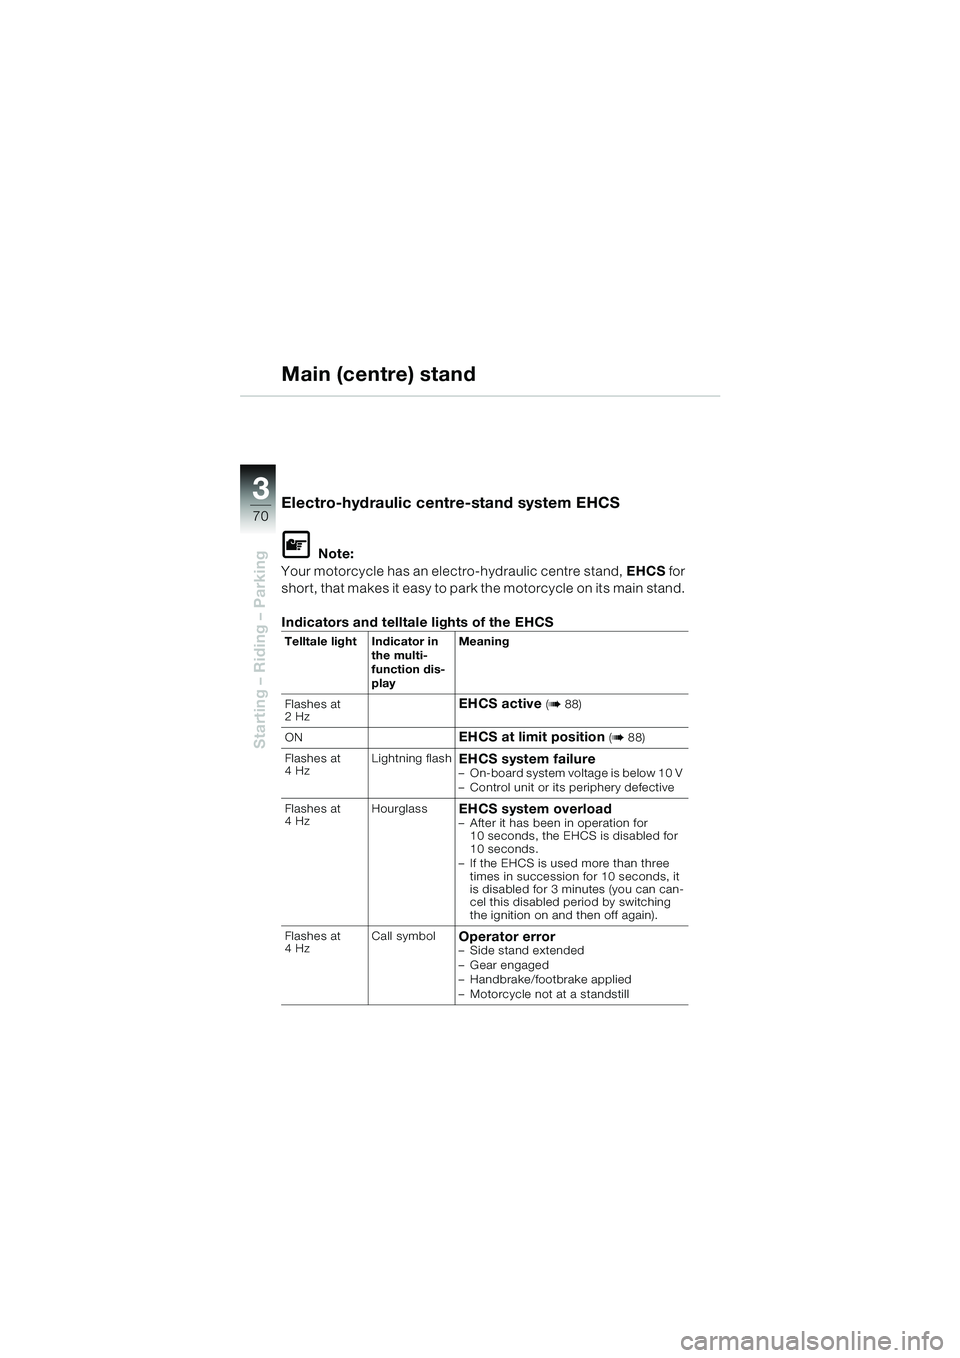
Electro-hydraulic centre-stand system EHCS
L Note:
Your motorcycle has an electro-hydraulic centre stand, EHCS for
short, that makes it easy to park the motorcycle on its main stand.
Indicators and telltale lights of the EHCS
Telltale light Indicator in the multi-
function dis-
playMeaning
Flashes at
2Hz
EHCS active (b88)
ON
EHCS at limit position (b88)
Flashes at
4Hz Lightning flash
EHCS system failure– On-board system voltage is below 10 V
– Control unit or its periphery defective
Flashes at
4Hz Hourglass
EHCS system overload– After it has been in operation for
10 seconds, the EHCS is disabled for
10 seconds.
– If the EHCS is used more than three times in succession for 10 seconds, it
is disabled for 3 minutes (you can can-
cel this disabled period by switching
the ignition on and then off again).
Flashes at
4Hz Call symbol
Operator error– Side stand extended
– Gear engaged
– Handbrake/footbrake applied
– Motorcycle not at a standstill
10LTbkg6.book Seite 70 Freitag, 1. Juli 2005 8:53 08
Page 73 of 108
3
71
Starting – Riding – Parking
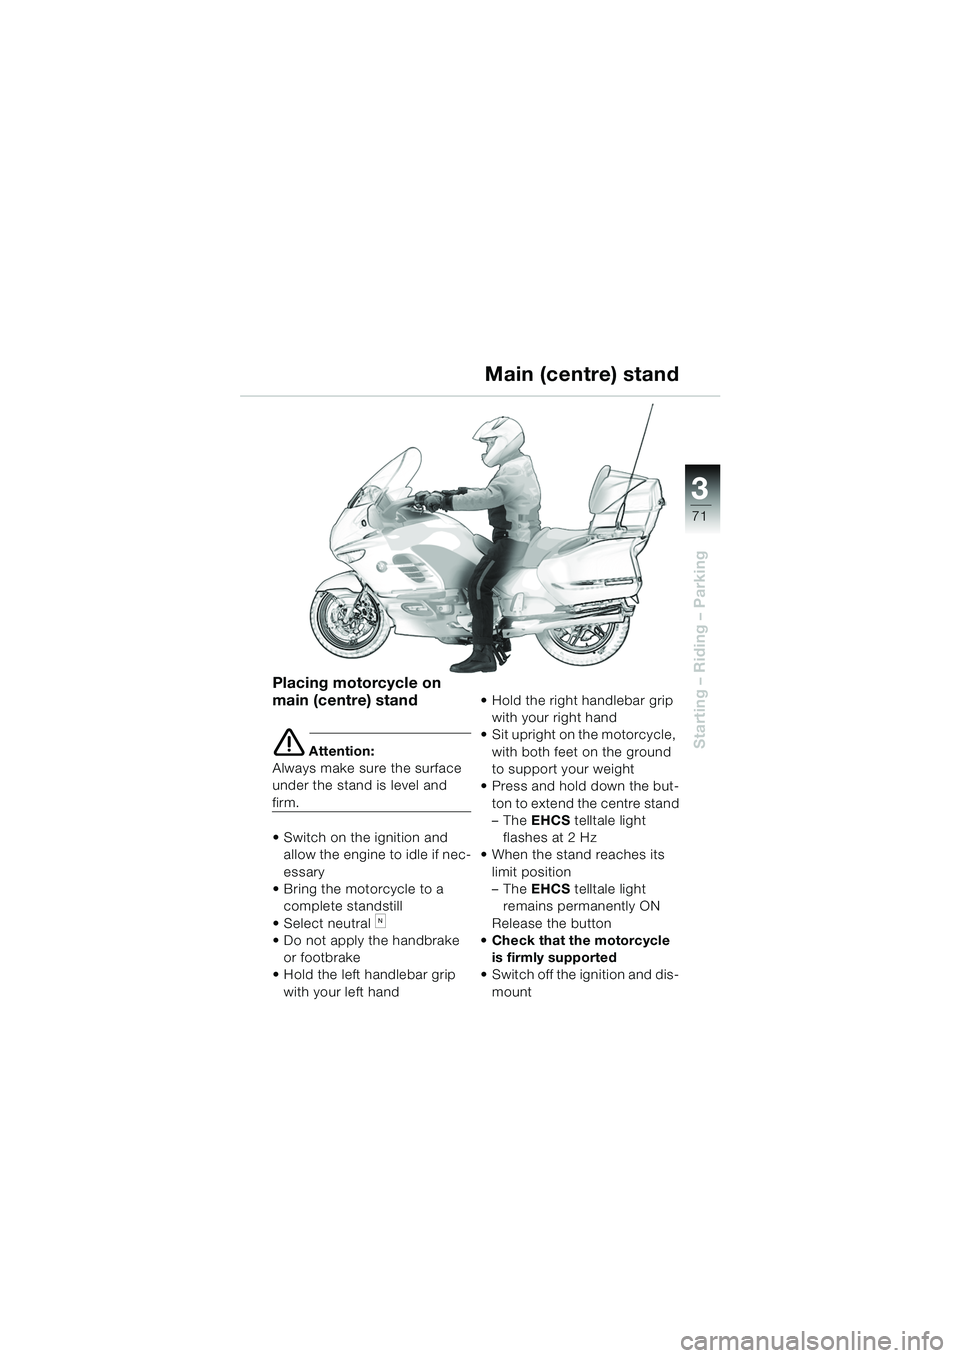
Placing motorcycle on
main (centre) stand
e Attention:
Always make sure the surface
under the stand is level and
firm.
Switch on the ignition and allow the engine to idle if nec-
essary
Bring the motorcycle to a complete standstill
Select neutral
kN
Do not apply the handbrake
or footbrake
Hold the left handlebar grip
with your left hand Hold the right handlebar grip
with your right hand
Sit upright on the motorcycle,
with both feet on the ground
to support your weight
Press and hold down the but- ton to extend the centre stand
–The EHCS telltale light
flashes at 2 Hz
When the stand reaches its
limit position
–The EHCS telltale light
remains permanently ON
Release the button
Check that the motorcycle
is firmly supported
Switch off the ignition and dis-
mount
Main (centre) stand
10LTbkg6.book Seite 71 Freitag, 1. Juli 2005 8:53 08
Page 88 of 108
86
Starting – Riding – Parking
3
Brake system - with BMW Integral ABS
Fully integral brakesThe integral brake function
interlinks the front and rear
brakes, so both wheels are
braked when you operate a
brake lever.
The electronic controller in the
BMW Integral ABS computes
the braking-force distribution
between front and rear wheels,
and applies the brakes accord-
ingly.
Braking-force distribution
depends on load and is recal-
culated every time the ABS
controller comes into action.
In a fully integral brake configu-
ration, the integral braking func-
tion is activated by either the
handbrake lever or the brake
pedal.
Brake boosterThe hydraulic pump in the BMW
Integral ABS actively boosts the
braking force acting on the
wheel when the brakes are
applied.
By boosting the braking force in
this way, the BMW Integral ABS
achieves higher braking effi-
ciency than standard brake
systems.
ABS - anti-lock brake sys-
tem
ABS prevents the wheels lock-
ing under heavy braking when
the motorcycle is travelling in a
straight line, thus contributing
significantly to road safety.
10LTbkg6.book Seite 86 Freitag, 1. Juli 2005 8:53 08
Page 101 of 108
99
Index
i
AABS, 86
Accessories and loads, 60, 61
Adjusting beam throw, 62
Adjusting fins, 17
Adjusting the handbrake lever, 47
Adjusting windscreen, 17
Aerial, 4
Anti-lock brake systemNotes, 84-91
Audio system controls
Passenger, 6
BBMW Integral ABS, 84-90Brake fluid level, 52
Brake-fluid reservoir, front
brakes, 6
Brake-fluid reservoir, rear
brakes, 6
Troubleshooting chart, 91
Warning lights, 10
BMW Service Card, 94
Brake booster, 86
Brake fluid level Check
Rear brake, 53
Brake pads, running in, 74
Brake system General, 48, 49
With BMW Integral ABS, 50-53
Brake system, checking, 48
CCassette recorder/radio, 9
Catalytic converter, 67
Catalytic convertor Safety instructions, 67
Checking brake pads, 49
Checking oil level, 42
Checklist, 41
Clutch
Fluid level, 54
Clutch lever, adjusting, 46
Cockpit Overview,8,9
Coolant level Check, 55
Coolant temperature, 78
Coolant temperature gauge, 8
Cruise-control system
Notes, 21
Operation, 22, 23, 24
Switch, 14
EEmergency off (kill) switch for ignition, 15, 75
Engine oil, 42, 43
Oil filler neck, 43
Engine oil pressure
Telltale light, 78
Engine speed, 80
A - E
10LTbkg6.book Seite 99 Freitag, 1. Juli 2005 8:53 08
Page 102 of 108
100
Index
i
FFront brakeBrake fluid level, 52
Handbrake lever, 47
Front seat Adjusting, 35
Locking, 35
Opening, 34
Front seat heating, 39
Fuel filler cap, 7, 44
Fuel gauge, 8
Fuel grade, 45
Fuel level, 78
Fully integral brakes, 86
Fuse box, 6
GGear shifts, 80, 81
General view
Left side,4,5
Right side,6,7
HHandlebar fittingLeft, 14
Right, 15
Handlebar-mounted remote controls for audio system, 14
Hazard warning flasher switch, 14
Hazard warning flashers, 16
Heated handlebar grips, 15
Helmet holder, 5, 40
High-beam/low-beam headlight switch, 14 Horn, 14
Horn push, 14
IIgnition switch and steering
lock,8,12,13
Instruments, cockpit, 8, 9
Integral brake function, 86
Integral brakes, 86
KKeys, 12, 13
LLeft flashing turn indicator switch, 14
Lights Beam throw, 62, 63
Notes, 62
MMain (centre) stand, 70, 71, 72
Motorcycle accessories, 96
NNeutral (gearbox), 76
Notes on safetyGeneral, 66
OOctane number, fuel, 45
Odometer, 8
Oil filler neck, 6, 42, 43
F - O
10LTbkg6.book Seite 100 Freitag, 1. Juli 2005 8:53 08