BMW MOTORRAD K 1200 S 2005 Rider's Manual (in English)
Manufacturer: BMW MOTORRAD, Model Year: 2005, Model line: K 1200 S, Model: BMW MOTORRAD K 1200 S 2005Pages: 165, PDF Size: 2.01 MB
Page 41 of 165
Left/right turn indicator tell-
tale lights off.Switching off the hazard
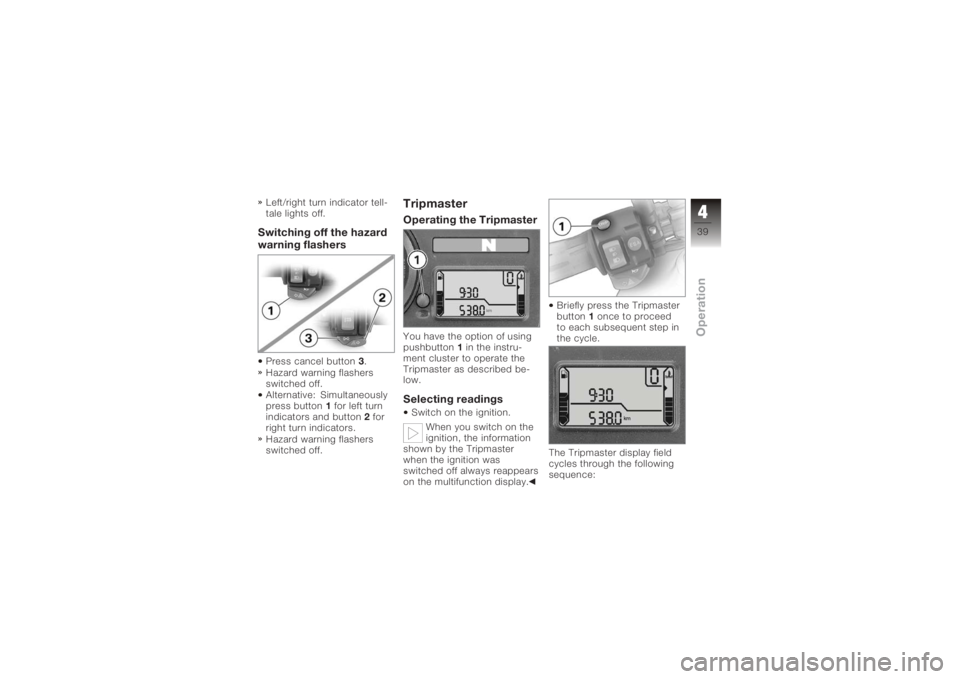
warning flashersPress cancel button3.
Hazard warning flashers
switched off.
Alternative: Simultaneously
press button 1for left turn
indicators and button 2for
right turn indicators.
Hazard warning flashers
switched off.
TripmasterOperating the TripmasterYou have the option of using
pushbutton 1in the instru-
ment cluster to operate the
Tripmaster as described be-
low.Selecting readingsSwitch on the ignition.
When you switch on the
ignition, the information
shown by the Tripmaster
when the ignition was
switched off always reappears
on the multifunction display. Briefly press the Tripmaster
button
1once to proceed
to each subsequent step in
the cycle.
The Tripmaster display field
cycles through the following
sequence:
439zOperation
Page 42 of 165
Total distance covered
Tripmeter 1 (Trip I)
Tripmeter 2 (Trip II)
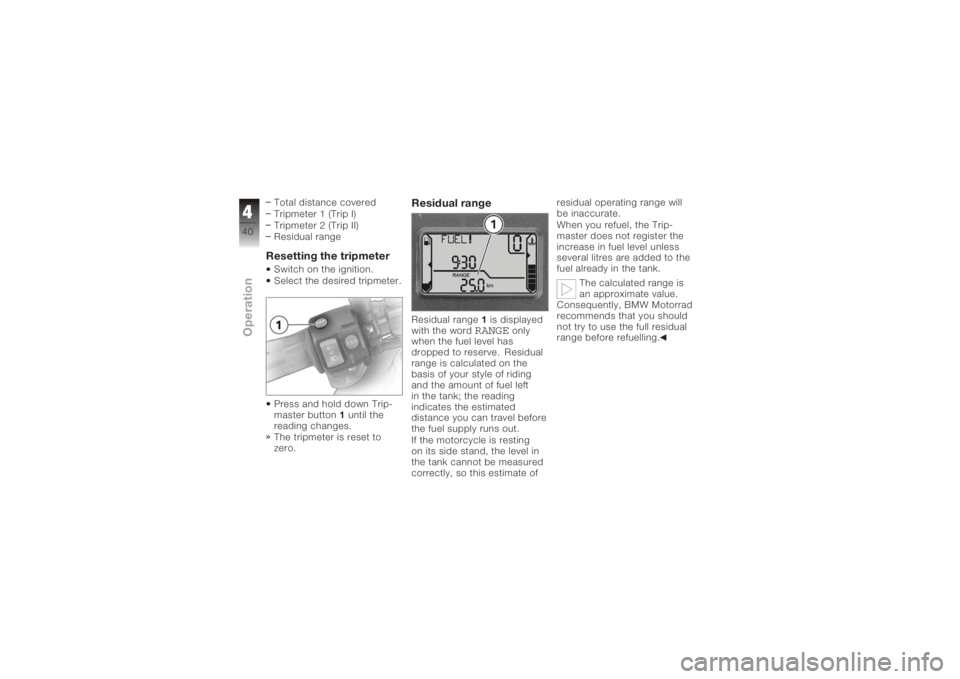
Residual rangeResetting the tripmeterSwitch on the ignition.
Select the desired tripmeter.
Press and hold down Trip-
master button1until the
reading changes.
The tripmeter is reset to
zero.
Residual rangeResidual range 1is displayed
with the word
RANGE
only
when the fuel level has
dropped to reserve. Residual
range is calculated on the
basis of your style of riding
and the amount of fuel left
in the tank; the reading
indicates the estimated
distance you can travel before
the fuel supply runs out.
If the motorcycle is resting
on its side stand, the level in
the tank cannot be measured
correctly, so this estimate of residual operating range will
be inaccurate.
When you refuel, the Trip-
master does not register the
increase in fuel level unless
several litres are added to the
fuel already in the tank.
The calculated range is
an approximate value.
Consequently, BMW Motorrad
recommends that you should
not try to use the full residual
range before refuelling.
440zOperation
Page 43 of 165
On-board computer
OE
Pushbutton, on-board
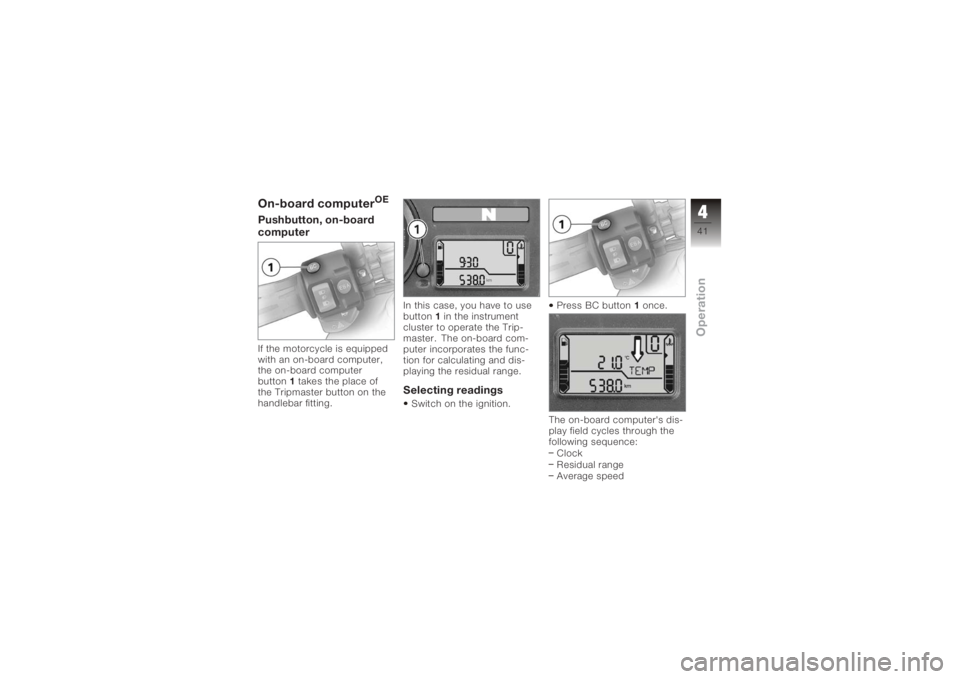
computerIf the motorcycle is equipped
with an on-board computer,
the on-board computer
button1 takes the place of
the Tripmaster button on the
handlebar fitting. In this case, you have to use
button
1in the instrument
cluster to operate the Trip-
master. The on-board com-
puter incorporates the func-
tion for calculating and dis-
playing the residual range.
Selecting readingsSwitch on the ignition. Press BC button
1once.
The on-board computer's dis-
play field cycles through the
following sequence: Clock
Residual range
Average speed
441zOperation
Page 44 of 165
Average consumption
Oil level
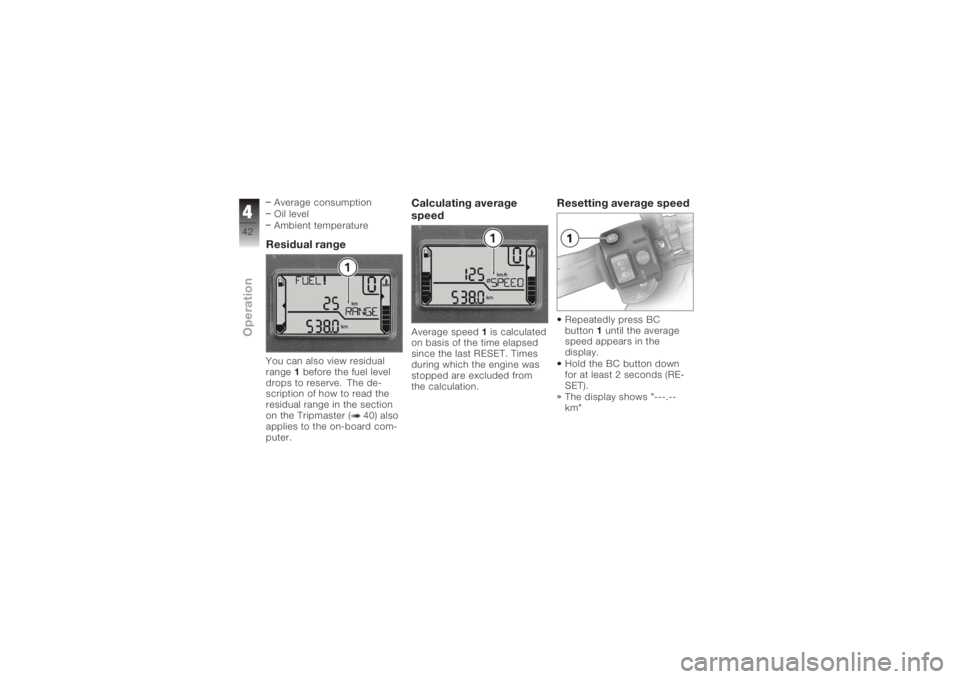
Ambient temperatureResidual rangeYou can also view residual
range1before the fuel level
drops to reserve. The de-
scription of how to read the
residual range in the section
on the Tripmaster ( 40) also
applies to the on-board com-
puter.
Calculating average
speedAverage speed 1is calculated
on basis of the time elapsed
since the last RESET. Times
during which the engine was
stopped are excluded from
the calculation.
Resetting average speedRepeatedly press BC
button 1until the average
speed appears in the
display.
Hold the BC button down
for at least 2 seconds (RE-
SET).
The display shows "---.--
km"
442zOperation
Page 45 of 165
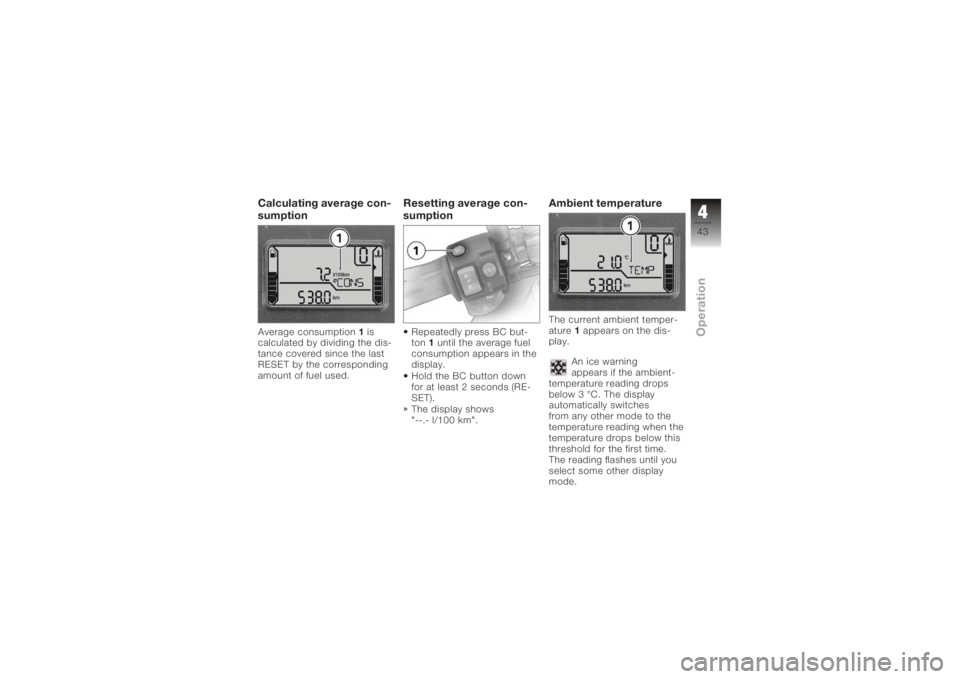
Calculating average con-
sumptionAverage consumption1is
calculated by dividing the dis-
tance covered since the last
RESET by the corresponding
amount of fuel used.
Resetting average con-
sumptionRepeatedly press BC but-
ton 1until the average fuel
consumption appears in the
display.
Hold the BC button down
for at least 2 seconds (RE-
SET).
The display shows
"--.- l/100 km".
Ambient temperatureThe current ambient temper-
ature 1appears on the dis-
play.
An ice warning
appears if the ambient-
temperature reading drops
below 3 °C. The display
automatically switches
from any other mode to the
temperature reading when the
temperature drops below this
threshold for the first time.
The reading flashes until you
select some other display
mode.
443zOperation
Page 46 of 165
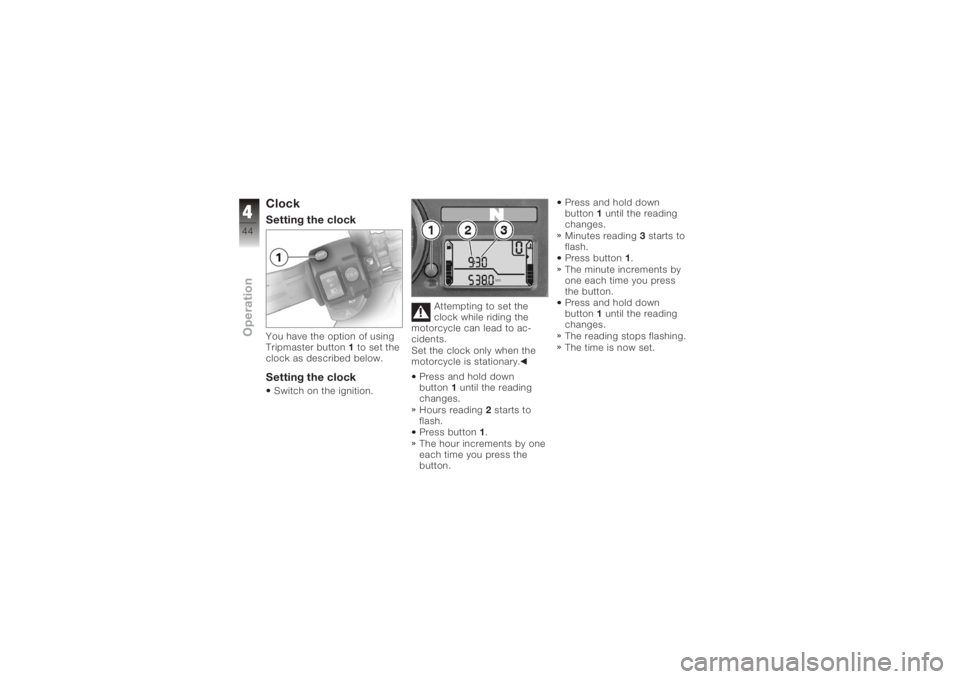
ClockSetting the clockYou have the option of using
Tripmaster button1to set the
clock as described below.Setting the clockSwitch on the ignition. Attempting to set the
clock while riding the
motorcycle can lead to ac-
cidents.
Set the clock only when the
motorcycle is stationary.
Press and hold down
button 1until the reading
changes.
Hours reading 2starts to
flash.
Press button 1.
The hour increments by one
each time you press the
button. Press and hold down
button
1until the reading
changes.
Minutes reading 3starts to
flash.
Press button 1.
The minute increments by
one each time you press
the button.
Press and hold down
button 1until the reading
changes.
The reading stops flashing.
The time is now set.
444zOperation
Page 47 of 165
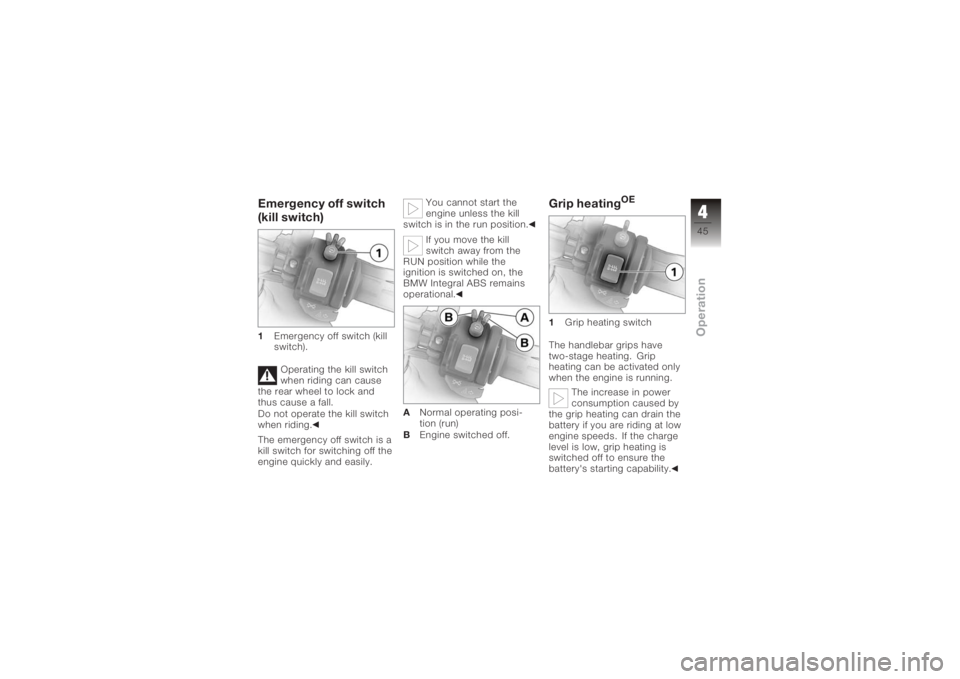
Emergency off switch
(kill switch)1Emergency off switch (kill
switch).
Operating the kill switch
when riding can cause
the rear wheel to lock and
thus cause a fall.
Do not operate the kill switch
when riding.
The emergency off switch is a
kill switch for switching off the
engine quickly and easily. You cannot start the
engine unless the kill
switch is in the run position.
If you move the kill
switch away from the
RUN position while the
ignition is switched on, the
BMW Integral ABS remains
operational.
A Normal operating posi-
tion (run)
B Engine switched off.
Grip heating
OE
1 Grip heating switch
The handlebar grips have
two-stage heating. Grip
heating can be activated only
when the engine is running. The increase in power
consumption caused by
the grip heating can drain the
battery if you are riding at low
engine speeds. If the charge
level is low, grip heating is
switched off to ensure the
battery's starting capability.
445zOperation
Page 48 of 165
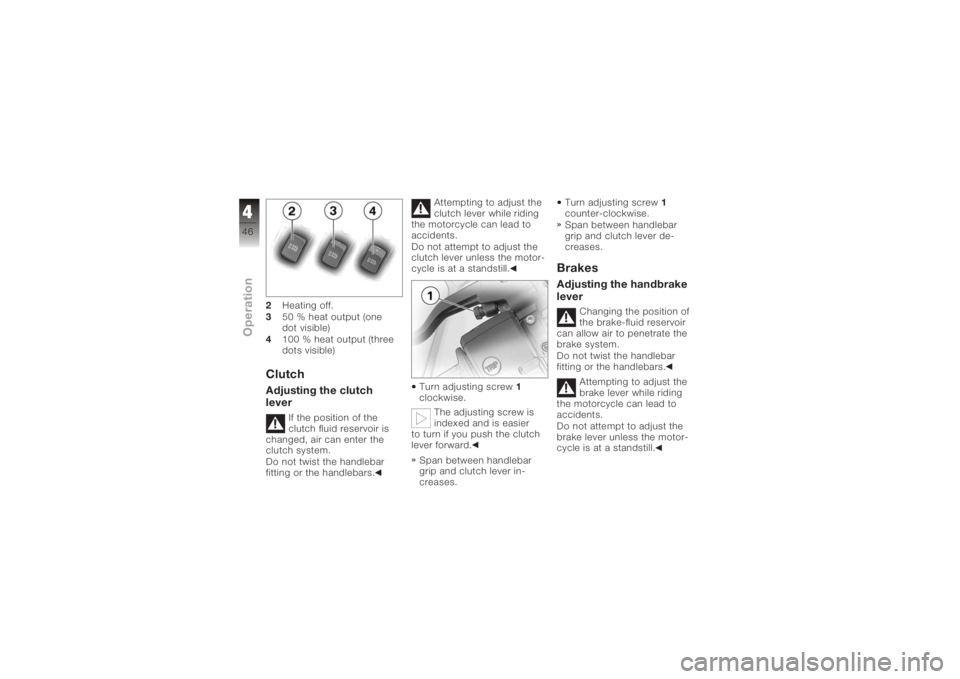
2Heating off.
3 50 % heat output (one
dot visible)
4 100 % heat output (three
dots visible)ClutchAdjusting the clutch
lever
If the position of the
clutch fluid reservoir is
changed, air can enter the
clutch system.
Do not twist the handlebar
fitting or the handlebars. Attempting to adjust the
clutch lever while riding
the motorcycle can lead to
accidents.
Do not attempt to adjust the
clutch lever unless the motor-
cycle is at a standstill.
Turn adjusting screw 1
clockwise.
The adjusting screw is
indexed and is easier
to turn if you push the clutch
lever forward.
Span between handlebar
grip and clutch lever in-
creases. Turn adjusting screw
1
counter-clockwise.
Span between handlebar
grip and clutch lever de-
creases.
BrakesAdjusting the handbrake
lever
Changing the position of
the brake-fluid reservoir
can allow air to penetrate the
brake system.
Do not twist the handlebar
fitting or the handlebars.
Attempting to adjust the
brake lever while riding
the motorcycle can lead to
accidents.
Do not attempt to adjust the
brake lever unless the motor-
cycle is at a standstill.
446zOperation
Page 49 of 165
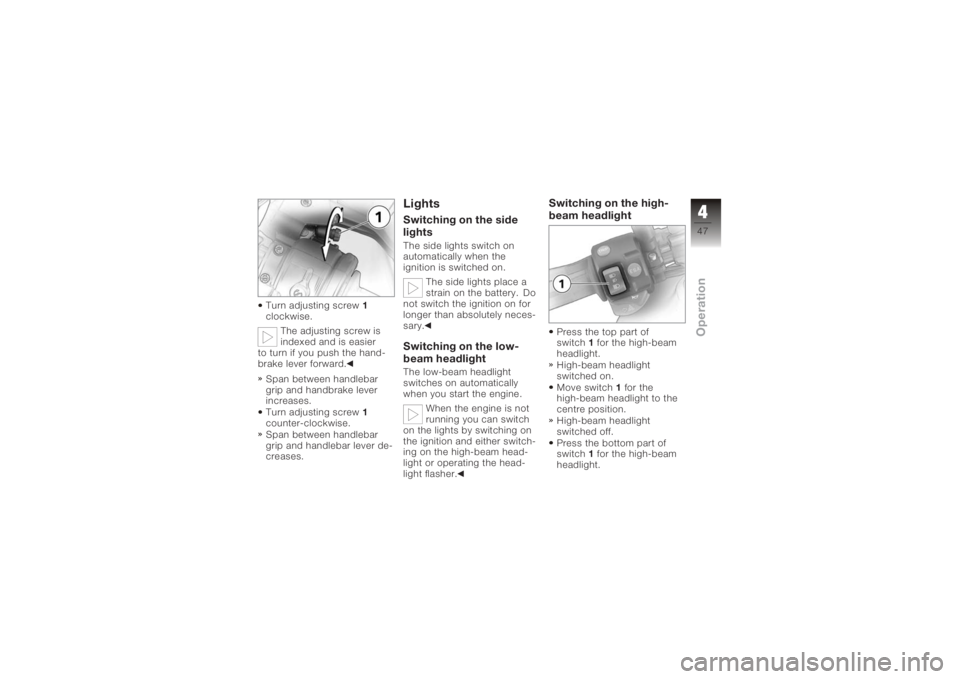
Turn adjusting screw1
clockwise.
The adjusting screw is
indexed and is easier
to turn if you push the hand-
brake lever forward.
Span between handlebar
grip and handbrake lever
increases.
Turn adjusting screw 1
counter-clockwise.
Span between handlebar
grip and handlebar lever de-
creases.
LightsSwitching on the side
lightsThe side lights switch on
automatically when the
ignition is switched on.
The side lights place a
strain on the battery. Do
not switch the ignition on for
longer than absolutely neces-
sary.Switching on the low-
beam headlightThe low-beam headlight
switches on automatically
when you start the engine.
When the engine is not
running you can switch
on the lights by switching on
the ignition and either switch-
ing on the high-beam head-
light or operating the head-
light flasher.
Switching on the high-
beam headlightPress the top part of
switch 1for the high-beam
headlight.
High-beam headlight
switched on.
Move switch 1for the
high-beam headlight to the
centre position.
High-beam headlight
switched off.
Press the bottom part of
switch 1for the high-beam
headlight.
447zOperation
Page 50 of 165
The high-beam headlight
is switched on until you re-
lease the button (headlight
flasher).Switching on the parking
lightsSwitch off the ignition.You can switch on the
parking lights only imme-
diately after switching off the
ignition.
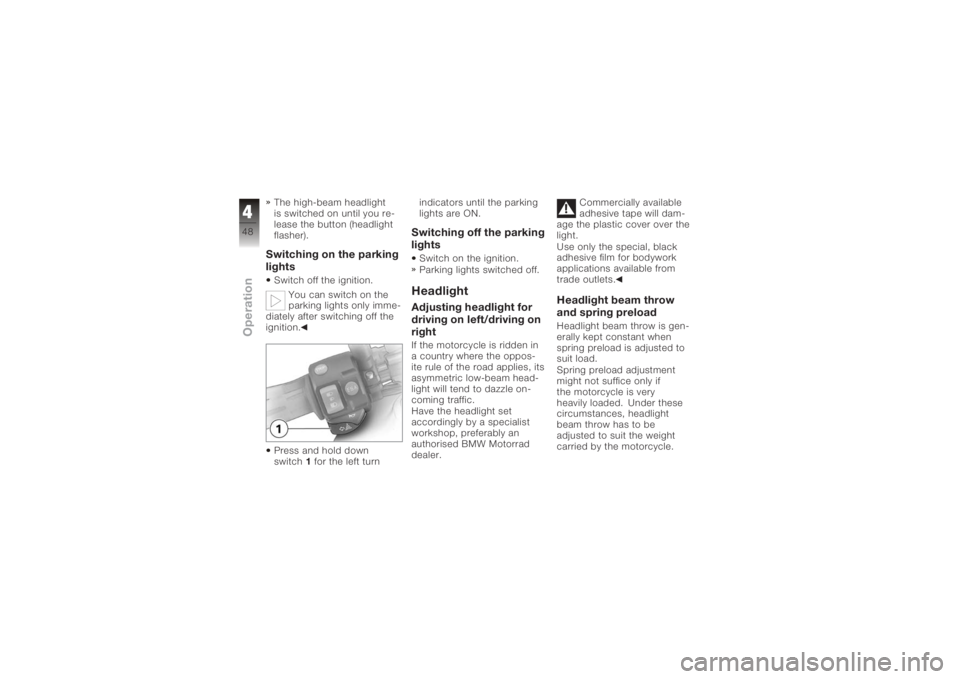
Press and hold down
switch 1for the left turn indicators until the parking
lights are ON.
Switching off the parking
lightsSwitch on the ignition.
Parking lights switched off.HeadlightAdjusting headlight for
driving on left/driving on
rightIf the motorcycle is ridden in
a country where the oppos-
ite rule of the road applies, its
asymmetric low-beam head-
light will tend to dazzle on-
coming traffic.
Have the headlight set
accordingly by a specialist
workshop, preferably an
authorised BMW Motorrad
dealer.
Commercially available
adhesive tape will dam-
age the plastic cover over the
light.
Use only the special, black
adhesive film for bodywork
applications available from
trade outlets.
Headlight beam throw
and spring preloadHeadlight beam throw is gen-
erally kept constant when
spring preload is adjusted to
suit load.
Spring preload adjustment
might not suffice only if
the motorcycle is very
heavily loaded. Under these
circumstances, headlight
beam throw has to be
adjusted to suit the weight
carried by the motorcycle.
448zOperation