headlight bulb BMW MOTORRAD K 1200 S 2007 Rider's Manual (in English)
[x] Cancel search | Manufacturer: BMW MOTORRAD, Model Year: 2007, Model line: K 1200 S, Model: BMW MOTORRAD K 1200 S 2007Pages: 166, PDF Size: 2.8 MB
Page 28 of 166
If the battery is not char-
ging, continuing to ride can
cause it to discharge completely,
in which case it will suffer irrepar-
able damage.
If possible, do not continue your
journey.
Battery is not being charged.
You can continue to ride until
the battery is discharged. Bear
in mind, however, that the en-
gine could cut out suddenly
and that the battery could dis-
charge until completely flat,
in which case it might have
suffered irreparable damage.
Have the fault rectified as
quickly as possible by a
specialist workshop, preferably
an authorised BMW Motorrad
dealer.
Rear light bulb defective General warning light shows
yellow.
LAMPR !
appears on the dis-
play.
A defective bulb places
your safety at risk because
it is easier for other users to
oversee the motorcycle.
Replace defective bulbs as
soon as possible; always carry a
complete set of spare bulbs if
possible.
Rear light or brake light bulb de-
fective.
Replacing brake light and rear
light bulb ( 120)
Front light bulb defective
LAMPF !
appears on the dis-
play.
A defective bulb places
your safety at risk because
it is easier for other users to
oversee the motorcycle.
Replace defective bulbs as
soon as possible; always carry a complete set of spare bulbs if
possible.
Low-beam headlight, high-beam
headlight, side-light or turn-indic-
ator bulb defective.
Replacing low-beam headlight
bulb ( 116)
Replacing high-beam headlight
bulb ( 118)
Replacing parking-light bulb
( 119)
Replacing front turn indicator
bulbs ( 122)
Replacing rear turn indicator
bulbs ( 123)
Bulbs defective General warning light shows
yellow.
LAMPS !
appears on the dis-
play.
A defective bulb places
your safety at risk because
it is easier for other users to
oversee the motorcycle.
326zStatus indicators
Page 118 of 166
indicators in the display tell you
that a bulb defect has occurred.A defective bulb places
your safety at risk because
it is easier for other users to
oversee the motorcycle.
Replace defective bulbs as
soon as possible; always carry a
complete set of spare bulbs if
possible.
The bulb is pressurised and
can cause injury if dam-
aged.
Wear protective goggles and
gloves when changing bulbs.
The types of bulb fitted to
your motorcycle are listed
in the section entitled "Technical
data".
Do not touch the glass of
new bulbs with your fingers.
Use a clean, dry cloth to hold
the bulbs when handling them.
Dirt deposits, in particular oil and
grease, interfere with heat radi- ation from the bulb. This leads
to overheating and shortens the
bulb's operating life.
Replacing low-beam
headlight bulb
If it is not standing firmly,
the motorcycle could topple
in the course of the operations
described below.
Always make sure that the
motorcycle is stable and firmly
supported.
Make sure the ground is level
and firm and place the motor-
cycle on its stand.
Switch off the ignition. Turn the handlebars to the
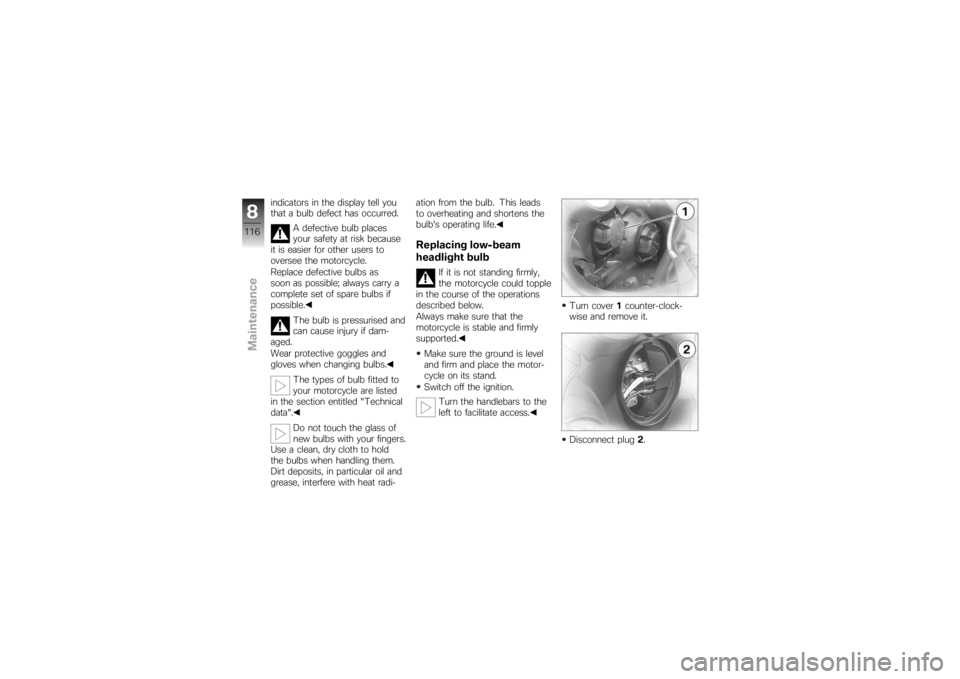
left to facilitate access. Turn cover
1counter-clock-
wise and remove it.
Disconnect plug 2.
8116zMaintenance
Page 120 of 166
Turn cover1clockwise to in-
stall.Replacing high-beam
headlight bulb
If it is not standing firmly,
the motorcycle could topple
in the course of the operations
described below.
Always make sure that the
motorcycle is stable and firmly
supported.
Make sure the ground is level
and firm and place the motor-
cycle on its stand.
Switch off the ignition. Turn the handlebars to the
left to facilitate access.
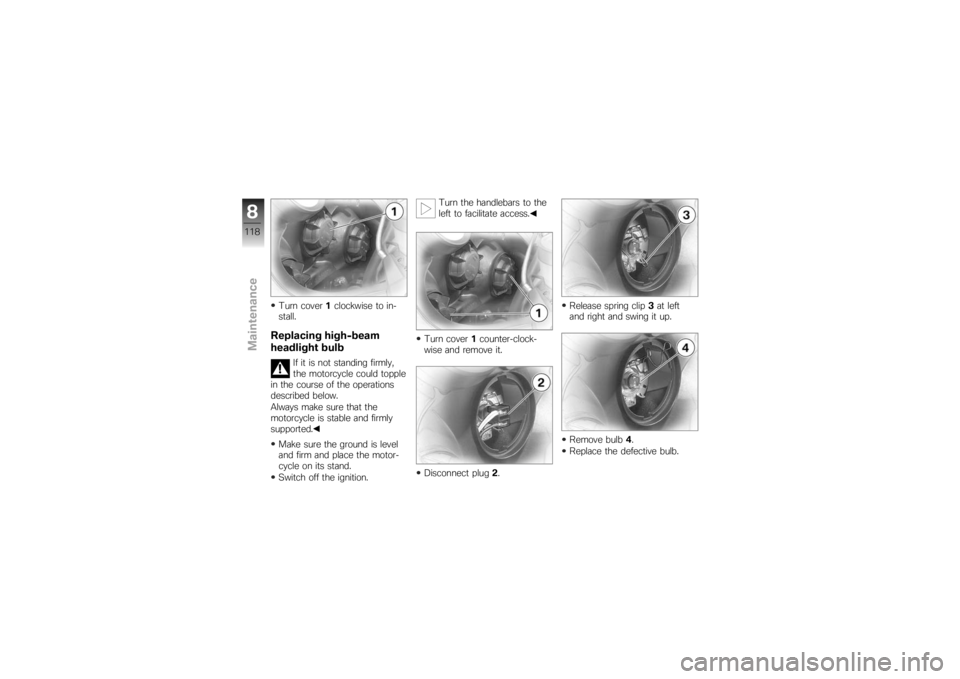
Turn cover 1counter-clock-
wise and remove it.
Disconnect plug 2. Release spring clip
3at left
and right and swing it up.
Remove bulb 4.
Replace the defective bulb.
8118zMaintenance
Page 121 of 166
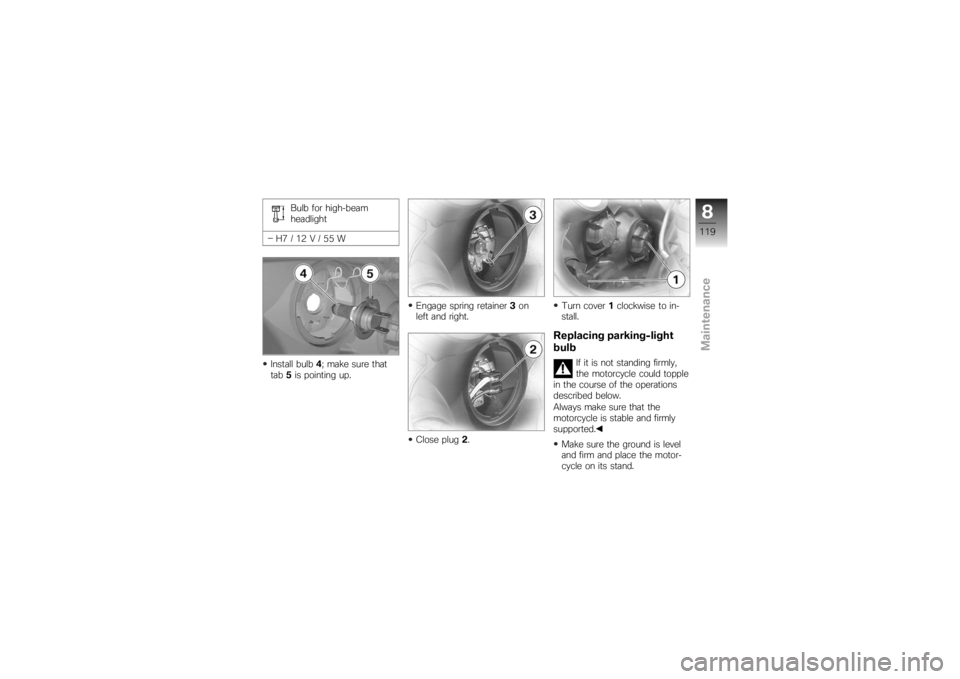
Bulb for high-beam
headlight
H7/12V/55W
Install bulb 4; make sure that
tab 5is pointing up. Engage spring retainer
3on
left and right.
Close plug 2. Turn cover
1clockwise to in-
stall.
Replacing parking-light
bulb
If it is not standing firmly,
the motorcycle could topple
in the course of the operations
described below.
Always make sure that the
motorcycle is stable and firmly
supported.
Make sure the ground is level
and firm and place the motor-
cycle on its stand.
8119zMaintenance
Page 122 of 166
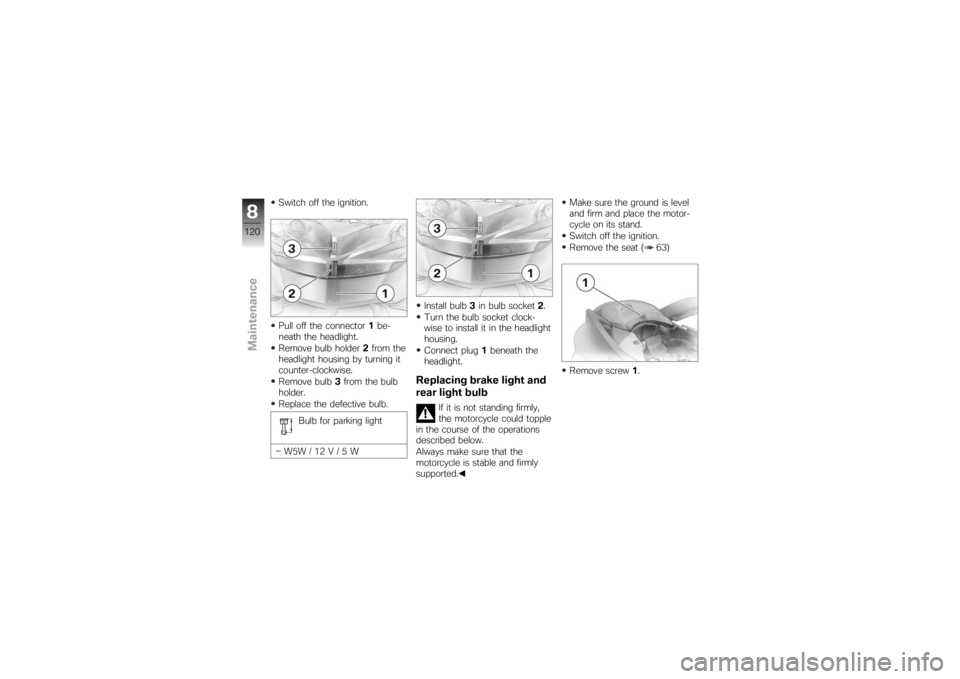
Switch off the ignition.
Pull off the connector1be-
neath the headlight.
Remove bulb holder 2from the
headlight housing by turning it
counter-clockwise.
Remove bulb 3from the bulb
holder.
Replace the defective bulb.
Bulb for parking light
W5W / 12 V / 5 W Install bulb
3in bulb socket 2.
Turn the bulb socket clock-
wise to install it in the headlight
housing.
Connect plug 1beneath the
headlight.
Replacing brake light and
rear light bulb
If it is not standing firmly,
the motorcycle could topple
in the course of the operations
described below.
Always make sure that the
motorcycle is stable and firmly
supported. Make sure the ground is level
and firm and place the motor-
cycle on its stand.
Switch off the ignition.
Remove the seat ( 63)
Remove screw
1.
8120zMaintenance
Page 147 of 166
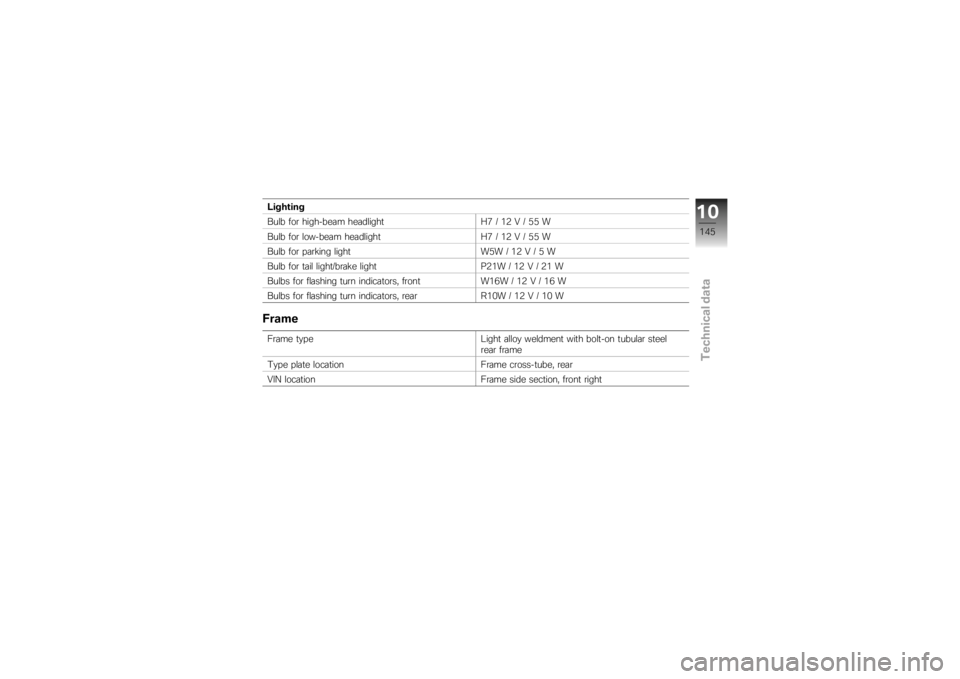
Lighting
Bulb for high-beam headlight H7 / 12 V / 55 W
Bulb for low-beam headlight H7 / 12 V / 55 W
Bulb for parking light W5W / 12 V / 5 W
Bulb for tail light/brake light P21W / 12 V / 21 W
Bulbs for flashing turn indicators, front W16W / 12 V / 16 W
Bulbs for flashing turn indicators, rear R10W / 12 V / 10 WFrameFrame typeLight alloy weldment with bolt-on tubular steel
rear frame
Type plate location Frame cross-tube, rear
VIN location Frame side section, front right
10145zTechnical data
Page 161 of 166

A
Abbreviations and symbols, 6
ABSSelf-diagnosis, 71
Warning, 29
Anti-theft alarm, 17 Warning, 38
ASC Self-diagnosis, 72
Switching off, 55
Switching on, 56
Warning, 31, 33
B
Battery Battery compartment, 13, 127
Charging battery when
connected, 126
Charging battery when
disconnected, 127
Installation, 129
Removal, 128
Technical data, 144
Warning for battery charge
current, 25 Brake fluid
Checking level, front, 13, 101
Checking level, rear, 13, 102
Brake pads Checking front, 100
Checking rear, 101
Running in, 73
Brakes Adjusting handbrake lever, 57
Checking operation, 99
Technical data, 142
Breakdown assistance kit, 93
Bulbs General instructions, 115
Replacing brake-light
bulbs, 120
Replacing front turn indicator
bulbs, 122
Replacing high-beam headlight
bulb, 118
Replacing low-beam headlight
bulb, 116
Replacing parking-light
bulb, 119
Replacing rear light bulbs, 120 Replacing rear turn indicator
bulbs, 123
Technical data, 145
Warning for bulb failure, 26
C
Case Adapting, 93
Adjusting, 91
Closing, 91
Installing, 92
Opening, 90
Removing, 92
Checklist, 70
Clock Adjusting, 44
Clutch Adjusting clutch lever, 56
Checking level, 11, 103
Checking operation, 103
Technical data, 140
Confirmation of maintenance work, 152
12159zIndex