BMW X5 4.4I 2000 Repair Manual
Manufacturer: BMW, Model Year: 2000, Model line: X5 4.4I, Model: BMW X5 4.4I 2000Pages: 201, PDF Size: 1.93 MB
Page 61 of 201
IndexDataTechnologyRepairsCar careControlsOverview
61n
Child restraints
*
Child seat security
Before installing any child restraint
device or child seat, please read
the following:
Never install a rear-facing child restraint
system in the front passenger seat of
this vehicle.
Your vehicle is equipped with an airbag
supplemental restraint system for the
front passenger. Because the backrest
on any rear-facing child restraint sys-
tem (of the kind designed for infants
under 1 year and 20 Ibs./9 kg) would be
within the airbag's deployment range,
you should never mount such a device
in the front passenger seat, since the
impact of the airbag against the child
restraint's backrest could lead to seri-
ous or fatal injuries.
If it is necessary for a child (not an in-
fant) to ride in the front seat, certain
precautions should be taken. First,
move the passenger seat as far away
from the dashboard as possible. This
important precaution is intended to
maximize the distance between the
airbag and the child. Older children
should be tightly secured with a safety
belt. Younger children should be se-
cured in an appropriate forward-facing
child restraint system that has first been
properly secured with a safety belt.
Never install a rear-facing child restraint
system in the front passenger seat.
We strongly urge you to carefully read
and comply with the instructions for in-
stallation and use provided by the child
restraint's manufacturer whenever you
use such a device.
Be sure that all occupants (of all ages)
remain properly and securely restrained
at all times.<
All rear seating positions in your vehicle
meet the recommendations of SAE
J1819, an industry-recommended prac-
tice for securing child restraint systems
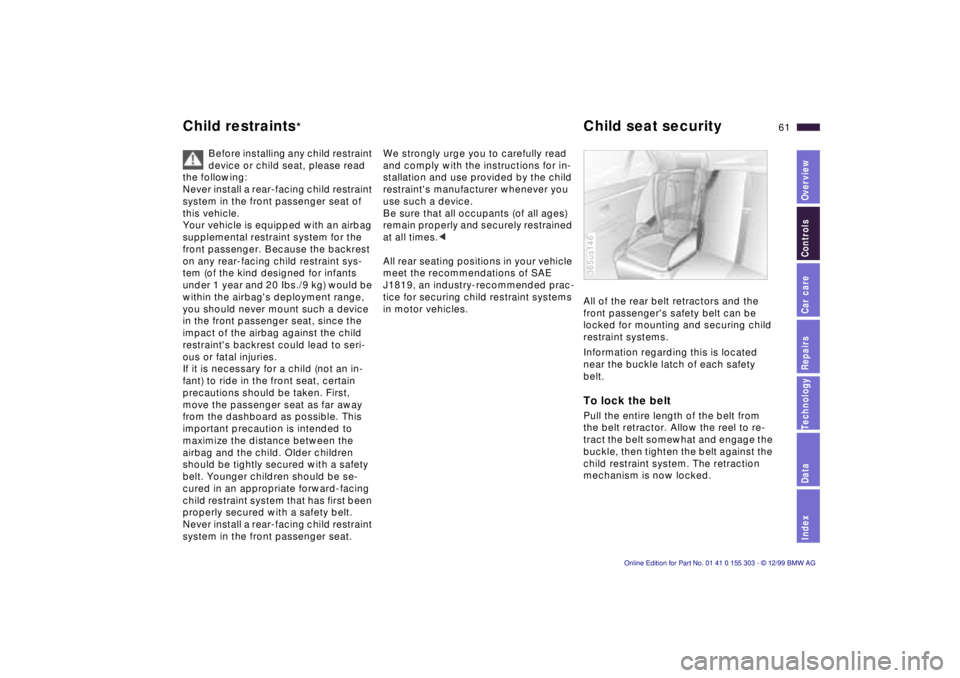
in motor vehicles. All of the rear belt retractors and the
front passenger's safety belt can be
locked for mounting and securing child
restraint systems.
Information regarding this is located
near the buckle latch of each safety
belt.
To lock the belt Pull the entire length of the belt from
the belt retractor. Allow the reel to re-
tract the belt somewhat and engage the
buckle, then tighten the belt against the
child restraint system. The retraction
mechanism is now locked. 365us146
Page 62 of 201
62n
Child seat security Child-safety locks To release the belt Release the buckle, remove the child-
restraint device and allow the belt
retractor to reel the belt completely in.
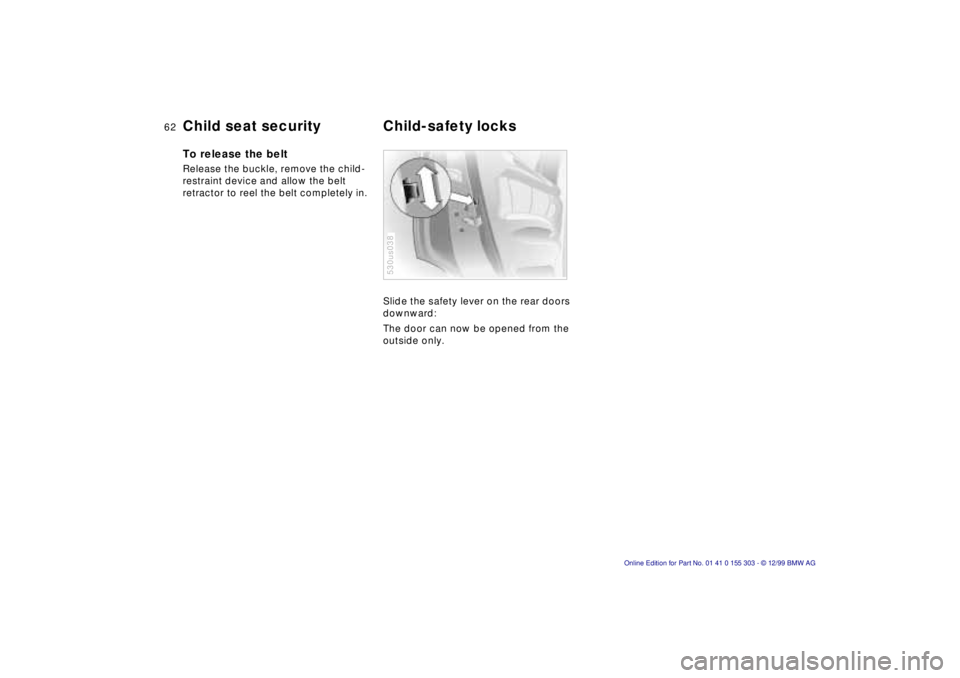
Slide the safety lever on the rear doors
downward:
The door can now be opened from the
outside only.
530us038
Page 63 of 201
IndexDataTechnologyRepairsCar careControlsOverview
63n
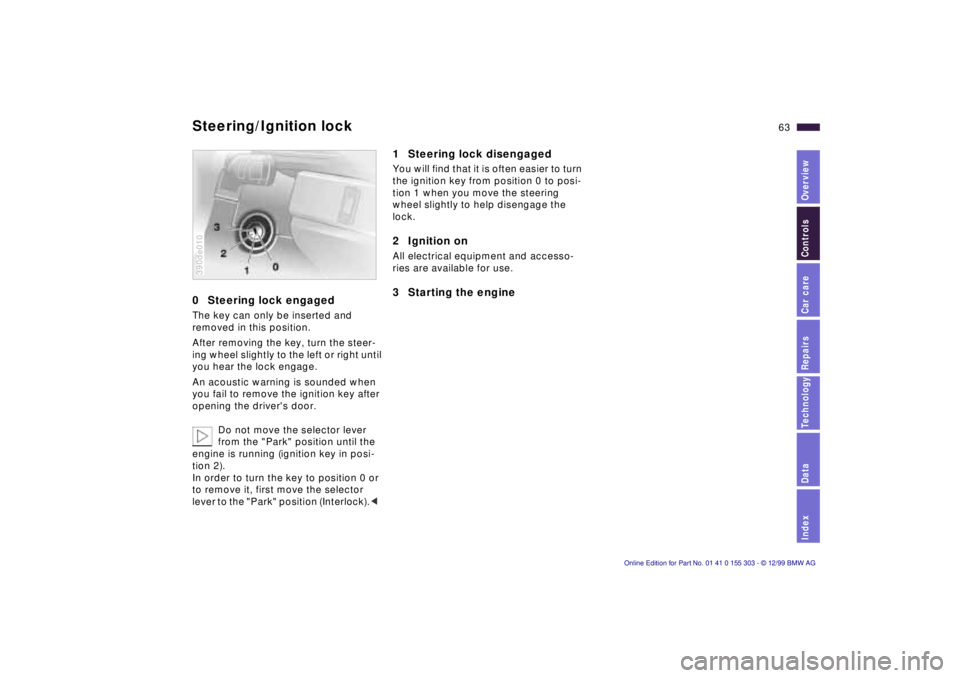
0 Steering lock engaged The key can only be inserted and
removed in this position.
After removing the key, turn the steer-
ing wheel slightly to the left or right until
you hear the lock engage.
An acoustic warning is sounded when
you fail to remove the ignition key after
opening the driver's door.
Do not move the selector lever
from the "Park" position until the
engine is running (ignition key in posi-
tion 2).
In order to turn the key to position 0 or
to remove it, first move the selector
lever to the "Park" position (Interlock).< 390de010
1 Steering lock disengaged You will find that it is often easier to turn
the ignition key from position 0 to posi-
tion 1 when you move the steering
wheel slightly to help disengage the
lock.2 Ignition on All electrical equipment and accesso-
ries are available for use. 3 Starting the engine
Steering/Ignition lock
Page 64 of 201

64n
Starting the engine Before starting >Engage the parking brake.
>Be sure that the selector lever is in
"Park" position.
Do not allow the engine to run in
enclosed spaces. The exhaust
gases contain carbon monoxide, an
odorless and colorless, but highly toxic
gas. Breathing the exhaust gases poses
an extreme health risk, and can lead to
unconsciousness and death.
Do not leave the vehicle unattended
with the engine running. An unattended
vehicle with a running engine repre-
sents a potential safety hazard.<
Do not press the accelerator pedal
while starting the engine.
Your BMW is equipped with the
convenience starting feature. Sim-
ply turn the key to position 3 (starter)
and then release it immediately. The
starter continues to operate automati-
cally.
The automatic starting mode will not
operate if the battery voltage is low.
The engine can be started by means of
jump-starting (refer to page 170).<
Do not allow the engine to warm up by
leaving it running while the vehicle re-
mains stationary. Instead, begin to drive
immediately at a moderate engine
speed.
Should the engine fail to start on the
first attempt (if it is very hot or cold, for
instance):
>Press the accelerator pedal halfway
down while the starter is engaged.
Engine idle speed is controlled by the
engine computer system. Increased
speeds at startup are normal and
should decrease as the engine warms
up. If engine speed does not decrease,
service is required.
To prevent the battery from discharg-
ing, always deactivate electrical de-
vices that are not in use. Switch the ig-
nition off when the vehicle is not being
driven.
Page 65 of 201
IndexDataTechnologyRepairsCar careControlsOverview
65n
Switching off the engine Parking brake Turn the ignition key to position 1 or 0.
Never remove the ignition key
while the vehicle is rolling. If you
did so, the ignition lock would engage
when the steering wheel is turned.
Always remove the ignition key and en-
gage the steering lock before leaving
the vehicle.
Always engage the parking brake and
place the selector lever in "Park" when
parking on slopes and inclined sur-
faces.<
The vehicle must be stationary and the
selector lever in "Park" before you can
remove the ignition key.
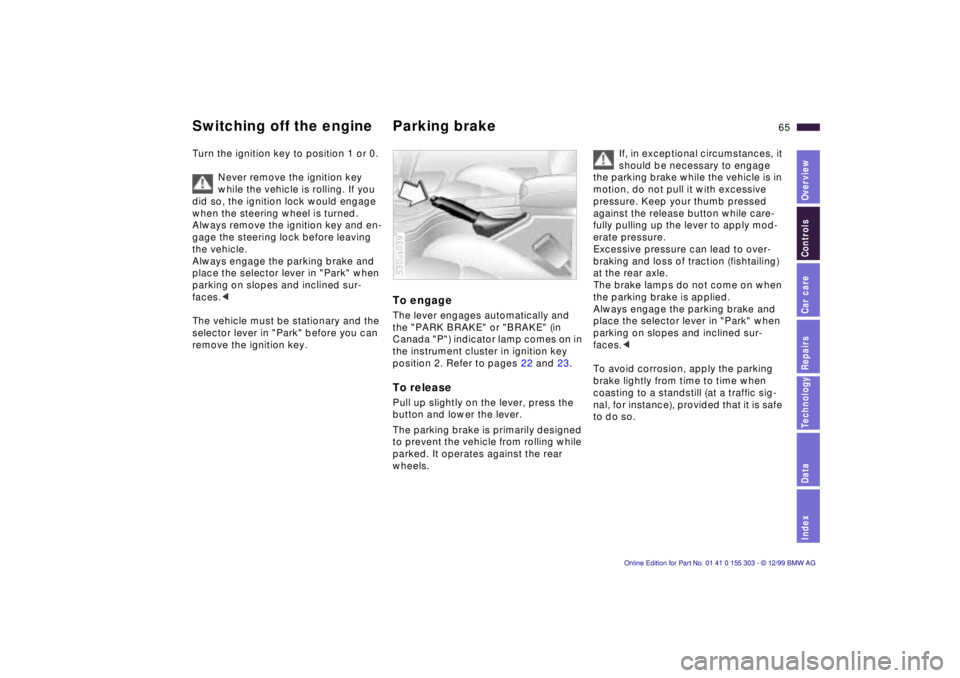
To engage The lever engages automatically and
the "PARK BRAKE" or "BRAKE" (in
Canada "P") indicator lamp comes on in
the instrument cluster in ignition key
position 2. Refer to pages 22 and 23. To release Pull up slightly on the lever, press the
button and lower the lever.
The parking brake is primarily designed
to prevent the vehicle from rolling while
parked. It operates against the rear
wheels. 530us039
If, in exceptional circumstances, it
should be necessary to engage
the parking brake while the vehicle is in
motion, do not pull it with excessive
pressure. Keep your thumb pressed
against the release button while care-
fully pulling up the lever to apply mod-
erate pressure.
Excessive pressure can lead to over-
braking and loss of traction (fishtailing)
at the rear axle.
The brake lamps do not come on when
the parking brake is applied.
Always engage the parking brake and
place the selector lever in "Park" when
parking on slopes and inclined sur-
faces.<
To avoid corrosion, apply the parking
brake lightly from time to time when
coasting to a standstill (at a traffic sig-
nal, for instance), provided that it is safe
to do so.
Page 66 of 201
66n
Automatic transmission with Steptronic You can drive as with a normal auto-
matic transmission. In addition, you can
also shift manually.
When you move the selector lever from
the "D" position to the left into the M/S
range, the performance-oriented shift
programs of the automatic transmission
are engaged. As soon as you briefly
touch the selector lever in the "+" or "Ð"
direction, Steptronic changes the gear.
The manual mode is engaged. When
you wish to use the automatic transmis-
sion mode again, move the selector
lever to the right into the "D" position.
The automatic transmission of your
BMW is equipped with Adaptive Trans-
mission Control (ATC), a system which
reacts with precision to your individual
driving style and the driving conditions. 530us040
To achieve this, different shift programs
are automatically engaged.
For additional details concerning the
ATC, please refer to the chapter de-
scribing "Advanced technology" on
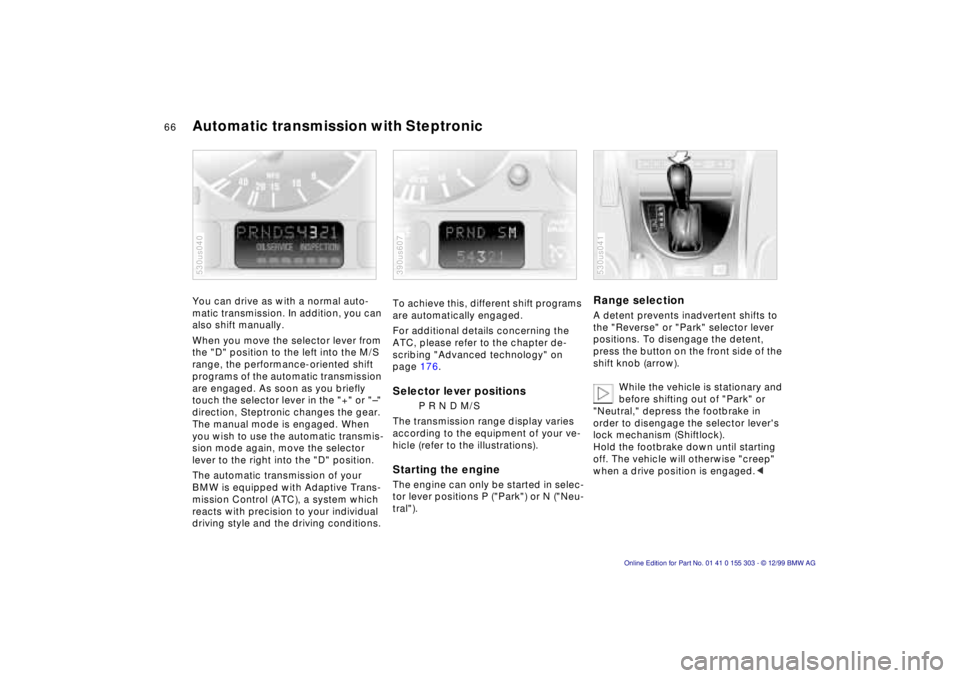
page 176. Selector lever positions
P R N D M/S
The transmission range display varies
according to the equipment of your ve-
hicle (refer to the illustrations).
Starting the engine The engine can only be started in selec-
tor lever positions P ("Park") or N ("Neu-
tral"). 390us607
Range selection A detent prevents inadvertent shifts to
the "Reverse" or "Park" selector lever
positions. To disengage the detent,
press the button on the front side of the
shift knob (arrow).
While the vehicle is stationary and
before shifting out of "Park" or
"Neutral," depress the footbrake in
order to disengage the selector lever's
lock mechanism (Shiftlock).
Hold the footbrake down until starting
off. The vehicle will otherwise "creep"
when a drive position is engaged.< 530us041
Page 67 of 201
IndexDataTechnologyRepairsCar careControlsOverview
67n
Automatic transmission with Steptronic
If you leave the vehicle with the
engine running, move the selector
lever to the "Park" or "Neutral" position
and apply the parking brake. If you fail
to do this, the vehicle could move.
Do not leave the vehicle unattended
with the engine running. An unattended
vehicle with a running engine repre-
sents a potential safety hazard.<
P Ñ Park Select "Park" only when the vehicle is
completely stopped. The transmission
locks to prevent the rear wheels from
turning. R Ñ Reverse Select "Reverse" only when the vehicle
is completely stopped.
When you select "Reverse", the backup
lamps will turn on automatically when
the ignition key is in position 2. N Ñ Neutral Select "Neutral" only if your journey is
interrupted for a longer period.
D Ñ Drive
(automatic shift program) This position is designed for driving
under all normal operating conditions.
All forward gears are available. "Kickdown" In the "Kickdown" mode, you achieve
maximum performance.
Depress the accelerator pedal past the
increased resistance point at the full-
throttle position.
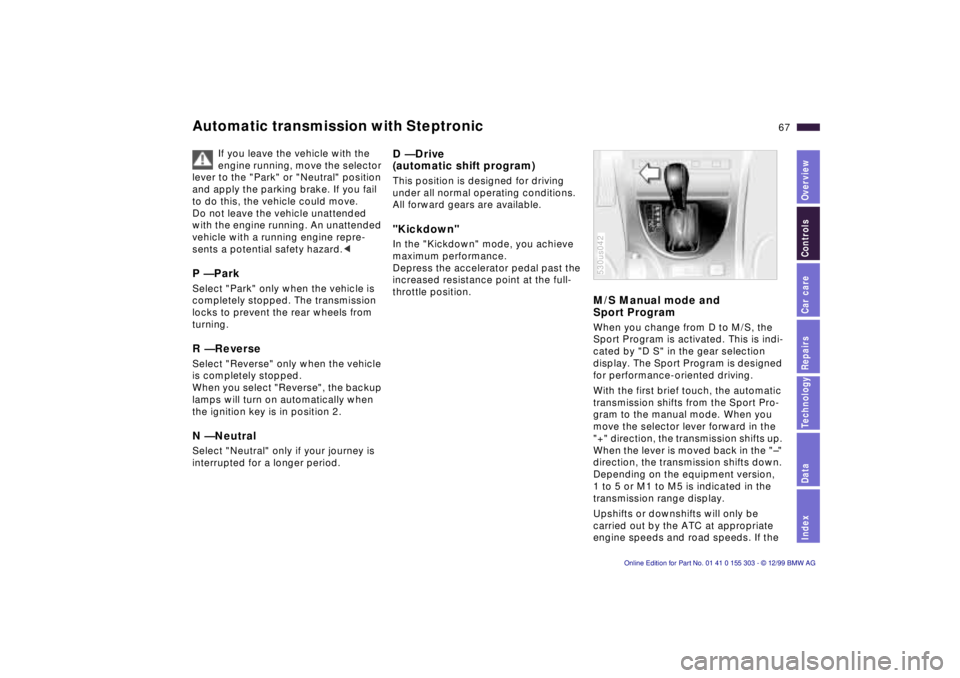
M/S Manual mode and
Sport Program When you change from D to M/S, the
Sport Program is activated. This is indi-
cated by "D S" in the gear selection
display. The Sport Program is designed
for performance-oriented driving.
With the first brief touch, the automatic
transmission shifts from the Sport Pro-
gram to the manual mode. When you
move the selector lever forward in the
"+" direction, the transmission shifts up.
When the lever is moved back in the "Ð"
direction, the transmission shifts down.
Depending on the equipment version,
1 to 5 or M1 to M5 is indicated in the
transmission range display.
Upshifts or downshifts will only be
carried out by the ATC at appropriate
engine speeds and road speeds. If the 530us042
Page 68 of 201
68n
Automatic transmission with Steptronic engine speed is too high, for instance,
the downshift will not be executed. The
gear selected will appear briefly in the
instrument cluster followed by the
current gear.
If you are driving in the manual
mode and wish to accelerate rap-
idly Ð to pass another vehicle, for exam-
ple Ð shift down manually or with the
kickdown function.<
You can only change from M/S to se-
lector lever positions "P," "R" and "N"
via the "D" position.
In the following situations, the Step-
tronic "thinks" for you in the manual
mode:
>In order to prevent engine over-
speeding, the transmission shifts
automatically to the next higher gear
shortly before the RPM cutoff point.
>At low speeds, the transmission
shifts down automatically Ð you do
not have to act.
>In the "Kickdown" mode, the trans-
mission shifts down to the lowest
possible gear based on the engine
speed.
>Depending on the situation Ð when
driving in adverse winter conditions,
for example Ð you may also start out
in 2nd or 3rd gear.
Electronic transmission control
module
If the indicator lamp comes on
or the message "TRANS.FAIL-
SAFE PROG" appears in the
Check Control
*, there is a fault in the
transmission system.
Bring the vehicle to a stop. Move the
transmission selector lever to "P." Set
the parking brake and turn the engine
off (ignition key to position 0).
Wait a few seconds, then start the en-
gine.
If the indicator lamp goes out after a
few seconds, normal transmission per-
formance has been restored. You may
continue to drive as usual. If the indica-
tor lamp does not go out, you can place
the selector lever in all positions. How-
ever, the vehicle will now only drive for-
ward with limited gear selection.
If this should occur, avoid extreme en-
gine loads and consult the nearest au-
thorized BMW center.
Do not work in the engine com-
partment when a drive gear (for-
ward or reverse) is engaged. If you do
this, the vehicle could move.<
Information on jump-starting, tow-start-
ing and towing begins on page 170.
Page 69 of 201
IndexDataTechnologyRepairsCar careControlsOverview
69n
Indicator/Headlamp flasher
Washer/Wiper system
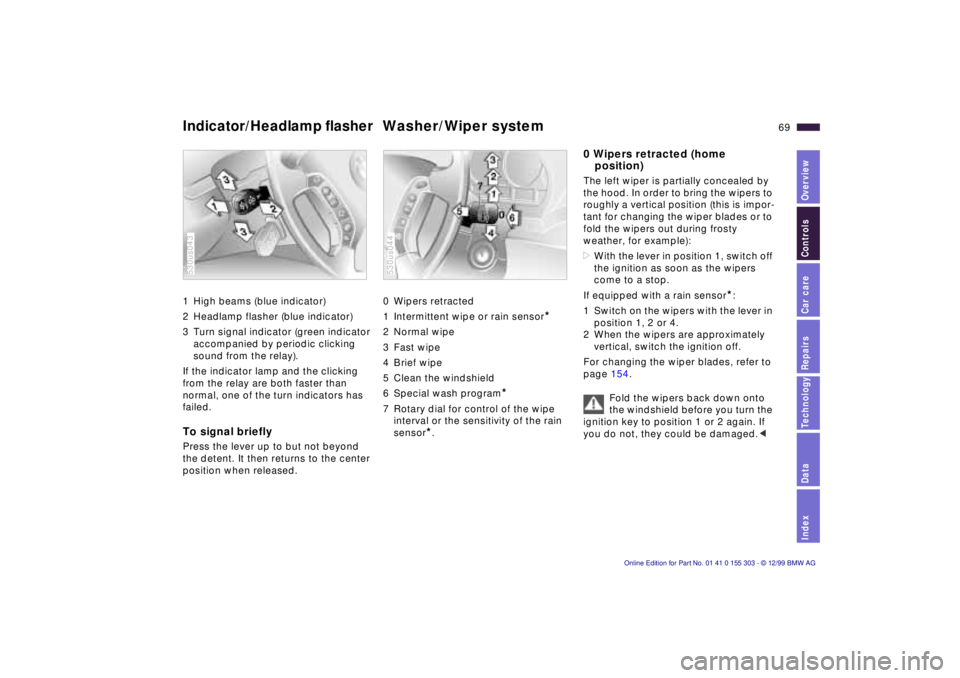
1 High beams (blue indicator)
2 Headlamp flasher (blue indicator)
3 Turn signal indicator (green indicator
accompanied by periodic clicking
sound from the relay).
If the indicator lamp and the clicking
from the relay are both faster than
normal, one of the turn indicators has
failed. To signal briefly Press the lever up to but not beyond
the detent. It then returns to the center
position when released. 530us043
0 Wipers retracted
1 Intermittent wipe or rain sensor
*
2 Normal wipe
3 Fast wipe
4 Brief wipe
5 Clean the windshield
6 Special wash program
*
7 Rotary dial for control of the wipe
interval or the sensitivity of the rain
sensor
*.
530us044
0 Wipers retracted (home
position) The left wiper is partially concealed by
the hood. In order to bring the wipers to
roughly a vertical position (this is impor-
tant for changing the wiper blades or to
fold the wipers out during frosty
weather, for example):
>With the lever in position 1, switch off
the ignition as soon as the wipers
come to a stop.
If equipped with a rain sensor
*:
1 Switch on the wipers with the lever in
position 1, 2 or 4.
2 When the wipers are approximately
vertical, switch the ignition off.
For changing the wiper blades, refer to
page 154.
Fold the wipers back down onto
the windshield before you turn the
ignition key to position 1 or 2 again. If
you do not, they could be damaged.<
Page 70 of 201
70n
Washer/Wiper system 1 Intermittent wipe or rain
sensor
*
Intermittent wipe:
You can set the wipe interval to four
stages with rotary dial 7.
In addition, the wipe interval is varied
automatically depending on road
speed.
Rain sensor:
When the rain sensor is activated, the
windshield wiper is controlled automati-
cally, depending on the degree of wet-
ness of the windshield (in both snow
and rain). You do not have to be con-
cerned with switching the windshield
wiper on or off or adjusting the wipe
interval between intermittent and full
wipe. Instead, you can concentrate fully
on the traffic conditions. This is espe-
cially important under adverse weather
conditions.
The rain sensor is positioned on the
windshield, directly in front of the inte-
rior rearview mirror.
To activate the rain sensor:
Move the lever to position 1 with the
ignition key in position 1 or higher. The
wipers travel once across the wind-
shield, regardless of the weather condi-
tions. You can leave the lever permanently in
position 1. It is then only necessary to
activate the rain sensor from ignition
key position 1 and up. To do this,
>turn rotary dial 7 briefly or
>clean the windshield 5 or use the
special wash program 6.
To adjust the sensitivity of the rain
sensor:
Turn rotary dial 7.
Turn the rain sensor off in auto-
matic car washes. If you do not,
damage may occur if the wipers switch
on unintentionally.<
2 Normal wiper speed The system switches automatically to
intermittent operation when the vehicle
is not moving (not on vehicles with the
rain sensor
*).
3 Fast wiper speed The wipers operate at normal speed
when the vehicle is not moving (not on
vehicles with the rain sensor
*).
5 Clean the windshield The system sprays washer fluid against
the windshield and activates the wipers
for a brief period.
If you pull the lever only briefly, the sys-
tem sprays washer fluid onto the wind-
shield without activating the wipers. 6 Special wash program
*
As at 5; there are also several additional
wash cycles, and the headlamps are
cleaned
*.
This program is recommended after you
have driven on extremely dirty roads.
Headlamp washers
*
>With the Special wash program 6
>With every fifth actuation of Clean
windshield 5 when the vehicle's
lighting is switched on.
Do not use the washers if there is
any danger that the fluid will
freeze on the windshield. If you do so,
your vision could be obscured. For this
reason, use an antifreeze agent. Refer
to page 136.
Do not use the washers when the reser-
voir is empty. This could cause damage
to the washer pump.< Windshield washer jets The windshield washer jets are warmed
automatically when the ignition key is in
position 2.