BUICK CENTURY 1994 Owners Manual
Manufacturer: BUICK, Model Year: 1994, Model line: CENTURY, Model: BUICK CENTURY 1994Pages: 308, PDF Size: 16.3 MB
Page 121 of 308
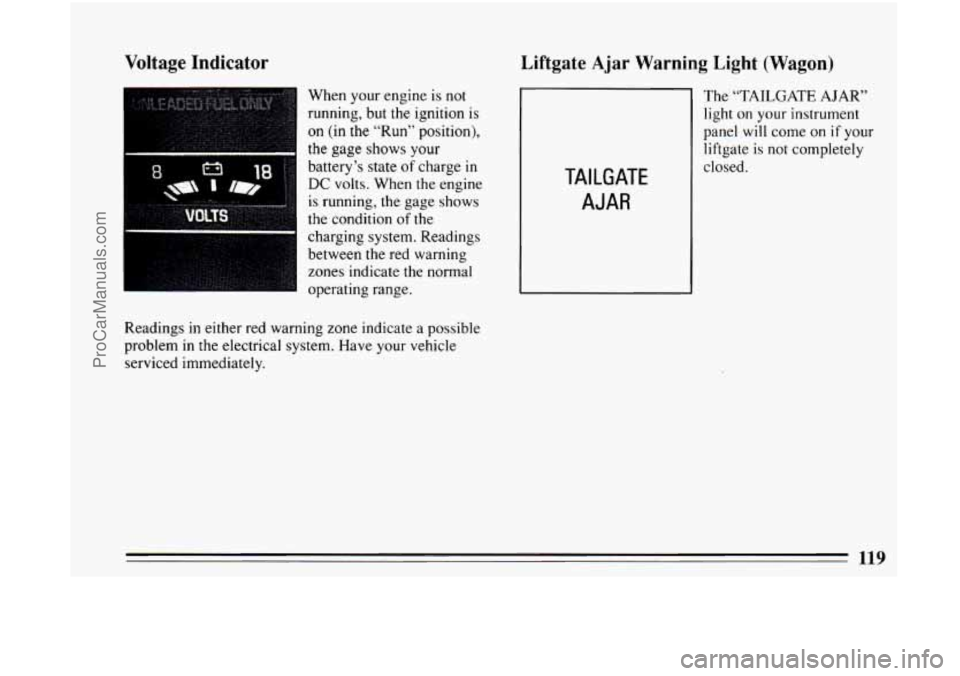
Voltage Indicator
When your engine is not
running, but the ignition is
on (in the “Run” position),
the gage shows your
battery’s
state of charge in
DC volts. When the engine
is running, the gage shows
the condition
of the
charging system. Readings
between
the red warning
zones indicate the normal
operating range.
Readings
in either red warning zone indicate a possible
problem in the electrical system. Have your vehicle
serviced immediately.
Liftgate Ajar Warning Light (Wagon)
The “TAILGATE AJAR”
light on your instrument
panel
will come on if your
liftgate
is not completely
TAILGATE
AJAR
closed.
119
ProCarManuals.com
Page 122 of 308
120
ProCarManuals.com
Page 123 of 308
Part 3 Comfort Controls and Audio Systems
In this part you’ll find out how to operate the comfort control systems and audio systems offered with your Buick .
Be sure to read about the particular system supplied with your vehicle .
Part 3 includes:
Comfort Control System .......................................................... i22
Airconditioner ............................................................... 122
Ventilation
................................................................... 123
Heater and Defroster
........................................................... 123
RearWindowDefogger
........................................................ 123
Audiosystems
.................................................................... 125
Radio Controls
....................................................... 126. 128. 130
TapePlayerControls ........................................................... 130
CDPlayerControls
............................................................ 132
Care of Cassette Tape Player and Tapes
............................................ 136
CareofCompactDiscs
......................................................... 136
Power Antenna Mast Care
...................................................... 137
ProCarManuals.com
Page 124 of 308
Your Buick Comfort Control System
The air conditioner and heater work best if you keep
your windows closed while using them. Your vehicle
also has the flow-through ventilation system described
later in this section.
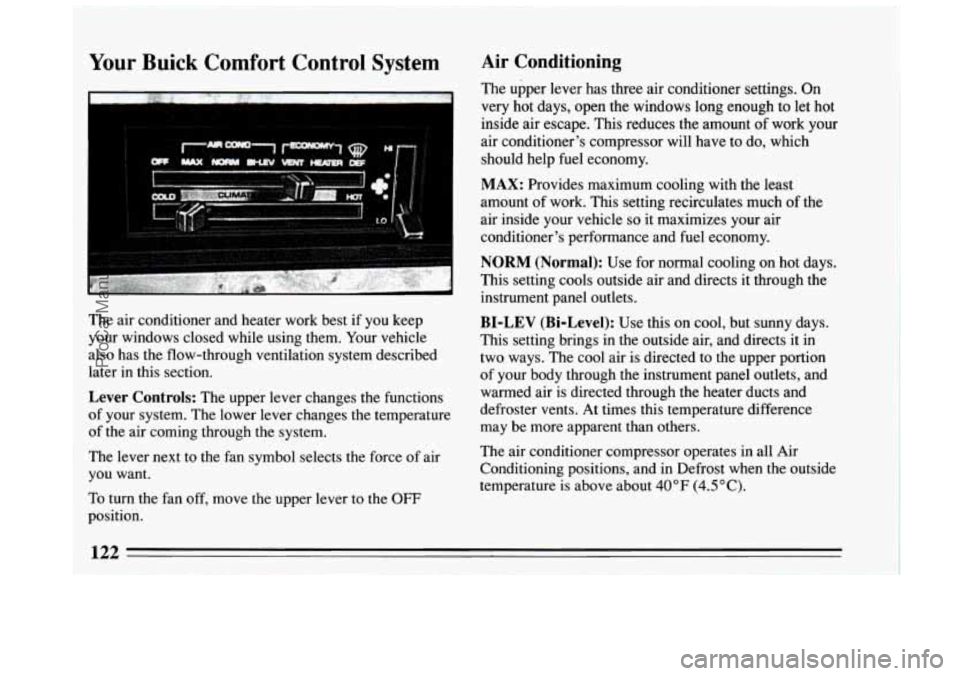
Lever Controls: The upper lever changes the functions
of your system. The lower lever changes the temperature
of the air coming through the system.
The lever next to the fan symbol selects the force of air
you want.
To turn the fan off, move the upper lever to the OFF
Air Conditioning
The upper lever has three air conditioner settings. On
very hot days, open the windows long enough to let hot
inside air escape. This reduces the amount of work your
air conditioner's compressor will have to do, which
should help fuel economy.
MAX: Provides maximum cooling with the least
amount of work. This setting recirculates much
of the
air inside your vehicle
so it maximizes your air
conditioner's performance and fuel economy.
NORM (Normal): Use for normal cooling on hot days.
This setting cools outside air and directs it through the
instrument panel outlets.
BI-LEV (Bi-Level): Use this on cool, but sunny days.
This setting brings in the outside air, and directs it in
two ways. The cool air is directed to the upper portion
of your body through the instrument panel outlets, and
warmed air is directed through the heater ducts and
defroster vents. At times this temperature difference
may be more apparent than others.
The air conditioner compressor operates in all Air
Conditioning positions, and in Defrost when the outside
temperature is above about 40°F (4.5"C).
position.
__
ProCarManuals.com
Page 125 of 308
Ventilation
For mild outside temperatures, when little heating or
cooling is needed, slide the upper lever
to VENT. Air
flow is through the instrument panel outlets. Rotate the
control next to the outlets to turn on, adjust or
turn off
the air flow. Adjust the lower lever
on the control panel
to the temperature desired.
Heating
When outside temperatures are cold, sliding the upper
lever
to HEATER and the lower lever to HOT will send
heated air through the heater ducts, and some through
the defroster vents. VENT and HEATER are labeled
ECONOMY positions because the air conditioner
compressor doesn't run in these two settings. This
reduces engine load, resulting in improved fuel
economy. If either setting fails to keep you comfortable,
or causes your windows
to fog up, slide the upper lever
to one of the Air Conditioning positions, or to DEF
(Defrost).
Defrosting
The DEF setting directs most of the air through the
defroster vents, and some through the heater ducts.
Defog
To quickly defog the windshield, set the upper lever to
DEF and move the fan switch to HI . Slide the lower
lever to
HOT.
In damp, cool weather (temperatures about 45 "-65"F,
7"- 1 8"C), you can use BI-LEV to defog the side
windows. Set the upper lever to BI-LEV and the fan
switch to
HI. Aim the side vents toward the side
windows. For increased air flow to the side vents, close
the center vents.
Rear Window Defogger (Option)
The rear window defogger
uses a warming grid to
remove fog from the rear
window. In winter, it can
also keep ice from forming
on the rear window.
132
ProCarManuals.com
Page 126 of 308
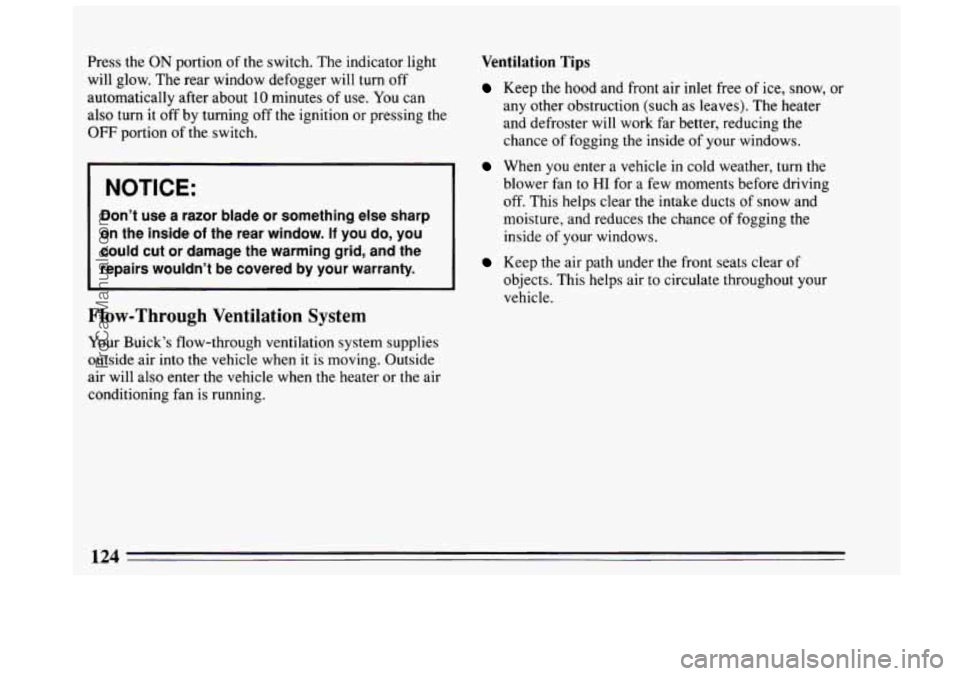
Press the ON portion of the switch. The indicator light
will glow. The rear window defogger will turn off
automatically after about
10 minutes of use. You can
also turn it off by turning
off the ignition or pressing the
OFF portion of the switch.
I NOTICE:
Don’t use a razor blade or somerning else sharp
on the inside
of the rear window. If you do, you
could cut or damage the warming grid, and the repairs wouldn’t be covered by your warranty.
Flow-Through Ventilation System
Your Buick’s flow-through ventilation system supplies
outside air into the vehicle when it
is moving. Outside
air will also enter the vehicle when the heater or the air
conditioning fan is running.
Ventilation Tips
Keep the hood and front air inlet free of ice, snow, or
any other obstruction (such as leaves). The heater
and defroster will work far better, reducing the
chance of fogging the inside of your windows.
When you enter a vehicle in cold weather, turn the
blower fan
to HI for a few moments before driving
off. This helps clear the intake ducts of snow and
moisture, and reduces
the chance of fogging the
inside of your windows.
Keep the air path under the front seats clear of
objects. This helps air to circulate throughout your
vehicle.
124
ProCarManuals.com
Page 127 of 308
Audio Systems
Your Delco@ audio system has been designed to operate
easily and give years
of listening pleasure. But you will
get the most enjoyment out
of it if you acquaint yourself
with it first. Find out what your Delco@ system can do
and how to operate all its controls, to be sure you're
getting the most out of the advanced engineering that
went into it.
AM Stereo
FM Stereo
FM stereo will give you the best sound. But FM signals
will reach only about
10 to 40 miles (16 to 65 km). Tall
buildings or hills can interfere with
FM signals, causing
the sound to come and
go.
AM
The range for most AM stations is greater than for FM,
especially at night. The longer range, however, can
cause stations to interfere with each other. AM can also
pick up noise from things like storms and power lines.
Try reducing the treble to lower this noise. Your
Delco@ system may be able to receive C-Quam@
stereo broadcasts. Many AM stations around the country
use C-Quam@
to produce stereo, though some do not.
(C-Quam@ is a registered trademark of Motorola, Inc.)
If your Delco' system can get C-Quam@ signals, your
stereo indicator light will come on when you are
receiving
it.
Be aware that hearing damage from loud noise is almost
undetectable
until it is too late. Your hearing can adapt
to higher volumes of sound. Sound that seems normal
can be loud and harmful to your hearing. Take
precautions by adjusting the volume control
on your
radio to a safe sound level before your hearing adapts
to it.
125
ProCarManuals.com
Page 128 of 308
To help avoid hearing loss or damage:
Adjust the volume control to the lowest setting.
Increase volume slowly until you hear comfortably
and clearly.
NOTICE:
Before you add any sound equipment to your
vehicle
-- like a tape player, CB radio, mobile
telephone or two-way radio
-- be sure you can
add what you want. If you can,
it's very important
to do
it properly. Added sound equipment may
interfere with the operation
of your vehicle's
engine, Delco@ radio or other systems, and even
damage them. And, your vehicle's systems may
interfere with the operation of sound equipment
that has been added improperly.
So, before adding sound equipment, check with
your dealer and be sure to check Federal rules
covering mobile radio and telephone units.
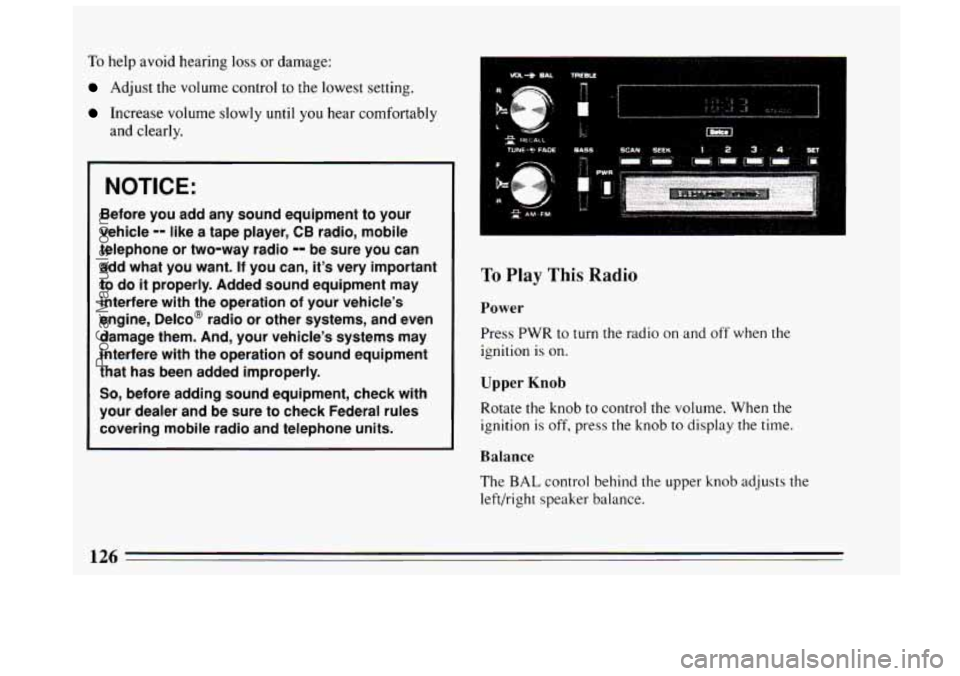
To Play This Radio
Power
Press PWR to turn the radio on and off when the
ignition is on.
Upper Knob
Rotate the knob to control the volume. When the
ignition is off, press the knob to display the time.
Balance
The BAL control behind the upper knob adjusts the
left/right speaker balance.
126
ProCarManuals.com
Page 129 of 308
Lower Knob Pushbuttons
Rotate
the lower knob to tune in radio stations. Press it
to change between the AM and FM bands.
Fade
The FADE control behind the lower knob adjusts the
front/rear speaker balance.
Treble
Slide this lever up to increase treble, or down to
decrease it. If a station is weak or noisy, reduce the
treble.
Bass
Slide this lever up to increase bass, or down to decrease it.
Scan
Press the SCAN button to hear each station for a few
seconds. Push it again to stop scanning.
Seek
rress the SEEK button to go to the next higher station
and stay there. Push
it again and it will find the next
higher station. The
four pushbuttons let you return to favorite stations.
To set the pushbuttons for up
to fourteen stations (7 AM
and
7 FM:
1. Use the lower knob (TUNE) to tune in the station
you want.
display.
3. Within 5 seconds, press one of the four pushbuttons.
Whenever you push that button again, the preset
station will return.
2. Press SET. The SET indicator will appear in the
Up to three more stations may be preset on each band by
pressing two pushbuttons that are next to each other, at
the same time.
1. Tune in the desired station.
2. Press SET, and within five seconds press any two
pushbuttons that are next to each other at the same
time. The station will return when the same two
pushbuttons are pressed again.
Clock
To set the clock,
1. Press the SET button.
127
ProCarManuals.com
Page 130 of 308
2. Within 5 seconds, press and hold SCAN until the
correct hour appears
on the display.
3. Press and hold SEEK until the correct minute
appears on the display.
...... _.__” ....... ~ ........ .”... .. 7
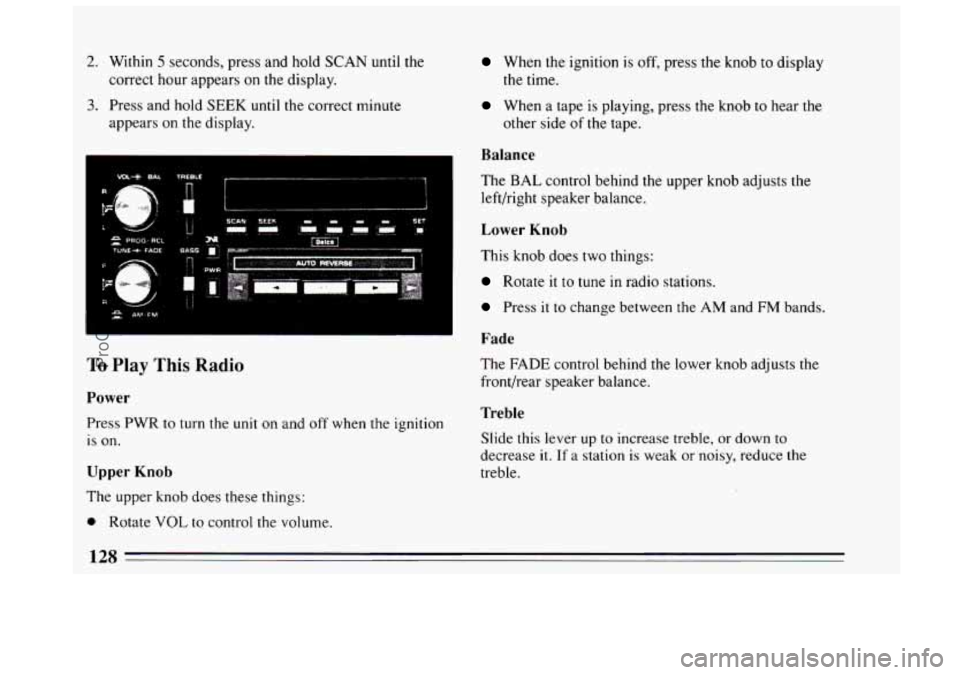
To Play This Radio
Power
Press PWR to turn the unit on and off when the ignition
is on.
Upper Knob
The upper knob does these things:
0 Rotate VOL to control the volume.
When the ignition is off, press the knob to display
the time.
When a tape is playing, press the knob t.o hear the
other side of the tape.
Balance
The BAL control behind the upper knob adjusts the
left/right speaker balance.
Lower Knob
This knob does two things:
Rotate it to tune in radio stations.
Press it to change between the AM and FM bands.
Fade
The FADE control behind the lower knob adjusts the
front/rear speaker balance.
Treble
Slide this lever up to increase treble, or down to
decrease
it. If a station is weak or noisy, reduce the
treble.
128
ProCarManuals.com