audio BUICK CENTURY 2003 Owner's Manual
[x] Cancel search | Manufacturer: BUICK, Model Year: 2003, Model line: CENTURY, Model: BUICK CENTURY 2003Pages: 344, PDF Size: 2.57 MB
Page 1 of 344
Seats and Restraint Systems........................... 1-1
Front Seats
............................................... 1-2
Rear Seats
............................................... 1-6
Safety Belts
.............................................. 1-7
Child Restraints
.......................................1-30
Air Bag Systems
......................................1-53
Restraint System Check
............................1-63
Features and Controls..................................... 2-1
Keys
........................................................ 2-2
Doors and Locks
......................................2-10
Windows
.................................................2-15
Theft-Deterrent Systems
............................2-17
Starting and Operating Your Vehicle
...........2-19
Mirrors
....................................................2-32
OnStar
žSystem
......................................2-34
Storage Areas
.........................................2-35
Instrument Panel............................................. 3-1
Instrument Panel Overview
.......................... 3-2
Climate Controls
......................................3-17
Warning Lights, Gages and Indicators
.........3-22
Audio System(s)
.......................................3-39Driving Your Vehicle....................................... 4-1
Your Driving, the Road, and Your Vehicle
..... 4-2
Towing
...................................................4-32
Service and Appearance Care.......................... 5-1
Service
..................................................... 5-3
Fuel
......................................................... 5-5
Checking Things Under the Hood
...............5-10
Headlamp Aiming
.....................................5-49
Bulb Replacement
....................................5-51
Windshield Wiper Blade Replacement
.........5-56
Tires
......................................................5-57
Appearance Care
.....................................5-79
Vehicle Identi®cation
.................................5-87
Electrical System
......................................5-88
Capacities and Speci®cations
.....................5-94
Normal Maintenance Replacement Parts
......5-95
Maintenance Schedule..................................... 6-1
Maintenance Schedule
................................ 6-2
Customer Assistance Information.................... 7-1
Customer Assistance Information
.................. 7-2
Reporting Safety Defects
...........................7-10
Index................................................................ 1
2003 Buick Century Owner ManualM
Page 4 of 344
Vehicle Damage Warnings
Also, in this book you will ®nd these notices:
Notice:These mean there is something that could
damage your vehicle.
A notice will tell you about something that can damage
your vehicle. Many times, this damage would not be
covered by your warranty, and it could be costly. But the
notice will tell you what to do to help avoid the damage.
When you read other manuals, you might see CAUTION
and NOTICE warnings in different colors or in different
words.
You'll also see warning labels on your vehicle. They use
the same words, CAUTION or NOTICE.
Vehicle Symbols
Your vehicle has components and labels that use
symbols instead of text. Symbols, used on your vehicle,
are shown along with the text describing the operation
or information relating to a speci®c component, control,
message, gage or indicator.
If you need help ®guring out a speci®c name of a
component, gage or indicator, reference the following
topics:
·Seats and Restraint Systems in Section 1
·Features and Controls in Section 2
·Instrument Panel Overview in Section 3
·Climate Controls in Section 3
·Warning Lights, Gages and Indicators in Section 3
·Audio System(s) in Section 3
·Engine Compartment Overview in Section 5
iv
Page 90 of 344
Notice:If your key seems stuck in LOCK and you
can't turn it, be sure you are using the correct key;
if so, is it all the way in? If it is, then turn the
steering wheel left and right while you turn the key
hard. Turn the key only with your hand. Using a
tool to force it could break the key or the ignition
switch. If none of these works, then your vehicle
needs service.
C (OFF):This position lets you turn off the engine but
still turn the steering wheel. It doesn't lock the steering
wheel. Use OFF if you must have your vehicle pushed or
towed.
D (RUN):This position is where the key returns to after
you start your vehicle. With the engine off, you can
use RUN to display some of your warning and
indicator lights.
E (START):This position starts your engine.
A warning chime will sound if you open the driver's door
when the ignition is in OFF, LOCK or ACCESSORY
and the key is in the ignition.Retained Accessory Power (RAP)
With Retained Accessory Power (RAP), your power
windows and audio system will continue to work for up
to 10 minutes after the ignition key is turned to OFF
and before any of the doors are opened.
Starting Your Engine
Move your shift lever to PARK (P) or NEUTRAL (N).
Your engine won't start in any other position ± that's a
safety feature. To restart when you're already moving,
use NEUTRAL (N) only.
Notice:Don't try to shift to PARK (P) if your
vehicle is moving. If you do, you could damage
the transaxle. Shift to PARK (P) only when your
vehicle is stopped.
1. With your foot off the accelerator pedal, turn your
ignition key to START. When the engine starts, let
go of the key. The idle speed will go down as
your engine gets warm.
2-20
Page 107 of 344
Instrument Panel Overview...............................3-2
Hazard Warning Flashers................................3-3
Other Warning Devices...................................3-4
Horn.............................................................3-4
Tilt Wheel.....................................................3-4
Turn Signal/Multifunction Lever.........................3-5
Exterior Lamps.............................................3-11
Interior Lamps..............................................3-14
Auxiliary Power Connection
(Power Drop)............................................3-16
Ashtrays and Cigarette Lighter........................3-16
Climate Controls............................................3-17
Dual Climate Control System..........................3-17
Outlet Adjustment.........................................3-20
Passenger Compartment Air Filter...................3-20
Warning Lights, Gages and Indicators.............3-22
Instrument Panel Cluster................................3-23
Speedometer and Odometer...........................3-24
Safety Belt Reminder Light.............................3-24
Air Bag Readiness Light................................3-25
Charging System Light..................................3-26
Brake System Warning Light..........................3-27
Anti-Lock Brake System Warning Light.............3-28
Enhanced Traction System Warning Light.........3-28
Low Traction Light........................................3-29Engine Coolant Temperature Warning Light......3-29
Engine Coolant Temperature Gage..................3-30
Tire Pressure Light.......................................3-30
Malfunction Indicator Lamp.............................3-31
Oil Pressure Light.........................................3-34
Low Oil Level Light.......................................3-35
Change Engine Oil Light................................3-35
Security Light...............................................3-36
Cruise Control Light......................................3-36
Low Washer Fluid Warning Light.....................3-36
Door/Trunk Ajar Warning Light........................3-36
Service Vehicle Soon Light............................3-37
Fuel Gage...................................................3-37
Low Fuel Warning Light.................................3-38
Audio System(s).............................................3-39
Setting the Time...........................................3-39
AM-FM Radio...............................................3-40
Radio with Cassette and CD..........................3-42
Theft-Deterrent Feature..................................3-48
Audio Steering Wheel Controls.......................3-50
Understanding Radio Reception......................3-50
Care of Your Cassette Tape Player.................3-51
Care of Your CDs.........................................3-52
Care of Your CD Player................................3-52
Fixed Mast Antenna......................................3-52
Section 3 Instrument Panel
3-1
Page 109 of 344
The main components of the instrument panel are the
following:
A. Exterior Lamps Control. See
Exterior Lamps on
page 3-11.
B. Turn Signal/Multifunction Lever. See
Turn
Signal/Multifunction Lever on page 3-5.
C. Instrument Panel Cluster. See
Instrument Panel
Cluster on page 3-23.
D. Audio Steering Wheel Controls. See
Audio Steering
Wheel Controls on page 3-50.
E. Gear Shift Lever. See
Automatic Transaxle
Operation on page 2-23.
F. Air Outlets. See
Outlet Adjustment on page 3-20.
G. Side Window Defogger Outlet.
H. Hood Release. See
Hood Release on page 5-11.
I. Tilt Wheel Lever. See
Tilt Wheel on page 3-4.
J. Horn. (See
Horn on page 3-4.
K. Audio System. See
Audio System(s) on page 3-39.
L. Ashtray. See
Ashtrays and Cigarette Lighter on
page 3-16.
M. Climate Control. See
Dual Climate Control System
on page 3-17.
N. Glove Box.
O. Instrument Panel Fuse Block. See
Fuses and Circuit
Breakers on page 5-89.
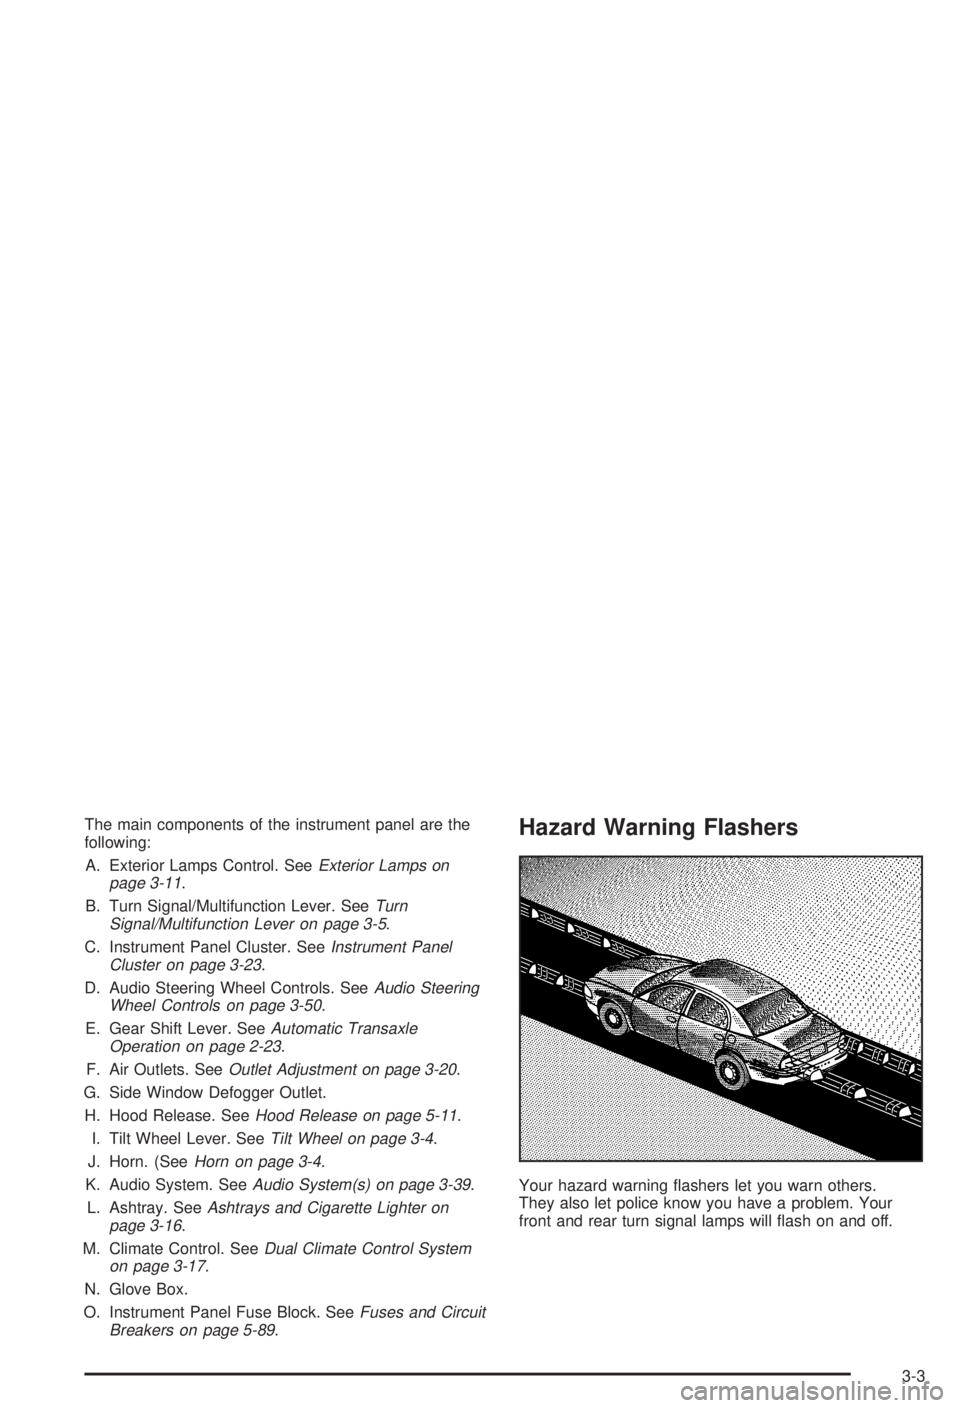
Hazard Warning Flashers
Your hazard warning ¯ashers let you warn others.
They also let police know you have a problem. Your
front and rear turn signal lamps will ¯ash on and off.
3-3
Page 145 of 344
Audio System(s)
Notice:Before you add any sound equipment to
your vehicle ± like a tape player, CB radio, mobile
telephone or two-way radio ± be sure you can
add what you want. If you can, it's very important to
do it properly. Added sound equipment may
interfere with the operation of your vehicle's engine,
radio or other systems, and even damage them.
Your vehicle's systems may interfere with the
operation of sound equipment that has been added
improperly.
So, before adding sound equipment, check with
your dealer and be sure to check federal rules
covering mobile radio and telephone units.
Your audio system has been designed to operate easily
and to give years of listening pleasure. You will get
the most enjoyment out of it if you acquaint yourself with
it ®rst. Figure out which radio you have in your vehicle,®nd out what your audio system can do and how to
operate all of its controls to be sure you're getting the
most out of the advanced engineering that went into it.
Your vehicle has a feature called Retained Accessory
Power (RAP). With RAP, you can play your audio
system even after the ignition is turned off. See
ªRetained Accessory Power (RAP)º under
Ignition
Positions on page 2-19.
Setting the Time
Press and hold HRS until the correct hour appears on
the display. Press and hold MIN until the correct minute
also appears.
You may set the time with the ignition off if you push
RECALL ®rst.
3-39
Page 152 of 344
Playing a Compact Disc
Insert a disc partway into the slot, label side up. The
player will pull it in. The disc should begin playing. If you
want to insert a CD while the ignition or the radio is
off, ®rst press EJECT or RECALL.
If you turn off the ignition or radio with a disc in the
player, it will stay in the player. When you turn on the
ignition or system, the disc will start playing where
it stopped, if it was the last selected audio source.
Also, as a protection feature, if a CD is ejected and left
in the player, it will be pulled back in the player with
the ignition on or off.
The integral CD player can play the smaller 8 cm single
discs with an adapter ring. Full-size compact discs
and the smaller discs are loaded in the same manner.
If playing a CD-R the sound quality may be reduced due
to CD-R quality, the method of recording, the quality of
the music that has been recorded and the way the CD-R
has been handled. You may experience an increase in
skipping, difficulty in ®nding tracks and/or difficulty in
loading and ejecting. If these problems occur try a known
good CD.Do not add paper labels to discs, they could get caught
in the CD player.
Do not play 3 inch discs without a standard adapter disc.
If an error appears on the display, see ªCompact Disc
Messagesº later in this section.
1 PREV (Previous):Press this pushbutton to go to the
start of the current track, if more than eight seconds
have played. If you hold this pushbutton or press it more
than once, the player will continue moving back
through the disc.
2 NEXT:Press this pushbutton to go to the next track.
If you hold this pushbutton or press it more than
once, the player will continue moving forward through
the disc.
3
r(Reverse):Press and hold this pushbutton to
quickly reverse within a track. You will hear sound at a
reduced level. Release it to play the passage.
4
[(Forward):Press and hold this pushbutton to
quickly advance within a track. You will hear sound at a
reduced level. Release it to play the passage.
6 RAND (Random):Press this pushbutton to hear the
tracks in random, rather than sequential, order.
Press it again to turn off random play.
3-46
Page 156 of 344
Audio Steering Wheel Controls
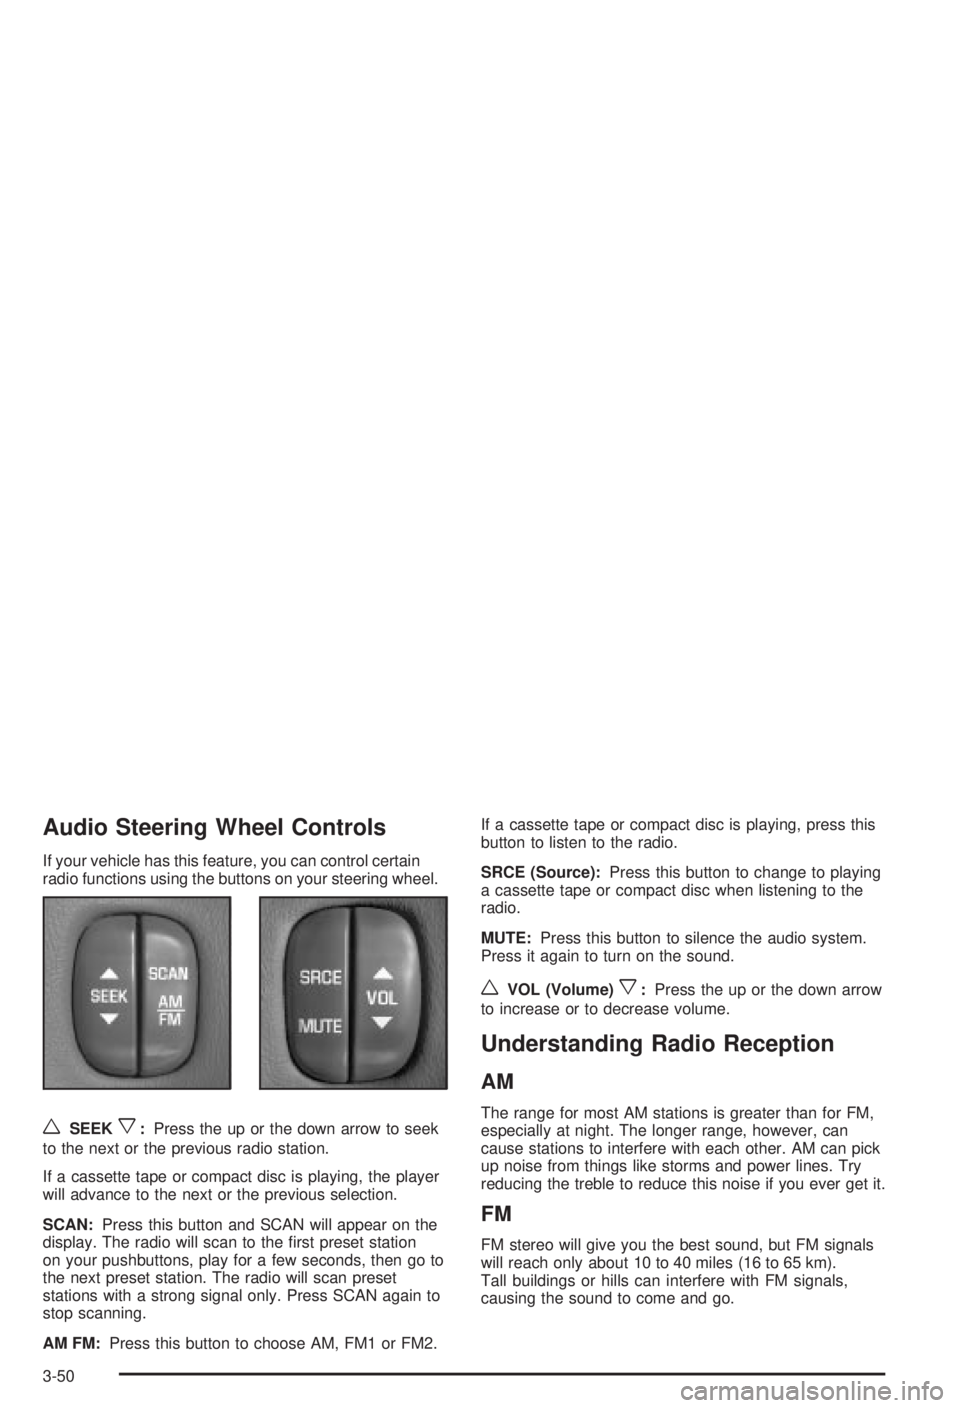
If your vehicle has this feature, you can control certain
radio functions using the buttons on your steering wheel.
wSEEKx:Press the up or the down arrow to seek
to the next or the previous radio station.
If a cassette tape or compact disc is playing, the player
will advance to the next or the previous selection.
SCAN:Press this button and SCAN will appear on the
display. The radio will scan to the ®rst preset station
on your pushbuttons, play for a few seconds, then go to
the next preset station. The radio will scan preset
stations with a strong signal only. Press SCAN again to
stop scanning.
AM FM:Press this button to choose AM, FM1 or FM2.If a cassette tape or compact disc is playing, press this
button to listen to the radio.
SRCE (Source):Press this button to change to playing
a cassette tape or compact disc when listening to the
radio.
MUTE:Press this button to silence the audio system.
Press it again to turn on the sound.
wVOL (Volume)x:Press the up or the down arrow
to increase or to decrease volume.
Understanding Radio Reception
AM
The range for most AM stations is greater than for FM,
especially at night. The longer range, however, can
cause stations to interfere with each other. AM can pick
up noise from things like storms and power lines. Try
reducing the treble to reduce this noise if you ever get it.
FM
FM stereo will give you the best sound, but FM signals
will reach only about 10 to 40 miles (16 to 65 km).
Tall buildings or hills can interfere with FM signals,
causing the sound to come and go.
3-50
Page 242 of 344
Replacing Brake System Parts
The braking system on a vehicle is complex. Its many
parts have to be of top quality and work well together if
the vehicle is to have really good braking. Your
vehicle was designed and tested with top-quality GM
brake parts. When you replace parts of your braking
system Ð for example, when your brake linings
wear down and you need new ones put in Ð be sure
you get new approved GM replacement parts. If
you don't, your brakes may no longer work properly. For
example, if someone puts in brake linings that are
wrong for your vehicle, the balance between your front
and rear brakes can change Ð for the worse. The
braking performance you've come to expect can change
in many other ways if someone puts in the wrong
replacement brake parts.
Battery
Your new vehicle comes with a maintenance free
ACDelcožbattery. When it's time for a new battery, get
one that has the replacement number shown on the
original battery's label. We recommend an ACDelco
ž
battery. SeeEngine Compartment Overview on
page 5-12for battery location.
Warning:Battery posts, terminals and related
accessories contain lead and lead compounds,
chemicals known to the State of California to cause
cancer and reproductive harm. Wash hands after
handling.
Vehicle Storage
If you're not going to drive your vehicle for 25 days
or more, remove the black, negative (-) cable from
the battery. This will help keep your battery from
running down.
{CAUTION:
Batteries have acid that can burn you and gas
that can explode. You can be badly hurt if you
aren't careful. See ªJump Startingº next for
tips on working around a battery without
getting hurt.
Contact your dealer to learn how to prepare your
vehicle for longer storage periods.
Also, for your audio system, see
Theft-Deterrent
Feature on page 3-48.
5-42
Page 291 of 344
Fuses Usage
BTSI PARK
LOCKShifter Lock Solenoid
AIR BAG Air Bag
BCM PWR Body Control Module
HAZARD Hazard Flashers
LH HEATED
SEATDriver's Heated Seat
Blank Not Used
BCM ACCIgnition Signal: Hot in ACC and Run,
Body Control Module
Blank Not Used
LOW BLOWER Low Blower
ABS Anti-Lock Brakes
TURN
SIGNALS,
CORN LPSTurn Signals, Cornering Lamps
RADIO, HVAC,
RFA,
CLUSTERRadio, Heating Ventilation Air
Conditioning Head, Remote Keyless
Entry, Cluster
HIGH BLOWER High Blower
RH HEATED
SEATPassenger's Heated Seat
STRG WHL
CONTAudio Steering Wheel Controls
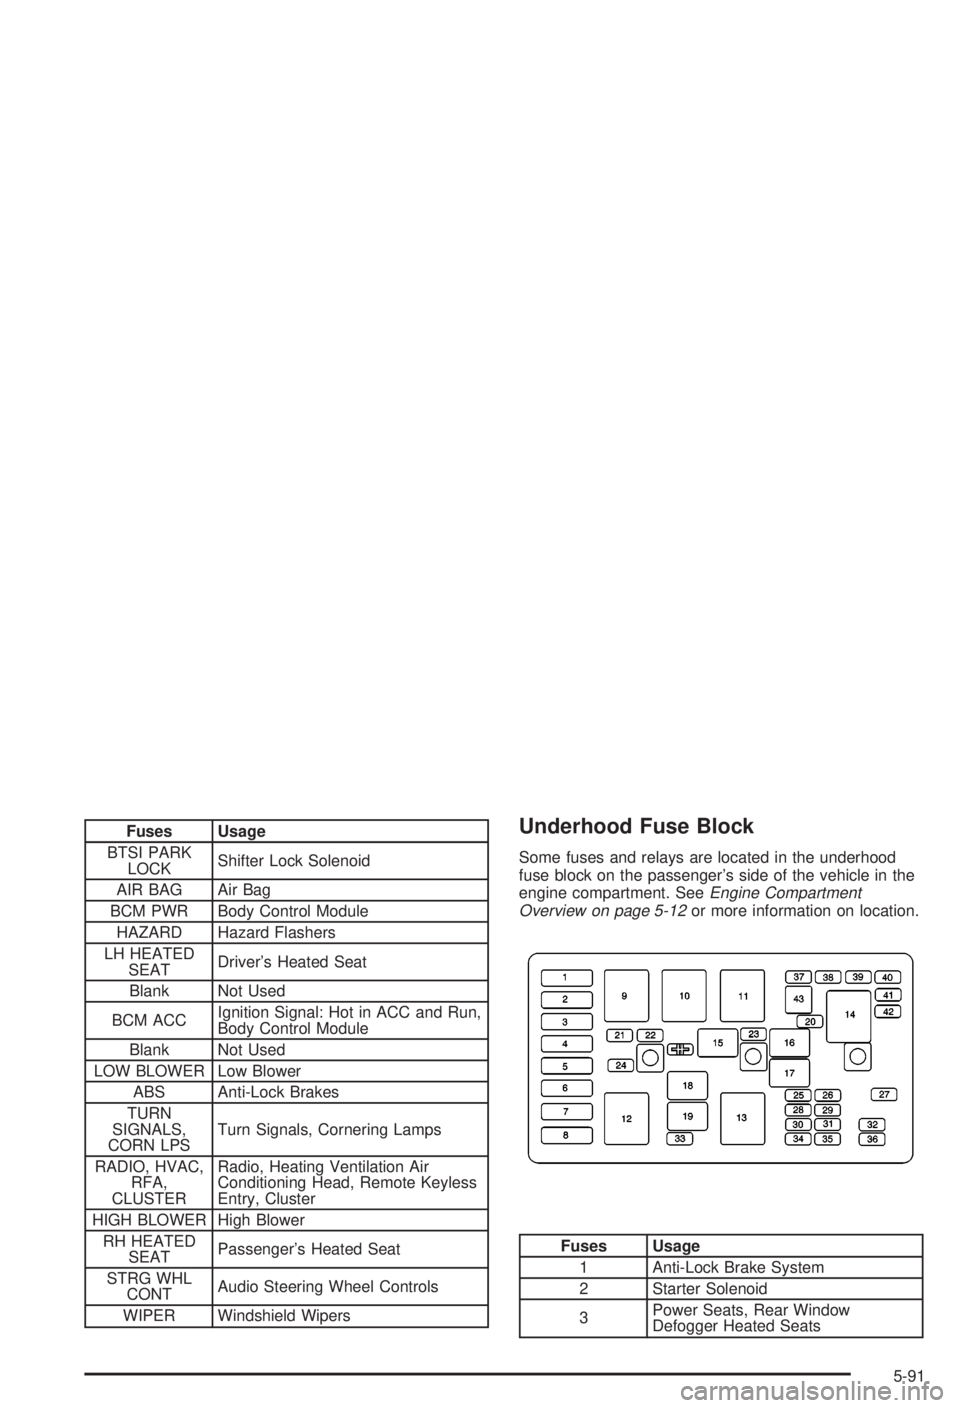
WIPER Windshield WipersUnderhood Fuse Block
Some fuses and relays are located in the underhood
fuse block on the passenger's side of the vehicle in the
engine compartment. See
Engine Compartment
Overview on page 5-12or more information on location.
Fuses Usage
1 Anti-Lock Brake System
2 Starter Solenoid
3Power Seats, Rear Window
Defogger Heated Seats
5-91