lock BUICK LACROSSE 2009 Get To Know Guide
[x] Cancel search | Manufacturer: BUICK, Model Year: 2009, Model line: LACROSSE, Model: BUICK LACROSSE 2009Pages: 20, PDF Size: 0.81 MB
Page 1 of 20
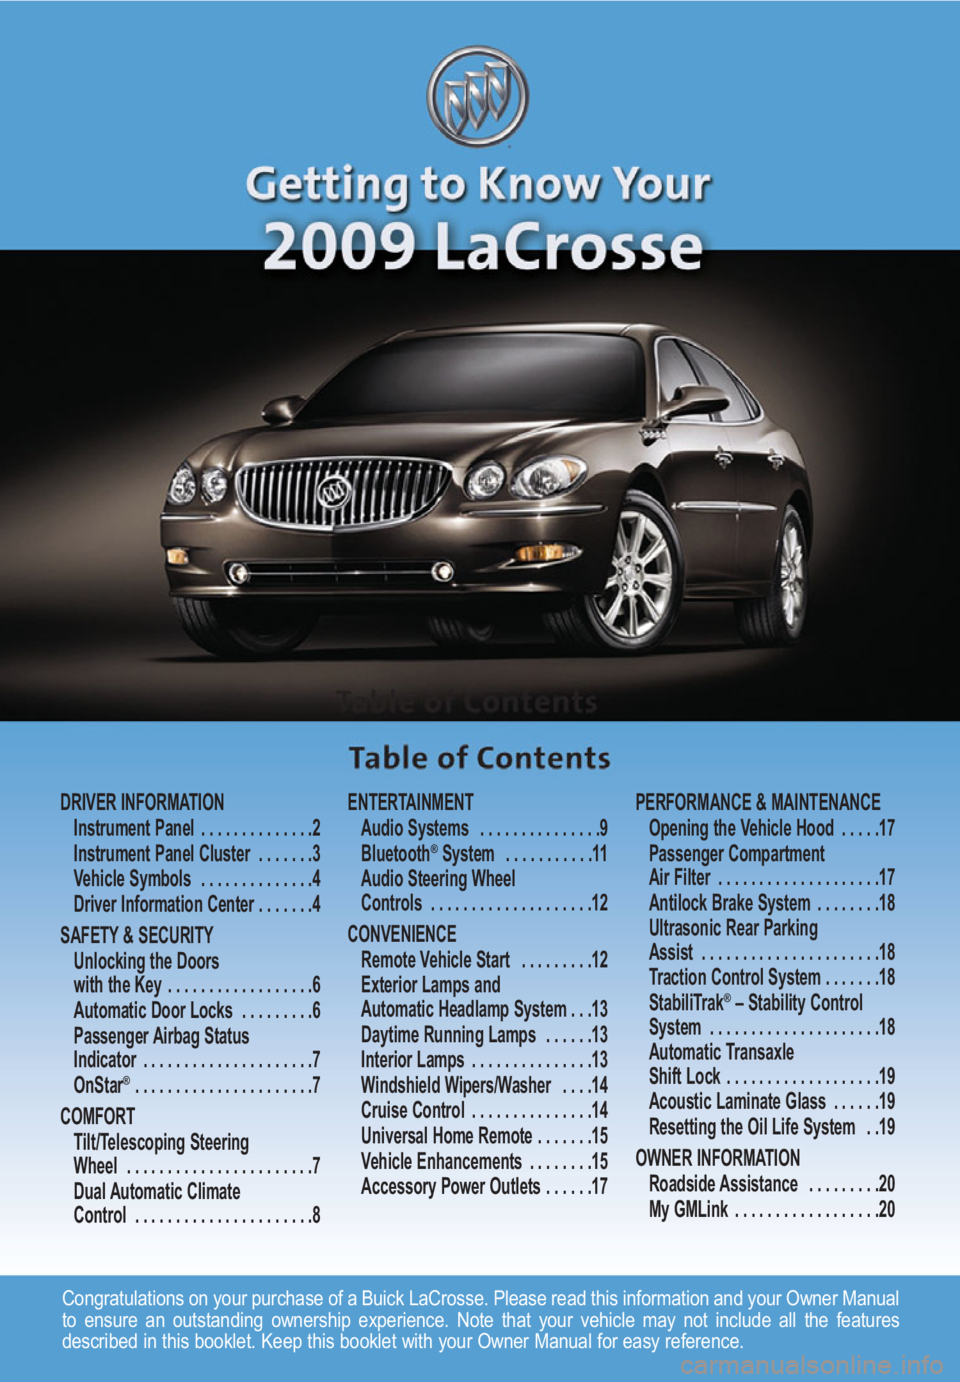
Congratulations on your purchase of a Buick LaCrosse. Please read this information and your Owner Manual
to ensure an outstanding ownership experience. Note that your vehicle may not include all the features
described in this booklet. Keep this booklet with your Owner Manual for easy reference.
DRIVER INFORMATION
Instrument Panel . . . . . . . . . . . . . .2
Instrument Panel Cluster . . . . . . .3
Vehicle Symbols . . . . . . . . . . . . . .4
Driver Information Center . . . . . . .4
SAFETY & SECURITY
Unlocking the Doors
with the Key . . . . . . . . . . . . . . . . . .6
Automatic Door Locks . . . . . . . . .6
Passenger Airbag Status
Indicator . . . . . . . . . . . . . . . . . . . . .7
OnStar
® . . . . . . . . . . . . . . . . . . . . . .7
COMFORT
Tilt/Telescoping Steering
Wheel . . . . . . . . . . . . . . . . . . . . . . .7
Dual Automatic Climate
Control . . . . . . . . . . . . . . . . . . . . . .8ENTERTAINMENT
Audio Systems . . . . . . . . . . . . . . .9
Bluetooth
®System . . . . . . . . . . .11
Audio Steering Wheel
Controls . . . . . . . . . . . . . . . . . . . .12
CONVENIENCE
Remote Vehicle Start . . . . . . . . .12
Exterior Lamps and
Automatic Headlamp System . . .13
Daytime Running Lamps . . . . . .13
Interior Lamps . . . . . . . . . . . . . . .13
Windshield Wipers/Washer . . . .14
Cruise Control . . . . . . . . . . . . . . .14
Universal Home Remote . . . . . . .15
Vehicle Enhancements . . . . . . . .15
Accessory Power Outlets . . . . . .17PERFORMANCE & MAINTENANCE
Opening the Vehicle Hood . . . . .17
Passenger Compartment
Air Filter . . . . . . . . . . . . . . . . . . . .17
Antilock Brake System . . . . . . . .18
Ultrasonic Rear Parking
Assist . . . . . . . . . . . . . . . . . . . . . .18
Traction Control System . . . . . . .18
StabiliTrak
®– Stability Control
System . . . . . . . . . . . . . . . . . . . . .18
Automatic Transaxle
Shift Lock . . . . . . . . . . . . . . . . . . .19
Acoustic Laminate Glass . . . . . .19
Resetting the Oil Life System . .19
OWNER INFORMATION
Roadside Assistance . . . . . . . . .20
My GMLink . . . . . . . . . . . . . . . . . .20
Page 3 of 20
3
BDFGHIKLM
UT
E
O
NA
RSVQ
J
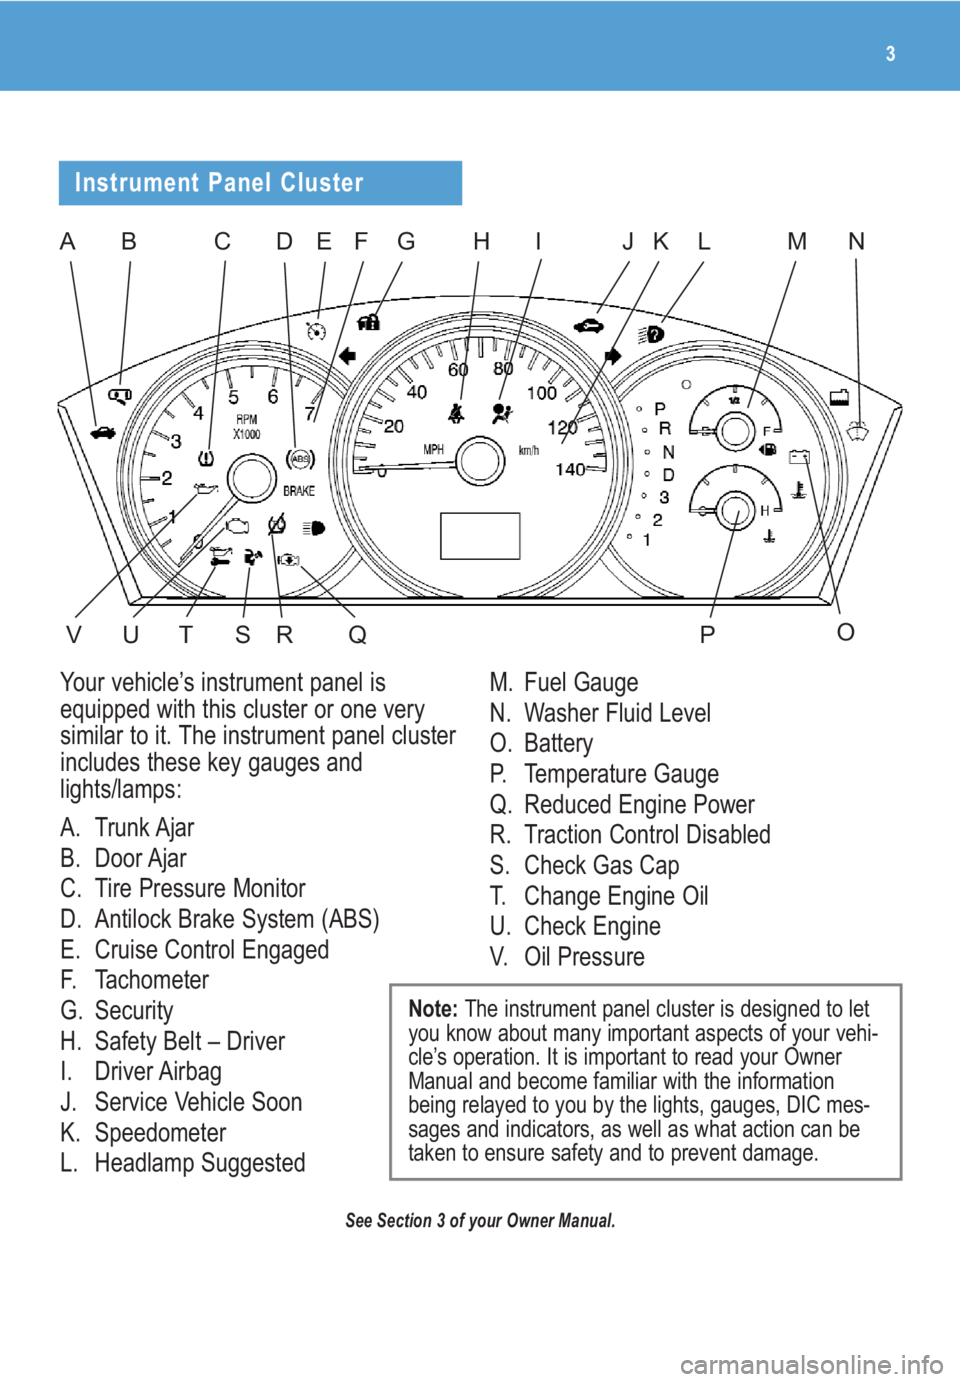
Your vehicle’s instrument panel is
equipped with this cluster or one very
similar to it. The instrument panel cluster
includes these key gauges and
lights/lamps:
A. Trunk Ajar
B. Door Ajar
C. Tire Pressure Monitor
D. Antilock Brake System (ABS)
E. Cruise Control Engaged
F. Tachometer
G. Security
H. Safety Belt – Driver
I. Driver Airbag
J. Service Vehicle Soon
K. Speedometer
L. Headlamp SuggestedM. Fuel Gauge
N. Washer Fluid Level
O. Battery
P. Temperature Gauge
Q. Reduced Engine Power
R. Traction Control Disabled
S. Check Gas Cap
T. Change Engine Oil
U. Check Engine
V. Oil Pressure
Note: The instrument panel cluster is designed to let
you know about many important aspects of your vehi-
cle’s operation. It is important to read your Owner
Manual and become familiar with the information
being relayed to you by the lights, gauges, DIC mes-
sages and indicators, as well as what action can be
taken to ensure safety and to prevent damage.
C
Instrument Panel Cluster
See Section 3 of your Owner Manual.
P
Page 5 of 20
5
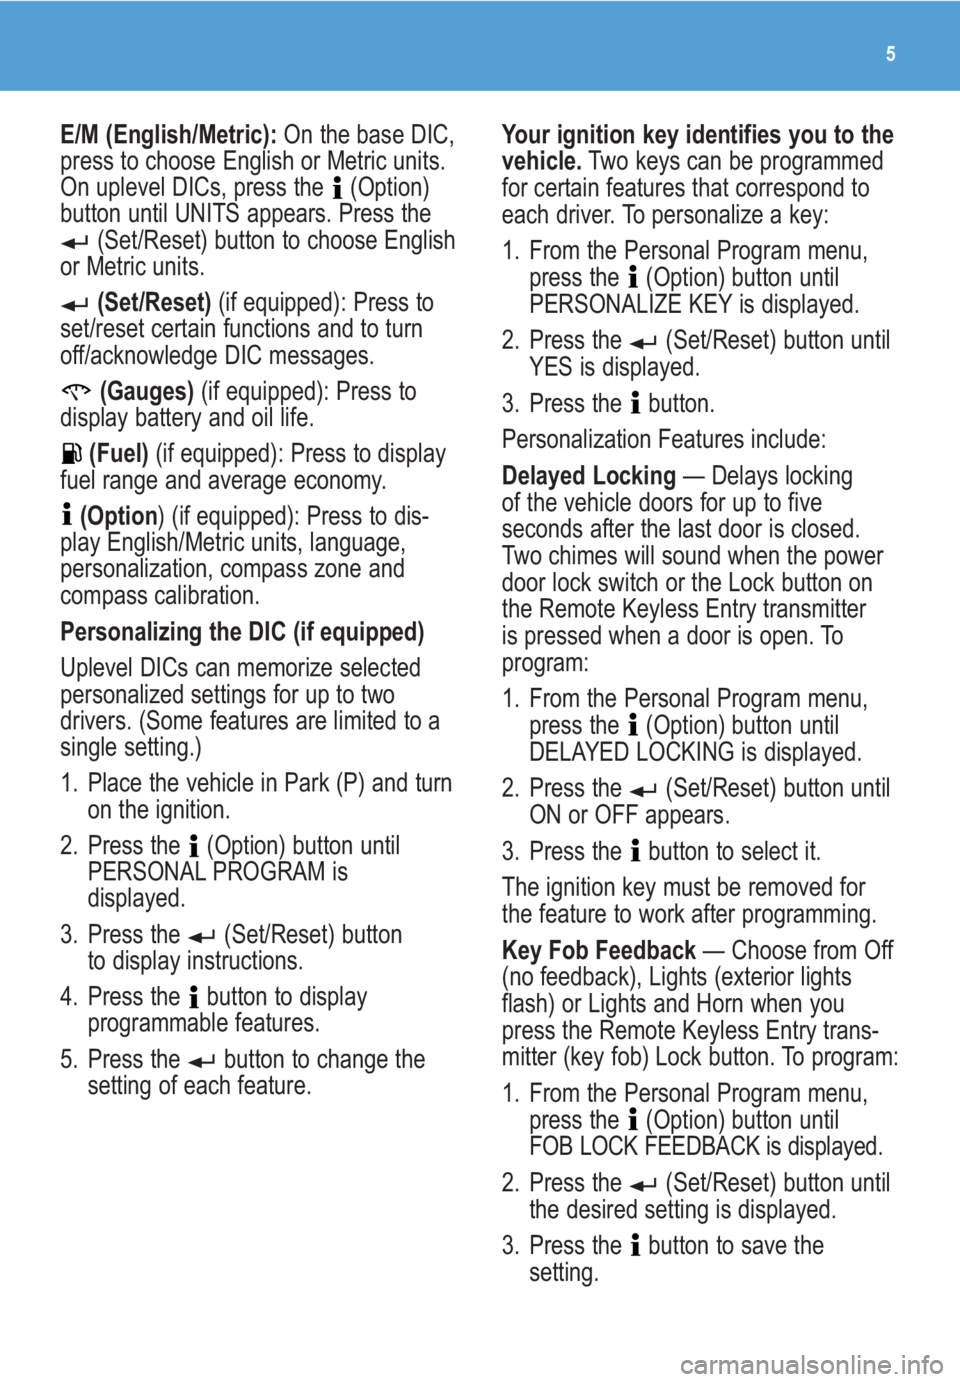
E/M (English/Metric):On the base DIC,
press to choose English or Metric units.
On uplevel DICs, press the (Option)
button until UNITS appears. Press the
(Set/Reset) button to choose English
or Metric units.
(Set/Reset)(if equipped): Press to
set/reset certain functions and to turn
off/acknowledge DIC messages.
(Gauges)(if equipped): Press to
display battery and oil life.
(Fuel)(if equipped): Press to display
fuel range and average economy.
(Option) (if equipped): Press to dis-
play English/Metric units, language,
personalization, compass zone and
compass calibration.
Personalizing the DIC (if equipped)
Uplevel DICs can memorize selected
personalized settings for up to two
drivers. (Some features are limited to a
single setting.)
1. Place the vehicle in Park (P) and turn
on the ignition.
2. Press the (Option) button until
PERSONAL PROGRAM is
displayed.
3. Press the (Set/Reset) button
to display instructions.
4. Press the button to display
programmable features.
5. Press the button to change the
setting of each feature.Your ignition key identifies you to the
vehicle.Two keys can be programmed
for certain features that correspond to
each driver. To personalize a key:
1. From the Personal Program menu,
press the (Option) button until
PERSONALIZE KEY is displayed.
2. Press the (Set/Reset) button until
YES is displayed.
3. Press the button.
Personalization Features include:
Delayed Locking— Delays locking
of the vehicle doors for up to five
seconds after the last door is closed.
Two chimes will sound when the power
door lock switch or the Lock button on
the Remote Keyless Entry transmitter
is pressed when a door is open. To
program:
1. From the Personal Program menu,
press the (Option) button until
DELAYED LOCKING is displayed.
2. Press the (Set/Reset) button until
ON or OFF appears.
3. Press the button to select it.
The ignition key must be removed for
the feature to work after programming.
Key Fob Feedback— Choose from Off
(no feedback), Lights (exterior lights
flash) or Lights and Horn when you
press the Remote Keyless Entry trans-
mitter (key fob) Lock button. To program:
1. From the Personal Program menu,
press the (Option) button until
FOB LOCK FEEDBACK is displayed.
2. Press the (Set/Reset) button until
the desired setting is displayed.
3. Press the button to save the
setting.
Page 6 of 20
Getting to Know Your LaCrosse6
Unlocking the Doors with the Key
Your vehicle’s passenger doors can be
unlocked using the driver’s door key.
With the key in the lock cylinder:
• Turn the key toward the front of the
vehicle to unlock the driver’s door.
• Turn and hold the key toward the
front of the vehicle for two seconds
to unlock all doors.
• Turn and hold the key toward the rear
of the vehicle to lock all doors.
See Section 2 of your Owner Manual.
SAFETY & SECURITY
Automatic Door Locks
Auto Door Lock
The automatic door locks will lock the
vehicle’s doors when all doors are closed
and the vehicle is shifted into Drive.
Auto Door Unlock
Automatic door unlocking options
include off, unlocking the driver’s door
or unlocking all doors. Press the
(Option) button on the DIC until Auto
Door Unlock is displayed; and then
press the (Set/Reset) button to scroll
through Off, Driver and All. If Driver or
All is selected, two additional choices —
Key-Out and Park — will be displayed.
Select one of these choices to deter-
mine when the vehicle’s door(s) will
automatically unlock.
See Section 3 of your Owner Manual.
Exterior Light Delay— Sets the time
for exterior lights to remain on after the
key is removed from the ignition or the
vehicle is unlocked with the Remote
Keyless Entry transmitter. To program:
1. From the Personal Program menu,
press the (Option) button until
EXT LIGHT DELAY is displayed.
2. Press the (Set/Reset) button to
scroll through OFF or 15/30/60/90-
second delays.
3. Press the button to store a setting.
You can also use the (Option) and
(Set/Reset) buttons to personalize
each of the following:
• Return settings to factory default/
reset all keys
• Interior lights on when key is
removed from the ignition
• Content theft-deterrent system on/off
• Remote start on/off
• Personalize/replace key
• Personalize radio stations
• Auto door unlock all/driver’s door/off
• Key fob unlock driver’s door/all doors
on first press
Exiting Programming Mode:The DIC
exits programming mode when:
• The vehicle is shifted out of Park.
• The vehicle is no longer in Run.
• You reach the end of the Personal
Program menu.
See Section 3 of your Owner Manual.
Page 7 of 20
• Roadside Assistance
• Fuel Station Location
• Information & Connections services
• Virtual Advisor, GPS-based Traffic &
Weather
For Turn-by-Turn Navigation, press your
OnStar button. OnStar Advisors can
send a planned route to your vehicle
and, as you approach a turn, instructions
will play over your vehicle speakers.
For Remote Door Unlock or Stolen
Vehicle Location Assistance, call
1-888-4-ONSTAR (1-888-466-7827). For
more information, refer to your OnStar
Owner’s Guide or visit onstar.com.
See Section 2 of your Owner Manual.
7
Tilt/Telescoping Steering Wheel
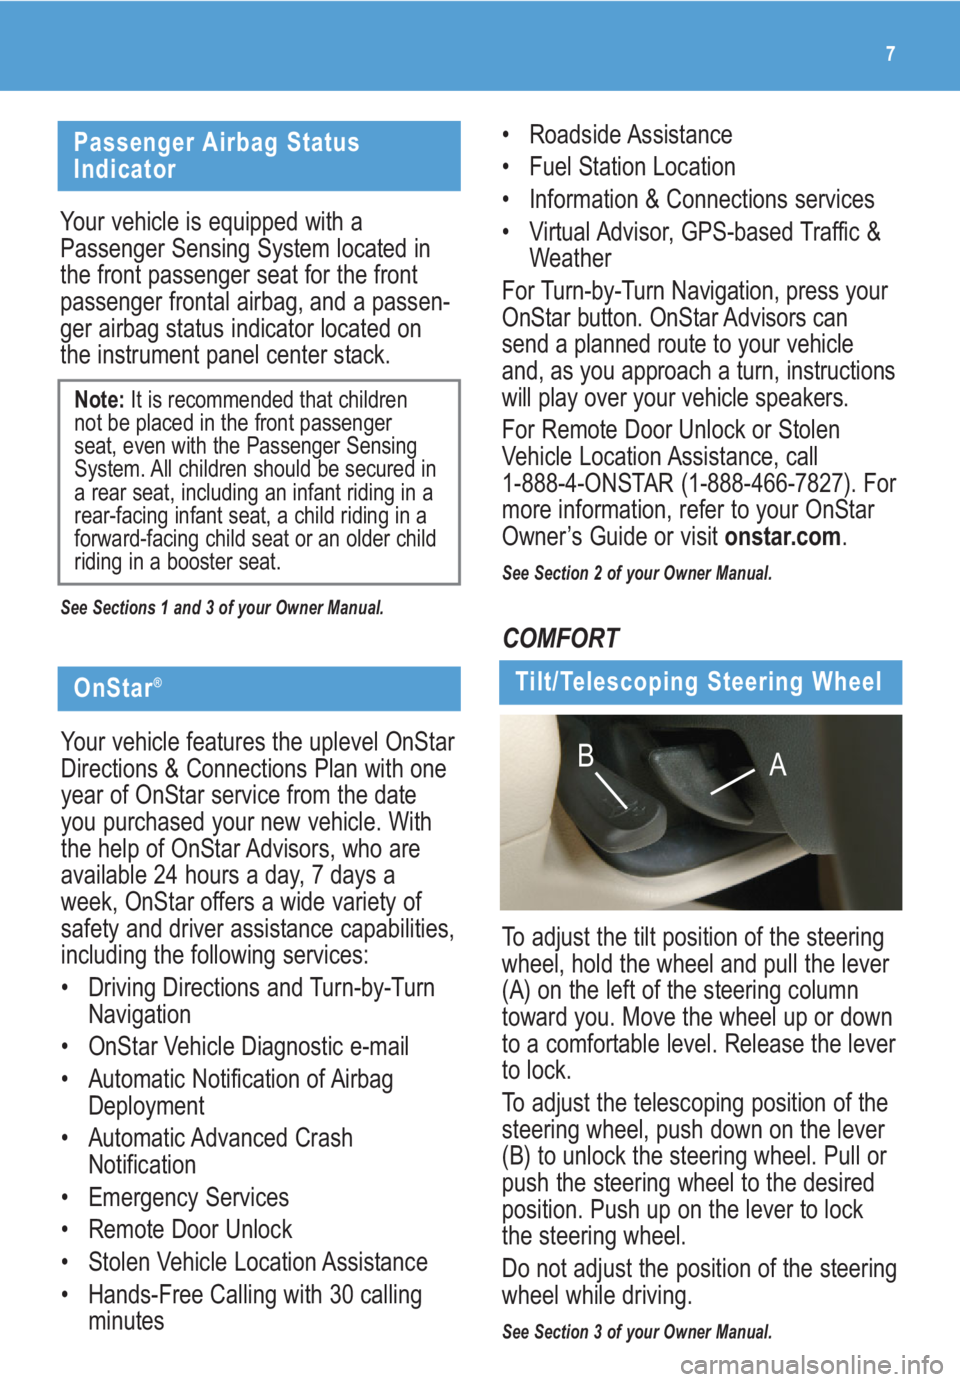
To adjust the tilt position of the steering
wheel, hold the wheel and pull the lever
(A) on the left of the steering column
toward you. Move the wheel up or down
to a comfortable level. Release the lever
to lock.
To adjust the telescoping position of the
steering wheel, push down on the lever
(B) to unlock the steering wheel. Pull or
push the steering wheel to the desired
position. Push up on the lever to lock
the steering wheel.
Do not adjust the position of the steering
wheel while driving.
See Section 3 of your Owner Manual.
A B
Passenger Airbag Status
Indicator
Your vehicle is equipped with a
Passenger Sensing System located in
the front passenger seat for the front
passenger frontal airbag, and a passen-
ger airbag status indicator located on
the instrument panel center stack.
See Sections 1 and 3 of your Owner Manual.
Note:It is recommended that children
not be placed in the front passenger
seat, even with the Passenger Sensing
System. All children should be secured in
a rear seat, including an infant riding in a
rear-facing infant seat, a child riding in a
forward-facing child seat or an older child
riding in a booster seat.
COMFORT
OnStar®
Your vehicle features the uplevel OnStar
Directions & Connections Plan with one
year of OnStar service from the date
you purchased your new vehicle. With
the help of OnStar Advisors, who are
available 24 hours a day, 7 days a
week, OnStar offers a wide variety of
safety and driver assistance capabilities,
including the following services:
• Driving Directions and Turn-by-Turn
Navigation
• OnStar Vehicle Diagnostic e-mail
• Automatic Notification of Airbag
Deployment
• Automatic Advanced Crash
Notification
• Emergency Services
• Remote Door Unlock
• Stolen Vehicle Location Assistance
• Hands-Free Calling with 30 calling
minutes
Page 12 of 20

Getting to Know Your LaCrosse12
CONVENIENCE
Remote Vehicle Start
This feature allows you to start the
engine from outside the vehicle by
using the Remote Keyless Entry (RKE)
transmitter. The remote start capability
must be turned on using the Driver
Information Center.
Audio Steering Wheel Controls
Audio Steering Wheel Controls
The following audio controls are located
on the steering wheel:
+ – (Volume): Pull up on the plus or
minus button to increase or decrease
the volume.
(Next/Previous/End): Press the
up or down arrow to go to the
next or previous radio station stored as
a favorite or, when a CD is playing, to
the next or previous track. Press the
(End) button to end an OnStar or
Bluetooth call.
SRCE (Source):Press this button to
switch between AM, FM, XM (if equip-
ped), CD and the auxiliary input jack.
(Seek):Press this button to go to
the next radio station on the same band
or, when a CD is playing, to the next
track.
(Mute/Push to Talk/Voice
Recognition): Press this button to
mute the vehicle speakers. Press and
hold the button for more than two sec-
onds to interact with the OnStar or
Bluetooth system.
See Section 3 of your Owner Manual.
Based on outside temperature, the vehi-
cle’s automatic climate control system
will default to a heating or cooling mode.
Starting the Vehicle
1. Aim the RKE transmitter at the
vehicle.
2. Press and release the (Lock)
button on the transmitter.
3. Immediately press and hold the
(Remote Start) button for about four
seconds. When the vehicle starts, the
parking lamps will light and remain
on while the engine is running. The
engine will continue running for
10 minutes.
4. Repeat these steps for a 10-minute
time extension. Only two consecutive
remote starts are allowed.
After a remote start, the ignition must
be turned to the On position before
driving.
Canceling a Remote Start
To turn off the engine instead of driving
after a remote start:
• Press and hold the (Remote Start)
button until the parking lamps turn off.
• Press and release the Hazard
Warning Flashers button. Press it
again to turn off the flashers.
• Turn the key in the ignition switch to
the On position and then off.
See Section 2 of your Owner Manual.
Note:The Remote Vehicle Start feature
will not operate if the key is in the igni-
tion, a door or the hood is open, or the
Check Engine light is illuminated on the
instrument panel cluster.
Page 15 of 20

Deck (Trunk) Lid Pull-Down Handle
A convenient handle is located in the
top-inside edge of the deck lid. Use the
handle to easily pull down the deck lid
when closing it.
Vehicle Enhancements
Trunk Access
Press the (Trunk) button on the
Remote Keyless Entry transmitter.
To unlock the trunk from inside the vehicle,
press and hold the top of the driver’s or
Universal Home Remote
(if equipped)
The Universal Home Remote is a com-
bined universal transmitter and receiver
that can activate up to three devices,
such as garage door openers, entry
door locks, gates and security systems.
It’s recommended that you read the
instructions in your Owner Manual com-
pletely before attempting to program any
of the three channels on the Universal
Home Remote. The engine should be
turned off when programming the
remote.
See Section 2 of your Owner Manual.
Note: Do not use the Universal Home
Remote with any garage door opener
that does not have the “stop and
reverse” feature or any opener manu-
factured before April 1, 1982.
front passenger’s power door lock switch
for approximately two seconds. The vehi-
cle must be in Park to unlock the trunk.
See Section 2 of your Owner Manual.
Rear Seat Trunk Pass-Through
(if equipped)
To fold down one/both sides of the rear
seatback to gain trunk access or haul
longer cargo, pull forward on the seat-
back tab on the outboard of the rear
seat and fold the seatback down.
See Section 1 of your Owner Manual.
15
Page 18 of 20
Getting to Know Your LaCrosse18
Ultrasonic Rear Parking Assist
(if equipped)
Ultrasonic Rear Parking Assist (URPA)
detects objects up to 5 feet (1.5 m)
behind the vehicle when the shift lever
is in the Reverse position and vehicle
speed is less than 3 mph (5 km/h).
Three color-coded lights inside the
vehicle, above the rear window, provide
distance and system information to the
driver.
See Section 2 of your Owner Manual.
Antilock Brake System
The Antilock Brake System (ABS) helps
prevent a braking skid. The ABS warn-
ing light illuminates briefly when the
engine is started. Momentary motor or
clicking noises and slight brake pedal
movement are normal as the system
checks itself when reaching speeds of
approximately 3 to 5 mph.
See Section 4 of your Owner Manual.
Traction Control System
The Traction Control System (TCS)
limits wheelspin. TCS activates when it
senses one or both front wheels spin-
ning or losing traction. Then the system
reduces engine power and may upshift
the transaxle to limit wheelspin. It is nor-
mal to hear or feel the system working.
TCS is always enabled unless you dis-
able it manually to rock the vehicle free
from sand, mud or snow.
To disable TCS, press the (Traction
Control) button on the instrument panel.
The TCS warning light will come on.
Press the button again to turn TCS on.
See Section 4 of your Owner Manual.
StabiliTrak® – Stability Control
System (if equipped)
StabiliTrak is a computer-controlled
system that detects and corrects differ-
ences between the path you have
chosen and the vehicle’s actual direction
by applying brake pressure individually
at the appropriate wheel. When the
system activates, STABILITY CONTROL
ACTIVE displays on the Driver
Information Center.
See Section 4 of your Owner Manual.
Page 19 of 20
Acoustic Laminate Glass
Special windshield and front door win-
dow glass composition reduces wind
and road noise. If replacement is neces-
sary, see your dealer or specify acoustic
laminateglass from the supplier. Failure
to do so can result in added wind and
outside noise in the cabin.
Automatic Transaxle Shift Lock
If the battery fails and it is necessary
to move the vehicle, the Automatic
Transaxle Shift Lock can be disabled to
allow the transaxle to be shifted out of
Park. Turn the ignition key to ACC posi-
tion, and shift the transaxle into Neutral.
With the car in Neutral, the vehicle can
be pushed out of a confined area.
See Sections 2 and 5 of your Owner Manual.
Resetting the Oil Life System
The Oil Life System calculates engine oil
life based on vehicle use and displays
CHANGE OIL SOON in the Driver
Information Center (DIC) when it’s nec-
essary to change your engine oil and fil-
ter. The Oil Life System should be reset
to 100% only following an oil change.
To reset the Oil Life System:
1. Turn on the ignition, with the engine
off.
2. Press the (Option) button until
the DIC displays ENGINE OIL
MONITOR.
3. Press the (Set/Reset) button. The
next screen indicates the system has
been reset.
4. Turn off the ignition.
See Section 5 of your Owner Manual.
19
Page 20 of 20

Getting to Know Your LaCrosse20
25783629 A
Roadside Assistance
My GMLink
1-800-252-1112
TTY Users: 1-888-889-2438
As the proud owner of a new Buick vehi-
cle, you are automatically enrolled in the
Buick Roadside Assistance program.
This value-added service is intended to
provide you with peace of mind as you
drive in the city or travel the open road.
Buick’s Roadside Assistance toll-free
number is staffed by a team of techni-
cally trained advisors who are available
24 hours a day, 365 days a year. The
advisors can provide minor repair infor-
mation or make arrangements to tow
your vehicle to the nearest Buick dealer.
Buick will provide the following services
for 5 years/100,000 miles at no expense
to you:
• Fuel delivery
• Lockout service (identification
required)
• Tow to nearest dealership for
warranty service
• Flat tire assistance
• Jump starts
In many instances, mechanical failures
are covered under Buick’s comprehen-
sive warranty. However, when other
services are utilized, our advisors will
explain any payment obligations you
might incur.
The Buick Owner Center at My GMLink
is a complimentary service for Buick
owners, a one-stop resource to enhance
your Buick ownership experience.
Exclusive member benefits include
online service reminders, vehicle
maintenance tips, online owner manual,
special privileges and more. Sign up
today at www.mygmlink.com. For prompt and efficient assistance
when calling, please provide the follow-
ing information to the advisor:
• Location of the vehicle
• Telephone number and your location
• Vehicle model, year and color
• Vehicle mileage
• Vehicle Identification Number (VIN)
• Vehicle license plate number
Buick reserves the right to limit services
or reimbursement to an owner or driver
when, in Buick’s judgment, the claims
become excessive in frequency or type
of occurrence.
Roadside Assistance and OnStar
(if equipped)
If you have a current OnStar subscription,
press the OnStar button and the vehicle
will send your current GPS location to an
OnStar Advisor who will speak to you,
assess your problem, contact Roadside
Assistance and relay your exact location
so you will get the help you need.
!25783629=A!
OWNER INFORMATION
Certain restrictions, precautions and safety procedures apply to your vehicle. Please read your Owner
Manual for complete instructions. All information contained herein is based on information available at the
time of printing and is subject to change without notice. Copyright 2008 by GM Corp. All rights reserved.