key BUICK LACROSSE 2010 Owner's Guide
[x] Cancel search | Manufacturer: BUICK, Model Year: 2010, Model line: LACROSSE, Model: BUICK LACROSSE 2010Pages: 414
Page 128 of 414
4-40 Instruments and Controls
Press the MENU / SELECT knob
when Auto Rear Defog is
highlighted to open the menu.
Turn the knob to highlight On or Off.
Press the knob to confirm the
selection and move back to the
last menu.
Comfort and Convenience
Select the Comfort and
Convenience menu and the
following will be displayed:
.Chime Volume
.Personalization by Driver
.Driver Seat Easy Exit
.Parking Tilt Mirrors
Chime Volume
This allows the selection of the
chime volume level.
Press the MENU / SELECT knob
when Chime Volume is highlighted.
Turn the knob to select Normal or
High. Press the knob to confirm and
go back to the last menu. Personalization by Driver
This allows the selection of if the
personalization settings are specific
to each driver or the same no matter
which key was used to enter and
start the vehicle.
Press the MENU / SELECT knob
when Personalization by Driver is
highlighted. Turn the knob to select
On or Off. Press the knob to confirm
and go back to the last menu.
Driver Seat Easy Exit
This allows you to turn the easy exit
seat feature on or off.
Press the MENU / SELECT knob
when Driver Seat Easy Exit is
highlighted. Turn the knob to select
On or Off. Press the knob to confirm
and go back to the last menu.
Park Tilt Mirrors
This allows you to turn the park tilt
mirrors feature on or off.
Press the MENU / SELECT knob
when Park Tilt Mirrors is highlighted.
Turn the knob to select Driver &Passenger or Off. Press the knob to
confirm and go back to the
last menu.
Collision/Detection Systems
Select the Collision/Detection
Systems menu and the following will
be displayed:
.Park Assist
Park Assist
This allows the Ultrasonic Parking
Assist feature to be turned on or off.
Press the MENU / SELECT knob
when Park Assist is highlighted.
Turn the knob to select On or Off.
Press the knob to confirm and go
back to the last menu.
Language
Select the Language menu and the
following will be displayed:
.English
.French
.Spanish
Page 144 of 414
5-6 Lighting
Lighting Features
Entry Lighting
The headlamps, taillamps, license
plate lamps, reverse lamps, dome
lamps, and most of the interior lights
turn on briefly, when the Remote
Keyless Entry (RKE)
Kis pressed,
or when the door handle is pulled on
a Keyless Access Vehicle. See
Ignition Positions (Key Access)
on
page 8‑18or Ignition Positions
(Keyless Access)on page 8‑19.
After about 30 seconds the exterior
lamps turn off, and then the dome
and remaining interior lights will dim
to off. Entry lighting can be disabled
manually by changing the ignition
out of the OFF position, or by
pressing the Remote Keyless
Entry (RKE)
Qbutton. This feature can be activated or
deactivated in the menu SETTINGS
in the Info Display. Press CONFIG
on the infotainment system to call
up the menu. See
Vehicle
Personalization on page 4‑38.
Exit Lighting
The headlamps, taillamps, parking
lamps, reverse lamps, and license
plate lamps come on at night, or in
areas with limited lighting, when the
key is removed from the ignition.
The dome lamps also come on
when the key is removed from the
ignition. The exterior lights and
dome lamps remain on after the
door is closed for a set amount of
time, then automatically turn off.
For a vehicle with Keyless Access,
the exterior lights and dome lamps
automatically turn on when a door is
opened after the ignition is turned
off. See Ignition Positions (Key
Access)
on page 8‑18or Ignition
Positions (Keyless Access)on
page 8‑19. The exterior lights turn off
immediately by turning the exterior
lamps control to OFF.
The exit lighting feature can be
activated, deactivated, or the
timeframe for the lighting can be
changed in the menu Settings in the
Info. Display. Press CONFIG on the
Infotainment system to access the
menu. See
Vehicle Personalization
on page 4‑38.
Battery Load
Management
The vehicle has Electric Power
Management (EPM) that estimates
the battery's temperature and state
of charge. It then adjusts the voltage
for best performance and extended
life of the battery.
When the battery's state of charge
is low, the voltage is raised slightly
to quickly bring the charge back up.
When the state of charge is high,
the voltage is lowered slightly to
prevent overcharging. If the vehicle
Page 185 of 414
Infotainment System 6-39
t(Previous Track/Chapter):
Press to go to the start of the
current track or chapter. Press again
to go to the previous track or
chapter. This button may not work
when the DVD is playing the
copyright information or the
previews.
u(Next Track/Chapter): Press to
go to the beginning of the next
chapter or track. This button might
not work when the DVD is playing
the copyright information or the
previews.
r(Fast Reverse): Press to
quickly reverse the DVD or CD. To
stop fast reversing a DVD video,
press
s. To stop fast reversing a
DVD audio or CD, release
r. This
button might not work when the
DVD is playing the copyright
information or the previews.
[(Fast Forward): Press to fast
forward the DVD or CD. To stop fast
forwarding a DVD video, press
s.
To stop fast forwarding a DVD audio
or CD, release
[. This button
might not work when the DVD is
playing the copyright information or
the previews.
e(Audio): Press to change audio
tracks on DVDs that have this
feature when the DVD is playing.
{(Subtitles): Press to turn
ON/OFF subtitles and to move
through subtitle options when a
DVD is playing.
AUX (Auxiliary): Press to switch
the video display between the DVD
player and an auxiliary source.
d(Camera): Press to change the
camera angle on DVDs that have
this feature when the DVD is
playing.
\(Clear) (If Available): Press this
button within three seconds after
inputting a numeric selection, to
clear all numeric inputs.
}10 (Double Digit Entries)
(If Available): Press this button to
select chapter or track numbers
greater than 9. Press this button
before inputting the number.
1 through 0 (Numeric Keypad):
The numbered keypad provides the
capability of direct chapter or track
number selection.
Replacing the Remote Control
If the remote control becomes lost
or damaged, a new universal
remote control can be purchased.
Use a Toshiba
®code set for
replacement universal remote
controls.
Page 204 of 414
6-58 Infotainment System
Bluetooth Pairing
To make calls with a Bluetooth cell
phone through your vehicle, it must
be paired to the vehicle's Bluetooth
system first and then connected to
the vehicle before it can be used.
Refer to the cell phone
manufacturer's user guide for
Bluetooth pairing instructions. If a
Bluetooth phone is off or not
connected, calls will automatically
be made using the OnStar
®
Hands-Free Calling feature,
if available. Refer to the OnStar
owner's guide for more information
about OnStar Hands-Free Calling.
The pairing process can be started
by using the voice recognition
system or the controls on the
infotainment system.Pairing Information:
.Up to five cell phones can be
paired to the Bluetooth system.
.The pairing process is disabled
when the vehicle is moving.
.The Bluetooth system
automatically links with the
paired cell phone in the order
the phones were paired.
.Only one paired cell phone can
be connected to the vehicle's
Bluetooth system at a time.
.Pairing should only need to be
completed once.
Pairing a Phone
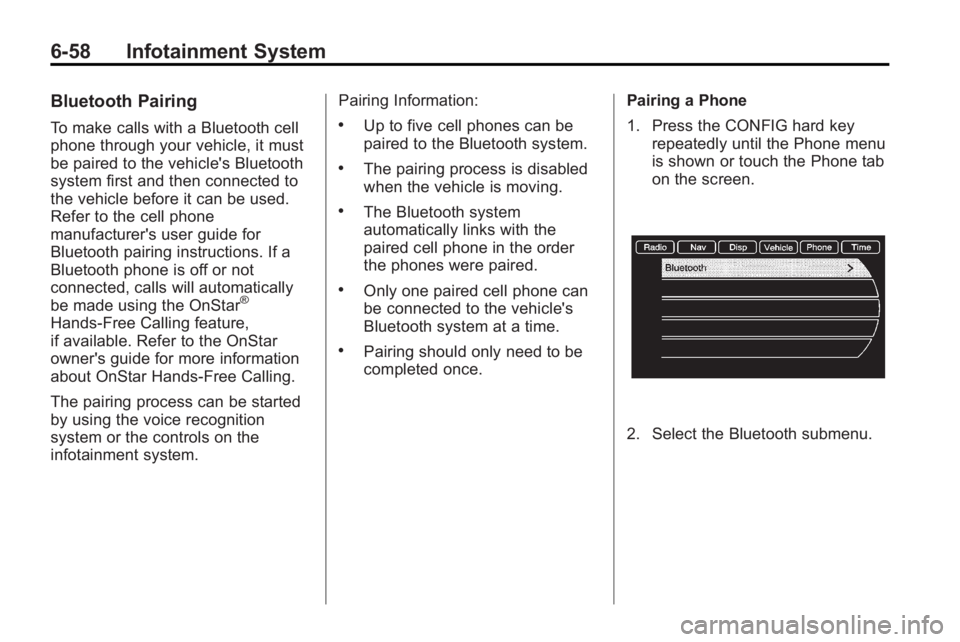
1. Press the CONFIG hard key
repeatedly until the Phone menu
is shown or touch the Phone tab
on the screen.
2. Select the Bluetooth submenu.
Page 205 of 414
Infotainment System 6-59
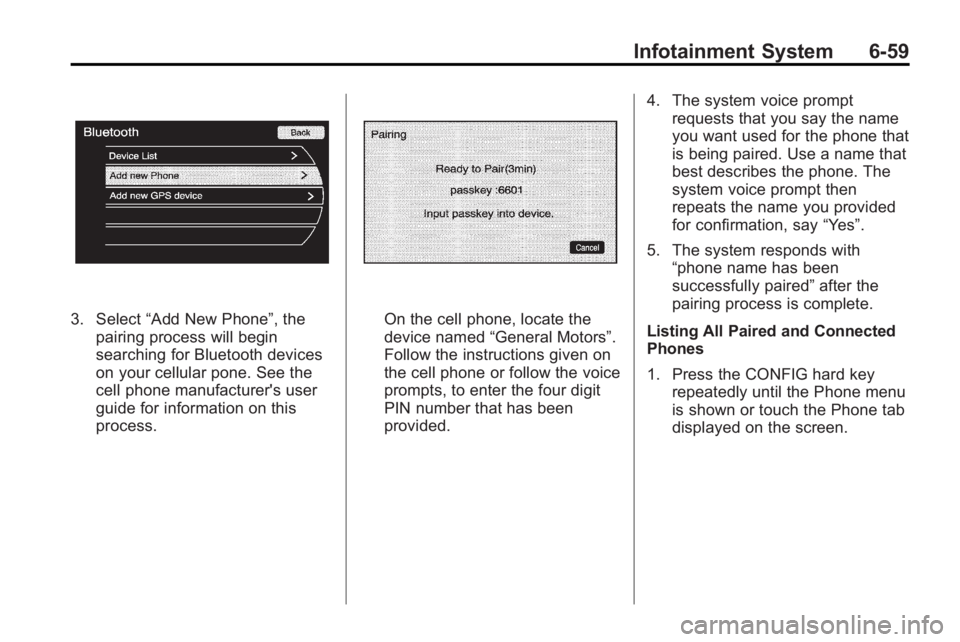
3. Select“Add New Phone”, the
pairing process will begin
searching for Bluetooth devices
on your cellular pone. See the
cell phone manufacturer's user
guide for information on this
process.On the cell phone, locate the
device named “General Motors”.
Follow the instructions given on
the cell phone or follow the voice
prompts, to enter the four digit
PIN number that has been
provided. 4. The system voice prompt
requests that you say the name
you want used for the phone that
is being paired. Use a name that
best describes the phone. The
system voice prompt then
repeats the name you provided
for confirmation, say “Yes”.
5. The system responds with “phone name has been
successfully paired” after the
pairing process is complete.
Listing All Paired and Connected
Phones
1. Press the CONFIG hard key repeatedly until the Phone menu
is shown or touch the Phone tab
displayed on the screen.
Page 207 of 414
Infotainment System 6-61
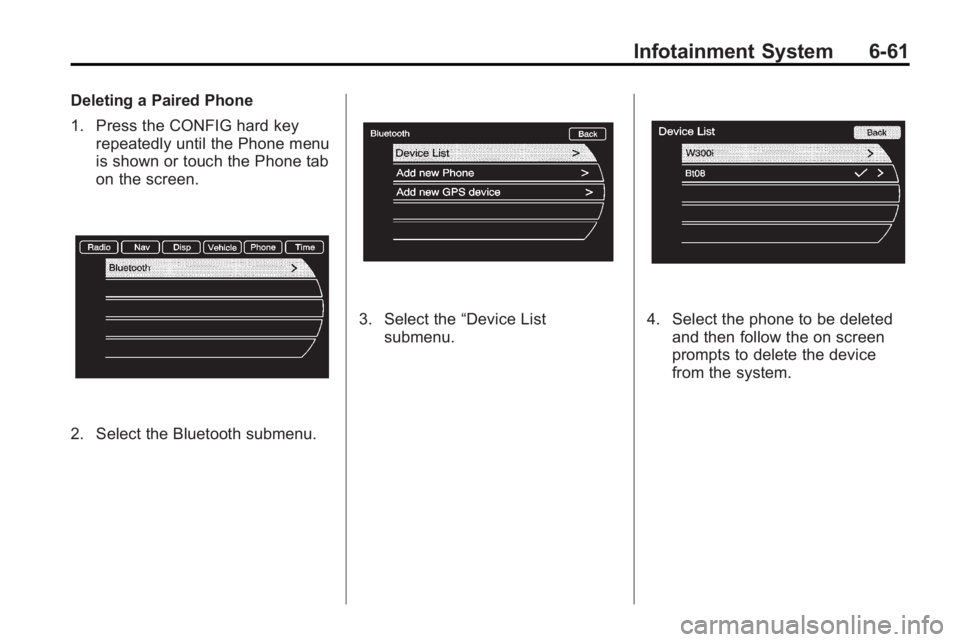
Deleting a Paired Phone
1. Press the CONFIG hard keyrepeatedly until the Phone menu
is shown or touch the Phone tab
on the screen.
2. Select the Bluetooth submenu.
3. Select the “Device List
submenu.4. Select the phone to be deleted and then follow the on screen
prompts to delete the device
from the system.
Page 208 of 414
6-62 Infotainment System
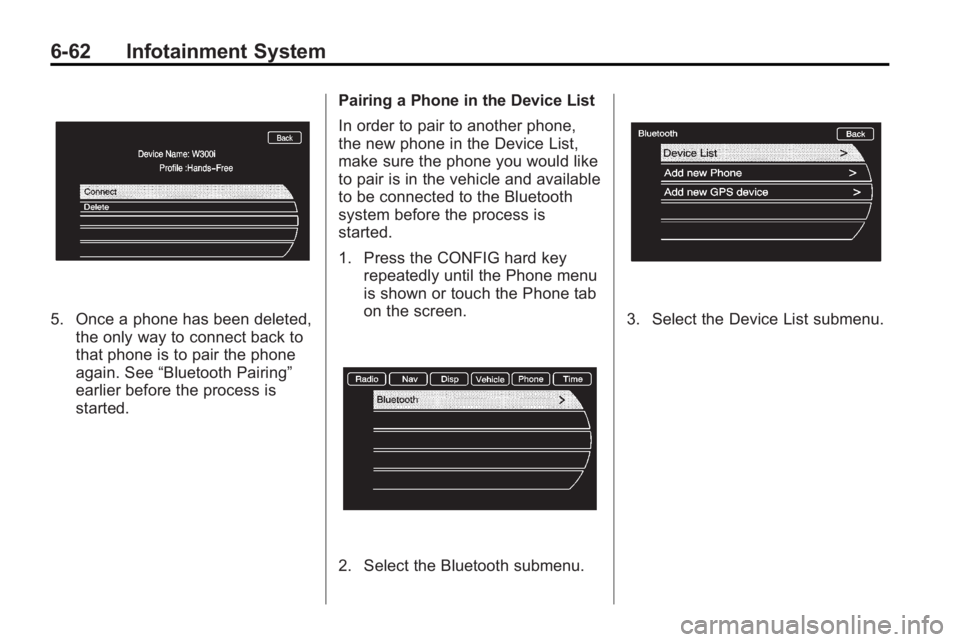
5. Once a phone has been deleted,the only way to connect back to
that phone is to pair the phone
again. See “Bluetooth Pairing”
earlier before the process is
started. Pairing a Phone in the Device List
In order to pair to another phone,
the new phone in the Device List,
make sure the phone you would like
to pair is in the vehicle and available
to be connected to the Bluetooth
system before the process is
started.
1. Press the CONFIG hard key
repeatedly until the Phone menu
is shown or touch the Phone tab
on the screen.
2. Select the Bluetooth submenu.
3. Select the Device List submenu.
Page 210 of 414
6-64 Infotainment System
Call Waiting (Only Available
with Call Waiting)
Call waiting must be supported on
the Bluetooth phone and enabled by
the wireless service carrier to work.
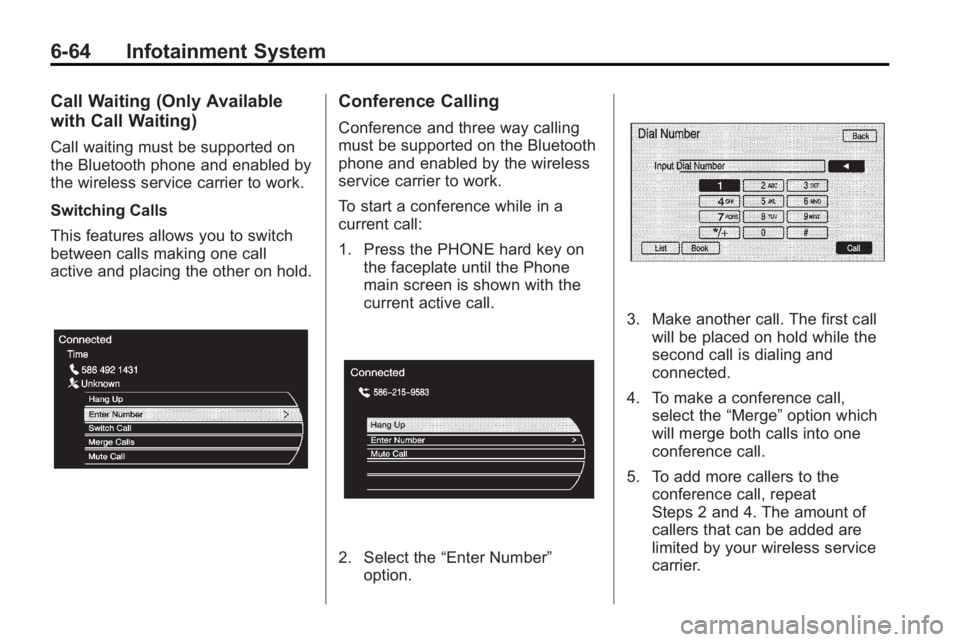
Switching Calls
This features allows you to switch
between calls making one call
active and placing the other on hold.
Conference Calling
Conference and three way calling
must be supported on the Bluetooth
phone and enabled by the wireless
service carrier to work.
To start a conference while in a
current call:
1. Press the PHONE hard key onthe faceplate until the Phone
main screen is shown with the
current active call.
2. Select the “Enter Number”
option.
3. Make another call. The first call will be placed on hold while the
second call is dialing and
connected.
4. To make a conference call, select the “Merge”option which
will merge both calls into one
conference call.
5. To add more callers to the conference call, repeat
Steps 2 and 4. The amount of
callers that can be added are
limited by your wireless service
carrier.
Page 211 of 414
Infotainment System 6-65
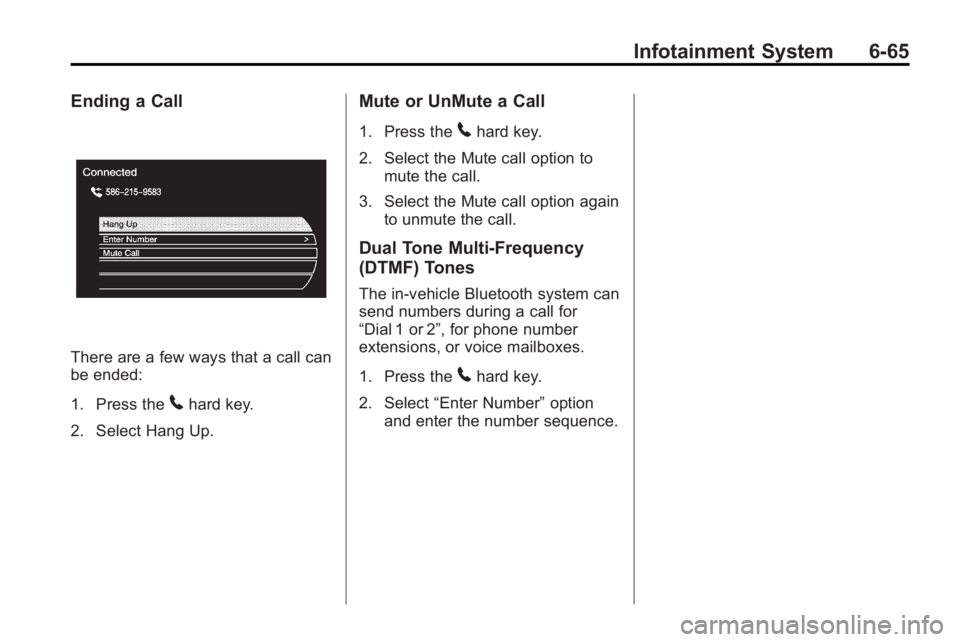
Ending a Call
There are a few ways that a call can
be ended:
1. Press the
5hard key.
2. Select Hang Up.
Mute or UnMute a Call
1. Press the5hard key.
2. Select the Mute call option to mute the call.
3. Select the Mute call option again to unmute the call.
Dual Tone Multi-Frequency
(DTMF) Tones
The in-vehicle Bluetooth system can
send numbers during a call for
“Dial 1 or 2”, for phone number
extensions, or voice mailboxes.
1. Press the
5hard key.
2. Select “Enter Number” option
and enter the number sequence.
Page 223 of 414
Driving and Operating 8-1
Driving and
Operating
Driving Information
Driving for Better FuelEconomy . . . . . . . . . . . . . . . . . . . . 8-2
Defensive Driving . . . . . . . . . . . . . 8-3
Drunk Driving . . . . . . . . . . . . . . . . . 8-3
Control of a Vehicle . . . . . . . . . . . 8-4
Braking . . . . . . . . . . . . . . . . . . . . . . . 8-4
Steering . . . . . . . . . . . . . . . . . . . . . . . 8-5
Off-Road Recovery . . . . . . . . . . . . 8-6
Loss of Control . . . . . . . . . . . . . . . . 8-7
Driving on Wet Roads . . . . . . . . . 8-8
Highway Hypnosis . . . . . . . . . . . . 8-8
Hill and Mountain Roads . . . . . . 8-9
Winter Driving . . . . . . . . . . . . . . . . . 8-9
If the Vehicle is Stuck . . . . . . . . 8-11
Vehicle Load Limits . . . . . . . . . . 8-12
Starting and Operating
New Vehicle Break-In . . . . . . . . 8-17
Ignition Positions (Key Access) . . . . . . . . . . . . . . . . . . . . 8-18
Ignition Positions (Keyless Access) . . . . . . . . . . . . . . . . . . . . 8-19 Retained Accessory
Power (RAP) . . . . . . . . . . . . . . . 8-20
Starting the Engine . . . . . . . . . . 8-20
Engine Heater . . . . . . . . . . . . . . . 8-22
Shifting Into Park . . . . . . . . . . . . 8-23
Shifting Out of Park . . . . . . . . . . 8-25
Parking Over Things That Burn . . . . . . . . . . . . . . . . . . 8-25
Engine Exhaust
Engine Exhaust . . . . . . . . . . . . . . 8-26
Running the Vehicle WhileParked . . . . . . . . . . . . . . . . . . . . . 8-26
Automatic Transmission
Automatic Transmission . . . . . 8-27
Manual Mode . . . . . . . . . . . . . . . . 8-29
Drive Systems
All-Wheel Drive . . . . . . . . . . . . . . 8-30
Brakes
Antilock BrakeSystem (ABS) . . . . . . . . . . . . . . 8-31
Parking Brake . . . . . . . . . . . . . . . 8-32
Brake Assist . . . . . . . . . . . . . . . . . 8-34
Ride Control Systems
Traction Control System (TCS) . . . . . . . . . . . . . . 8-34
Electronic Stability Control (ESC) . . . . . . . . . . . . . . 8-35
Selective Ride Control . . . . . . . 8-36
Cruise Control
Cruise Control . . . . . . . . . . . . . . . 8-37
Object Detection Systems
Ultrasonic Parking Assist . . . . 8-40
Side Blind Zone
Alert (SBZA) . . . . . . . . . . . . . . . 8-43
Rear Vision Camera (RVC) . . . . . . . . . . . . . 8-46
Fuel
Fuel . . . . . . . . . . . . . . . . . . . . . . . . . 8-49
Recommended Fuel . . . . . . . . . 8-50
Gasoline Specifications . . . . . . 8-50
California FuelRequirements . . . . . . . . . . . . . . 8-51
Fuels in Foreign Countries . . . 8-51
Fuel Additives . . . . . . . . . . . . . . . 8-51
Filling the Tank . . . . . . . . . . . . . . 8-52
Filling a Portable Fuel Container . . . . . . . . . . . . . . . . . . . 8-53