BUICK REGAL 1998 Owners Manual
Manufacturer: BUICK, Model Year: 1998, Model line: REGAL, Model: BUICK REGAL 1998Pages: 388, PDF Size: 20.19 MB
Page 161 of 388
9 FRONT This setting brings in outside air and
directs most of the air through the defrost vent. Some
of
the air also goes to the floor ducts and the side window
defogger outlets. The indicator on the button will light
and WINDSHIELD will be lit in the display.
The air
conditioning compressor will run automatically in
this setting unless the outside temperature is below
40°F (4°C).
VENT: This pushbutton turns the air conditioning
compressor on and
off. The indicator lights when the
compressor is turned off. Recirculation is not permitted
when the compressor
is off. The system will try to
control the temperature automatically, but without
the compressor.
Vent is not permitted in FRONT defrost mode. If the
vent button is pushed while in FRONT defrost mode,
the indicator will light for one second and then turn off.
RECIRC: This setting recirculates much of the air
inside your vehicle. This setting is not permitted in
FRONT defrost mode and is only permitted in
WINDSHIELD/FLOOR mode if the compressor is
turned
on. The indicator light will be lit when
recirculation is engaged, but will light for
one second
and then turn off if selected when not permitted.
Air Conditioning
On very hot days, open the windows long enough to let
hot, inside air escape. This reduces the time
for the
vehicle to cool down.
For a quick cool-down
on very hot days, use MAX with
the temperature knobs all the way in the blue area.
If
this setting is used for long periods of time, the air in
your vehicle may become too dry.
For normal cooling
on hot days, use NORM with the
temperature knobs in the blue area. The system will
bring in outside air and cool it.
On cool, but sunny days, the sun may warm your upper
body, but your lower body may
not be warm enough.
You can use BI-LEV and set the temperature knob to a
comfortable setting. The system will bring in outside air
and direct it to your upper body, while sending slightly
warmed air to your lower body. You may notice this
temperature difference more at
some times than others.
3-9
ProCarManuals.com
Page 162 of 388
Heating Ventilation System
On cold days, use HTR with the temperature knobs all
the way in the red area. The system will bring in outside
air, heat it and send it to the floor ducts.
If your vehicle has an engine coolant heater, you can use
it
to help your system provide wm air faster when it’s
cold outside
(0°F (-18°C) or lower). An engine coolant
heater wms the coolant your engine and heating
system use to provide heat. See “Engine Coolant
Heater” in the Index.
Defogging and Defrosting
Your system has two settings for clearing the front and
side windows.
To defrost the windows quickly, press the
FRONT button; set the temperature to 90 OF (32”C),
select high fan speed and turn the DUAL button off. To
warm passengers while keeping the windows clear, push
the AIR
FLOW button until WINDSHIELDFLOOR
appears in the display. Select fan speed for comfort and
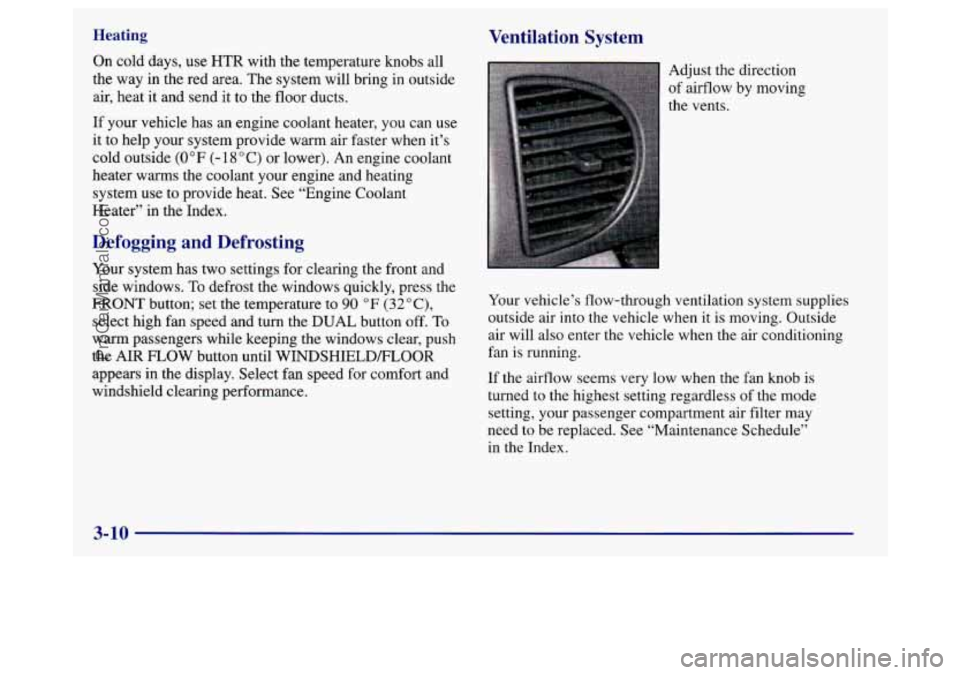
windshield clearing performance. Adjust the direction
of airflow by moving
the vents.
Your vehicle’s flow-through ventilation system supplies
outside air into the vehicle when it
is moving. Outside
air will also enter the vehicle when the air conditioning
fan is running.
If the airflow seems very low when the fan knob is
turned
to the highest setting regardless of the mode
setting, your passenger compartment air filter may
need
to be replaced. See “Maintenance Schedule’’
in the Index.
3-10
ProCarManuals.com
Page 163 of 388
Ventilation Tips
0 Keep the hood and front air inlet free of ice, snow or
any other obstruction, such
as leaves. The heater and
defroster will work far better, reducing the chance of
fogging the inside
of your windows.
0 When you enter a vehicle in cold weather, adjust the
mode knob or button
to FLOOR and the fan to the
highest speed for a few seconds before driving off.
This helps clear the intake ducts of snow and
moisture and reduces the chance of fogging the
inside of your windows.
0 Keep the air path under the front seats clear of
objects. This helps air to circulate throughout
your vehicle.
Rear Window Defogger
@I
REAR 1
1
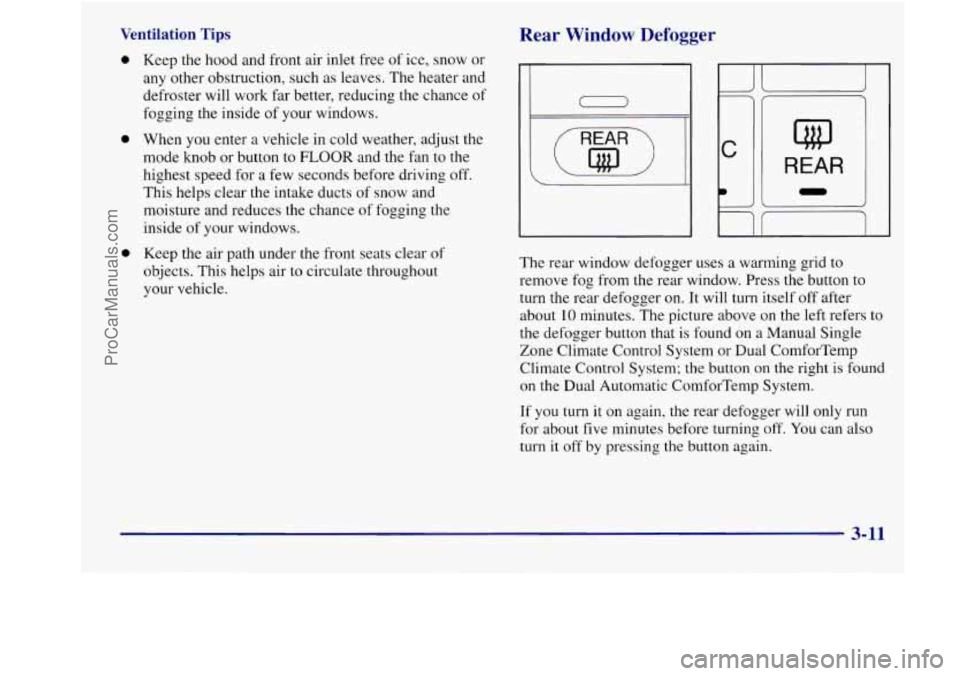
The rear window defogger uses a warming grid to
remove fog from the rear window. Press the button
to
turn the rear defogger on. It will turn itself off after
about
10 minutes. The picture above on the left refers to
the defogger button that is found on a Manual Single
Zone Climate Control System or Dual ComforTemp
Climate Control System; the button
on the right is found
on the Dual Automatic ComforTemp System.
If you turn it on again, the rear defogger will only run
for about five minutes before turning off. You can also
turn it off by pressing the button again.
3-11
ProCarManuals.com
Page 164 of 388
I NOTICE:
Do not attach anything like a temporary vehicle
license or decal across the defogger grid.
I NOTICE:
Don’t use a razor blade or anything else sharp on
the inside of the rear window.
If you do, you
could cut or damage the warming grid, and the
repairs wouldn’t be covered
by your warranty.
Audio Systems
Your Delco Electronics audio system has been designed
to operate easily and give years
of listening pleasure.
You will get the most enjoyment out
of it if you acquaint
yourself with it first. Find out what your Delco
Electronics system can do and
how to operate all its
controls, to be sure you’re getting the most out
of the
advanced engineering that went into it.
Setting the Clock
Press and hold HRS until the correct hour appears. Press
and hold
MIN until the correct minute appears.
You may set the clock with the ignition off if you
press
RECALL first and follow the same procedure
described above.
3-12
ProCarManuals.com
Page 165 of 388
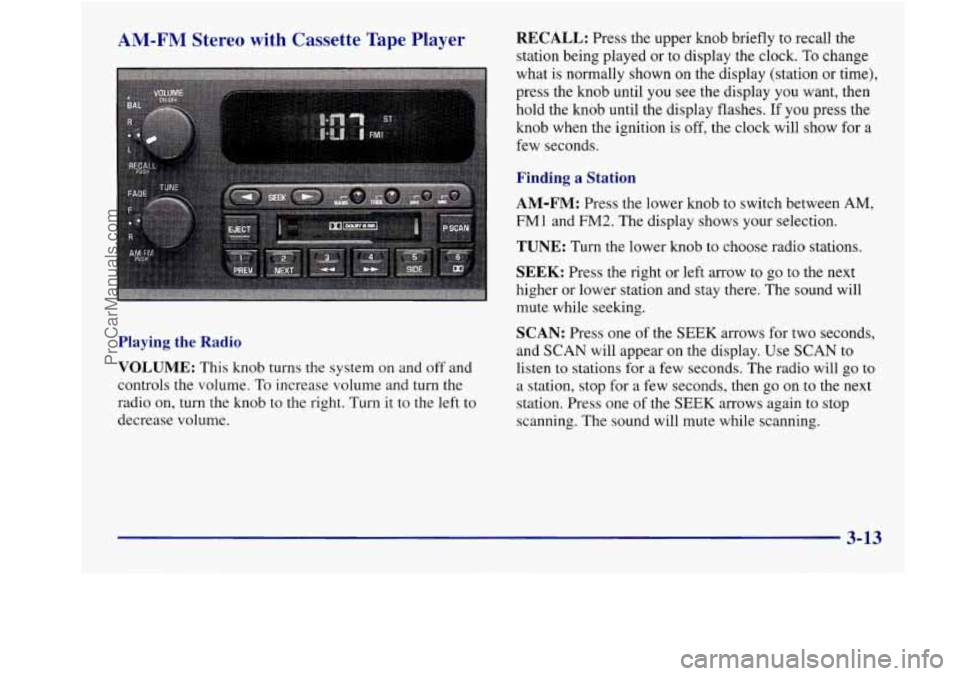
AM-FM Stereo with Cassette Tape Player
Playing the Radio
VOLUME:
This knob turns the system on and off and
controls the volume. To increase volume and turn the
radio
on, turn the knob to the right. Turn it to the left to
decrease volume.
RECALL: Press the upper knob briefly to recall the
station being played or to display the clock.
To change
what is normally shown on the display (station
or time),
press the
knob until you see the display you want, then
hold the knob until the display flashes. If you press the
knob when the ignition is off, the clock will show for a
few seconds.
Finding a Station
AM-FM:
Press the lower knob to switch between AM,
FMl and FM2. The display shows your selection.
TUNE: Turn the lower knob to choose radio stations.
SEEK: Press the right or left arrow to go to the next
higher or lower station and stay there. The sound will
mute while seeking.
SCAN: Press one of the SEEK arrows for two seconds,
and
SCAN will appear on the display. Use SCAN to
listen
to stations for a few seconds. The radio will go to
a station, stop for a few seconds, then go on to the next
station. Press one of the
SEEK arrows again to stop
scanning. The sound will mute while scanning.
3-13
ProCarManuals.com
Page 166 of 388
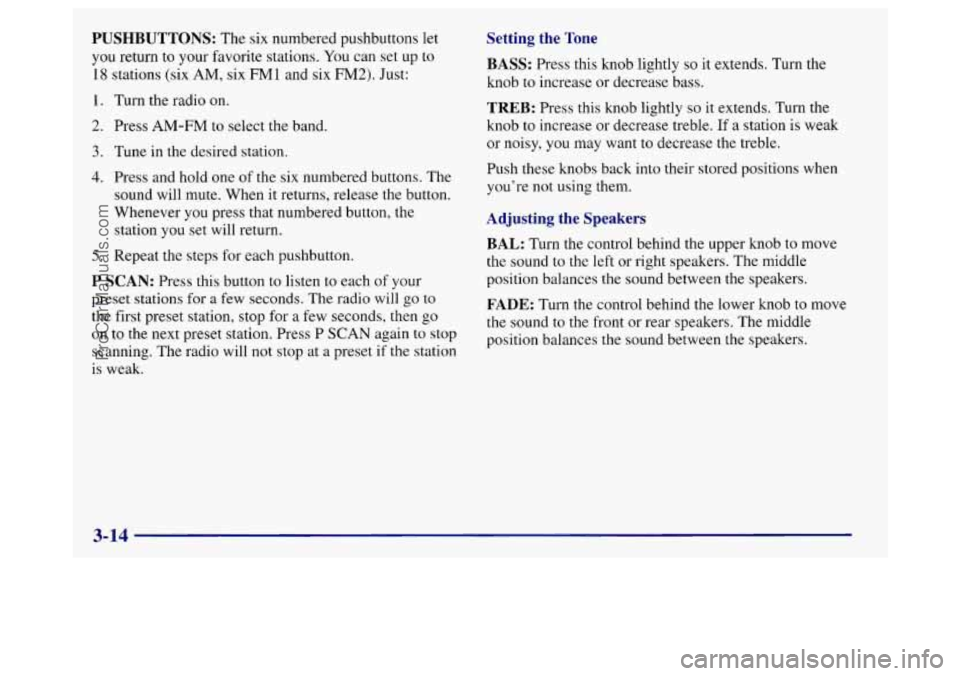
PUSHBUTTONS: The six numbered pushbuttons let
you return to your favorite stations.
You can set up to
18 stations (six AM, six FMl and six FM2). Just:
1. Turn the radio on.
2. Press AM-FM to select the band.
3. Tune in the desired station.
4. Press and hold one of the six numbered buttons. The
sound will mute. When it returns, release the button.
Whenever you press that numbered button, the
station you set will return.
5. Repeat the steps for each pushbutton.
P SCAN: Press this button to listen to each of your
preset stations for
a few seconds. The radio will go to
the first preset station, stop for
a few seconds, then go
on to the next preset station. Press P SCAN again to stop
scanning. The radio will not stop at a preset if the station
is weak.
Setting the Tone
BASS:
Press this knob lightly so it extends. Turn the
knob to increase
or decrease bass.
TREB: Press this knob lightly so it extends. Turn the
knob to increase or decrease treble. If
a station is weak
or noisy, you may want to decrease the treble.
Push these knobs back into their stored positions when
you’re not using them.
Adjusting the Speakers
BAL:
Turn the control behind the upper knob to move
the sound to the left or right speakers. The middle
position balances the sound between the speakers.
FADE: Turn the control behind the lower knob to move
the sound to the front or rear speakers. The middle
position balances the sound between the speakers.
3-14
ProCarManuals.com
Page 167 of 388
Playing a Cassette Tape 0 Ell: The tape is broken. Try a new tape.
If any error occurs repeatedly or if an error can’t be
corrected, please contact your dealer. If your radio
displays an error number, write it down and provide it to
your dealer when reporting the problem.
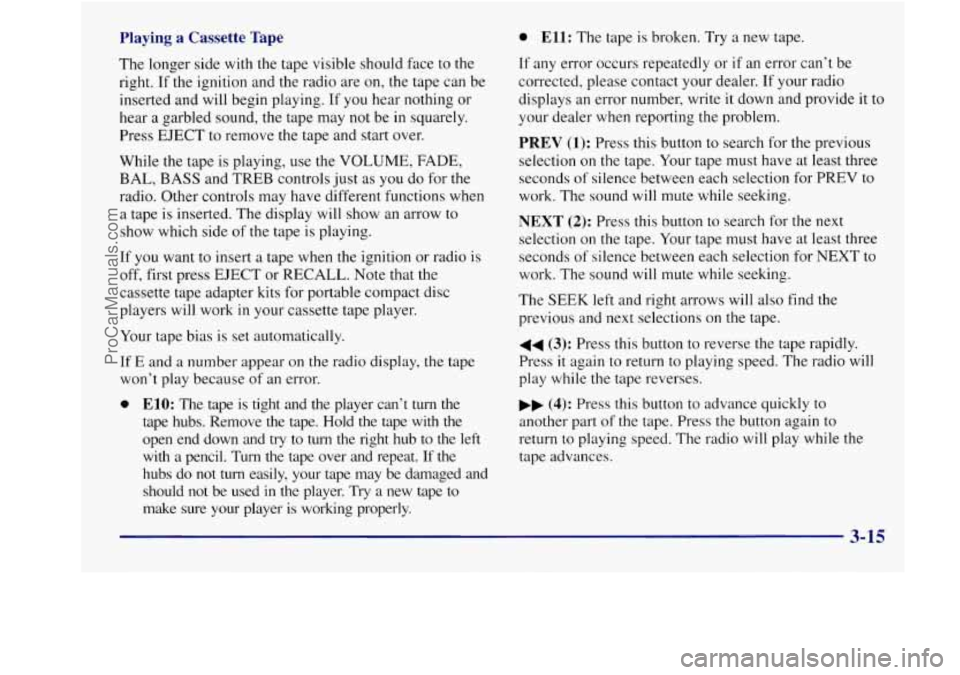
PREV (1): Press this button to search for the previous
selection on the tape. Your tape must have at least three
seconds
of silence between each selection for PREV to
work. The sound will mute while seeking.
NEXT (2): Press this button to search for the next
selection on the tape. Your tape must have at least three
seconds of silence between each selection for NEXT to
work.
The sound will mute while seeking.
The longer side
with the tape visible should face to the
right. If the ignition and the radio are on, the tape can be
inserted and will begin playing. If you hear nothing or
hear
a garbled sound, the tape may not be in squarely.
Press EJECT
to remove the tape and start over.
While the tape is playing, use the VOLUME, FADE,
BAL, BASS and TREB controls just as you do for the
radio. Other controls may have different functions when
a tape is inserted. The display will show an arrow to
show which side of the tape is playing.
If you want to insert a tape when the ignition or radio is
off, first press EJECT or RECALL. Note that the
cassette tape adapter kits for portable compact disc
players will work in your cassette tape player.
Your tape bias is set automatically.
If
E and a number appear on the radio display, the tape
won’t play because of an error.
0 ElO: The tape is tight and the player can’t turn the
tape hubs. Remove the tape. Hold the tape with the open end down and
try to turn the right hub to the left
with
a pencil. Turn the tape over and repeat. If the
hubs do
not turn easily, your tape may be damaged and
should not be used in
the player. Try a new tape to
make sure your player
is working properly. The SEEK
left and right arrows will
also find the
previous and
next selections on the tape.
44 (3): Press this button to reverse the tape rapidly.
Press
it again to return to playing speed. The radio will
play
while the tape reverses.
bb (4): Press this button to advance quickly to
another part
of the tape. Press the button again to
return to playing speed. The radio will play while the
tape advances.
ProCarManuals.com
Page 168 of 388
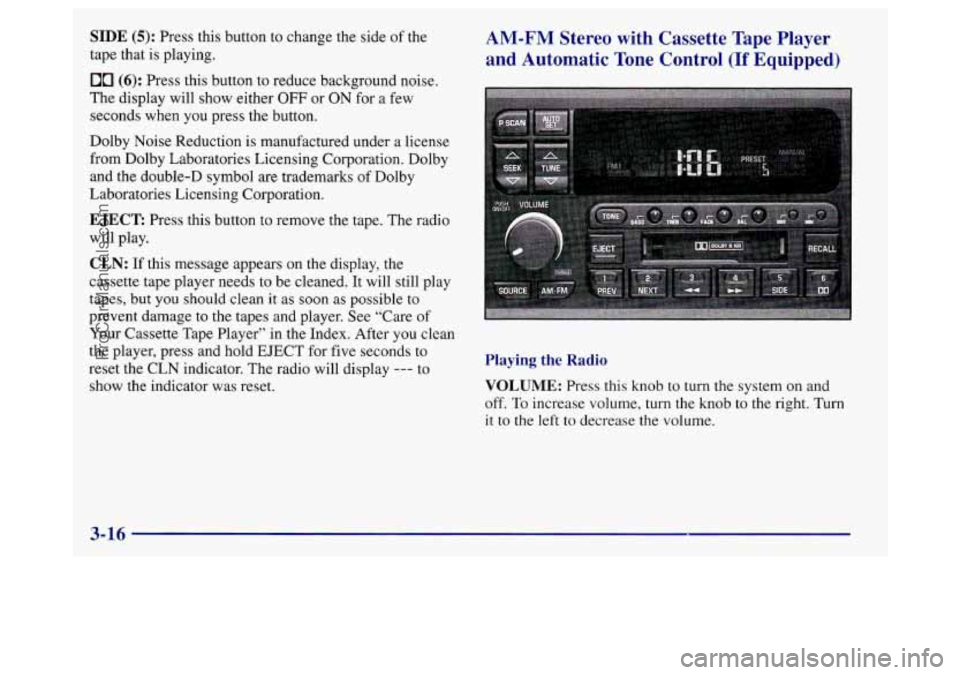
SIDE (5): Press this button to change the side of the
tape that is playing.
00 (6): Press this button to reduce background noise.
The display will show either
OFF or ON for a few
seconds when you press the button.
Dolby Noise Reduction
is manufactured under a license
from Dolby Laboratories Licensing Corporation. Dolby
and the double-D symbol are trademarks of Dolby
Laboratories Licensing Corporation.
EJECT: Press this button to remove the tape. The radio
will play.
CLN: If this message appears on the display, the
cassette tape player needs to be cleaned.
It will still play
tapes, but you should clean
it as soon as possible to
prevent damage to the tapes and player. See “Care
of
Your Cassette Tape Player” in the Index. After you clean
the player, press and hold EJECT for five seconds to
reset the CLN indicator. The radio will display
--- to
show the indicator was reset.
AM-FM Stereo with Cassette Tape Player
and Automatic Tone Control
(If Equipped)
Playing the Radio
VOLUME: Press this knob to turn the system on and
off.
To increase volume, turn the knob to the right. Turn
it to the left
to decrease the volume.
3-16
ProCarManuals.com
Page 169 of 388
RECALL: Press this button briefly to recall the station
being played or to display the clock.
To change what is
normally shown on the display (station or time), press
this button until you see the display you want, then hold
the button until the display flashes. If you press the
button when the ignition is off, the clock will show for a
few seconds.
Finding a Station
AM-FM: Press this button to switch between AM, FMl
and
FM2. The display shows your selection.
TUNE: Press the up or down arrow to choose
radio stations.
SEEK: Press the up or down arrow to go to the next
higher or lower station and stay there. The sound will
mute while seeking.
SCAN: Press one of the SEEK arrows for two seconds
and
SCAN will appear on the display. Use SCAN to
listen to stations for
a few seconds. The radio will go to
a station,
stop for a few seconds, then go on to the next
station. Press one
of the SEEK buttons again to stop
scanning. The sound will mute while scanning.
PUSHBUTTONS: The six numbered pushbuttons let
you return to your favorite stations. You can set up to
18 stations (six AM, six FM 1 and six FM2). Just:
1. Turn the radio on.
2. Press AM-FM to select the band.
3. Tune in the desired station.
4. Press TONE to select the setting you prefer.
5. Press and hold one of the six numbered buttons. The
sound will mute. When it returns, release the button.
Whenever you press that numbered button, the
station you set will return and the tone you selected
will be automatically selected for that button.
6. Repeat the steps for each pushbutton.
P SCAN: Press this button to listen to each of your
preset stations for a few seconds. The radio will go to
the first preset station, stop for a few seconds, then go
on to the next preset station. Press P SCAN again to stop
scanning. If a preset station has weak reception, the
radio will not stop at the preset station.
3-17
ProCarManuals.com
Page 170 of 388
AUTO SET Press this button and the system will seek
and set the 12 strongest
FM or the 6 strongest AM
stations on your preset buttons (depending on which
band (AM or
FM) you are listening to). AUTO SET will
flash while seeking and will remain on until this
function is complete. To return to the stations you
manually set, press AUTO SET again.
Setting the Tone
BASS:
Press this knob lightly so it extends. Turn the
knob to increase or decrease bass.
TREB: Press this knob lightly so it extends. Turn the
knob to increase or decrease treble. If a station is weak
or noisy, you may want to decrease the treble.
Push these knobs back into their stored positions when
you’re not using them.
TONE: This feature allows you to choose preset bass
and treble equalization settings designed for classical,
pop, rock, jazz, talk and country/western stations.
CLASS will appear
on the display when you first press
TONE. Each time you press it, another setting will
appear on the display. Press it again after
C & W
appears and MANUAL will appear. Tone control will
return to
the BASS and TREB knobs. Also, if you use
the BASS and TREB knobs, control
will return to them
and MANUAL will appear.
Adjusting the Speakers
BAL: Press this knob lightly so it extends. Turn the knob
to move the sound to the left or right speakers. The middle
position balances the sound between the speakers.
FADE: Press this knob lightly so it extends. Turn the
knob to move the sound to the front or rear speakers.
The
middle position balances the sound between the speakers.
Push these knobs back into their stored positions when
you’re not using them.
Playing a Cassette Tape
The longer side with the tape visible should face to the
right. If the ignition and the radio are on, the tape can be
inserted and will begin playing.
If you hear nothing or
hear a garbled sound, the tape may not be in squarely.
Press EJECT to remove the tape and start over.
While
the tape is playing, use the VOLUME, FADE,
BAL, BASS and TREB controls just as you do for the
radio. Other controls may have different functions when
a tape is inserted. The display will show an arrow to
show which side of the tape is playing.
3-18
ProCarManuals.com