wheel BUICK REGAL 2012 Manual PDF
[x] Cancel search | Manufacturer: BUICK, Model Year: 2012, Model line: REGAL, Model: BUICK REGAL 2012Pages: 440, PDF Size: 6.22 MB
Page 344 of 440
Black plate (70,1)Buick Regal Owner Manual - 2012
10-70 Vehicle Care
heated environment for five minutes.
This will help to inflate the tire
faster.
If a tire goes flat, avoid further tire
and wheel damage by driving slowly
to a level place. Turn on the hazard
warning flashers. SeeHazard
Warning Flashers on page 6‑3.
See If a Tire Goes Flat on
page 10‑65 for other important
safety warnings.
Do not remove any objects that
have penetrated the tire.
1. Remove the tire sealant and compressor kit from its storage
location. See Storing the Tire
Sealant and Compressor Kit on
page 10‑82.
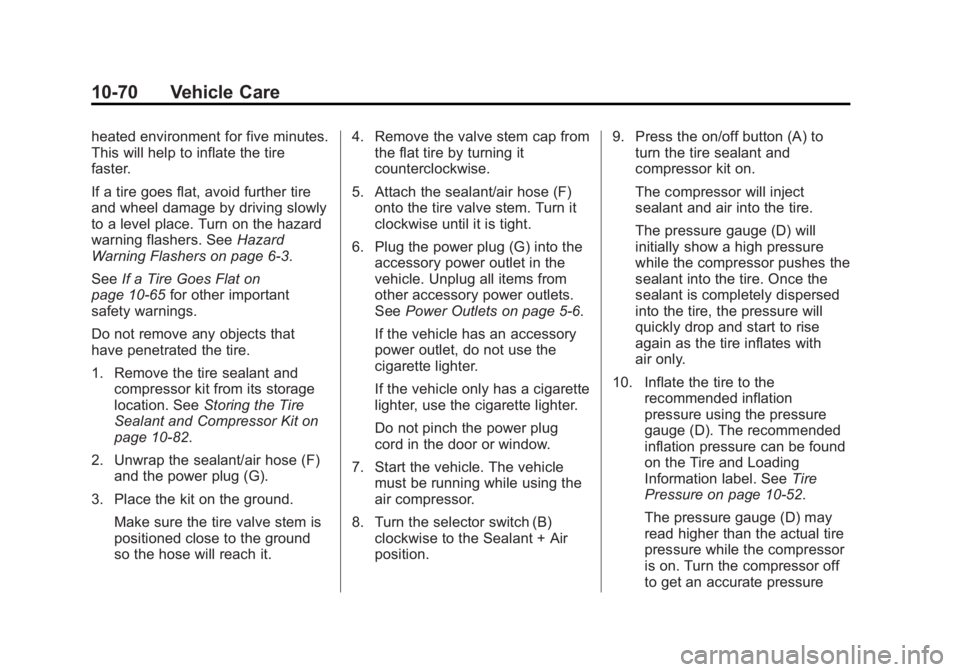
2. Unwrap the sealant/air hose (F) and the power plug (G).
3. Place the kit on the ground. Make sure the tire valve stem is
positioned close to the ground
so the hose will reach it. 4. Remove the valve stem cap from
the flat tire by turning it
counterclockwise.
5. Attach the sealant/air hose (F) onto the tire valve stem. Turn it
clockwise until it is tight.
6. Plug the power plug (G) into the accessory power outlet in the
vehicle. Unplug all items from
other accessory power outlets.
See Power Outlets on page 5‑6.
If the vehicle has an accessory
power outlet, do not use the
cigarette lighter.
If the vehicle only has a cigarette
lighter, use the cigarette lighter.
Do not pinch the power plug
cord in the door or window.
7. Start the vehicle. The vehicle must be running while using the
air compressor.
8. Turn the selector switch (B) clockwise to the Sealant + Air
position. 9. Press the on/off button (A) to
turn the tire sealant and
compressor kit on.
The compressor will inject
sealant and air into the tire.
The pressure gauge (D) will
initially show a high pressure
while the compressor pushes the
sealant into the tire. Once the
sealant is completely dispersed
into the tire, the pressure will
quickly drop and start to rise
again as the tire inflates with
air only.
10. Inflate the tire to the recommended inflation
pressure using the pressure
gauge (D). The recommended
inflation pressure can be found
on the Tire and Loading
Information label. See Tire
Pressure on page 10‑52.
The pressure gauge (D) may
read higher than the actual tire
pressure while the compressor
is on. Turn the compressor off
to get an accurate pressure
Page 346 of 440
Black plate (72,1)Buick Regal Owner Manual - 2012
10-72 Vehicle Care
If the tire pressure has fallen
more than 68 kPa (10 psi)
below the recommended
inflation pressure, stop driving
the vehicle. The tire is too
severely damaged and the tire
sealant cannot seal the tire.
SeeRoadside Assistance
Program (U.S. and Canada) on
page 13‑7 orRoadside
Assistance Program (Mexico)
on page 13‑9.
If the tire pressure has not
dropped more than 68 kPa
(10 psi) from the recommended
inflation pressure, use the
compressor kit to inflate the tire
to the recommended inflation
pressure. 20. Wipe off any sealant from the
wheel, tire, and vehicle.
21. Dispose of the used sealant canister and sealant/air
hose (F) assembly at a local
dealer or in accordance with
local state codes and practices.
22. Replace it with a new canister available from your dealer.
23. After temporarily sealing a tire using the tire sealant and
compressor kit, take the
vehicle to an authorized dealer
within 161 km (100 mi) of
driving to have the tire repaired
or replaced.Using the Tire Sealant and
Compressor Kit without
Sealant to Inflate a Tire
(Not Punctured)
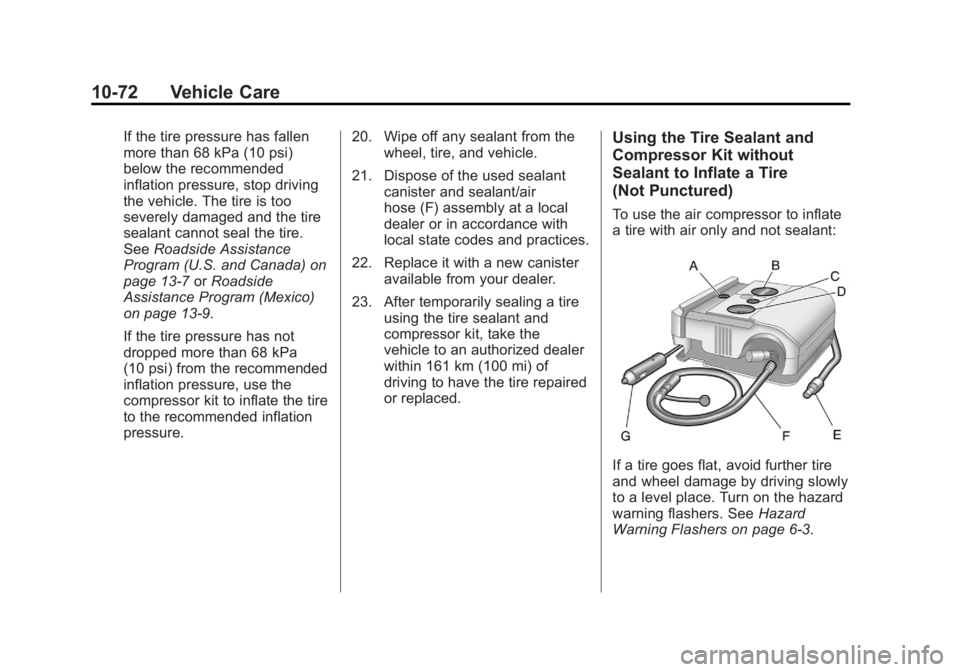
To use the air compressor to inflate
a tire with air only and not sealant:
If a tire goes flat, avoid further tire
and wheel damage by driving slowly
to a level place. Turn on the hazard
warning flashers. See Hazard
Warning Flashers on page 6‑3.
Page 350 of 440
Black plate (76,1)Buick Regal Owner Manual - 2012
10-76 Vehicle Care
The tire sealant and compressor
can be used to temporarily seal
punctures up to 6 mm (0.25 in) in
the tread area of the tire. It can also
be used to inflate an
underinflated tire.
If the tire has been separated from
the wheel, has damaged sidewalls,
or has a large puncture, the tire is
too severely damaged for the tire
sealant and compressor kit to be
effective. SeeRoadside Assistance
Program (U.S. and Canada) on
page 13‑7 orRoadside Assistance
Program (Mexico) on page 13‑9.
Read and follow all of the tire
sealant and compressor kit
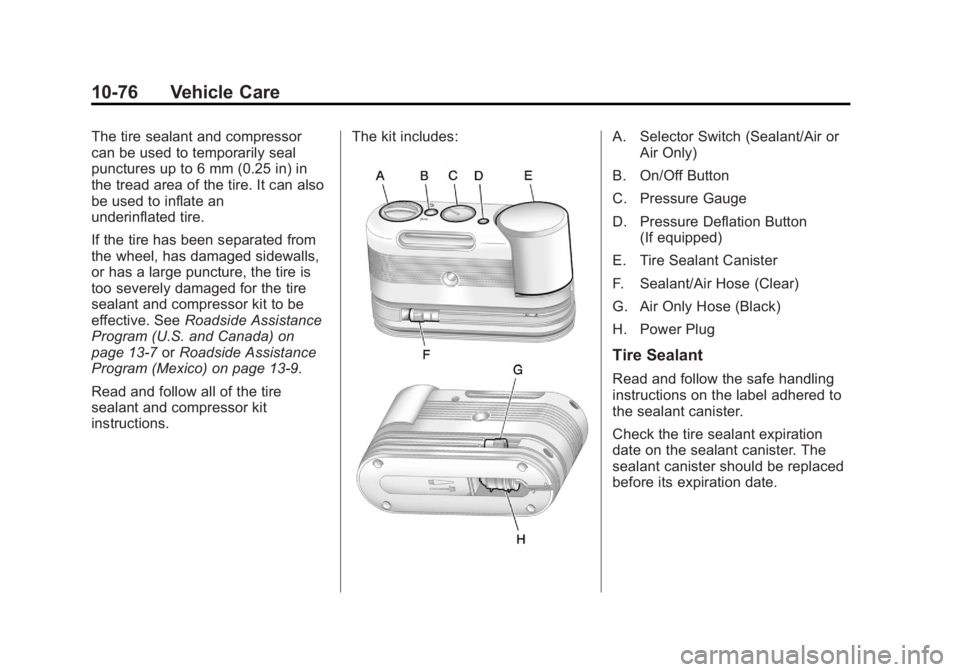
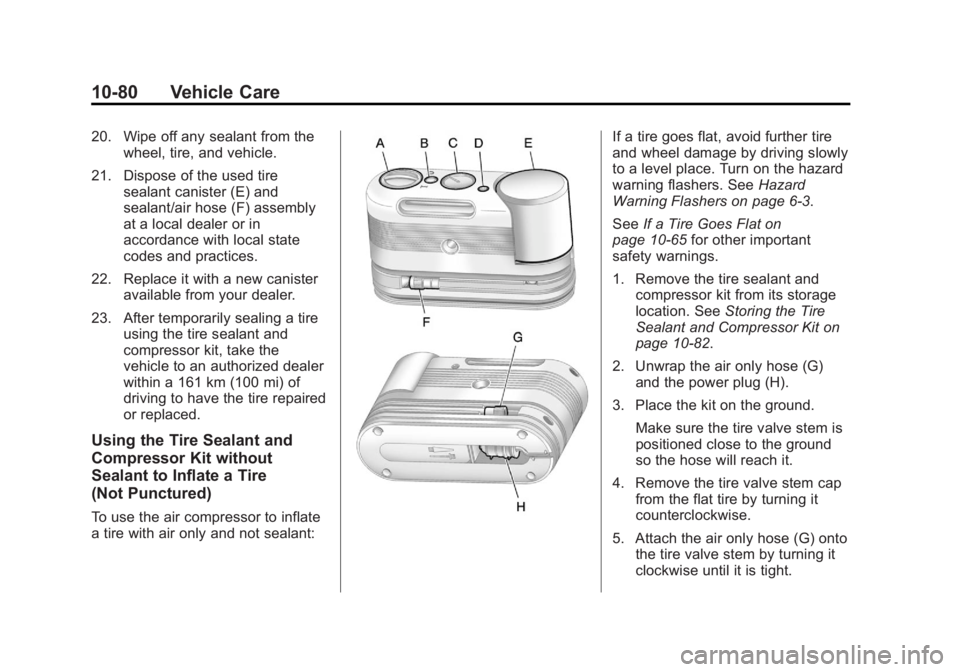
instructions. The kit includes:A. Selector Switch (Sealant/Air or
Air Only)
B. On/Off Button
C. Pressure Gauge
D. Pressure Deflation Button (If equipped)
E. Tire Sealant Canister
F. Sealant/Air Hose (Clear)
G. Air Only Hose (Black)
H. Power Plug
Tire Sealant
Read and follow the safe handling
instructions on the label adhered to
the sealant canister.
Check the tire sealant expiration
date on the sealant canister. The
sealant canister should be replaced
before its expiration date.
Page 351 of 440
Black plate (77,1)Buick Regal Owner Manual - 2012
Vehicle Care 10-77
Replacement sealant canisters are
available at your local dealer. See
“Removal and Installation of the
Sealant Canister”following.
There is only enough sealant to seal
one tire. After usage, the sealant
canister and sealant/air hose
assembly must be replaced. See
“Removal and Installation of the
Sealant Canister” following.
Using the Tire Sealant and
Compressor Kit to Temporarily
Seal and Inflate a
Punctured Tire
Follow the directions closely for
correct sealant usage.
When using the tire sealant and
compressor kit during cold
temperatures, warm the kit in a heated environment for five minutes.
This will help to inflate the tire
faster.
If a tire goes flat, avoid further tire
and wheel damage by driving slowly
to a level place. Turn on the hazard
warning flashers. See
Hazard
Warning Flashers on page 6‑3.
See If a Tire Goes Flat on
page 10‑65 for other important
safety warnings.
Do not remove any objects that
have penetrated the tire.
1. Remove the tire sealant and compressor kit from its storage
location. See Storing the Tire
Sealant and Compressor Kit on
page 10‑82.
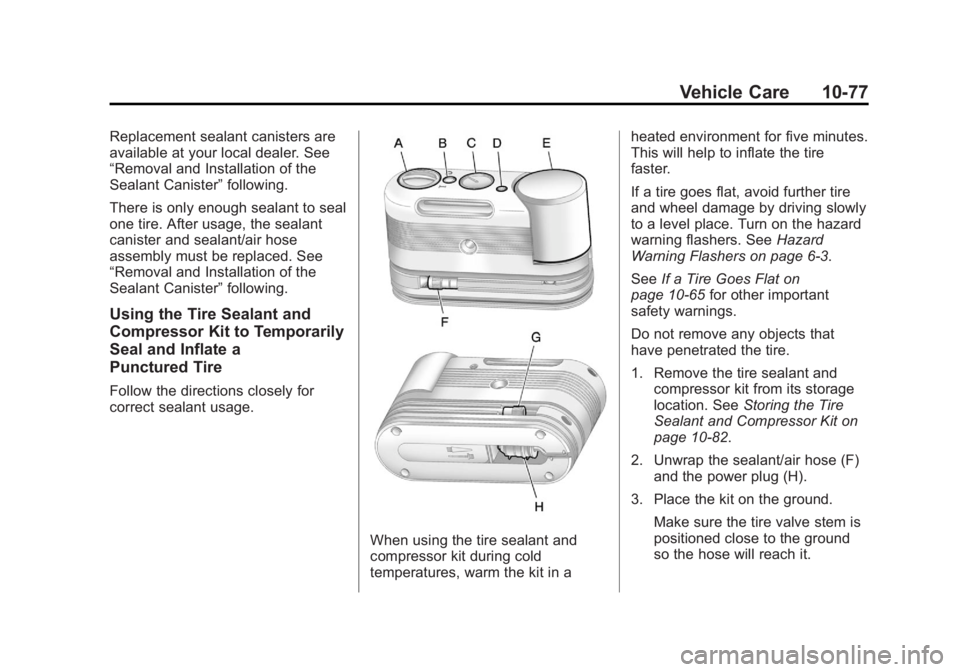
2. Unwrap the sealant/air hose (F) and the power plug (H).
3. Place the kit on the ground. Make sure the tire valve stem is
positioned close to the ground
so the hose will reach it.
Page 354 of 440
Black plate (80,1)Buick Regal Owner Manual - 2012
10-80 Vehicle Care
20. Wipe off any sealant from thewheel, tire, and vehicle.
21. Dispose of the used tire sealant canister (E) and
sealant/air hose (F) assembly
at a local dealer or in
accordance with local state
codes and practices.
22. Replace it with a new canister available from your dealer.
23. After temporarily sealing a tire using the tire sealant and
compressor kit, take the
vehicle to an authorized dealer
within a 161 km (100 mi) of
driving to have the tire repaired
or replaced.
Using the Tire Sealant and
Compressor Kit without
Sealant to Inflate a Tire
(Not Punctured)
To use the air compressor to inflate
a tire with air only and not sealant:
If a tire goes flat, avoid further tire
and wheel damage by driving slowly
to a level place. Turn on the hazard
warning flashers. See Hazard
Warning Flashers on page 6‑3.
See If a Tire Goes Flat on
page 10‑65 for other important
safety warnings.
1. Remove the tire sealant and compressor kit from its storage
location. See Storing the Tire
Sealant and Compressor Kit on
page 10‑82.
2. Unwrap the air only hose (G) and the power plug (H).
3. Place the kit on the ground. Make sure the tire valve stem is
positioned close to the ground
so the hose will reach it.
4. Remove the tire valve stem cap from the flat tire by turning it
counterclockwise.
5. Attach the air only hose (G) onto the tire valve stem by turning it
clockwise until it is tight.
Page 358 of 440
Black plate (84,1)Buick Regal Owner Manual - 2012
10-84 Vehicle Care
Removing the Flat Tire and
Installing the Spare Tire
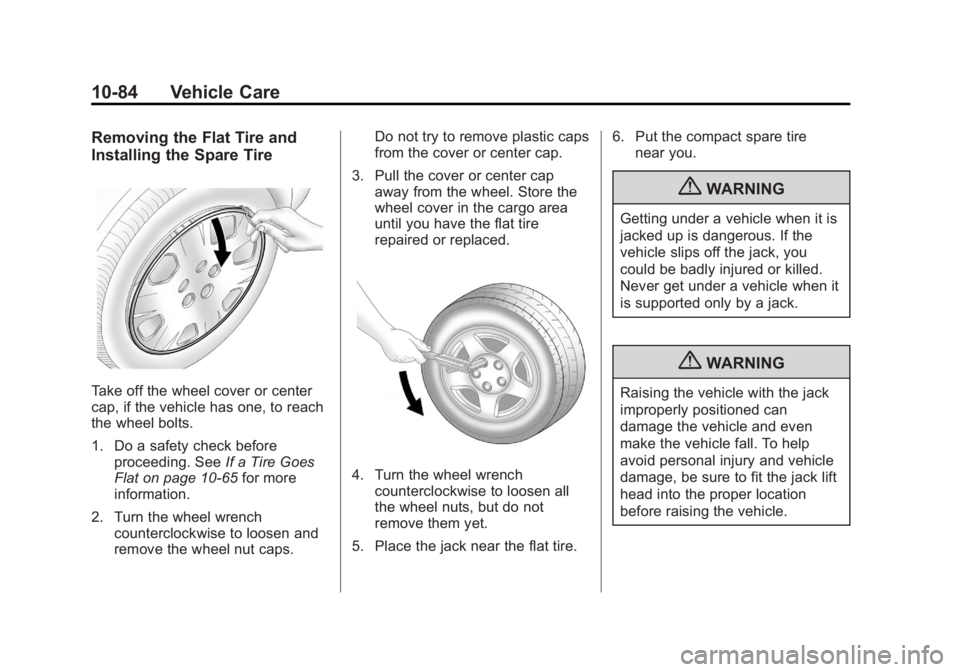
Take off the wheel cover or center
cap, if the vehicle has one, to reach
the wheel bolts.
1. Do a safety check beforeproceeding. See If a Tire Goes
Flat on page 10‑65 for more
information.
2. Turn the wheel wrench counterclockwise to loosen and
remove the wheel nut caps. Do not try to remove plastic caps
from the cover or center cap.
3. Pull the cover or center cap away from the wheel. Store the
wheel cover in the cargo area
until you have the flat tire
repaired or replaced.
4. Turn the wheel wrenchcounterclockwise to loosen all
the wheel nuts, but do not
remove them yet.
5. Place the jack near the flat tire. 6. Put the compact spare tire
near you.
{WARNING
Getting under a vehicle when it is
jacked up is dangerous. If the
vehicle slips off the jack, you
could be badly injured or killed.
Never get under a vehicle when it
is supported only by a jack.
{WARNING
Raising the vehicle with the jack
improperly positioned can
damage the vehicle and even
make the vehicle fall. To help
avoid personal injury and vehicle
damage, be sure to fit the jack lift
head into the proper location
before raising the vehicle.
Page 360 of 440
Black plate (86,1)Buick Regal Owner Manual - 2012
10-86 Vehicle Care
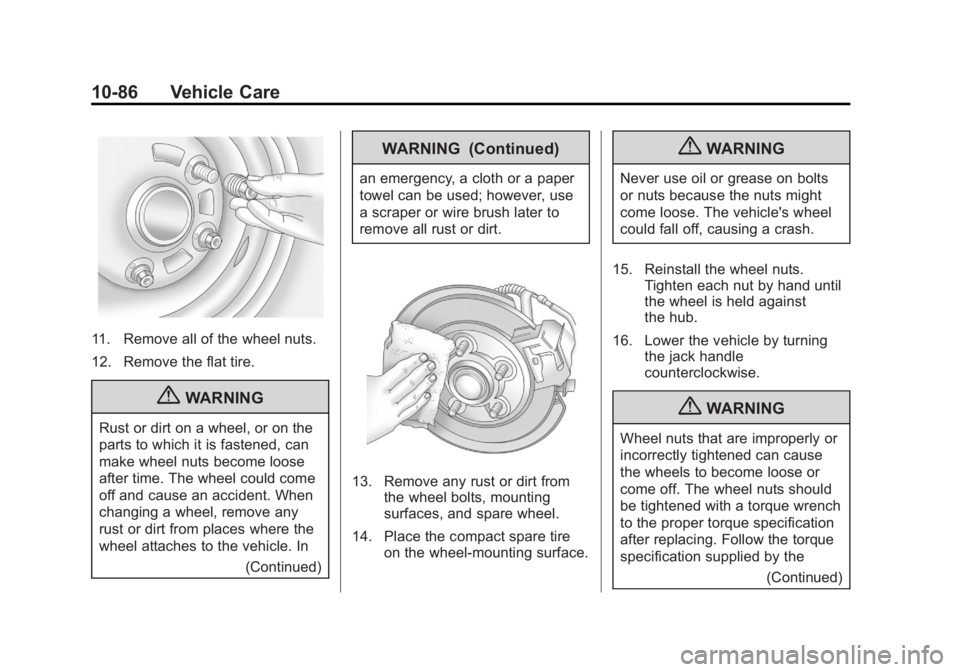
11. Remove all of the wheel nuts.
12. Remove the flat tire.
{WARNING
Rust or dirt on a wheel, or on the
parts to which it is fastened, can
make wheel nuts become loose
after time. The wheel could come
off and cause an accident. When
changing a wheel, remove any
rust or dirt from places where the
wheel attaches to the vehicle. In(Continued)
WARNING (Continued)
an emergency, a cloth or a paper
towel can be used; however, use
a scraper or wire brush later to
remove all rust or dirt.
13. Remove any rust or dirt fromthe wheel bolts, mounting
surfaces, and spare wheel.
14. Place the compact spare tire on the wheel-mounting surface.
{WARNING
Never use oil or grease on bolts
or nuts because the nuts might
come loose. The vehicle's wheel
could fall off, causing a crash.
15. Reinstall the wheel nuts. Tighten each nut by hand until
the wheel is held against
the hub.
16. Lower the vehicle by turning the jack handle
counterclockwise.
{WARNING
Wheel nuts that are improperly or
incorrectly tightened can cause
the wheels to become loose or
come off. The wheel nuts should
be tightened with a torque wrench
to the proper torque specification
after replacing. Follow the torque
specification supplied by the
(Continued)
Page 361 of 440
Black plate (87,1)Buick Regal Owner Manual - 2012
Vehicle Care 10-87
WARNING (Continued)
aftermarket manufacturer when
using accessory locking wheel
nuts. SeeCapacities and
Specifications on page 12‑2 for
original equipment wheel nut
torque specifications.
Notice: Improperly tightened
wheel nuts can lead to brake
pulsation and rotor damage. To
avoid expensive brake repairs,
evenly tighten the wheel nuts in
the proper sequence and to the
proper torque specification. See
Capacities and Specifications on
page 12‑2 for the wheel nut
torque specification.
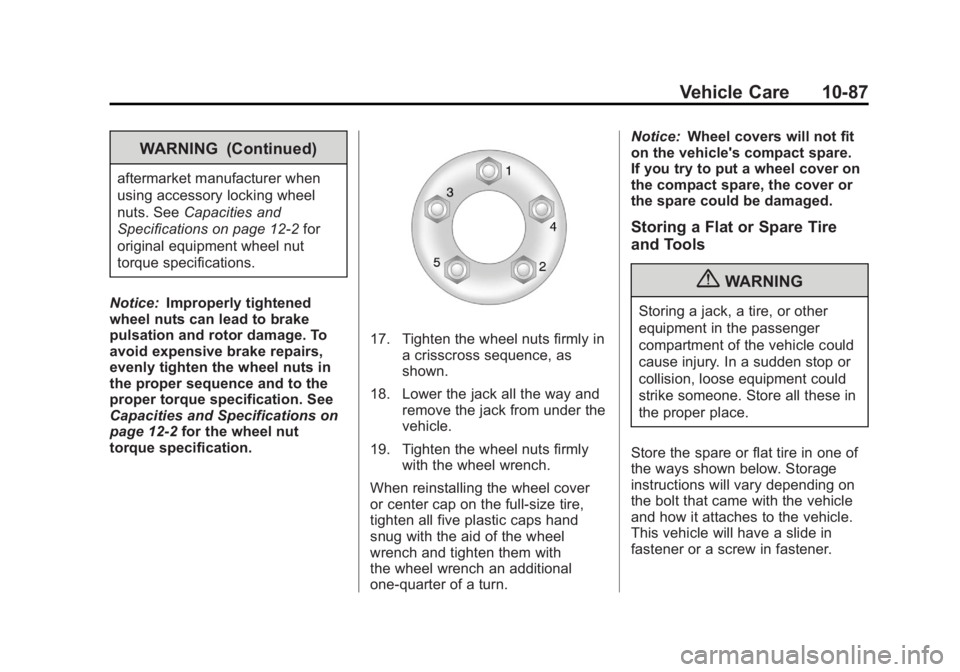
17. Tighten the wheel nuts firmly in a crisscross sequence, as
shown.
18. Lower the jack all the way and remove the jack from under the
vehicle.
19. Tighten the wheel nuts firmly with the wheel wrench.
When reinstalling the wheel cover
or center cap on the full-size tire,
tighten all five plastic caps hand
snug with the aid of the wheel
wrench and tighten them with
the wheel wrench an additional
one‐quarter of a turn. Notice:
Wheel covers will not fit
on the vehicle's compact spare.
If you try to put a wheel cover on
the compact spare, the cover or
the spare could be damaged.
Storing a Flat or Spare Tire
and Tools
{WARNING
Storing a jack, a tire, or other
equipment in the passenger
compartment of the vehicle could
cause injury. In a sudden stop or
collision, loose equipment could
strike someone. Store all these in
the proper place.
Store the spare or flat tire in one of
the ways shown below. Storage
instructions will vary depending on
the bolt that came with the vehicle
and how it attaches to the vehicle.
This vehicle will have a slide in
fastener or a screw in fastener.
Page 362 of 440
Black plate (88,1)Buick Regal Owner Manual - 2012
10-88 Vehicle Care
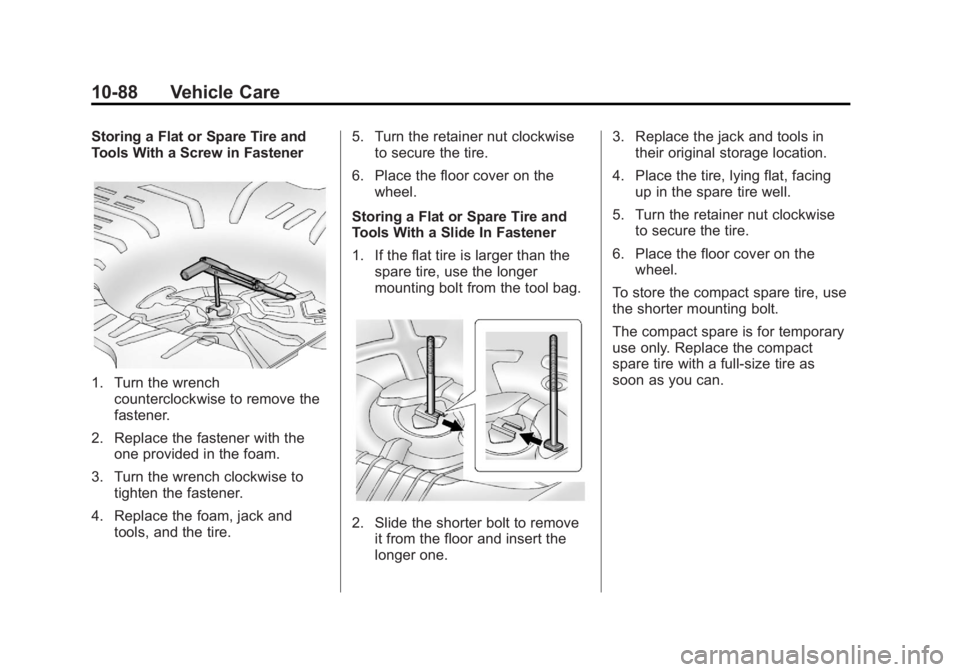
Storing a Flat or Spare Tire and
Tools With a Screw in Fastener
1. Turn the wrenchcounterclockwise to remove the
fastener.
2. Replace the fastener with the one provided in the foam.
3. Turn the wrench clockwise to tighten the fastener.
4. Replace the foam, jack and tools, and the tire. 5. Turn the retainer nut clockwise
to secure the tire.
6. Place the floor cover on the wheel.
Storing a Flat or Spare Tire and
Tools With a Slide In Fastener
1. If the flat tire is larger than the spare tire, use the longer
mounting bolt from the tool bag.
2. Slide the shorter bolt to removeit from the floor and insert the
longer one. 3. Replace the jack and tools in
their original storage location.
4. Place the tire, lying flat, facing up in the spare tire well.
5. Turn the retainer nut clockwise to secure the tire.
6. Place the floor cover on the wheel.
To store the compact spare tire, use
the shorter mounting bolt.
The compact spare is for temporary
use only. Replace the compact
spare tire with a full-size tire as
soon as you can.
Page 363 of 440
Black plate (89,1)Buick Regal Owner Manual - 2012
Vehicle Care 10-89
Compact Spare Tire
{WARNING
Driving with more than one
compact spare tire at a time could
result in loss of braking and
handling. This could lead to a
crash and you or others could be
injured. Use only one compact
spare tire at a time.
If this vehicle has a compact spare
tire, it was fully inflated when the
vehicle was new; however, it can
lose air after a time. Check the
inflation pressure regularly. It should
be 420 kPa (60 psi).
Stop as soon as possible and check
that the spare tire is correctly
inflated after installing the spare on
the vehicle. The compact spare is
designed to perform well at speeds
up to 105 km/h (65 mph) for
distances up to 5 000 km (3,000 mi), so a trip can be completed and the
full-size tire repaired or replaced
when possible. However, the
compact spare tire will last longer
and be in good shape if it is
replaced as soon as possible.
Notice:
When the compact spare
is installed, do not take the
vehicle through an automatic car
wash with guide rails. The
compact spare can get caught on
the rails which can damage the
tire, wheel, and other parts of the
vehicle.
Do not use the compact spare on
other vehicles.
Do not mix the compact spare tire or
wheel with other wheels or tires.
They will not fit. Keep the spare tire
and its wheel together.
Notice: Tire chains will not fit the
compact spare. Using them can
damage the vehicle and can
damage the chains too. Do not
use tire chains on the compact
spare.
Jump Starting
Jump Starting (On-board
with eAssist Only)
If the vehicle fails to crank, it may
be jump started by using the eAssist
battery to charge the 12-volt battery.
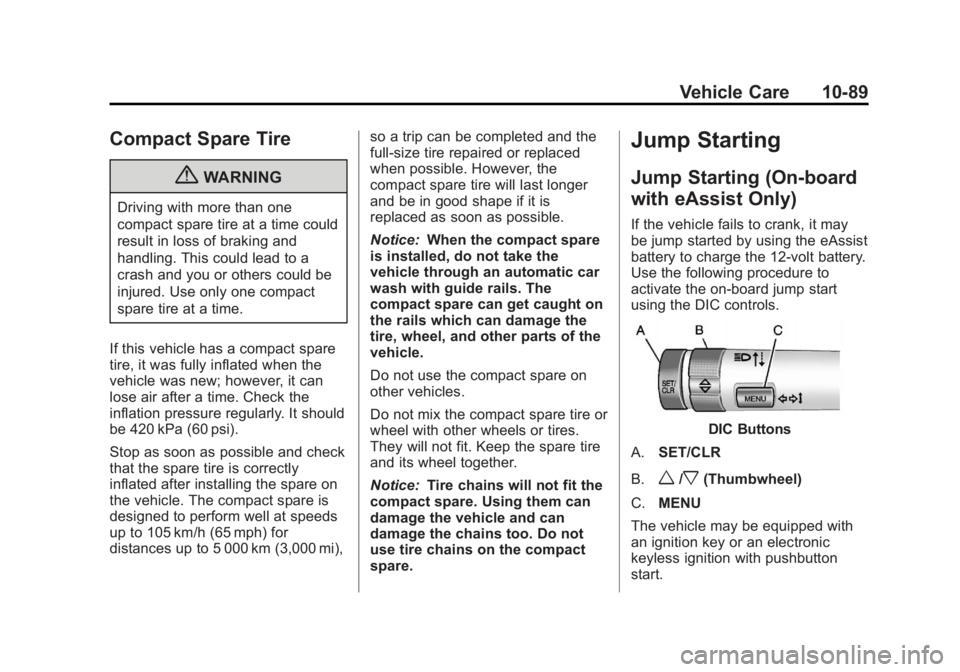
Use the following procedure to
activate the on‐board jump start
using the DIC controls.
DIC Buttons
A. SET/CLR
B.
w/x(Thumbwheel)
C. MENU
The vehicle may be equipped with
an ignition key or an electronic
keyless ignition with pushbutton
start.