controls CADILLAC CT6 2018 1.G User Guide
[x] Cancel search | Manufacturer: CADILLAC, Model Year: 2018, Model line: CT6, Model: CADILLAC CT6 2018 1.GPages: 445, PDF Size: 7.7 MB
Page 63 of 445
Cadillac CT6 Owner Manual (GMNA-Localizing-U.S./Canada-11292458) -
2018 - crc - 2/14/17
62 KEYS, DOORS, AND WINDOWS
Slide Switch
Express-Open/Express-Close :Press
the rear or front of
D(1) to the
second detent and release to
express-open or express-close the
sunroof.
Open/Close (Manual Mode) : Press
the rear of
D(1) to the first detent
and hold to open the sunroof. Press
the front of
D(1) to the first detent
and hold to close the sunroof.
Tilt Switch
Vent Feature : Press and hold the
front of
E(2) to vent the sunroof.
Press and hold the rear of
E(2) to
close the sunroof vent.
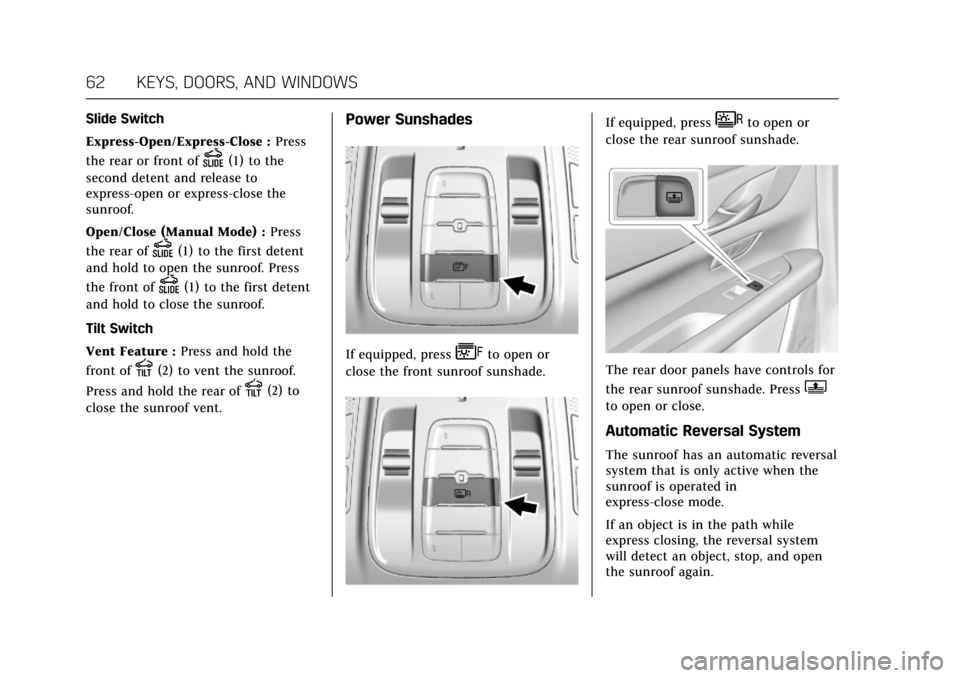
Power Sunshades
If equipped, pressFto open or
close the front sunroof sunshade.
If equipped, pressGto open or
close the rear sunroof sunshade.
The rear door panels have controls for
the rear sunroof sunshade. Press
Q
to open or close.
Automatic Reversal System
The sunroof has an automatic reversal
system that is only active when the
sunroof is operated in
express-close mode.
If an object is in the path while
express closing, the reversal system
will detect an object, stop, and open
the sunroof again.
Page 72 of 445
Cadillac CT6 Owner Manual (GMNA-Localizing-U.S./Canada-11292458) -
2018 - crc - 2/15/17
SEATS AND RESTRAINTS 71
2. Adjust all available memoryfeatures to the desired driving
position.
3. Press and release SET; a beep will sound.
4. Immediately press and hold the 1 or 2 memory button matching
the above DIC welcome message
until two beeps sound.
If too much time passes between
releasing SET and pressing 1, the
memory position will not be
saved and two beeps will not
sound. Repeat steps 3 and 4.
1 or 2 corresponds to the driver
number. See “Identifying Driver
Number” in this section.
5. Repeat Steps 1–4 for a second driver using 1 or 2.
To save positions for
Band easy exit
features, repeat Steps 1–4 using
B.
This stores the positions for getting
out of the vehicle. Manually Recalling Memory
Positions
Press and hold 1, 2, or
Bto recall
the previously stored memory
positions.
To stop manual recall movement,
release 1, 2, or
B. Recall can also be
stopped by pressing a power seat, SET,
power mirror, or power steering wheel
control. The driver or passenger side
mirror must be selected.
Auto Memory Recall
If equipped with memory seat 1, 2 or
Bbuttons on the passenger door,
those positions must be recalled
manually. They will not be linked to
an RKE transmitter.
The vehicle identifies the number of
the current driver’s RKE transmitter
(1–8). See Remote Keyless Entry (RKE)
System Operation 035. If the RKE
transmitter is 1 or 2, and Auto
Memory Recall is programmed on in
vehicle personalization, the positions
saved to the same memory button
number 1 or 2 are automatically
recalled when the ignition is turned
on, or turned from OFF to ACC/ ACCESSORY. RKE transmitters 3–8
will not provide automatic memory
recalls.
To turn Auto Memory Recall on or off,
see "Vehicle Personalization Settings"
previously in this section and
Vehicle
Personalization 0170.
The transmission must be in P (Park)
to initiate Auto Memory Recall. Auto
Memory Recall will complete if the
vehicle is shifted out of P (Park) prior
to reaching the stored memory
position.
To stop Auto Memory Recall
movement, turn the ignition off or
press any of the following memory
controls:
. Power seat
. Memory SET, 1, 2, or
B
.Power mirror, with the driver or
passenger side mirror selected
. Power steering wheel
If the stored memory seat position
does not automatically recall or recalls
to the wrong positions, the driver’s
RKE transmitter number (1 or 2) may
not match the memory button
Page 73 of 445
Cadillac CT6 Owner Manual (GMNA-Localizing-U.S./Canada-11292458) -
2018 - crc - 2/15/17
72 SEATS AND RESTRAINTS
number that positions were saved to.
Try storing the position to the other
memory button or try the other RKE
transmitter.
Easy Exit Recall
Easy Exit Recall is not linked to an
RKE transmitter. The position stored
to
Bis used for all drivers. To turn
Easy Exit Recall on or off, see "Vehicle
Personalization Settings" previously in
this section and Vehicle Personalization
0 170.
If turned on, the positions saved to
Bare automatically recalled when
one of the following occurs:
. The vehicle is turned off and the
driver door is opened within a
short time.
. The vehicle is turned off with the
driver door open.
To stop Easy Exit Recall movement,
press any of the following memory
controls:
. Power seat
. Memory SET, 1, 2, or
B
.Power mirror, with the driver or
passenger side mirror selected
. Power steering wheel
Obstructions
If something has blocked the driver
seat and/or power steering wheel
while recalling a memory position, the
recall may stop. Remove the
obstruction and try the recall again.
If the memory position still does not
recall, see your dealer for service.
Heated and Ventilated
Front Seats
{Warning
If temperature change or pain to
the skin cannot be felt, the seat
heater may cause burns. To reduce
the risk of burns, use care when
using the seat heater, especially for
long periods of time. Do not place
anything on the seat that insulates
against heat, such as a blanket,
cushion, cover, or similar item. This (Continued)
Warning (Continued)
may cause the seat heater to
overheat. An overheated seat heater
may cause a burn or may damage
the seat.
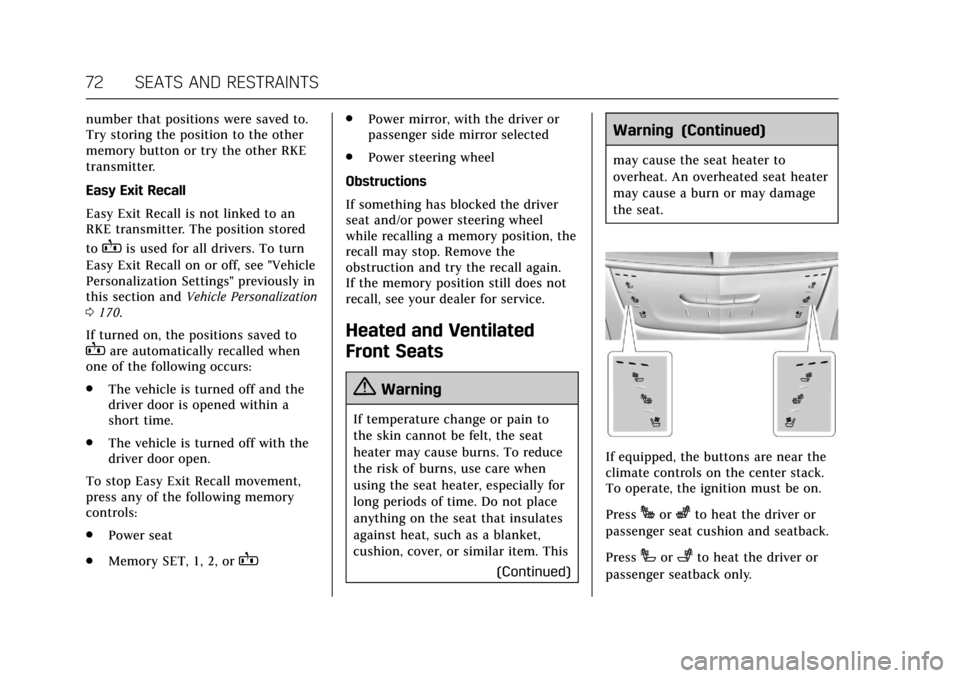
If equipped, the buttons are near the
climate controls on the center stack.
To operate, the ignition must be on.
Press
Jorzto heat the driver or
passenger seat cushion and seatback.
Press
Ior+to heat the driver or
passenger seatback only.
Page 76 of 445
Cadillac CT6 Owner Manual (GMNA-Localizing-U.S./Canada-11292458) -
2018 - crc - 2/15/17
SEATS AND RESTRAINTS 75
vehicle through the rear door and left
the vehicle without the vehicle being
shut off.
The feature can be turned on or off.
SeeVehicle Personalization 0170.
Rear Seat Adjustment
{Warning
The power seats will work with the
ignition off. Children could operate
the power seats and be injured.
Never leave children alone in the
vehicle.
Caution
Do not adjust the power seat when
a child restraint is installed.
Adjusting the seat may cause
damage to the installed child
restraint. Use the window lockout
button on the driver door to
prevent adjustment of the seat
whenever a child restraint is
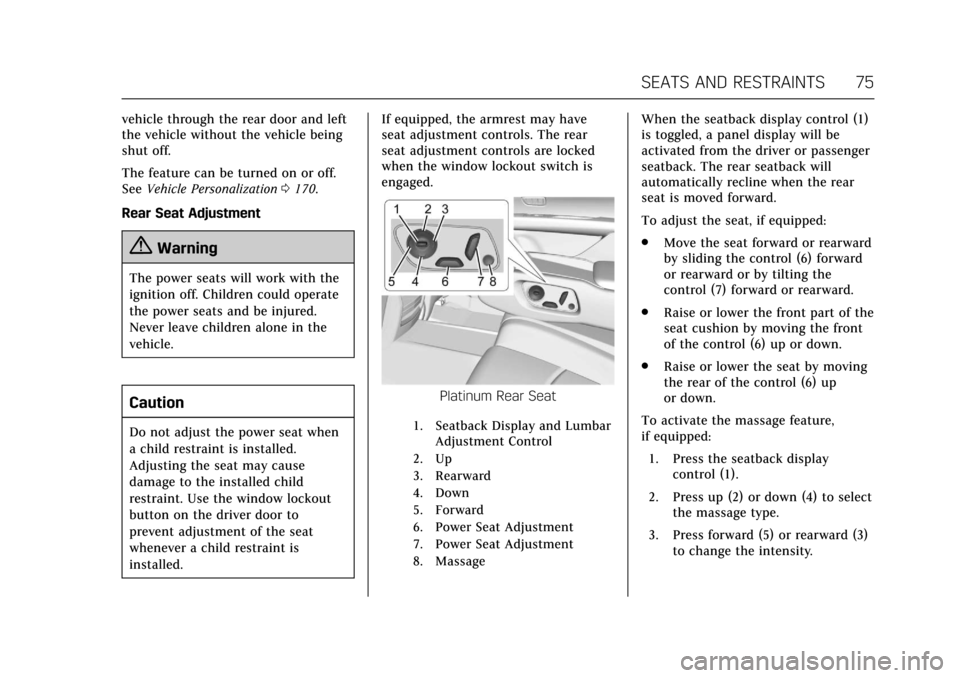
installed. If equipped, the armrest may have
seat adjustment controls. The rear
seat adjustment controls are locked
when the window lockout switch is
engaged.
Platinum Rear Seat
1. Seatback Display and Lumbar
Adjustment Control
2. Up
3. Rearward
4. Down
5. Forward
6. Power Seat Adjustment
7. Power Seat Adjustment
8. Massage
When the seatback display control (1)
is toggled, a panel display will be
activated from the driver or passenger
seatback. The rear seatback will
automatically recline when the rear
seat is moved forward.
To adjust the seat, if equipped:
. Move the seat forward or rearward
by sliding the control (6) forward
or rearward or by tilting the
control (7) forward or rearward.
. Raise or lower the front part of the
seat cushion by moving the front
of the control (6) up or down.
. Raise or lower the seat by moving
the rear of the control (6) up
or down.
To activate the massage feature,
if equipped: 1. Press the seatback display control (1).
2. Press up (2) or down (4) to select the massage type.
3. Press forward (5) or rearward (3) to change the intensity.
Page 77 of 445
Cadillac CT6 Owner Manual (GMNA-Localizing-U.S./Canada-11292458) -
2018 - crc - 2/15/17
76 SEATS AND RESTRAINTS
4. Press the massage control button(8) to recall the last massage
type and intensity.
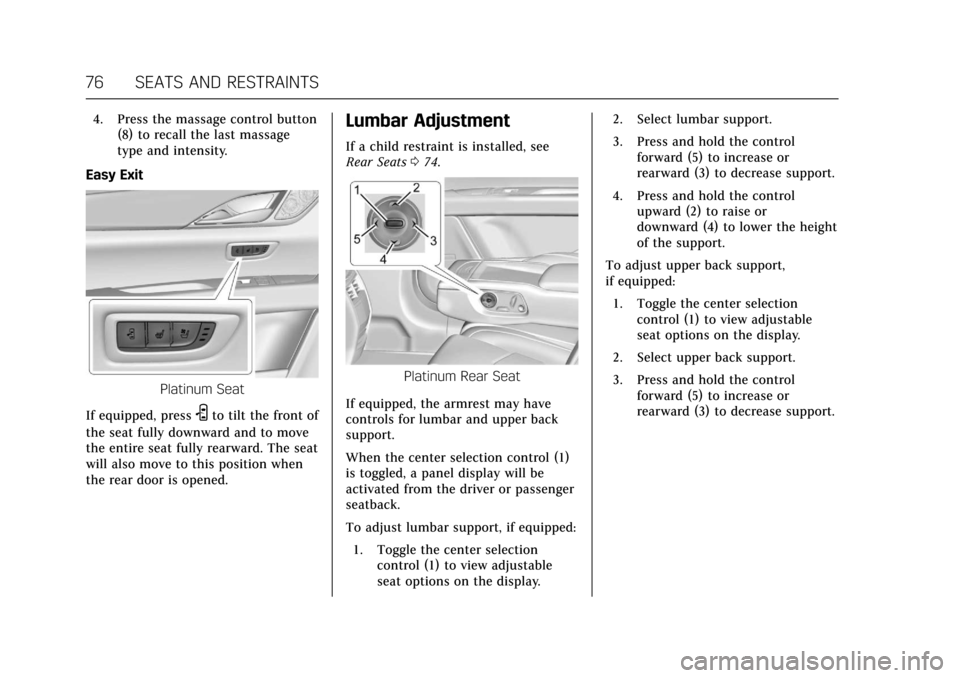
Easy Exit
Platinum Seat
If equipped, press
Sto tilt the front of
the seat fully downward and to move
the entire seat fully rearward. The seat
will also move to this position when
the rear door is opened.
Lumbar Adjustment
If a child restraint is installed, see
Rear Seats 074.
Platinum Rear Seat
If equipped, the armrest may have
controls for lumbar and upper back
support.
When the center selection control (1)
is toggled, a panel display will be
activated from the driver or passenger
seatback.
To adjust lumbar support, if equipped: 1. Toggle the center selection control (1) to view adjustable
seat options on the display. 2. Select lumbar support.
3. Press and hold the control
forward (5) to increase or
rearward (3) to decrease support.
4. Press and hold the control upward (2) to raise or
downward (4) to lower the height
of the support.
To adjust upper back support,
if equipped:
1. Toggle the center selection control (1) to view adjustable
seat options on the display.
2. Select upper back support.
3. Press and hold the control forward (5) to increase or
rearward (3) to decrease support.
Page 78 of 445
Cadillac CT6 Owner Manual (GMNA-Localizing-U.S./Canada-11292458) -
2018 - crc - 2/15/17
SEATS AND RESTRAINTS 77
Heated and Ventilated
Rear Seats
{Warning
If you cannot feel temperature
change or pain to the skin, the seat
heater may cause burns. See the
Warning underHeated and
Ventilated Front Seats 072.
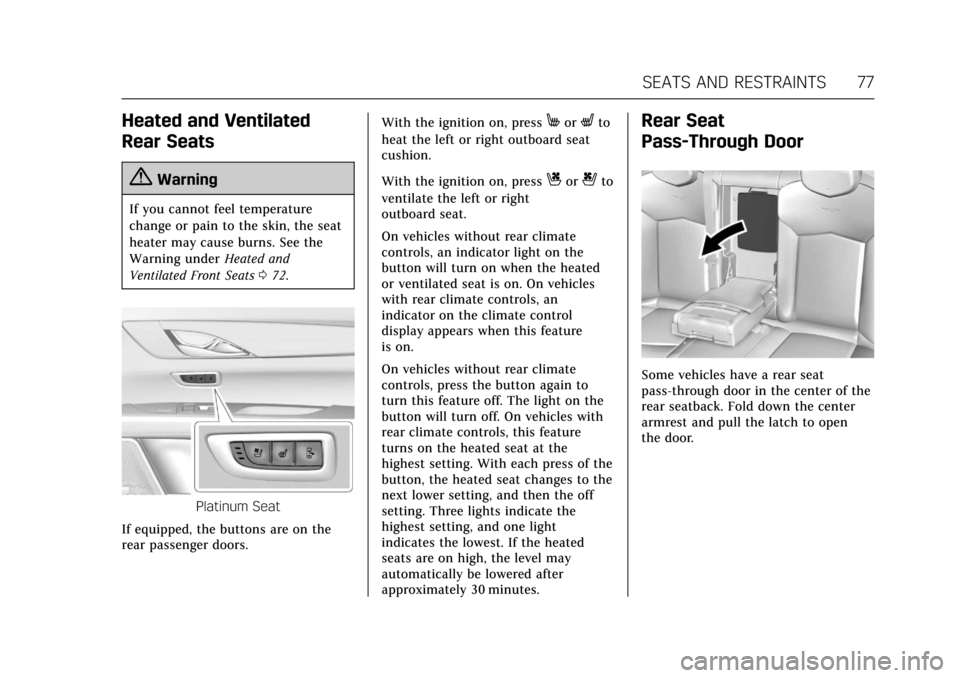
Platinum Seat
If equipped, the buttons are on the
rear passenger doors. With the ignition on, press
MorLto
heat the left or right outboard seat
cushion.
With the ignition on, press
Cor{to
ventilate the left or right
outboard seat.
On vehicles without rear climate
controls, an indicator light on the
button will turn on when the heated
or ventilated seat is on. On vehicles
with rear climate controls, an
indicator on the climate control
display appears when this feature
is on.
On vehicles without rear climate
controls, press the button again to
turn this feature off. The light on the
button will turn off. On vehicles with
rear climate controls, this feature
turns on the heated seat at the
highest setting. With each press of the
button, the heated seat changes to the
next lower setting, and then the off
setting. Three lights indicate the
highest setting, and one light
indicates the lowest. If the heated
seats are on high, the level may
automatically be lowered after
approximately 30 minutes.
Rear Seat
Pass-Through Door
Some vehicles have a rear seat
pass-through door in the center of the
rear seatback. Fold down the center
armrest and pull the latch to open
the door.
Page 91 of 445
Cadillac CT6 Owner Manual (GMNA-Localizing-U.S./Canada-11292458) -
2018 - crc - 2/21/17
90 SEATS AND RESTRAINTS
{Warning
When an airbag inflates, there may
be dust in the air. This dust could
cause breathing problems for
people with a history of asthma or
other breathing trouble. To avoid
this, everyone in the vehicle should
get out as soon as it is safe to do
so. If you have breathing problems
but cannot get out of the vehicle
after an airbag inflates, then get
fresh air by opening a window or a
door. If you experience breathing
problems following an airbag
deployment, you should seek
medical attention.
The vehicle has a feature that may
automatically unlock the doors, turn
on the interior lamps and hazard
warning flashers, and shut off the fuel
system after the airbags inflate. The
feature may also activate, without
airbag inflation, after an event that
exceeds a predetermined threshold.
You can lock the doors, turn off the interior lamps, and turn off the hazard
warning flashers by using the controls
for those features.
{Warning
A crash severe enough to inflate the
airbags may have also damaged
important functions in the vehicle,
such as the fuel system, brake and
steering systems, etc. Even if the
vehicle appears to be drivable after
a moderate crash, there may be
concealed damage that could make
it difficult to safely operate the
vehicle.
Use caution if you should attempt
to restart the engine after a crash
has occurred.
PLUG-IN vehicles have a high voltage
battery and a standard 12-volt battery.
If an airbag inflates or the vehicle has
been in a crash, the vehicle's sensing
system may shut down the high
voltage system. When this occurs, the
high voltage battery is disconnected
and the vehicle is not charging the
12-volt battery or the electrical system. The vehicle may start but it
shuts down once the 12-volt battery is
depleted. The airbag readiness light
and/or the 12-volt battery warning
light are displayed. Before the vehicle
can be operated again, it must be
serviced at your dealer.
In many crashes severe enough to
inflate the airbag, windshields are
broken by vehicle deformation.
Additional windshield breakage may
also occur from the front outboard
passenger airbag.
.
Airbags are designed to inflate
only once. After an airbag inflates,
you will need some new parts for
the airbag system. If you do not
get them, the airbag system will
not be there to help protect you in
another crash. A new system will
include airbag modules and
possibly other parts. The service
manual for the vehicle covers the
need to replace other parts.
Page 117 of 445
Cadillac CT6 Owner Manual (GMNA-Localizing-U.S./Canada-11292458) -
2018 - crc - 2/14/17
116 STORAGE
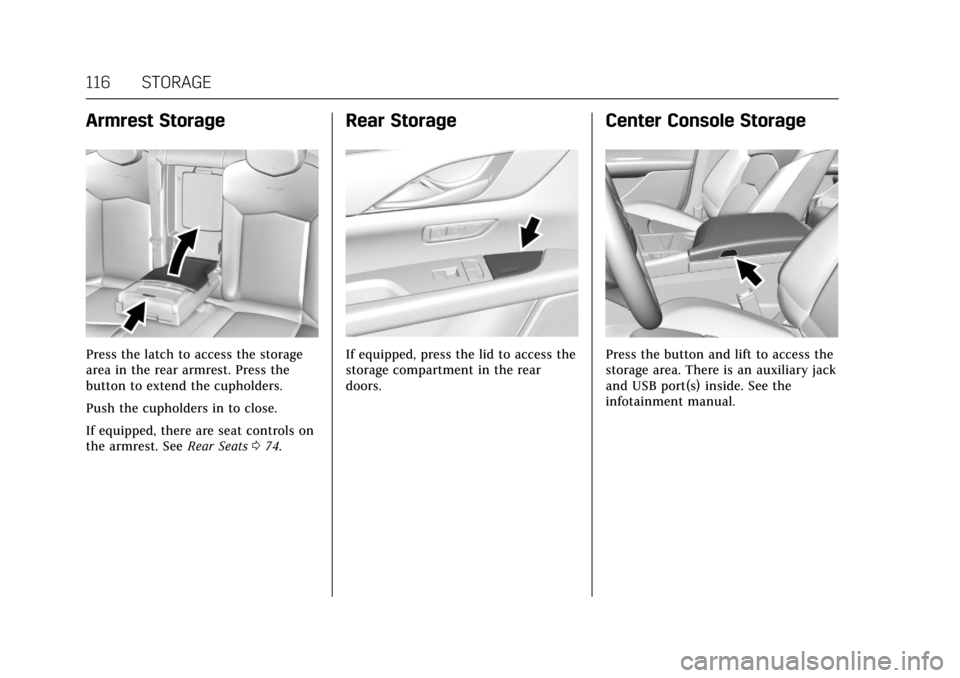
Armrest Storage
Press the latch to access the storage
area in the rear armrest. Press the
button to extend the cupholders.
Push the cupholders in to close.
If equipped, there are seat controls on
the armrest. SeeRear Seats074.
Rear Storage
If equipped, press the lid to access the
storage compartment in the rear
doors.
Center Console Storage
Press the button and lift to access the
storage area. There is an auxiliary jack
and USB port(s) inside. See the
infotainment manual.
Page 119 of 445
Cadillac CT6 Owner Manual (GMNA-Localizing-U.S./Canada-11292458) -
2018 - crc - 2/14/17
118 INSTRUMENTS AND CONTROLS
Instruments and
Controls
Controls
Steering Wheel Adjustment . . . . . 119
Steering Wheel Controls . . . . . . . . . 119
Heated Steering Wheel . . . . . . . . . . 119
Horn . . . . . . . . . . . . . . . . . . . . . . . . . . . . . . . 120
Windshield Wiper/Washer . . . . . . . 120
Compass . . . . . . . . . . . . . . . . . . . . . . . . . . 122
Clock . . . . . . . . . . . . . . . . . . . . . . . . . . . . . . 122
Power Outlets . . . . . . . . . . . . . . . . . . . . . 123
Wireless Charging . . . . . . . . . . . . . . . . 124
Cigarette Lighter . . . . . . . . . . . . . . . . . . 125
Ashtrays . . . . . . . . . . . . . . . . . . . . . . . . . . 126
Warning Lights, Gauges, and
Indicators
Warning Lights, Gauges, andIndicators . . . . . . . . . . . . . . . . . . . . . . . 126
Instrument Cluster (Base
Level) . . . . . . . . . . . . . . . . . . . . . . . . . . . . 127
Instrument Cluster (Uplevel) . . . . 130
Speedometer . . . . . . . . . . . . . . . . . . . . . . 134
Odometer . . . . . . . . . . . . . . . . . . . . . . . . . 134
Trip Odometer . . . . . . . . . . . . . . . . . . . . 134
Tachometer . . . . . . . . . . . . . . . . . . . . . . . 134
Battery Gauge (High Voltage) . . . 135
Fuel Gauge . . . . . . . . . . . . . . . . . . . . . . . . 135 Power Indicator Gauge
(PLUG-IN Only) . . . . . . . . . . . . . . . . . 136
Boost Gauge (Performance Configuration Only) . . . . . . . . . . . . 136
Engine Oil Pressure Gauge (Base
Level Cluster Only) . . . . . . . . . . . . . 137
Engine Oil Temperature Gauge (Performance
Configuration Only) . . . . . . . . . . . . 138
Engine Coolant Temperature Gauge . . . . . . . . . . . . . . . . . . . . . . . . . . . . 139
Voltmeter Gauge (Base Level Cluster Only) . . . . . . . . . . . . . . . . . . . . 140
Seat Belt Reminders . . . . . . . . . . . . . . 140
Airbag Readiness Light . . . . . . . . . . 141
Passenger Airbag Status Indicator . . . . . . . . . . . . . . . . . . . . . . . . . 141
Charging System Light . . . . . . . . . . . 142
Malfunction Indicator Lamp (Check Engine Light) . . . . . . . . . . . 143
Service Vehicle Soon Light (PLUG-IN Only) . . . . . . . . . . . . . . . . . 145
Brake System Warning Light . . . . 145
Electric Parking Brake Light . . . . . 145
Service Electric Parking Brake Light . . . . . . . . . . . . . . . . . . . . . . . . . . . . . 146
Antilock Brake System (ABS) Warning Light . . . . . . . . . . . . . . . . . . 146
Sport Mode Light . . . . . . . . . . . . . . . . . 146
Winter Driving Mode Light . . . . . . 146 Automatic Vehicle Hold (AVH)
Light . . . . . . . . . . . . . . . . . . . . . . . . . . . . . 147
Lane Keep Assist (LKA) Light . . . 147
Vehicle Ahead Indicator . . . . . . . . . 147
Pedestrian Ahead Indicator . . . . . . 147
Traction Off Light . . . . . . . . . . . . . . . . 148
StabiliTrak OFF Light . . . . . . . . . . . . 148
Traction Control System (TCS)/ StabiliTrak Light . . . . . . . . . . . . . . . . 148
Engine Coolant Temperature Warning Light . . . . . . . . . . . . . . . . . . 149
Tire Pressure Light . . . . . . . . . . . . . . . 149
Engine Oil Pressure Light . . . . . . . . 149
Low Fuel Warning Light . . . . . . . . . 150
Auto Stop Mode (Uplevel Cluster) . . . . . . . . . . . . . . . . . . . . . . . . . . 150
Security Light . . . . . . . . . . . . . . . . . . . . . 150
Vehicle Ready Light (PLUG-IN Only) . . . . . . . . . . . . . . . . . 151
High-Beam On Light . . . . . . . . . . . . . 151
Lamps On Reminder . . . . . . . . . . . . . 151
Cruise Control Light . . . . . . . . . . . . . . 151
Door Ajar Light . . . . . . . . . . . . . . . . . . . 152
Information Displays
Power Flows (PLUG-IN Only) . . . . 152
Programmable Charging (PLUG-IN Only) . . . . . . . . . . . . . . . . . 152
Energy Information (PLUG-IN Only) . . . . . . . . . . . . . . . . . 161
Page 120 of 445
Cadillac CT6 Owner Manual (GMNA-Localizing-U.S./Canada-11292458) -
2018 - crc - 2/14/17
INSTRUMENTS AND CONTROLS 119
Driver InformationCenter (DIC) . . . . . . . . . . . . . . . . . . . . . 162
Head-Up Display (HUD) . . . . . . . . . 165
Vehicle Messages
Vehicle Messages . . . . . . . . . . . . . . . . . 169
Engine Power Messages . . . . . . . . . . 169
Vehicle Speed Messages . . . . . . . . . 169
Vehicle Personalization
Vehicle Personalization . . . . . . . . . . 170
Universal Remote System
Universal Remote System . . . . . . . . 179
Universal Remote System Programming . . . . . . . . . . . . . . . . . . . 179
Universal Remote System Operation . . . . . . . . . . . . . . . . . . . . . . . . 181
Controls
Steering Wheel Adjustment
Power Tilt and Telescoping Steering
Wheel
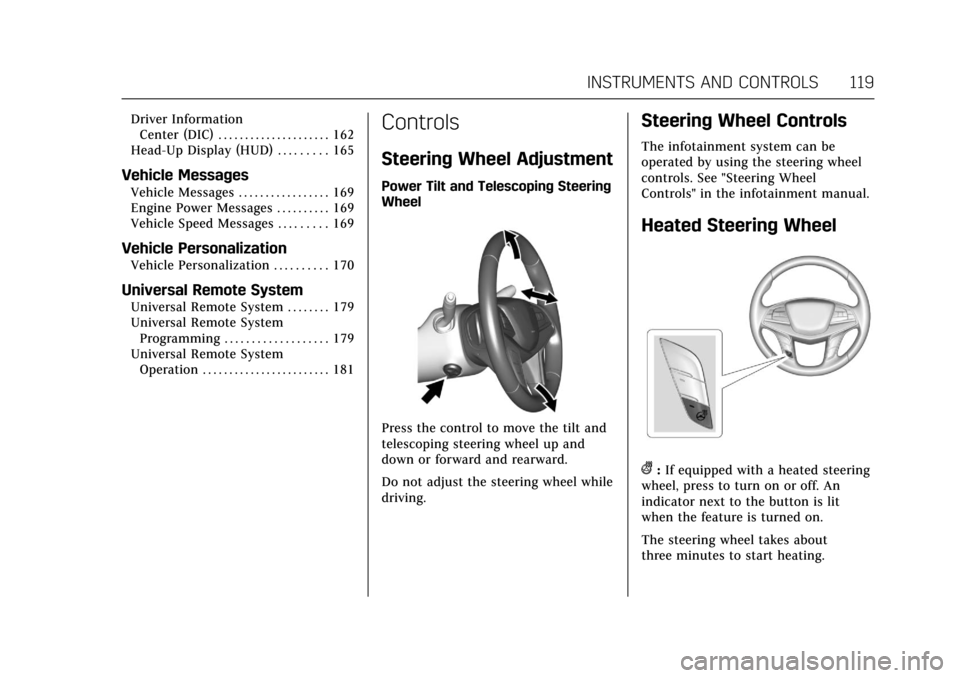
Press the control to move the tilt and
telescoping steering wheel up and
down or forward and rearward.
Do not adjust the steering wheel while
driving.
Steering Wheel Controls
The infotainment system can be
operated by using the steering wheel
controls. See "Steering Wheel
Controls" in the infotainment manual.
Heated Steering Wheel
(:If equipped with a heated steering
wheel, press to turn on or off. An
indicator next to the button is lit
when the feature is turned on.
The steering wheel takes about
three minutes to start heating.