Mode CADILLAC CT6 2018 1.G Owner's Manual
[x] Cancel search | Manufacturer: CADILLAC, Model Year: 2018, Model line: CT6, Model: CADILLAC CT6 2018 1.GPages: 445, PDF Size: 7.7 MB
Page 135 of 445
Cadillac CT6 Owner Manual (GMNA-Localizing-U.S./Canada-11292458) -
2018 - crc - 2/14/17
134 INSTRUMENTS AND CONTROLS
Speed Warning :Allows the driver to
set a speed that they do not want to
exceed. To set the Speed Warning,
press SEL when Speed Warning is
displayed. Press
yorzto adjust the
value. This feature can be turned off
by pressing and holding SEL while
viewing this page. If the selected
speed limit is exceeded, a pop-up
warning is displayed and a chime may
sound.
Head-up Display (HUD) Rotation :
This feature allows for adjusting the
angle of the HUD image. Press SEL on
the steering wheel controls while
Head-up Display Rotation is
highlighted to enter Adjust Mode.
Press
yorzto adjust the angle of
the HUD display. Press
SorTto
highlight OK, then press SEL to save
the setting. Cancel can also be
selected to cancel the setting. The
vehicle must be in P (Park).
Open Source Software : Press SEL
while Open Source Software is
highlighted to display open source
software information.
Speedometer
The speedometer shows the vehicle's
speed in either kilometers per hour
(km/h) or miles per hour (mph).
Odometer
The odometer shows how far the
vehicle has been driven, in either
kilometers or miles.
Trip Odometer
The trip odometer shows how far the
vehicle has been driven since the trip
odometer was last reset.
The trip odometer is accessed and
reset through the Driver Information
Center (DIC). See Driver Information
Center (DIC) 0162.
Tachometer
The tachometer displays the engine
speed in revolutions per minute (rpm).
On the base cluster, if the vehicle has
the Stop/Start system, when the
ignition is on, the tachometer
indicates the vehicle status. When
pointing to AUTO STOP, the engine is off but the vehicle is on and can
move. The engine could auto start at
any time. When the indicator points
to OFF, the vehicle is off.
When the engine is on, the
tachometer will indicate the engine’s
revolutions per minute (rpm). The
tachometer may vary by several
hundred rpm’s, during Auto Stop
mode, when the engine is shutting off
and restarting.
A slight bump may be felt when the
transmission is determining the most
fuel efficient operating range.
Caution
If the engine is operated with the
rpm’s in the warning area at the
high end of the tachometer, the
vehicle could be damaged, and the
damage would not be covered by
the vehicle warranty. Do not operate
the engine with the rpm’s in the
warning area.
Page 138 of 445
Cadillac CT6 Owner Manual (GMNA-Localizing-U.S./Canada-11292458) -
2018 - crc - 2/14/17
INSTRUMENTS AND CONTROLS 137
English
This gauge indicates boost under
heavier throttle.
It displays the air pressure level in the
intake manifold before it enters the
engine's combustion chamber.
The gauge is automatically centered at
zero every time the engine is started.
Actual boost is displayed from this
zero point. Changes in ambient
pressure, such as driving in mountains
and changing weather, will slightly
change the zero reading.
Engine Oil Pressure Gauge
(Base Level Cluster Only)
Metric Standard Theme
English Standard Theme
The engine oil pressure gauge shows
the engine oil pressure
in kPa (kilopascals) or psi (pounds per
square inch) when the engine is
running.
Oil pressure can vary with engine
speed, outside temperature, and oil
viscosity.
On some models, the oil pump will
vary engine oil pressure according to
engine needs. Oil pressure may change
quickly as the engine speed or load
varies. This is normal.
If the oil pressure warning light or
Driver Information Center (DIC)
message indicates oil pressure outside
Page 144 of 445
Cadillac CT6 Owner Manual (GMNA-Localizing-U.S./Canada-11292458) -
2018 - crc - 2/14/17
INSTRUMENTS AND CONTROLS 143
If a short distance must be driven
with the light on, be sure to turn off
all accessories, such as the radio and
air conditioner.
Charge Cord Connected
(PLUG-IN Only)
This light comes on when a charge
cord is connected to the vehicle.
Malfunction Indicator Lamp
(Check Engine Light)
This light is part of the vehicle’s
emission control on-board diagnostic
system. If this light is on while the
engine is running, a malfunction has
been detected and the vehicle may
require service. The light should come
on to show that it is working when
the ignition is in Service Mode. See
Ignition Positions0217.
Malfunctions are often indicated by
the system before any problem is
noticeable. Being aware of the light
and seeking service promptly when it
comes on may prevent damage.
Caution
If the vehicle is driven continually
with this light on, the emission
control system may not work as
well, the fuel economy may be
lower, and the vehicle may not run
smoothly. This could lead to costly
repairs that might not be covered
by the vehicle warranty.
Caution
Modifications to the engine,
transmission, exhaust, intake,
or fuel system, or the use of
replacement tires that do not meet
the original tire specifications, can
cause this light to come on. This
could lead to costly repairs not
covered by the vehicle warranty.
This could also affect the vehicle’s
ability to pass an Emissions
Inspection/Maintenance test. See
Accessories and Modifications 0298.
If the light is f lashing : A
malfunction has been detected that
could damage the emission control
system and increase vehicle
emissions. Diagnosis and service may
be required.
To help prevent damage, reduce
vehicle speed and avoid hard
accelerations and uphill grades.
If towing a trailer, reduce the amount
of cargo being hauled as soon as
possible.
Page 145 of 445
Cadillac CT6 Owner Manual (GMNA-Localizing-U.S./Canada-11292458) -
2018 - crc - 2/14/17
144 INSTRUMENTS AND CONTROLS
If the light continues to flash, find a
safe place to park. Turn the vehicle off
and wait at least 10 seconds before
restarting the engine. If the light is
still flashing, follow the previous
guidelines and see your dealer for
service as soon as possible.
If the light is on steady :A
malfunction has been detected.
Diagnosis and service may be
required.
Check the following:
. If fuel has been added to the
vehicle using the capless fuel
funnel adapter, make sure that it
has been removed. See “Filling the
Tank with a Portable Gas Can ”
under Filling the Tank 0288. The
diagnostic system can detect if the
adapter has been left installed in
the vehicle, allowing fuel to
evaporate into the atmosphere.
A few driving trips with the
adapter removed may turn off the
light.
. Poor fuel quality can cause
inefficient engine operation and
poor driveability, which may go
away once the engine is warmed up. If this occurs, change the fuel
brand. It may require at least one
full tank of the proper fuel to turn
the light off. See
Fuel0286.
If the light remains on, see your
dealer.
Emissions Inspection and
Maintenance Programs
If the vehicle requires an Emissions
Inspection/Maintenance test, the test
equipment will likely connect to the
vehicle's Data Link Connector (DLC).
The DLC is under the instrument
panel to the left of the steering wheel.
Connecting devices that are not used
to perform an Emissions Inspection/
Maintenance test or to service the
vehicle may affect vehicle operation.
See Add-On Electrical Equipment 0295.
See your dealer if assistance is needed. The vehicle may not pass
inspection if:
.
The light is on when the engine is
running.
. The light does not come on when
the ignition is in Service Mode.
. Critical emission control systems
have not been completely
diagnosed. If this happens, the
vehicle would not be ready for
inspection and might require
several days of routine driving
before the system is ready for
inspection. This can happen if the
12-volt battery has recently been
replaced or run down, or if the
vehicle has been recently serviced.
See your dealer if the vehicle will not
pass or cannot be made ready for
the test.
Page 147 of 445
Cadillac CT6 Owner Manual (GMNA-Localizing-U.S./Canada-11292458) -
2018 - crc - 2/14/17
146 INSTRUMENTS AND CONTROLS
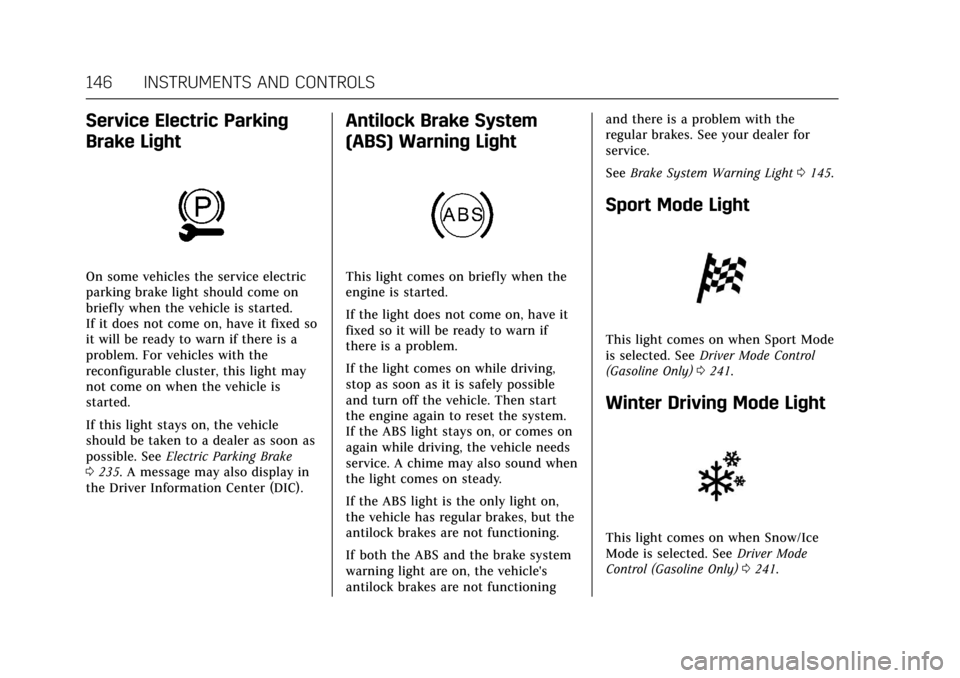
Service Electric Parking
Brake Light
On some vehicles the service electric
parking brake light should come on
briefly when the vehicle is started.
If it does not come on, have it fixed so
it will be ready to warn if there is a
problem. For vehicles with the
reconfigurable cluster, this light may
not come on when the vehicle is
started.
If this light stays on, the vehicle
should be taken to a dealer as soon as
possible. SeeElectric Parking Brake
0 235. A message may also display in
the Driver Information Center (DIC).
Antilock Brake System
(ABS) Warning Light
This light comes on briefly when the
engine is started.
If the light does not come on, have it
fixed so it will be ready to warn if
there is a problem.
If the light comes on while driving,
stop as soon as it is safely possible
and turn off the vehicle. Then start
the engine again to reset the system.
If the ABS light stays on, or comes on
again while driving, the vehicle needs
service. A chime may also sound when
the light comes on steady.
If the ABS light is the only light on,
the vehicle has regular brakes, but the
antilock brakes are not functioning.
If both the ABS and the brake system
warning light are on, the vehicle's
antilock brakes are not functioning and there is a problem with the
regular brakes. See your dealer for
service.
See
Brake System Warning Light 0145.
Sport Mode Light
This light comes on when Sport Mode
is selected. See Driver Mode Control
(Gasoline Only) 0241.
Winter Driving Mode Light
This light comes on when Snow/Ice
Mode is selected. See Driver Mode
Control (Gasoline Only) 0241.
Page 151 of 445
Cadillac CT6 Owner Manual (GMNA-Localizing-U.S./Canada-11292458) -
2018 - crc - 2/14/17
150 INSTRUMENTS AND CONTROLS
Caution (Continued)
vehicle serviced. Always follow the
maintenance schedule for changing
engine oil.
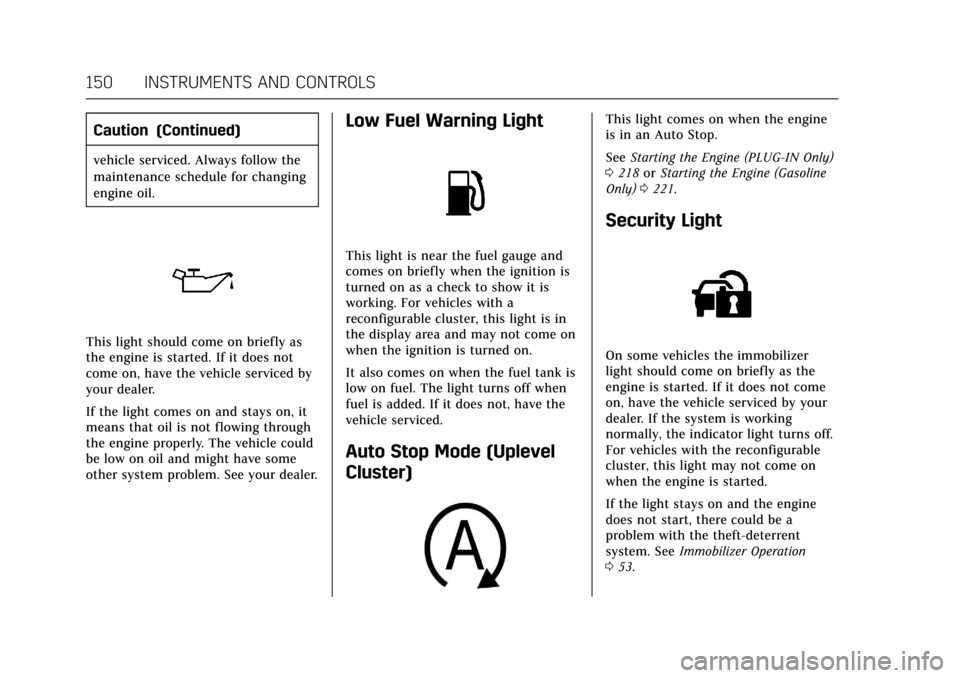
This light should come on briefly as
the engine is started. If it does not
come on, have the vehicle serviced by
your dealer.
If the light comes on and stays on, it
means that oil is not flowing through
the engine properly. The vehicle could
be low on oil and might have some
other system problem. See your dealer.
Low Fuel Warning Light
This light is near the fuel gauge and
comes on briefly when the ignition is
turned on as a check to show it is
working. For vehicles with a
reconfigurable cluster, this light is in
the display area and may not come on
when the ignition is turned on.
It also comes on when the fuel tank is
low on fuel. The light turns off when
fuel is added. If it does not, have the
vehicle serviced.
Auto Stop Mode (Uplevel
Cluster)
This light comes on when the engine
is in an Auto Stop.
SeeStarting the Engine (PLUG-IN Only)
0 218 orStarting the Engine (Gasoline
Only) 0221.
Security Light
On some vehicles the immobilizer
light should come on briefly as the
engine is started. If it does not come
on, have the vehicle serviced by your
dealer. If the system is working
normally, the indicator light turns off.
For vehicles with the reconfigurable
cluster, this light may not come on
when the engine is started.
If the light stays on and the engine
does not start, there could be a
problem with the theft-deterrent
system. See Immobilizer Operation
0 53.
Page 154 of 445

Cadillac CT6 Owner Manual (GMNA-Localizing-U.S./Canada-11292458) -
2018 - crc - 2/14/17
INSTRUMENTS AND CONTROLS 153
.Mount the charging cord to reduce
strain on the electrical outlet/plug.
{Danger
Improper use of portable electric
vehicle charge cords may cause a
fire, electrical shock, or burns, and
may result in damage to property,
serious injury, or death.
. Do not use extension cords,
multi-outlet power strips,
splitters, grounding adaptors,
surge protectors, or similar
devices.
. Do not use an electrical outlet
that is worn or damaged,
or will not hold the plug
firmly in place.
. Do not use an electrical outlet
that is not properly grounded.
. Do not use an electrical outlet
that is on a circuit with other
electrical loads.
See the charge cord user guide.
Programmable Charge Modes
This vehicle has three programmable
charge modes. To view the current
charge mode status in the
infotainment display, touch
[in
the infotainment display and then
touch CHARGING at the bottom of
the display.
The Charge Start and Charge
Complete time estimates are also
displayed on the screen. These
estimates are most accurate when the
vehicle is plugged in and in moderate
temperature conditions. Also, to get
an accurate time estimate, the vehicle
uses an internal clock for
programmable charging, not the clock
in the infotainment display.
Charge Mode Status
Immediately : The vehicle starts
charging as soon as it is connected to
an electrical outlet. See Plug-In
Charging (PLUG-IN Only) 0274.
Delay Charge Based on Departure
Time : The vehicle estimates the
charging start time considering the
programmed departure time for the
current day of the week. Charging
begins at the start time and is
complete by the departure time only if
sufficient time is allowed after the
charge cord is plugged in.
Page 155 of 445
Cadillac CT6 Owner Manual (GMNA-Localizing-U.S./Canada-11292458) -
2018 - crc - 2/14/17
154 INSTRUMENTS AND CONTROLS
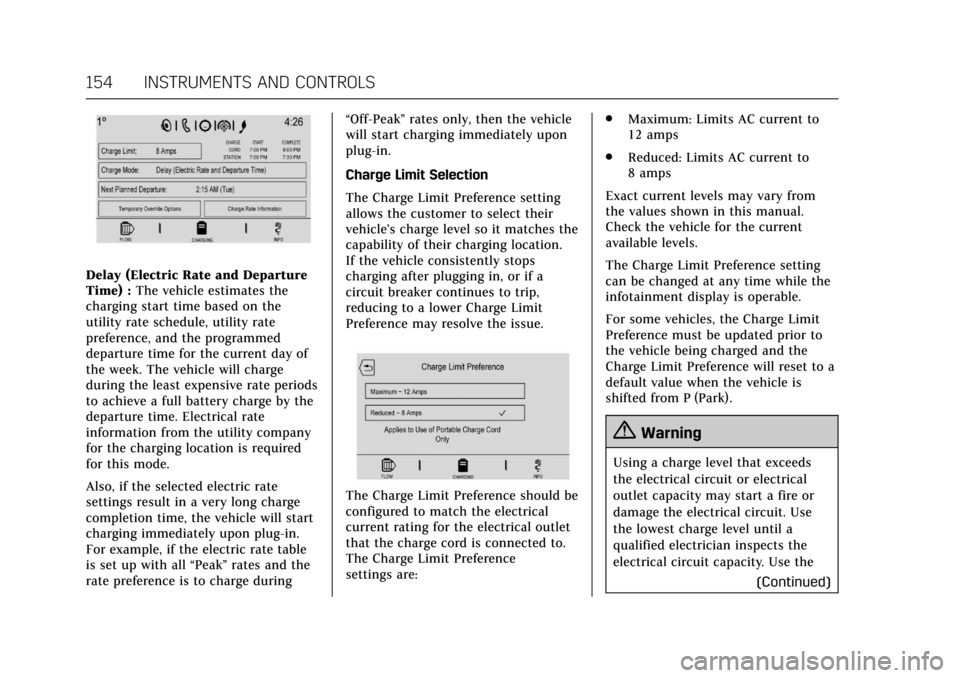
Delay (Electric Rate and Departure
Time) :The vehicle estimates the
charging start time based on the
utility rate schedule, utility rate
preference, and the programmed
departure time for the current day of
the week. The vehicle will charge
during the least expensive rate periods
to achieve a full battery charge by the
departure time. Electrical rate
information from the utility company
for the charging location is required
for this mode.
Also, if the selected electric rate
settings result in a very long charge
completion time, the vehicle will start
charging immediately upon plug-in.
For example, if the electric rate table
is set up with all “Peak”rates and the
rate preference is to charge during “Off-Peak”
rates only, then the vehicle
will start charging immediately upon
plug-in.
Charge Limit Selection
The Charge Limit Preference setting
allows the customer to select their
vehicle’s charge level so it matches the
capability of their charging location.
If the vehicle consistently stops
charging after plugging in, or if a
circuit breaker continues to trip,
reducing to a lower Charge Limit
Preference may resolve the issue.
The Charge Limit Preference should be
configured to match the electrical
current rating for the electrical outlet
that the charge cord is connected to.
The Charge Limit Preference
settings are: .
Maximum: Limits AC current to
12 amps
. Reduced: Limits AC current to
8 amps
Exact current levels may vary from
the values shown in this manual.
Check the vehicle for the current
available levels.
The Charge Limit Preference setting
can be changed at any time while the
infotainment display is operable.
For some vehicles, the Charge Limit
Preference must be updated prior to
the vehicle being charged and the
Charge Limit Preference will reset to a
default value when the vehicle is
shifted from P (Park).
{Warning
Using a charge level that exceeds
the electrical circuit or electrical
outlet capacity may start a fire or
damage the electrical circuit. Use
the lowest charge level until a
qualified electrician inspects the
electrical circuit capacity. Use the (Continued)
Page 156 of 445
Cadillac CT6 Owner Manual (GMNA-Localizing-U.S./Canada-11292458) -
2018 - crc - 2/14/17
INSTRUMENTS AND CONTROLS 155
Warning (Continued)
lowest charge level if the electrical
circuit or electrical outlet capacity
is not known.
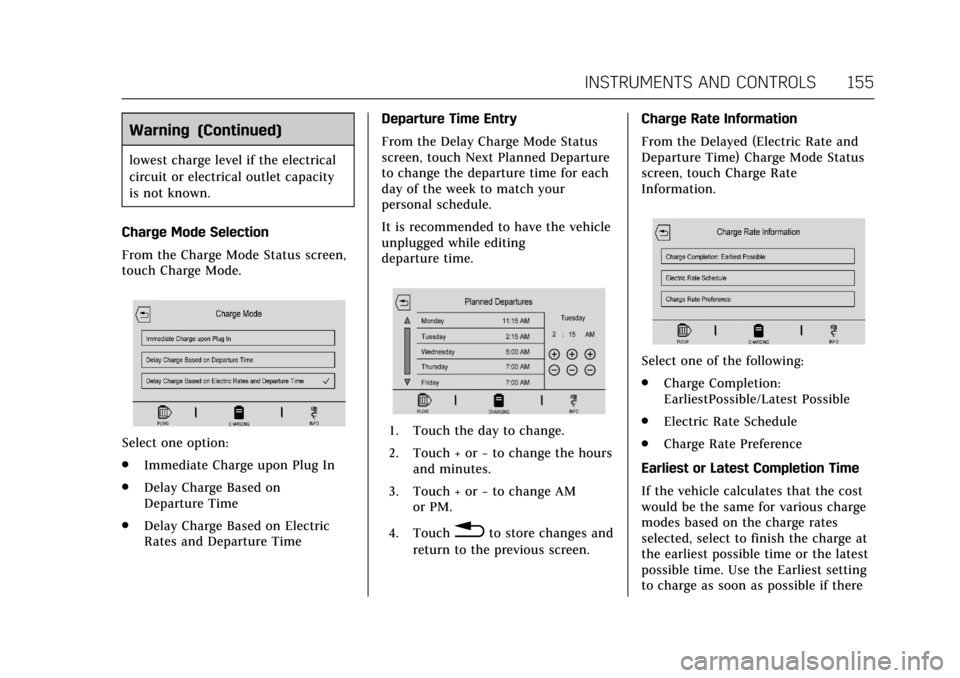
Charge Mode Selection
From the Charge Mode Status screen,
touch Charge Mode.
Select one option:
. Immediate Charge upon Plug In
. Delay Charge Based on
Departure Time
. Delay Charge Based on Electric
Rates and Departure Time Departure Time Entry
From the Delay Charge Mode Status
screen, touch Next Planned Departure
to change the departure time for each
day of the week to match your
personal schedule.
It is recommended to have the vehicle
unplugged while editing
departure time.1. Touch the day to change.
2. Touch + or
−to change the hours
and minutes.
3. Touch + or −to change AM
or PM.
4. Touch
0to store changes and
return to the previous screen. Charge Rate Information
From the Delayed (Electric Rate and
Departure Time) Charge Mode Status
screen, touch Charge Rate
Information.
Select one of the following:
.
Charge Completion:
EarliestPossible/Latest Possible
. Electric Rate Schedule
. Charge Rate Preference
Earliest or Latest Completion Time
If the vehicle calculates that the cost
would be the same for various charge
modes based on the charge rates
selected, select to finish the charge at
the earliest possible time or the latest
possible time. Use the Earliest setting
to charge as soon as possible if there
Page 159 of 445
Cadillac CT6 Owner Manual (GMNA-Localizing-U.S./Canada-11292458) -
2018 - crc - 2/14/17
158 INSTRUMENTS AND CONTROLS
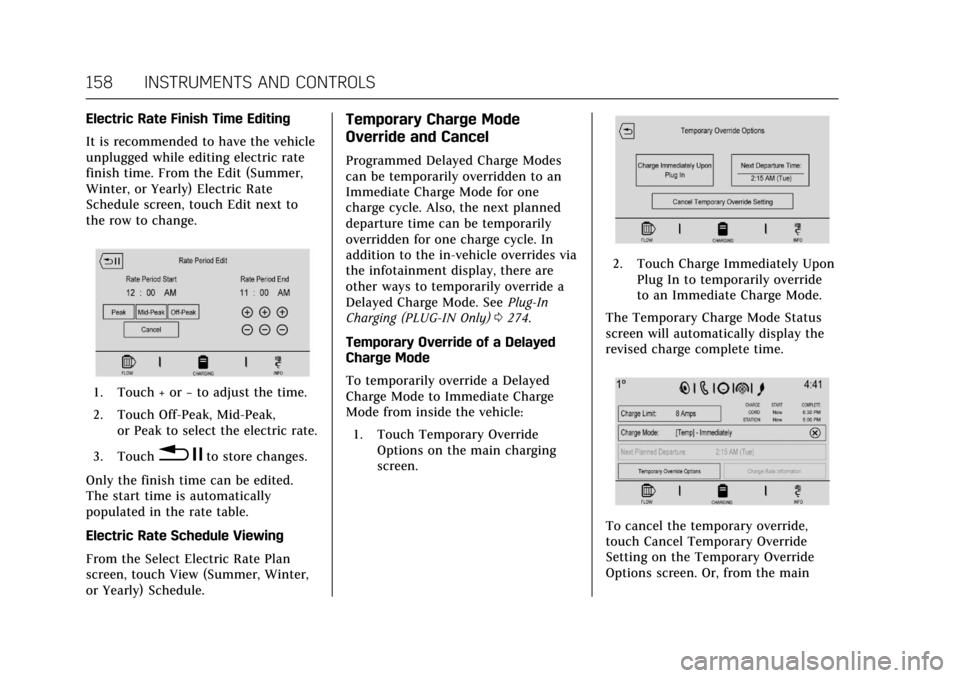
Electric Rate Finish Time Editing
It is recommended to have the vehicle
unplugged while editing electric rate
finish time. From the Edit (Summer,
Winter, or Yearly) Electric Rate
Schedule screen, touch Edit next to
the row to change.
1. Touch + or−to adjust the time.
2. Touch Off-Peak, Mid-Peak, or Peak to select the electric rate.
3. Touch
0 jto store changes.
Only the finish time can be edited.
The start time is automatically
populated in the rate table.
Electric Rate Schedule Viewing
From the Select Electric Rate Plan
screen, touch View (Summer, Winter,
or Yearly) Schedule.
Temporary Charge Mode
Override and Cancel
Programmed Delayed Charge Modes
can be temporarily overridden to an
Immediate Charge Mode for one
charge cycle. Also, the next planned
departure time can be temporarily
overridden for one charge cycle. In
addition to the in-vehicle overrides via
the infotainment display, there are
other ways to temporarily override a
Delayed Charge Mode. See Plug-In
Charging (PLUG-IN Only) 0274.
Temporary Override of a Delayed
Charge Mode
To temporarily override a Delayed
Charge Mode to Immediate Charge
Mode from inside the vehicle: 1. Touch Temporary Override Options on the main charging
screen.
2. Touch Charge Immediately UponPlug In to temporarily override
to an Immediate Charge Mode.
The Temporary Charge Mode Status
screen will automatically display the
revised charge complete time.
To cancel the temporary override,
touch Cancel Temporary Override
Setting on the Temporary Override
Options screen. Or, from the main