audio CADILLAC CTS 2011 2.G Owners Manual
[x] Cancel search | Manufacturer: CADILLAC, Model Year: 2011, Model line: CTS, Model: CADILLAC CTS 2011 2.GPages: 496, PDF Size: 7.71 MB
Page 1 of 496

Black plate (1,1)Cadillac CTS/CTS-V Owner Manual - 2011
2011 Cadillac CTS/CTS-V Owner ManualM
In Brief. . . . . . . . . . . . . . . . . . . . . . . . 1-1
Instrument Panel . . . . . . . . . . . . . . 1-2
Initial Drive Information . . . . . . . . 1-4
Vehicle Features . . . . . . . . . . . . . 1-15
Performance and Maintenance . . . . . . . . . . . . . . . . 1-21
Keys, Doors and Windows . . . 2-1
Keys and Locks . . . . . . . . . . . . . . . 2-2
Doors . . . . . . . . . . . . . . . . . . . . . . . . 2-17
Vehicle Security . . . . . . . . . . . . . . 2-23
Exterior Mirrors . . . . . . . . . . . . . . . 2-27
Interior Mirrors . . . . . . . . . . . . . . . . 2-28
Windows . . . . . . . . . . . . . . . . . . . . . 2-28
Roof . . . . . . . . . . . . . . . . . . . . . . . . . . 2-32 Seats and Restraints
. . . . . . . . . 3-1
Head Restraints . . . . . . . . . . . . . . . 3-2
Front Seats . . . . . . . . . . . . . . . . . . . . 3-3
Rear Seats . . . . . . . . . . . . . . . . . . . 3-13
Safety Belts . . . . . . . . . . . . . . . . . . 3-14
Airbag System . . . . . . . . . . . . . . . . 3-30
Child Restraints . . . . . . . . . . . . . . 3-44
Storage . . . . . . . . . . . . . . . . . . . . . . . 4-1
Storage Compartments . . . . . . . . 4-1
Additional Storage Features . . . 4-2
Roof Rack System . . . . . . . . . . . . . 4-6
Instruments and Controls . . . . 5-1
Controls . . . . . . . . . . . . . . . . . . . . . . . 5-2
Warning Lights, Gauges, and
Indicators . . . . . . . . . . . . . . . . . . . 5-10
Information Displays . . . . . . . . . . 5-27
Vehicle Messages . . . . . . . . . . . . 5-31
Vehicle Personalization . . . . . . . 5-45
Universal Remote System . . . . 5-53 Lighting
. . . . . . . . . . . . . . . . . . . . . . . 6-1
Exterior Lighting . . . . . . . . . . . . . . . 6-1
Interior Lighting . . . . . . . . . . . . . . . . 6-5
Lighting Features . . . . . . . . . . . . . . 6-6
Infotainment System . . . . . . . . . 7-1
Introduction . . . . . . . . . . . . . . . . . . . . 7-1
Radio . . . . . . . . . . . . . . . . . . . . . . . . . . 7-9
Audio Players . . . . . . . . . . . . . . . . 7-17
Phone . . . . . . . . . . . . . . . . . . . . . . . . 7-38
Climate Controls . . . . . . . . . . . . . 8-1
Climate Control Systems . . . . . . 8-1
Air Vents . . . . . . . . . . . . . . . . . . . . . . . 8-6
Maintenance . . . . . . . . . . . . . . . . . . . 8-6
Page 5 of 496
Black plate (5,1)Cadillac CTS/CTS-V Owner Manual - 2011
Introduction v
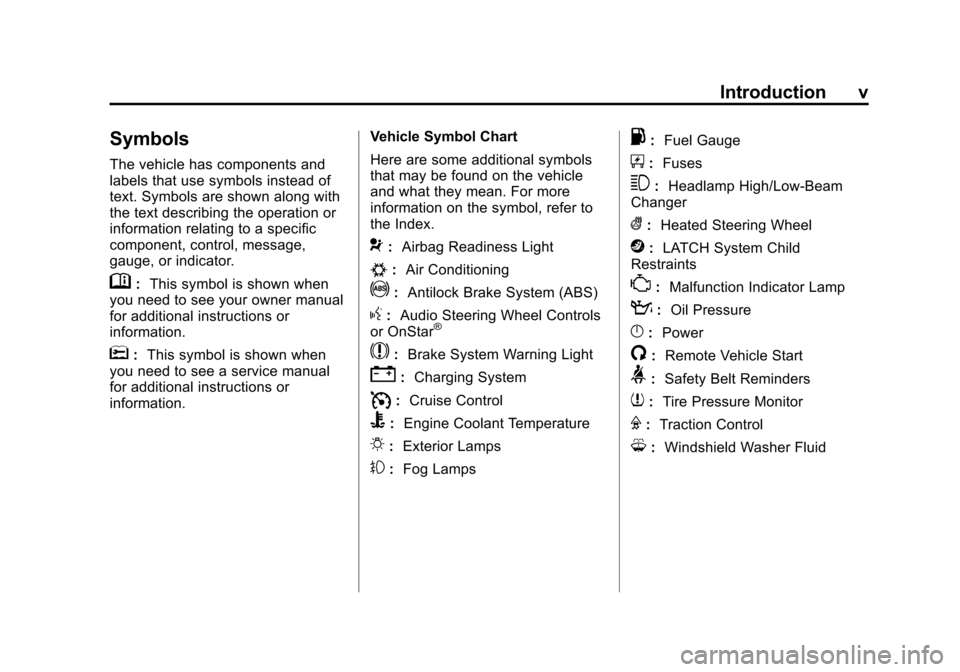
Symbols
The vehicle has components and
labels that use symbols instead of
text. Symbols are shown along with
the text describing the operation or
information relating to a specific
component, control, message,
gauge, or indicator.
M:This symbol is shown when
you need to see your owner manual
for additional instructions or
information.
*: This symbol is shown when
you need to see a service manual
for additional instructions or
information. Vehicle Symbol Chart
Here are some additional symbols
that may be found on the vehicle
and what they mean. For more
information on the symbol, refer to
the Index.
9:
Airbag Readiness Light
#:Air Conditioning
!:Antilock Brake System (ABS)
g:Audio Steering Wheel Controls
or OnStar®
$: Brake System Warning Light
":Charging System
I:Cruise Control
B: Engine Coolant Temperature
O:Exterior Lamps
#:Fog Lamps
.: Fuel Gauge
+:Fuses
3: Headlamp High/Low-Beam
Changer
(: Heated Steering Wheel
j:LATCH System Child
Restraints
*: Malfunction Indicator Lamp
::Oil Pressure
}:Power
/:Remote Vehicle Start
>:Safety Belt Reminders
7:Tire Pressure Monitor
F:Traction Control
M:Windshield Washer Fluid
Page 7 of 496
Black plate (1,1)Cadillac CTS/CTS-V Owner Manual - 2011
In Brief 1-1
In Brief
Instrument Panel
Instrument Panel . . . . . . . . . . . . . . 1-2
Initial Drive Information
Initial Drive Information . . . . . . . . 1-4
Starting the Engine . . . . . . . . . . . 1-4
Remote Keyless Entry (RKE)System . . . . . . . . . . . . . . . . . . . . . . 1-4
Remote Vehicle Start . . . . . . . . . 1-5
Door Locks . . . . . . . . . . . . . . . . . . . 1-5
Liftgate . . . . . . . . . . . . . . . . . . . . . . . . 1-6
Trunk Release . . . . . . . . . . . . . . . . 1-6
Windows . . . . . . . . . . . . . . . . . . . . . . 1-6
Seat Adjustment . . . . . . . . . . . . . . 1-7
Memory Features . . . . . . . . . . . . . 1-8
Heated and Ventilated Seats . . . . . . . . . . . . . . . . . . . . . . . . 1-9
Head Restraint Adjustment . . . . 1-9
Safety Belt . . . . . . . . . . . . . . . . . . . 1-10
Sensing System for Passenger Airbag . . . . . . . . . . 1-10
Mirror Adjustment . . . . . . . . . . . . 1-10 Steering Wheel
Adjustment . . . . . . . . . . . . . . . . . 1-11
Interior Lighting . . . . . . . . . . . . . . 1-12
Exterior Lighting . . . . . . . . . . . . . 1-12
Windshield Wiper/Washer . . . . 1-13
Climate Controls . . . . . . . . . . . . . 1-14
Transmission . . . . . . . . . . . . . . . . 1-15Vehicle Features
Radio(s) . . . . . . . . . . . . . . . . . . . . . 1-15
Satellite Radio . . . . . . . . . . . . . . . 1-16
Portable Audio Devices . . . . . . 1-16
Bluetooth
®. . . . . . . . . . . . . . . . . . . 1-16
Steering Wheel Controls (Audio) . . . . . . . . . . . . . . . . . . . . . 1-17
Navigation System . . . . . . . . . . . 1-17
Driver Information Center (DIC) . . . . . . . . . . . . . . . 1-18
Cruise Control . . . . . . . . . . . . . . . 1-18
Rear Vision Camera (RVC) . . . . . . . . . . . . . 1-19
Ultrasonic Parking Assist . . . . 1-19
Storage Compartments . . . . . . 1-19
Power Outlets . . . . . . . . . . . . . . . 1-20
Universal Remote System . . . 1-20
Sunroof . . . . . . . . . . . . . . . . . . . . . . 1-20
Performance and Maintenance
Traction Control System (TCS) . . . . . . . . . . . . . . 1-21
StabiliTrak
®. . . . . . . . . . . . . . . . . . 1-21
Tire Pressure Monitor . . . . . . . . 1-22
Tire Sealant and Compressor Kit . . . . . . . . . . . . . 1-22
Engine Oil Life System . . . . . . 1-22
Driving for Better Fuel Economy . . . . . . . . . . . . . . . . . . . 1-23
Roadside Service . . . . . . . . . . . . 1-23
OnStar
®. . . . . . . . . . . . . . . . . . . . . 1-24
Page 9 of 496

Black plate (3,1)Cadillac CTS/CTS-V Owner Manual - 2011
In Brief 1-3
A.Air Vents on page 8‑6.
B. Driver Information Center (DIC)
on page 5‑27.
C. Instrument Panel Illumination
Control on page 6‑5.
D. Turn and Lane-Change Signals
on page 6‑4.
E. Instrument Cluster
on
page 5‑11.
F. Windshield Wiper/Washer
on
page 5‑4.
Rear Window Wiper/Washer
on
page 5‑6(If Equipped).
G. Navigation Button (If Equipped). See Navigation System Manual.
H. Traction Control System (TCS)
on page 9‑37.
Magnetic Ride Control
on
page 9‑39(CTS‐V
Model Only).
I. Clock on page 5‑8.
J. Passenger Sensing System
on
page 3‑37. K.
Hazard Warning Flashers
on
page 6‑4.
L. Navigation Display Brightness Control (If Equipped). See
Navigation System Manual.
M. AM-FM Radio
on page 7‑9(Base Audio System).
Navigation/Radio System (If
Equipped). See Navigation
System Manual.
N. Parking Brake Release Lever. See Parking Brake (Manual)
on
page 9‑33or Parking Brake
(Electric) on page 9‑34.
O. Hood Release. See Hood
on
page 10‑5.
P. Cruise Control
on page 9‑40.
Heated Steering Wheel
on
page 5‑4(If Equipped).
Traction Control System (TCS)
Disable Button (CTS-V Model
Only). See Traction Control
System (TCS) on page 9‑37. Q. Tap Shift Controls (If Equipped).
See Manual Mode
on
page 9‑28.
R. Data Link Connector. See
Malfunction Indicator Lamp
on
page 5‑19.
S. Steering Wheel Adjustmenton
page 5‑2.
T. Horn on page 5‑4.
U. Steering Wheel Controls (Audio)
on page 5‑3.
V. Heated and Ventilated Front
Seats on page 3‑12.
W. Dual Automatic Climate Control
System on page 8‑1.
X. Parking Brake Button. See Parking Brake (Manual)
on
page 9‑33or Parking Brake
(Electric) on page 9‑34.
Y. Shift Lever. See Automatic
Transmission
on page 9‑26or
Manual Transmissionon
page 9‑30.
Z. Instrument Panel Storageon
page 4‑1.
Power Outlets on page 5‑9.
AA. Glove Box
on page 4‑1.
Page 22 of 496
Black plate (16,1)Cadillac CTS/CTS-V Owner Manual - 2011
1-16 In Brief
Setting the Clock
The analog clock is located on the
instrument panel above the radio.
The clock is not connected with any
other vehicle system and runs by
itself. To adjust the clock:
1. Locate the adjustment buttonsdirectly below the clock face.
2. Push and hold the right adjustment button to move the
clock hands forward, or the left
adjustment button to make the
clock hands go backward.
Holding either button down will
cause the clock to advance
faster. Release the button before
the desired time is reached.
3. Push and release either button to adjust the time by one minute
increments until the desired time
is reached.
For more information on setting the
clock, see Clock on page 5‑8.
Satellite Radio
Vehicles with an XM™ Satellite
Radio tuner and a valid XM Satellite
Radio subscription can receive XM
programming.
XM Satellite Radio Service
XM is a satellite radio service based
in the 48 contiguous United States
and 10 Canadian provinces. XM
Satellite Radio has a wide variety of
programming and commercial-free
music, coast to coast, and in
digital-quality sound. A fee is
required to receive the XM service.
For more information refer to:
.www.xmradio.com or call
1-800-929-2100 (U.S.).
.www.xmradio.ca or call
1-877-438-9677 (Canada).
For more information, see Satellite
Radio on page 7‑12.
Portable Audio Devices
This vehicle may have a 3.5 mm
(1/8 in) auxiliary input and a USB
port located in the center console.
External devices such as iPods
®,
laptop computers, MP3 players, CD
changers, and USB storage
devices. may be connected,
depending on the audio system.
For more information, see Auxiliary
Devices on page 7‑36.
Bluetooth®
The Bluetooth®system allows users
with a Bluetooth-enabled cell phone
to make and receive hands-free
calls using the vehicle’s audio
system, microphone, and controls.
The Bluetooth-enabled cell phone
must be paired with the in-vehicle
Bluetooth system before it can be
used in the vehicle. Not all phones
will support all functions.
See Bluetooth on page 7‑38.
Page 23 of 496
Black plate (17,1)Cadillac CTS/CTS-V Owner Manual - 2011
In Brief 1-17
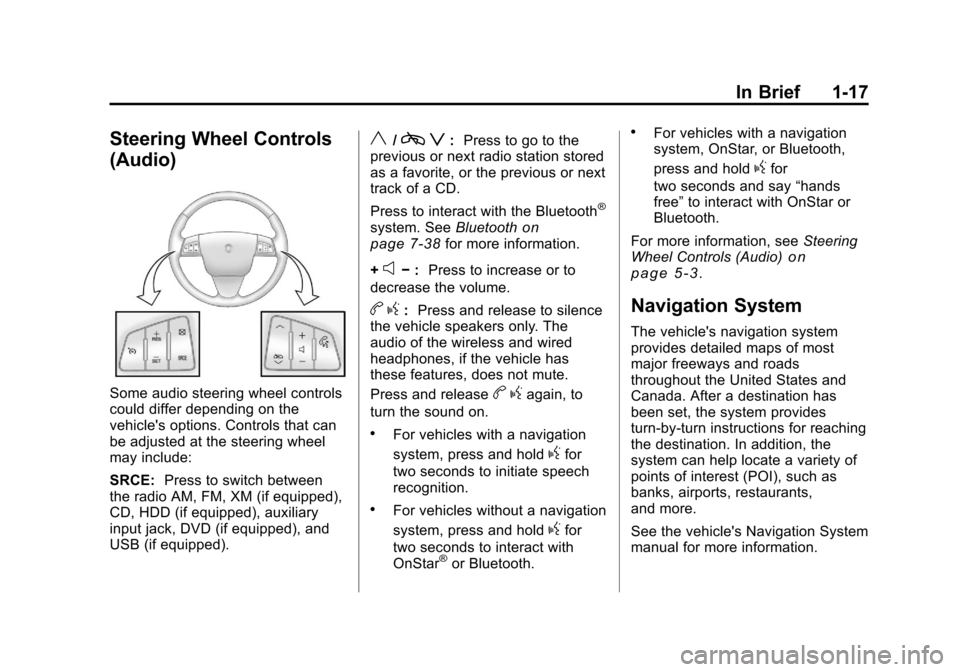
Steering Wheel Controls
(Audio)
Some audio steering wheel controls
could differ depending on the
vehicle's options. Controls that can
be adjusted at the steering wheel
may include:
SRCE:Press to switch between
the radio AM, FM, XM (if equipped),
CD, HDD (if equipped), auxiliary
input jack, DVD (if equipped), and
USB (if equipped).
y/c z:Press to go to the
previous or next radio station stored
as a favorite, or the previous or next
track of a CD.
Press to interact with the Bluetooth
®
system. See Bluetoothon
page 7‑38for more information.
+
e− : Press to increase or to
decrease the volume.
b g: Press and release to silence
the vehicle speakers only. The
audio of the wireless and wired
headphones, if the vehicle has
these features, does not mute.
Press and release
b gagain, to
turn the sound on.
.For vehicles with a navigation
system, press and hold
gfor
two seconds to initiate speech
recognition.
.For vehicles without a navigation
system, press and hold
gfor
two seconds to interact with
OnStar
®or Bluetooth.
.For vehicles with a navigation
system, OnStar, or Bluetooth,
press and hold
gfor
two seconds and say “hands
free” to interact with OnStar or
Bluetooth.
For more information, see Steering
Wheel Controls (Audio)
on
page 5‑3.
Navigation System
The vehicle's navigation system
provides detailed maps of most
major freeways and roads
throughout the United States and
Canada. After a destination has
been set, the system provides
turn-by-turn instructions for reaching
the destination. In addition, the
system can help locate a variety of
points of interest (POI), such as
banks, airports, restaurants,
and more.
See the vehicle's Navigation System
manual for more information.
Page 31 of 496
Black plate (25,1)Cadillac CTS/CTS-V Owner Manual - 2011
In Brief 1-25
service. Service involving location
information about your vehicle can’t
work unless GPS signals are
available, unobstructed, and
compatible with the OnStar
hardware. The vehicle has to have a
working electrical system and
adequate battery power for the
OnStar equipment to operate.
OnStar service may not work if the
OnStar Equipment isn’t properly
installed or you haven’t maintained
it and your vehicle is in good
working order and in compliance
with all government regulations.
If you try to add, connect or modify
any equipment or software in your
vehicle, OnStar service may not
work. Other problems OnStar can’t
control may prevent service to you,
such as hills, tall buildings, tunnels,
weather, electrical system design
and architecture of your vehicle,
damage to important parts of your
vehicle in a crash, or wireless phone
network congestion or jamming.See Radio Frequency Statement for
Information regarding Part 15 of the
Federal Communication
Commission (FCC) rules and
Industry Canada Standards RS-210/
220/310.
OnStar Steering Wheel
Controls
This vehicle may have a Talk/Mute
button that can be used to interact
with OnStar Hands-Free calling.
See
Steering Wheel Controls
(Audio)
on page 5‑3for more
information.
On some vehicles, the mute button
can be used to dial numbers into
voice mail systems, or to dial phone
extensions. See the OnStar Owner's
Guide for more information.
Your Responsibility
Increase the volume of the radio if
the OnStar advisor cannot be heard.
If the light next to the OnStar
buttons is red, the system may not
be functioning properly. Press
Q
and request a vehicle diagnostic.
If the light appears clear (no light is
appearing), your OnStar
subscription has expired and all
services have been deactivated.
Press
Qto confirm that the OnStar
equipment is active.
Page 141 of 496
Black plate (1,1)Cadillac CTS/CTS-V Owner Manual - 2011
Instruments and Controls 5-1
Instruments and
Controls
Controls
Steering Wheel Adjustment . . . 5-2
Steering Wheel Controls(Audio) . . . . . . . . . . . . . . . . . . . . . . 5-3
Heated Steering Wheel . . . . . . . 5-4
Horn . . . . . . . . . . . . . . . . . . . . . . . . . . 5-4
Windshield Wiper/Washer . . . . . 5-4
Rear Window Wiper/ Washer . . . . . . . . . . . . . . . . . . . . . . 5-6
Headlamp Washer . . . . . . . . . . . . 5-7
Compass . . . . . . . . . . . . . . . . . . . . . 5-7
Clock . . . . . . . . . . . . . . . . . . . . . . . . . 5-8
Power Outlets . . . . . . . . . . . . . . . . . 5-9
Cigarette Lighter . . . . . . . . . . . . . . 5-9
Ashtrays . . . . . . . . . . . . . . . . . . . . . 5-10
Warning Lights, Gauges, and
Indicators
Warning Lights, Gauges, and Indicators . . . . . . . . . . . . . . . . . . 5-10
Instrument Cluster . . . . . . . . . . . 5-11
Speedometer . . . . . . . . . . . . . . . . 5-13
Odometer . . . . . . . . . . . . . . . . . . . . 5-13
Trip Odometer . . . . . . . . . . . . . . . 5-13 Tachometer . . . . . . . . . . . . . . . . . . 5-13
Fuel Gauge . . . . . . . . . . . . . . . . . . 5-13
Boost Gauge . . . . . . . . . . . . . . . . 5-14
Engine Speed Limiter . . . . . . . . 5-15
Engine Oil Pressure
Gauge . . . . . . . . . . . . . . . . . . . . . . 5-15
Engine Coolant Temperature Gauge . . . . . . . . . . . . . . . . . . . . . . 5-16
Safety Belt Reminders . . . . . . . 5-17
Airbag Readiness Light . . . . . . 5-17
Passenger Airbag Status Indicator . . . . . . . . . . . . . . . . . . . . 5-18
Charging System Light . . . . . . 5-19
Malfunction Indicator Lamp . . . . . . . . . . . . . 5-19
Brake System Warning Light . . . . . . . . . . . . . . . . . . . . . . . 5-22
Antilock Brake System (ABS) Warning Light . . . . . . . . . . . . . . 5-23
Up-Shift Light . . . . . . . . . . . . . . . . 5-24
Traction Control System (TCS)/StabiliTrak
®Light . . . . 5-24
Engine Coolant Temperature Warning Light . . . . . . . . . . . . . . 5-25
Tire Pressure Light . . . . . . . . . . 5-25
Engine Oil Pressure Light . . . . 5-26
Security Light . . . . . . . . . . . . . . . . 5-26
High-Beam on Light . . . . . . . . . 5-26 Fog Lamp Light . . . . . . . . . . . . . . 5-27
Lamps on Reminder . . . . . . . . . 5-27
Cruise Control Light . . . . . . . . . 5-27
Information Displays
Driver Information
Center (DIC) . . . . . . . . . . . . . . . 5-27
Vehicle Messages
Vehicle Messages . . . . . . . . . . . 5-31
Battery Voltage and ChargingMessages . . . . . . . . . . . . . . . . . . 5-31
Brake System Messages . . . . 5-32
Compass Messages . . . . . . . . . 5-34
Cruise Control Messages . . . . 5-34
Door Ajar Messages . . . . . . . . . 5-34
Engine Cooling System Messages . . . . . . . . . . . . . . . . . . 5-35
Engine Oil Messages . . . . . . . . 5-35
Engine Power Messages . . . . 5-36
Fuel System Messages . . . . . . 5-36
Key and Lock Messages . . . . . 5-36
Lamp Messages . . . . . . . . . . . . . 5-39
Object Detection System Messages . . . . . . . . . . . . . . . . . . 5-39
Ride Control System Messages . . . . . . . . . . . . . . . . . . 5-40
Airbag System Messages . . . . 5-42
Page 143 of 496
Black plate (3,1)Cadillac CTS/CTS-V Owner Manual - 2011
Instruments and Controls 5-3
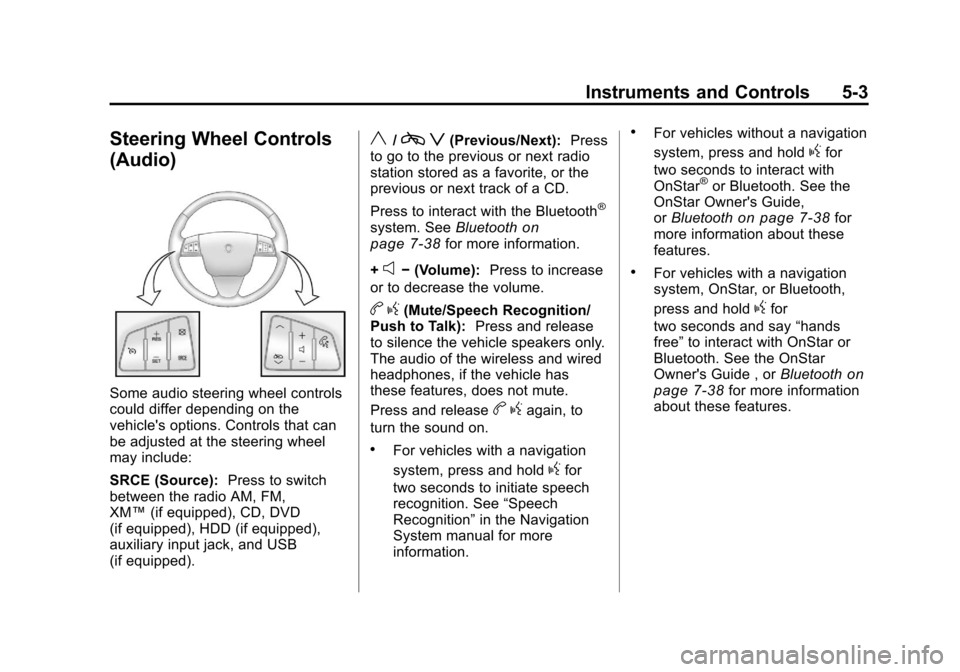
Steering Wheel Controls
(Audio)
Some audio steering wheel controls
could differ depending on the
vehicle's options. Controls that can
be adjusted at the steering wheel
may include:
SRCE (Source):Press to switch
between the radio AM, FM,
XM™ (if equipped), CD, DVD
(if equipped), HDD (if equipped),
auxiliary input jack, and USB
(if equipped).
y/c z(Previous/Next): Press
to go to the previous or next radio
station stored as a favorite, or the
previous or next track of a CD.
Press to interact with the Bluetooth
®
system. See Bluetoothon
page 7‑38for more information.
+
e− (Volume): Press to increase
or to decrease the volume.
b g(Mute/Speech Recognition/
Push to Talk): Press and release
to silence the vehicle speakers only.
The audio of the wireless and wired
headphones, if the vehicle has
these features, does not mute.
Press and release
b gagain, to
turn the sound on.
.For vehicles with a navigation
system, press and hold
gfor
two seconds to initiate speech
recognition. See “Speech
Recognition” in the Navigation
System manual for more
information.
.For vehicles without a navigation
system, press and hold
gfor
two seconds to interact with
OnStar
®or Bluetooth. See the
OnStar Owner's Guide,
or Bluetooth
on page 7‑38for
more information about these
features.
.For vehicles with a navigation
system, OnStar, or Bluetooth,
press and hold
gfor
two seconds and say “hands
free” to interact with OnStar or
Bluetooth. See the OnStar
Owner's Guide , or Bluetooth
on
page 7‑38for more information
about these features.
Page 202 of 496
Black plate (4,1)Cadillac CTS/CTS-V Owner Manual - 2011
6-4 Lighting
Adaptive Forward
Lighting (AFL)
The Adaptive Forward Lighting
System (AFL) pivots the headlamps
horizontally to provide greater road
illumination while turning. To enable
AFL, set the exterior lamp switch on
the multifunction lever to the AUTO
position. Moving the switch out of
the AUTO position will deactivate
the system. AFL will operate when
the vehicle speed is greater than
3 km/h (2 mph). AFL will not operate
when the transmission is in
R (Reverse). AFL is not immediately
operable after starting the vehicle;
driving a short distance is required
to calibrate the AFL. SeeExterior
Lamp Controls on page 6‑1.
Hazard Warning Flashers
|
Hazard Warning Flasher:
Press this button located on the
instrument panel near the audio
system, to make the front and rear
turn signal lamps flash on and off.
This warns others that you are
having trouble. Press again to turn
the flashers off.
Turn and Lane-Change
Signals
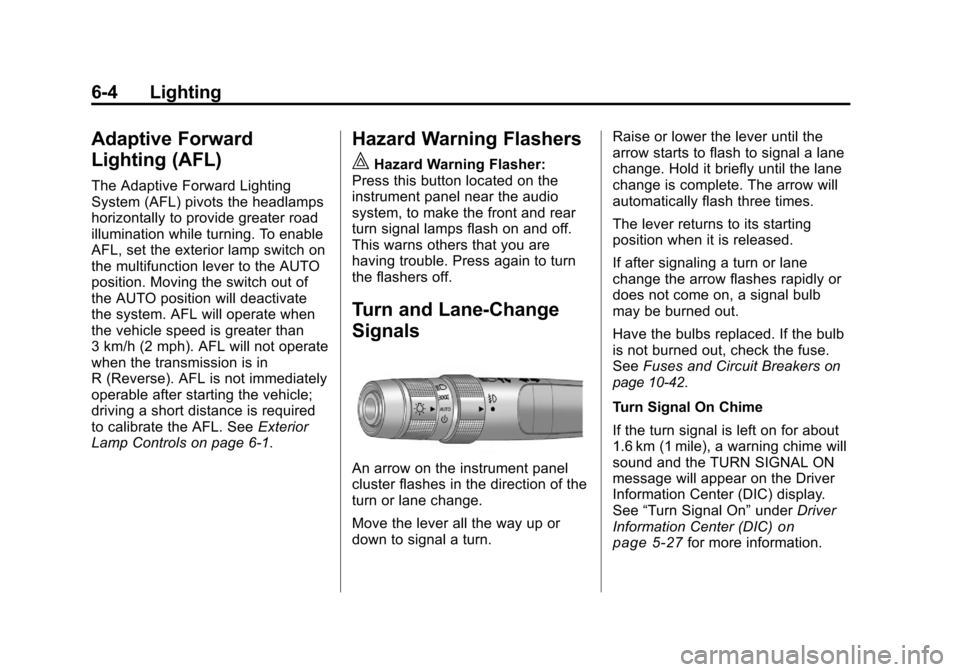
An arrow on the instrument panel
cluster flashes in the direction of the
turn or lane change.
Move the lever all the way up or
down to signal a turn. Raise or lower the lever until the
arrow starts to flash to signal a lane
change. Hold it briefly until the lane
change is complete. The arrow will
automatically flash three times.
The lever returns to its starting
position when it is released.
If after signaling a turn or lane
change the arrow flashes rapidly or
does not come on, a signal bulb
may be burned out.
Have the bulbs replaced. If the bulb
is not burned out, check the fuse.
See
Fuses and Circuit Breakers
on
page 10‑42.
Turn Signal On Chime
If the turn signal is left on for about
1.6 km (1 mile), a warning chime will
sound and the TURN SIGNAL ON
message will appear on the Driver
Information Center (DIC) display.
See “Turn Signal On” underDriver
Information Center (DIC)
on
page 5‑27for more information.