instrument cluster CADILLAC CTS V 2005 1.G Owners Manual
[x] Cancel search | Manufacturer: CADILLAC, Model Year: 2005, Model line: CTS V, Model: CADILLAC CTS V 2005 1.GPages: 432, PDF Size: 2.52 MB
Page 69 of 432

If a person of adult-size is sitting in the right front
passenger’s seat, but the off indicator is lit, it could be
because that person is not sitting properly in the seat. If
this happens, turn the vehicle off and ask the person to
place the seatback in the fully upright position, then sit
upright in the seat, centered on the seat cushion, with the
person’s legs comfortably extended. Restart the vehicle
and have the person remain in this position for about two
minutes. This will allow the system to detect that person
and then enable the passenger’s airbag.
{CAUTION:
If the airbag readiness light in the instrument
panel cluster ever comes on and stays on, it
means that something may be wrong with the
airbag system. If this ever happens, have the
vehicle serviced promptly, because an
adult-size person sitting in the right front
passenger’s seat may not have the protection
of the frontal airbag. SeeAirbag Readiness
Light on page 3-38for more on this, including
important safety information.
A thick layer of additional material such as a blanket, or
aftermarket equipment such as seat covers, seat
heaters and seat massagers can affect how well the
passenger sensing system operates. Remove any
additional material from the seat cushion before
reinstalling or securing the child restraint or small
occupant. You may want to consider not using seat
covers or other aftermarket equipment if your vehicle
has the passenger sensing system. SeeAdding
Equipment to Your Airbag-Equipped Vehicle on
page 1-64for more information about modications that
can affect how the system operates.
1-63
Page 90 of 432
Theft-Deterrent Systems
Vehicle theft is big business, especially in some cities.
Although your vehicle has a number of theft-deterrent
features, we know that nothing we put on it can make it
impossible to steal.
Theft-Deterrent System
If your vehicle has this
feature, the security light is
located on the instrument
panel cluster.
If the ignition is off and a door is open, the security light
will ash, reminding you to arm the theft-deterrent
system.
To arm the system, do the following:
1. Lock the door using the remote keyless entry
transmitter or the power door lock switch.
2. Close all the doors. The security light will illuminate.
It should go off within approximately 30 seconds.
Your security system is now armed.If a door or a trunk is opened without a key or a remote
keyless entry transmitter, the horn will sound and the
lamps will ash for up to 30 seconds.
The theft-deterrent system won’t arm if you lock
the doors with a key or use the manual door lock.
It activates only if you use the remote keyless entry
transmitter or the power lock on the door.
To avoid activating the alarm by accident do the
following:The vehicle should be locked with the door key or
the manual door lock after the doors are closed if
you don’t want to arm the theft-deterrent system.
Always unlock a door with a key or use the remote
keyless entry transmitter. Pressing the unlock
button on the remote keyless entry transmitter
disables the theft-deterrent system. Unlocking a
door any other way will activate the alarm when a
door or the trunk is opened.
If you activate the alarm by accident, unlock the driver’s
door with your key. You can also turn off the alarm by
using the unlock button on the remote keyless entry
transmitter, or by starting the vehicle with a valid key.
2-18
Page 101 of 432
Sport Mode Button
(Automatic Transmission)
This button allows you to change the driving mode of
the vehicle from the normal driving mode to a sportier
driving mode. In sport mode the vehicle will have rmer
shifting and increased performance.
The sport mode button is
located on the center
console near the
transmission shift lever.
Press the button once to turn on the sport mode. Press
the button again to return to normal driving mode.This light located on the
instrument panel cluster
will come on while
the sport mode is active.
When driving in sport mode, the transmission may
remain in a gear longer than it would in normal driving
mode. Also, if the transmission is in AUTOMATIC
OVERDRIVE (D) when the sport mode button is
pressed, the transmission will immediately downshift
into FOURTH (4) gear to provide more power. Both of
these situations are normal and do not indicate a
transmission problem.
When you turn off the ignition while driving in sport mode,
the vehicle will remain in sport mode. If your vehicle is
equipped with the memory feature, the transmission
mode (sport or normal) will be saved with the memory
seat position. Press the sport mode button again to turn
off the feature and return to normal driving mode.
2-29
Page 102 of 432

Winter Driving Mode Button
(Automatic Transmission)
This feature provides more traction during slippery
conditions by using THIRD (3) gear when you begin to
accelerate from a stopped position.
The winter driving mode
button is located on the
center console near
the transmission shift lever.
Press this button once to turn on the winter driving
mode feature. Press it again to turn the feature off. The
winter driving mode feature works when the vehicle
is in any gear except SECOND (2).This light on the instrument
panel cluster will come on
when the winter driving
mode is active.
When you turn off the ignition while using this feature,
winter mode is automatically turned off. The vehicle
will return to normal driving mode. You must select the
winter driving mode feature each time you restart
the vehicle if you wish to use the feature.
The transmission will be in THIRD (3) gear when the
vehicle begins to move. Once the vehicle is moving, the
vehicle will upshift normally.
The transmission will downshift when the accelerator
pedal is pressed and held for more than two seconds,
and the vehicle will accelerate more slowly than
normal while using the winter driving mode.
This feature is not intended for continuous use or for
use when the vehicle is stuck in sand, mud, ice, snow or
gravel. If your vehicle becomes stuck, seeRocking
Your Vehicle to Get It Out on page 4-33for more
information on how to free it.
2-30
Page 105 of 432
Parking Brake
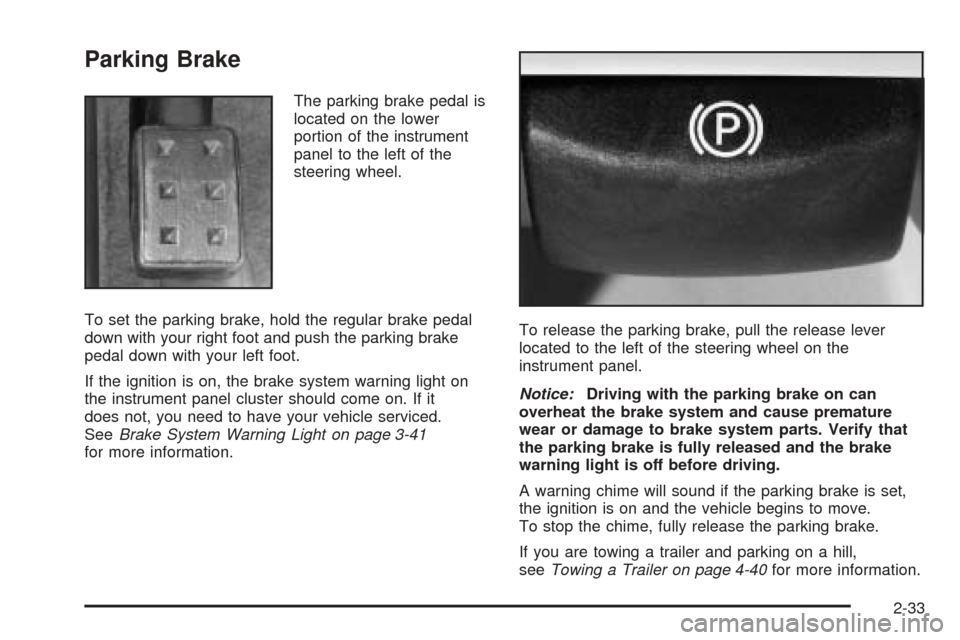
The parking brake pedal is
located on the lower
portion of the instrument
panel to the left of the
steering wheel.
To set the parking brake, hold the regular brake pedal
down with your right foot and push the parking brake
pedal down with your left foot.
If the ignition is on, the brake system warning light on
the instrument panel cluster should come on. If it
does not, you need to have your vehicle serviced.
SeeBrake System Warning Light on page 3-41
for more information.To release the parking brake, pull the release lever
located to the left of the steering wheel on the
instrument panel.
Notice:Driving with the parking brake on can
overheat the brake system and cause premature
wear or damage to brake system parts. Verify that
the parking brake is fully released and the brake
warning light is off before driving.
A warning chime will sound if the parking brake is set,
the ignition is on and the vehicle begins to move.
To stop the chime, fully release the parking brake.
If you are towing a trailer and parking on a hill,
seeTowing a Trailer on page 4-40for more information.
2-33
Page 127 of 432
Instrument Panel Overview...............................3-4
Hazard Warning Flashers................................3-6
Other Warning Devices...................................3-6
Horn.............................................................3-6
Tilt Wheel.....................................................3-6
Recongurable Steering Wheel
Controls (SWC) (CTS).................................3-7
Turn Signal/Multifunction Lever.........................3-8
Turn and Lane-Change Signals........................3-9
Headlamp High/Low-Beam Changer..................3-9
Flash-to-Pass...............................................3-10
Windshield Wipers........................................3-10
Windshield Washer.......................................3-11
Headlamp Washer........................................3-12
Cruise Control (CTS).....................................3-12
Cruise Control (CTS-V)..................................3-16
Headlamps..................................................3-19
Wiper Activated Headlamps............................3-20
Headlamps on Reminder................................3-21
Daytime Running Lamps (DRL).......................3-21
Fog Lamps..................................................3-23
Exterior Lighting Battery Saver........................3-23
Instrument Panel Brightness...........................3-24
Entry Lighting...............................................3-24
Parade Dimming...........................................3-24
Reading Lamps............................................3-25Accessory Power Outlets...............................3-25
Ashtrays and Cigarette Lighter........................3-26
Climate Controls............................................3-27
Dual Climate Control System..........................3-27
Outlet Adjustment.........................................3-31
Passenger Compartment Air Filter...................3-32
Steering Wheel Climate Controls (CTS)............3-33
Warning Lights, Gages, and Indicators............3-34
Instrument Panel Cluster................................3-35
Speedometer and Odometer...........................3-37
Trip Odometers............................................3-37
Tachometer.................................................3-37
Engine Speed Limiter....................................3-38
Safety Belt Reminder Light.............................3-38
Airbag Readiness Light..................................3-38
Passenger Airbag Status Indicator...................3-39
Charging System Light..................................3-41
Brake System Warning Light..........................3-41
Anti-Lock Brake System Warning Light.............3-42
Traction Control System (TCS)
Warning Light...........................................3-43
Engine Coolant Temperature Warning
Light (CTS)..............................................3-43
Engine Coolant Temperature Gage..................3-44
Tire Pressure Light (CTS-V)...........................3-44
Section 3 Instrument Panel
3-1
Page 131 of 432

The main components of the instrument panel are the following:
A. Air Outlets. SeeOutlet Adjustment on page 3-31.
B. Turn Signal/Multifunction Lever. SeeTurn
Signal/Multifunction Lever on page 3-8.
C. Recongurable Steering Wheel Controls (CTS). See
Recongurable Steering Wheel Controls (SWC)
(CTS) on page 3-7or Message Center Controls
(CTS-V) seeMessage Center (CTS-V) on page 3-51.
D. Instrument Panel Cluster. SeeInstrument Panel
Cluster on page 3-35.
E. Windshield Wiper Lever. SeeWindshield Wipers on
page 3-10.
F. Hazard Warning Flasher Button. SeeHazard
Warning Flashers on page 3-6.
G. Audio/Navigation System. SeeNavigation/Radio
System on page 3-105.
H. OnStar
®Button (Base Radio) or Voice Recognition
Button (Navigation System) (CTS). SeeAudio
Steering Wheel Controls (CTS) on page 3-105or
Cruise Controls (CTS-V) seeCruise Control
(CTS) on page 3-12orCruise Control (CTS-V) on
page 3-16.I. Audio Volume Knob and Source Button. SeeAudio
Steering Wheel Controls (CTS) on page 3-105
or Cruise Controls (CTS-V) seeCruise Control (CTS)
on page 3-12orCruise Control (CTS-V) on
page 3-16.
J. Storage Compartment or Ashtray. SeeAshtrays and
Cigarette Lighter on page 3-26.
K. Transmission Shift Lever. SeeAutomatic
Transmission Operation on page 2-26orManual
Transmission Operation on page 2-31.
L. Accessory Power Outlet or Cigarette Lighter. See
Accessory Power Outlets on page 3-25orAshtrays
and Cigarette Lighter on page 3-26.
M. Climate Control System. SeeDual Climate Control
System on page 3-27.
N. Glove Box. SeeGlove Box on page 2-50.
3-5
Page 135 of 432

Flash-To-Pass Feature. SeeFlash-to-Pass on
page 3-10.
-Fog Lamps. SeeFog Lamps on page 3-23.
ICruise Control. SeeCruise Control (CTS) on
page 3-12orCruise Control (CTS-V) on page 3-16.
Turn and Lane-Change Signals
To signal a turn, move the lever all the way up or down.
The lever returns automatically when the turn is
complete.
An arrow on the instrument
panel cluster will ash in
the direction of the
turn or lane change.
Raise or lower the lever until the arrow starts to ash to
signal a lane change. Hold it there until the lane
change is complete. The lever returns to its original
position when it’s released.Arrows that ash rapidly when signaling for a turn or
lane change may be caused by a burned-out signal bulb.
Other driver’s won’t see the signal.
Replace burned-out bulbs to help avoid possible
accidents. Check the fuse and for burned-out bulbs if
the arrow fails to work when signaling a turn. SeeFuses
and Circuit Breakers on page 5-96for more information.
Turn Signal On Chime
If the turn signal is left on for about 1 mile (1.6 km), a
warning chime will sound and the Turn Signal On
message will appear on the Driver Information Center
(DIC) display. See “Turn Signal On” underDIC Warnings
and Messages on page 3-65for more information.
Headlamp High/Low-Beam Changer
Push forward on the turn signal/multifunction lever
to change the headlamps from low to high beam. Pull
the lever back and then release it to change from high to
low beam.
This light on the
instrument panel cluster
will be on, indicating
high-beam usage.
3-9
Page 139 of 432

With cruise control, you can maintain a speed of about
25 mph (40 km/h) or more without keeping your foot
on the accelerator. This can really help on long
trips. Cruise control does not work at speeds below
about 25 mph (40 km/h).
If you apply your brakes, the cruise control will shut off.
{CAUTION:
Cruise control can be dangerous where you
cannot drive safely at a steady speed. So, do
not use your cruise control on winding roads
or in heavy traffic.
Cruise control can be dangerous on slippery
roads. On such roads, fast changes in tire
traction can cause needless wheel spinning,
and you could lose control. Do not use cruise
control on slippery roads.
If your vehicle is in cruise control when the traction
control system begins to limit wheel spin, the cruise
control will automatically disengage. SeeTraction
Control System (TCS) (CTS) on page 4-8orTraction
Control System (TCS) (CTS-V) on page 4-9and
StabiliTrak
®System on page 4-11. When road
conditions allow you to safely use it again, you may turn
the cruise control back on.
Setting Cruise Control
{CAUTION:
If you leave your cruise control on when you
are not using cruise, you might hit a button
and go into cruise when you do not want to.
You could be startled and even lose control.
Keep the cruise control switch off until you
want to use cruise control.
1. Move the cruise control switch to on.
2. Get up to the speed you want.
3. Press in the set button at the end of the lever and
release it.
4. Take your foot off the accelerator pedal.
This light on the instrument
panel cluster will come
on while cruise control
is on.
3-13
Page 143 of 432

Setting Cruise Control
{CAUTION:
If you leave your cruise control on when you
are not using cruise, you might hit a button
and go into cruise when you do not want to.
You could be startled and even lose control.
Keep the cruise control switch off until you
want to use cruise control.
1. Press the cruise control on/off button to turn cruise
control on. An indicator light on the button will come
on to show that the cruise control is on.
2. Accelerate to the speed you want.
3. Press the set button and release it. This will set the
cruise control.
4. Remove your foot from the accelerator pedal.This light on the instrument
panel cluster will come on
when cruise control is
on. It will go out when
cruise control is turned off.
Resuming a Set Speed
Suppose you set your cruise control at a desired speed
and then you apply the brake. This shuts off the
cruise control. But you don’t need to reset it.
Once the vehicle is traveling approximately 25 mph
(40 km/h) or more, you can press the plus
(resume/accelerate) button to return to your
desired preset speed. The cruise control light will be
displayed again.
The vehicle will return to and stay at your preset speed.
If you press and hold the plus (resume/accelerate)
button, the vehicle speed will increase until you release
the button or apply the brake. Unless you want to go
faster, do not press and hold the plus
(resume/accelerate) button.
3-17