CADILLAC DEVILLE 1996 7.G User Guide
Manufacturer: CADILLAC, Model Year: 1996, Model line: DEVILLE, Model: CADILLAC DEVILLE 1996 7.GPages: 354, PDF Size: 20.32 MB
Page 11 of 354
Downloaded from www.Manualslib.com manuals search engine The electronics and computerization which were
pioneered
by Cadillac in the '70s came of age in the
'80s with Digital Fuel Injection and On-Board
Diagnostics in
1980, four wheel Anti-lock Brakes on
1986 models and Traction Control in the fall of 1989.
The 1992 Seville STS
was the first car ever to win all
three major automotive awards: Car of the Year, Motor
Trend; Ten Best List, Car
& Driver; Car of the Year,
Automobile Magazine.
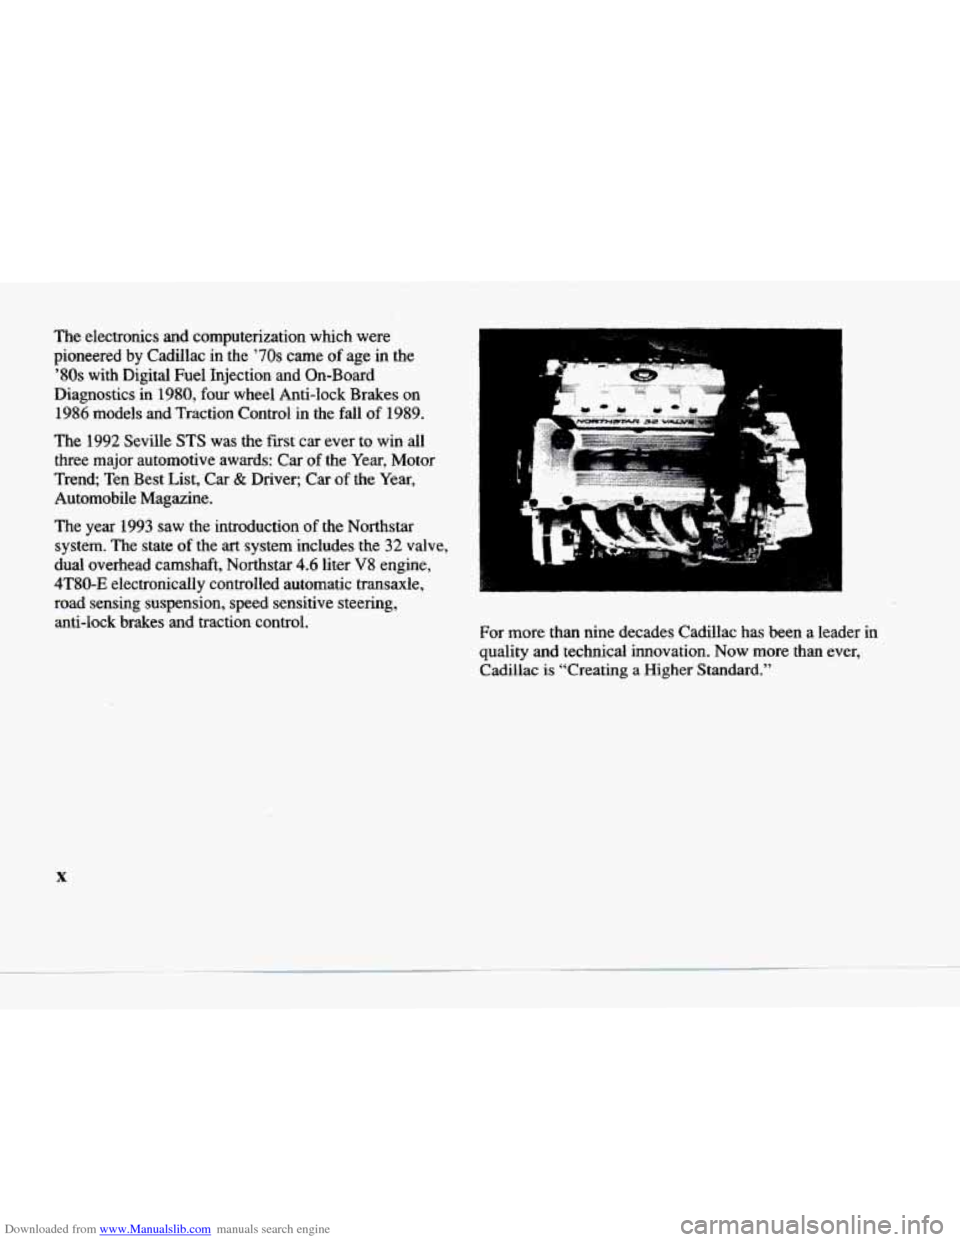
The year 1993 saw the introduction
of the Northstar
system. The state
of the art system includes the 32 valve,
dual overhead camshaft, Northstar
4.6 liter V8 engine,
4T80-E electronically controlled automatic transaxle, road sensing suspension, speed sensitive steering, anti-lock brakes and traction control.
j
c
bi
For more than nine decades Cadillac has been a leader in
quality
and technical innovation. Now more than ever,
Cadillac
is "Creating a Higher Standard."
X
Page 12 of 354
Downloaded from www.Manualslib.com manuals search engine c
c
c
How to Use this Manual
Many people read their owner’s manual from beginning
to end when they first receive their new vehicle.
If you
do this, it will help you learn about the features and
controls for your vehicle. In this
manual, you’ll find that
pictures and words work together to explain things quickly.
Index
A good place to look for what you need is the Index in
the back of the manual. It’s an alphabetical list of all
that’s in the manual, and the page number where you’ll find it.
Safety Warnings and Symbols
You will find a number of safety cautions in this book.
We use a box and the word CAUTION to tell you about
things that could hurt you
if you were to ignore the
warning.
I A CAUTION:
These mean’there is something that could hurt
you or other peonle.
In the caution area, we tell you what the hazard is. Then .
we tell you what to do to help avoid or reduce the
hazard. Please read these cautions. If you don’t, you or
others could be
hurt.
You will also find a circle
with a slash through it in
this book. This safety
symbol means “Don’t,’’
“Don’t do this,” or “Don’t
let this happen.”
xi
Page 13 of 354
Downloaded from www.Manualslib.com manuals search engine Vehicle Damage Warnings
Also; in this book you will find these notices:
In the notice area, we. tell you about something that can
damage your vehicle.
Many times, this damage would
not be covered by your warranty, and it could be costly.
I m But the notice will tell you what to do to help avoid the
NOTICE:
damage.
When you read other manuals, you
might see CAUTION
These mean there is something that could
damage your vehicle. I
and NOTICE warnings in dBerent colors or in different
words.
I
--
I You'll also see warning labels on your vehicle. They use
the same words,
CAUTION or NOTICE.
xii
Page 14 of 354
Downloaded from www.Manualslib.com manuals search engine c
c
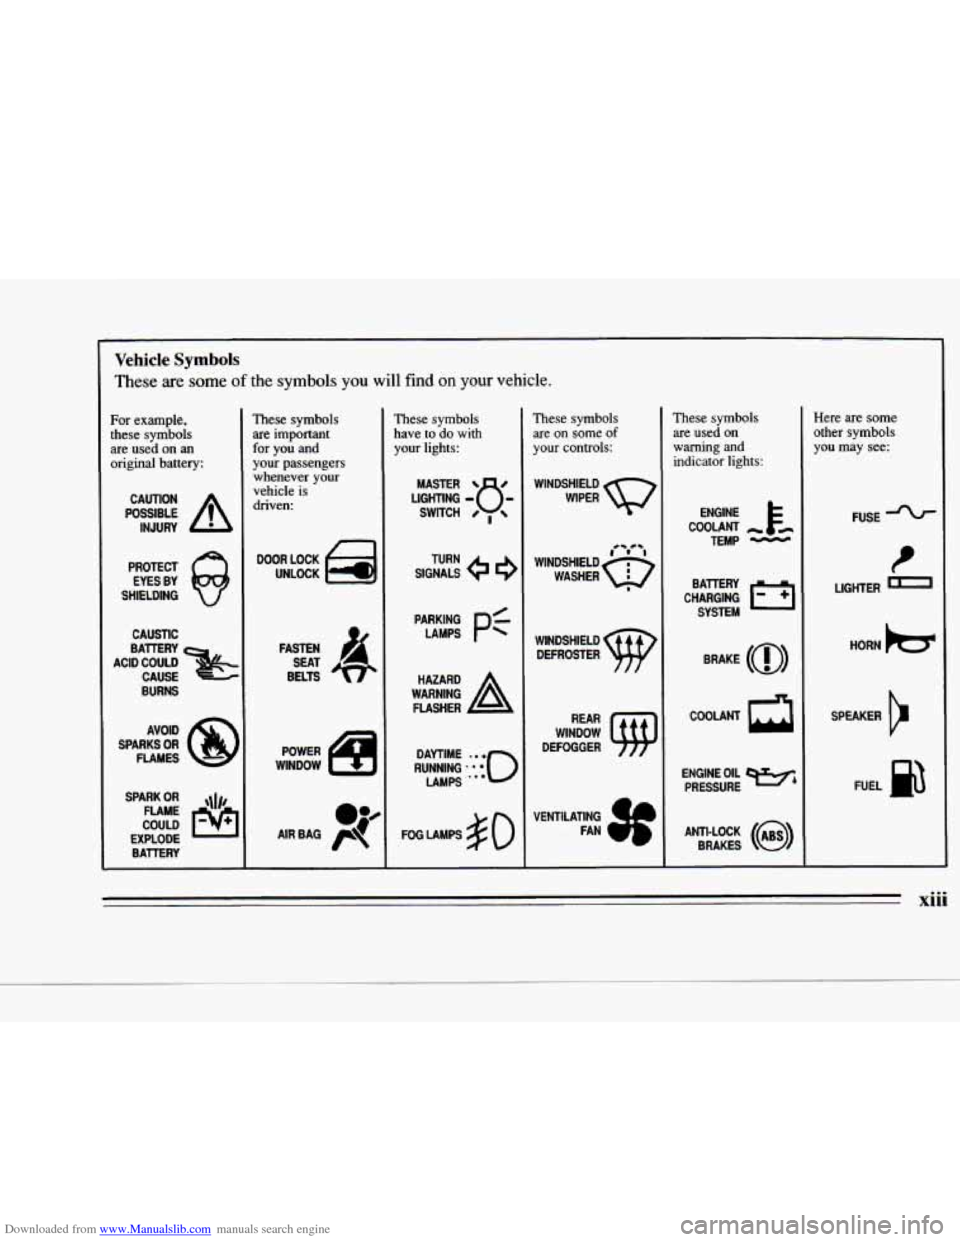
Vehicle Symbols
These are some of the symbols you will find on your vehicle.
For example,
these symbols
are used on
an
original battery:
POSSIBLE A
CAUTION
INJURY
PROTECT EYES BY
SHIELDING
CAUSTIC
BAllERY
CAUSE
BURNS
ACID COULD
&
AVOID
SPARKS
OR
FLAMES
SPARK
OR ,111,
COULD FLAME
EXPLODE BATTERY
These symbols are important
for
you and
your passengers whenever your
vehicle is
driven:
DOOR LOCK
UNLOCK
POWER
WINDOW
These symbols
have to do with
your lights:
SIGNALS @
TURN
WARNING
A
HAZARD
FLASHER
FOG LAMPS
$0
These symbols
are on some of
your controls:
WINDSHIELD
WIPER
VENTILATING FAN
(
These symbols
are used on
warning and
indicator lights:
COOLANT
TEMP
-
CHARGING I-1
BAllERY
SYSTEM
BRAKE
(a)
COOLANT a
ENGINE OIL w,
PRESSURE
ANTI-LocK
(@) BRAKES
Here are some
other symbols
you may see:
FUSE *
P
LIGHTER
HORN
h=r.
SPEAKER
c>
FUEL B
xiii
Page 15 of 354
Downloaded from www.Manualslib.com manuals search engine NOTES
xiv - -*
Page 16 of 354
Downloaded from www.Manualslib.com manuals search engine F
c
,*A- -4
Section 1 Seats and Restraint Systems
Here you'll find information about the seats in your
Cadillac and
how to use your safety belts properly. You
can
also learn about some things you should not do with
air bags and safety belts.
Seats and Seat Controls
This section tells you about the power seats -- how to
adjust them, and also about reclining front seatbacks,
memory seats, lumbar adjustments, heated seats and
head restraints.
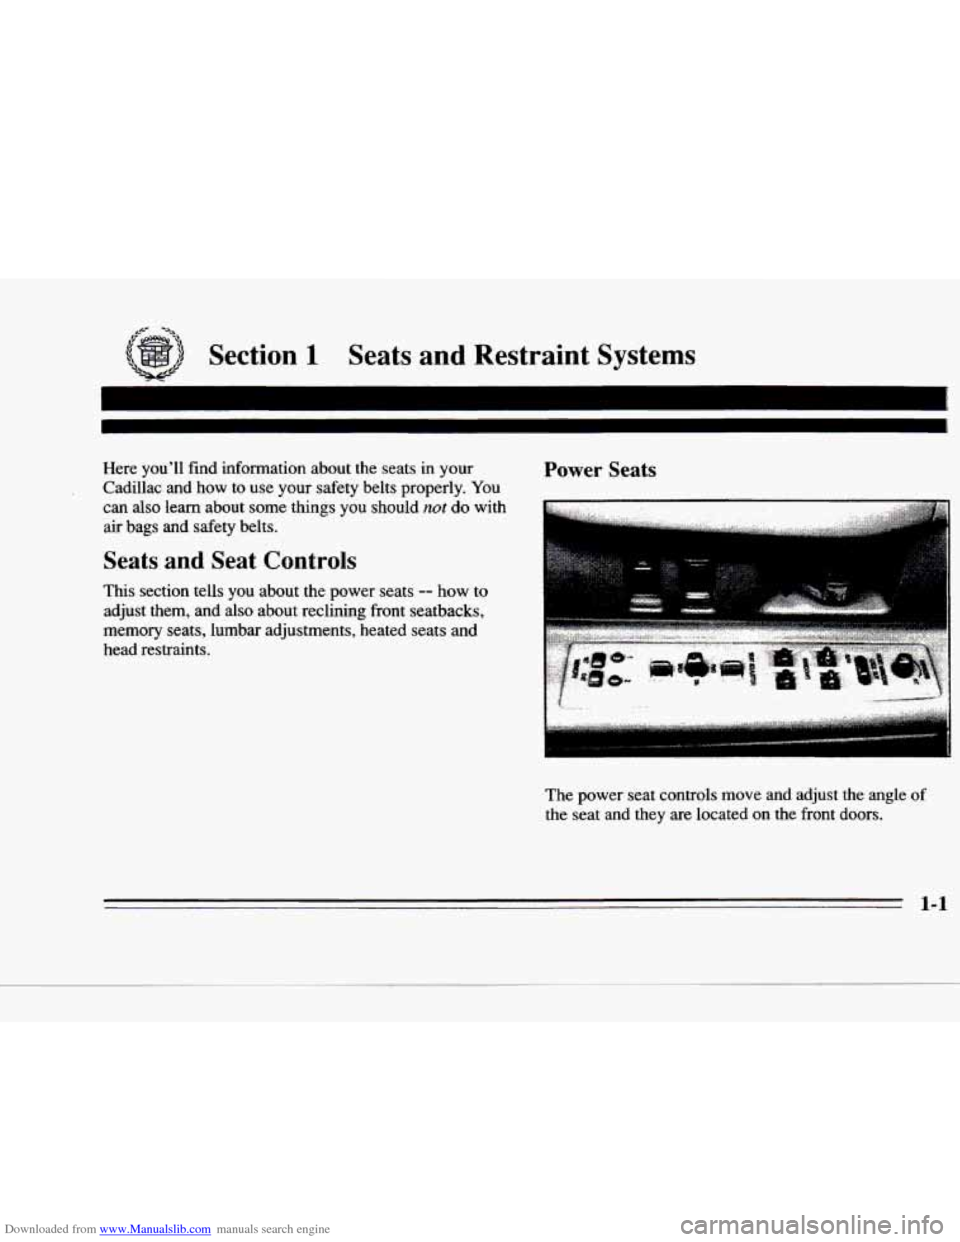
Power Seats
The power seat controls move and adjust the angle of
the seat and they are located on the front doors.
1-1
Page 17 of 354
Downloaded from www.Manualslib.com manuals search engine i
0
0
0
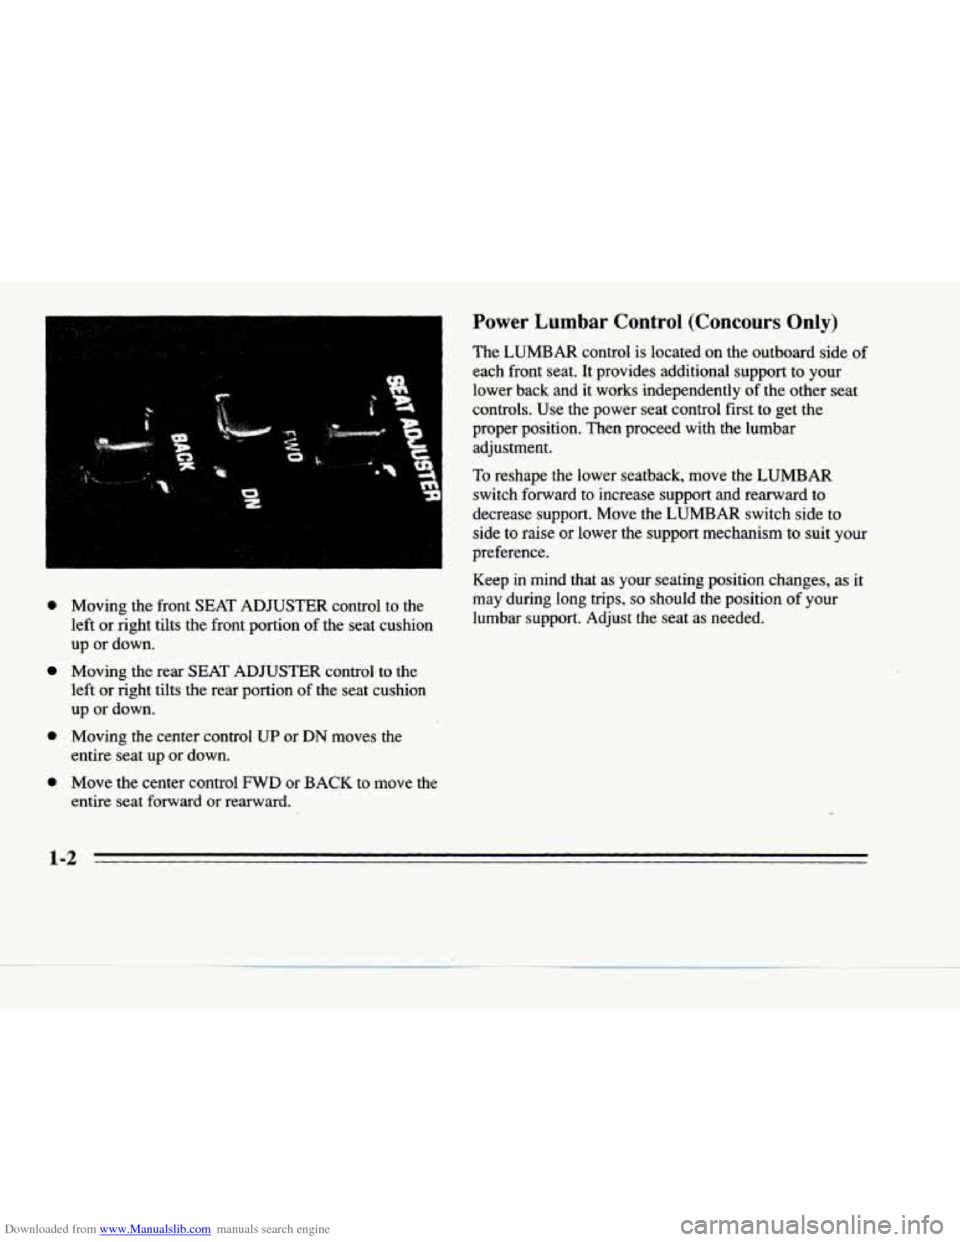
Moving the front SEAT ADJUSTER control to the
left
or right tilts the front portion of the seat cushion
up or down.
Moving
the rear SEAT ADJUSTER control to the
left or right tilts the rear portion
of the seat cushion
up or down.
Moving the center control
UP or DN moves the
entire seat up
or down.
Move the center control
FWD or BACK to move the
entire seat forward or rearward.
Power Lumbar Control (Concours Only)
The LUMBAR control is located on the outboard side of
each front seat. It provides additional support to your
lower back and it works independently of the other seat
controls. Use the power seat control first to get the
proper position. Then proceed with the lumbar
adjustment.
To reshape the lower seatback, move the LUMBAR
switch forward to increase support and rearward to
decrease support. Move the
LUMBAR switch side to
side to raise
or lower the support mechanism to suit your
preference.
Keep in mind that
as your seating position changes, as it
may during long trips,
so should the position of your
lumbar support. Adjust the seat as needed.
-.
13
Page 18 of 354
Downloaded from www.Manualslib.com manuals search engine c
Memory Seat (Option)
c
c
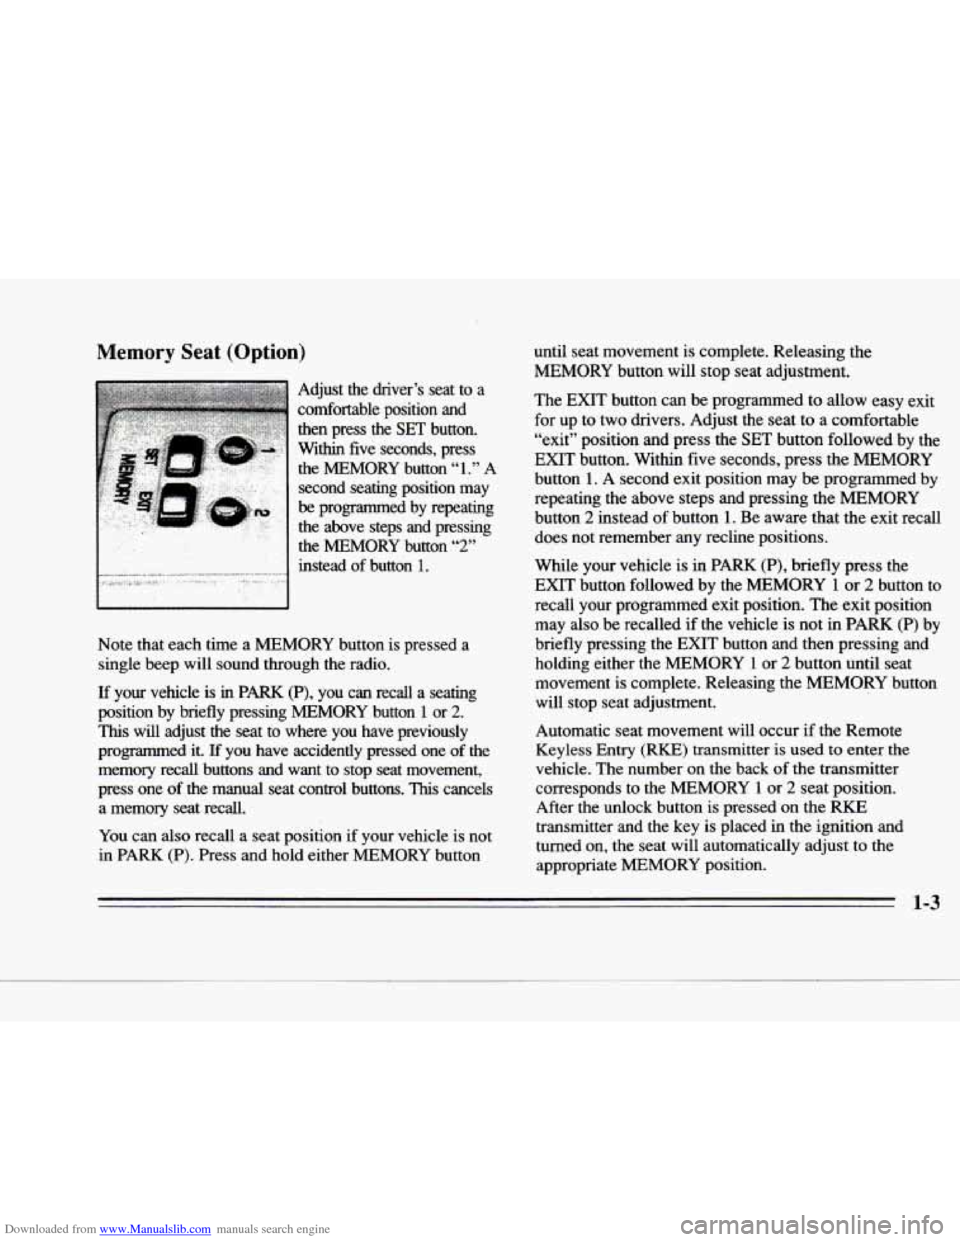
Adjust the driver’s seat to a
comfortable position and then press the
SET button.
Within five seconds, press
the MEMORY button
“1.” A
second seating position may
be programmed by repeating
the above steps and pressing
I
the MEMORY button “2”
instead of button 1. ,x,__” _.,,,.. (_u ..._.,, l,,.l.l.” ...... 1.1.*.1.1..-.”1...”-”..1... .... .........
Note that each time a MEMORY button is pressed a single beep will sound through the radio.
If your vehicle is in PARK (P), you can recall a seating
position by briefly pressing MEMORY button
1 or 2.
This will adjust the seat to where you have previously
programmed
it. If you have accidently pressed one of the
memory recall buttons and want to stop seat movement,
press one
of the manual seat control buttons. This cancels
a memory seat recall.
You can also recall a seat position if your vehicle is not
in PARK
(P). Press and hold either MEMORY button until seat movement is complete. Releasing the
MEMORY button will stop seat adjustment.
The
EXIT button can be programmed to allow easy exit
for up to two drivers. Adjust
the seat to a comfortable
“exit” position and press the
SET button followed by the
EXIT button. Within five seconds, press the MEMORY
button
1. A second exit position may be programmed by
repeating the above steps and pressing the MEMORY
button
2 instead of button 1. Be aware that the exit recall
does not remember any recline positions.
While your vehicle is in PARK (P), briefly press the
EXIT button followed by the MEMORY 1 or 2 button to
recall your programmed exit position. The exit position
may also
be recalled if the vehicle is not in PARK (P) by
briefly pressing the
EXIT button and then pressing and
holding either
the MEMORY 1 or 2 button until seat
movement
is complete. Releasing the MEMORY button
will stop seat adjustment.
Automatic seat movement will occur
if the Remote
Keyless Entry
(RKE) transmitter is used to enter the
vehicle. The number on the back of the transmitter
corresponds to the MEMORY
1 or 2 seat position.
After
the unlock button is pressed on the RKE
transmitter and the key is placed
in the ignition and
turned on, the seat will automatically adjust to the
appropriate MEMORY position.
1-3
Page 19 of 354
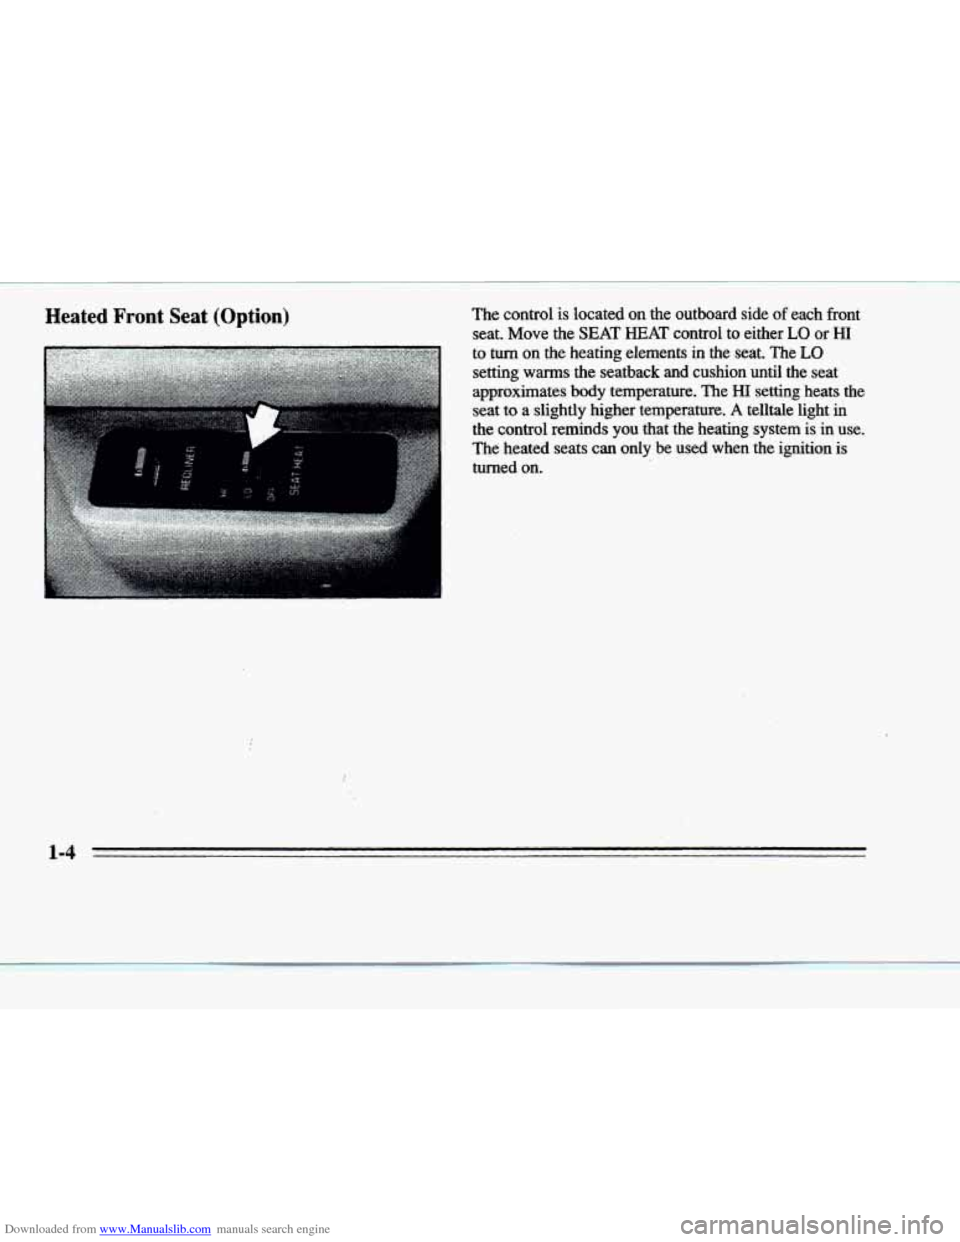
Downloaded from www.Manualslib.com manuals search engine Heated Front Seat (Option) The control is located on the outboard side of each front
seat. Move the SEAT HEAT control to either LO or HI
1
P
P
Page 20 of 354
Downloaded from www.Manualslib.com manuals search engine c
C
Reclining Front Seatbacks
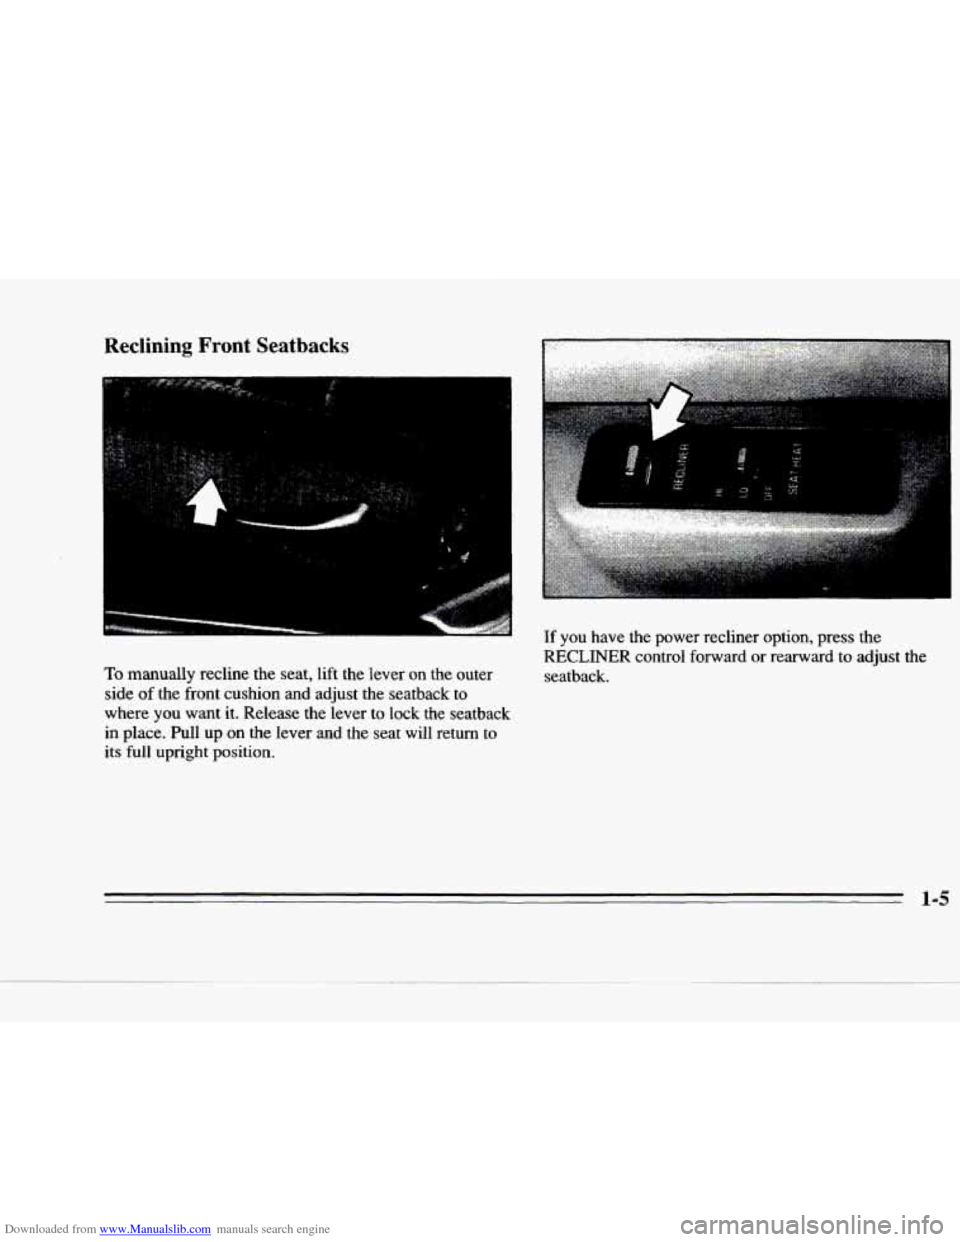
To manually recline the seat, lift the lever on the outer
side
of the front cushion and adjust the seatback to
where you
want it. Release the lever to lock the seatback
in place. Pull up on the lever and the seat will return to
its full upright position.
If you have the power recliner option, press the
RECLINER control forward or rearward to adjust the
seatback.
1-5