buttons CADILLAC DEVILLE 1998 7.G User Guide
[x] Cancel search | Manufacturer: CADILLAC, Model Year: 1998, Model line: DEVILLE, Model: CADILLAC DEVILLE 1998 7.GPages: 386, PDF Size: 22.36 MB
Page 153 of 386
Downloaded from www.Manualslib.com manuals search engine TIMER: This feature is like a stopwatch, in that
you can clock the time it takes to get from one point
to another.
To operate, press the TIMER button until- TIMER OFF
0O:OO:OO is displayed on the Driver Information Center
(DIC). Each of the fields for the hours, minutes and
seconds are two numeric digits.
Once TIMER
OFF 0O:OO:OO is displayed, press the
TIMER button to start the timing feature. Press the
TIMER button again to stop it.
If you will be starting
and stopping your vehicle
-- during a trip for
instance
-- the TIMER feature will automatically start
timing where it left off when you last stopped. To reset
it, press,and hold the INFO RESET button
until the
display reads TIMER
0O:OO:OO. Press the INFO button
to exit from the TIMER function.
ENG/MET: You can change the display from English
(miles) to metric (kilometers) by pressing this button.
The same button also changes other readings (like
temperature, fuel and odometer).
..
DIC Messages
These messages will appear if there is a problem sensed
in one of your vehicle’s systems. Vehicles that are first
sold in Canada will have a number after each message.
This number helps to identify the message which is only
displayed in English.
APPLY BRAKE TO SHIFT - 46: This message will
appear
if your vehicle is in PARK (P) for about 15
seconds and the brake is not pressed in. To remove this
message from the Driver Information Center (DIC)
display, hold the
OFF and the blue (cooler) buttons on
the digital cluster control panel for about five seconds.
On the analog climate control panel, press the
OFF
button (next to the MODE button) and the down arrow
on the PASS TEMP button for about five seconds. Hold
the same two buttons to display the message again.
BATTERY NOT CHARGING - 7: This message will
appear if the battery is not.being charged. Have the
electrical system checked by your dealership at your
earliest convenience.
2-82
Page 160 of 386
Downloaded from www.Manualslib.com manuals search engine TRACTION ENGAGED - 91: When your traction
control system is limiting wheel spin, the TRACTION
ENGAGED message will be displayed. Slippery road conditions may exist if this message is displayed,
so
adjust your driving accordingly. This message will stay
on for a few seconds after the traction control system
stops limiting wheel spin.
TRACTION OFF - 89: This message will be displayed
after the traction control has been turned off.
TRACTION READY - 90: This message informs the
driver that the traction control system
is available. This
occurs when the traction
ordoff button in the glove box
has been returned to an on position (pressing the button
once turns the traction control system off pressing the
button again turns the system back on). This message
also self-cancels after five seconds.
TRACTION SUSPENDED - 56: This message
displays when the traction control system has been
temporarily shut
off because your vehicle’s brakes have
overheated. This message does not indicate a problem
with your vehicle’s traction control system. After a few
minutes, the traction control system will be available
again and the TRACTION READY message
will appear.
TRANS FLUID RESET - 48: With the engine not
running and the ignition on, press and hold the
OFF and
rear defog buttons until the TRANS FLUID RESET message appears on the Driver Information Center
(DIC) (between
five and 20 seconds).
TRANS HOT IDLE ENG - 112: This messages
indicates that the transaxle fluid in your vehicle is too
hot. Stop and allow your vehicle to idle until it cools
down or until this message is removed.
TRUNK OPEN - 24: This message indicates that the
trunk is open when your vehicle’s ignition is in
RUN.
TURN SIGNAL ON - 20: This message is a reminder,
after driving about
1 mile (1.6 km/h), that you have the
turn signal on. A multiple chime will also sound when
this message is displayed.
VEHICLE OVERSPEED - 52: A failure in the
suspension control system has occurred when this
message appears. The PCM determines the speed your
vehicle is limited to. Have your vehicle serviced if this
message appears.
VEHICLE SPEED LIMITED TO XXX MPH
(KM/H) - 113: A failure in the suspension control
system has occurred when this message appears. The
PCM determines the speed your vehicle is limited to.
Have your vehicle serviced if this message appears.
Page 161 of 386
Downloaded from www.Manualslib.com manuals search engine Programmable, Memory and Personalization
r atures (If Equipped)
Your vehicle may be equipped with the following
features that can be individually programmed,
memorized or personalized for up to two drivers. For a
brief description of each feature (except for climate
control and radio personalization), see each feature
in
the Index.
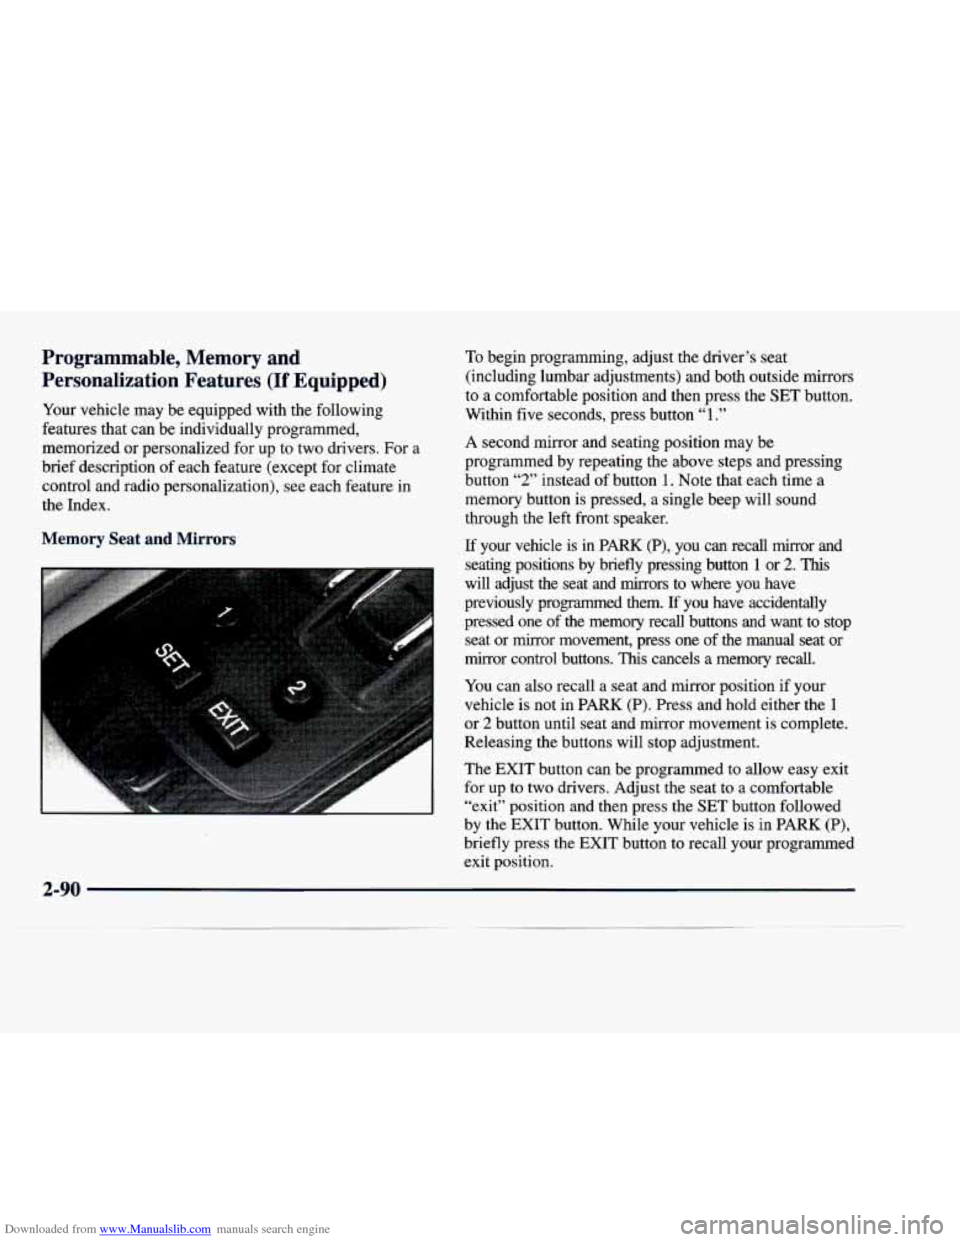
Memory Seat and Mirrors
To begin programming, adjust the driver’s seat
(including lumbar adjustments) and both outside mirrors
to a comfortable position and then press the SET button.
Within five seconds, press button
“1.”
A second mirror and seating position may be
programmed by repeating the above steps and pressing
button
“2” instead of button 1. Note that each time a
memory button is pressed, a single beep will sound
through the left front speaker.
If your vehicle is in PARK (P), you can recall mirror and
seating positions by briefly pressing button
1 or 2. This
will adjust the seat and mirrors to where you have
previously programmed them.
If you have accidentally
pressed one of the memory recall buttons
and want to stop
seat or mirror movement, press one of the manual seat or
mirror control buttons.
This cancels a memory recall.
You can also recall a seat and mirror position if your
vehicle is not in PARK (P). Press and hold either the
1
or 2 button until seat and mirror movement is complete.
Releasing the buttons will stop adjustment.
The EXIT button can be programmed to allow easy exit
for up to two drivers. Adjust the seat to a comfortable
“exit” position and then press the
SET button followed
by the EXIT button.
While your vehicle is in PARK (P),
briefly press the EXIT button to recall your programmed
exit position.
Page 162 of 386
Downloaded from www.Manualslib.com manuals search engine Programmable Automatic Door Locks
Your vehicle’s ignition must be in RUN. To begin
programming, press and hold the INFORMATION
(INFO) and RESET (INFO RESET) buttons at the same
time to display the following prompts.
DOORS LOCK IN GEAR: All doors automatically
lock when shifted out of PARK (P).
DOOR UNLOCK IN PARK: All doors automatically
lock when shifted out of PARK
(P). All doors
automatically unlock when shifted into PARK
(P).
DRIVR UNLOCK IN PARK: All doors automatically
lock when shifted out of PARK (P). Only the driver’s
door automatically unlocks when shifted into
PARK (P).
DRIVR UNLOCK IN KEY OFF: All doors
automatically lock when shifted out of PARK (P). Only
the driver’s door automatically unlocks when the
ignition key
is turned to OFF.
DOORS UNLOCK KEY OFF: All doors
automatically lock when shifted out of PARK (P). All
doors automatically unlock when the ignition key
is
turned to OFF.
A “yes” or “no” response must be made after each prompt
is displayed
in order to continue on to the next prompt or
personalization feature. The “yes” and “no” buttons
are
displayed in amber on the vehicle’s digital control cluster. \
Press the
TRIP SET (TRIP RESET) button to choose yes,
press the RESET
(INFO RESET) button to.choose no or
press the INFORMATION
(INFO) button to “skip” to the
next personalization feature.
FEATURE ON appears when a yes response is made and FEATURE OFF appears with a no response.
If a no response is made after the DOORS LOCK
IN
GEAR prompt is displayed, FEATURE OFF will appear.
The automatic door locking system has been disabled
and no other door lock messages will be displayed.
LGHTS.FLSH AT UNLOCK, which is the next
available personalization feature to display, will appear
next. See “Lock/Unlock Confirmation” following for
more information.
If a yes response is made after the DOORS LOCK
IN
GEAR prompt is displayed, FEATURE ON appears.
The automatic door locking system is enabled and
allows the DRIVR UNLOCK
IN PARK prompt to
appear. Choosing this prompt advances
you to LGHTS
FLSH AT UNLOCK whereas a no response will display
the DRIVR UNLOCK
KEY OFF prompt.
If DRIVR UNLOCK
KEY OFF is chosen, FEATURE
ON appears. You will advance to the LGHTS
FLSH AT
UNLOCK prompt. If you don’t choose this prompt,
Page 163 of 386
Downloaded from www.Manualslib.com manuals search engine FEATURE OFF appears as well as the next
prompt
-- DOORS UNLOCK IN PARK. If this
prompt is chosen, FEATURE ON appears. If a no
response was made, DOORS UNLOCK
KEY OFF will
appear. At this point, a yes or no response automatically
brings up the LGHTS
FLSH AT UNLOCK feature.
LocWnlock Confirmation
This personalization feature allows the driver to
program the parking lamps to blink when the lock or
unlock buttons on the remote keyless entry transmitter
are pressed, to program the horn to sound when the lock
button is pressed. and/or to program the exterior lamps to
turn on when the unlock button is pressed. Press the
TRIP (TRIP RESET) button to answer “yes,” press the
RESET (INFO RESET) button to indicate “no” or press
the INFORMATION (INFO) button to “skip” to the next
personalization feature.
To begin programming, your vehicle’s ignition must be
in RUN. Press and hold the INFORMATION (INFO)
and RESET (INFO RESET) buttons at the same time to display the following prompts. LOCKNNLOCK
confirmation is the second feature to appear. To “skip”
past the first personalization feature, press the
INFORMATION
(INFO) button.
LGHTS FLSH AT UNLOCK: Parking lamps blink
twice when the unlock button on the remote keyless
entry transmitter is pressed.
LIGHTS FLASH AT LOCK: Parking lamps blink
once when
the lock button on the remote keyless entry
transmitter
is pressed.
HORN SOUNDS AT LOCK: Horn sounds when
the lock button on the remote keyless entry transmitter
is pressed.
EXT LIGHTS AT UNLOCK: Exterior lamps (parking
lamps, taillamps, sidemarker lamps, license plate lamps, low-beafn headlamps, etc.)
turn on when the unlock
button on the remote keyless entry transmitter is pressed, and
it is dark outside. These lamps stay on for
about
20 seconds or when the key is turned out of OFF.
The prompts listed here appear in the same order as
displayed on the Driver Information Center (DIC).
FEATURE ON appears when a yes response is made
and FEATURE
OFF appears with a no response. To skip
to the next personalization feature (REMOTE RECALL
MEMORY), press the INFORMATION (INFO) button.
2-92
Page 164 of 386
Downloaded from www.Manualslib.com manuals search engine Remote Recall Memory (If Equipped with
Memory Personalization)
Memory settings that have been previously programmed
(climate control settings, radio preset settings, exterior
lighting choices, lockhnlock confirmation choices and
programmable automatic door lock choices)
can be
recalled by using the remote keyless entry transmitter or
by placing the key in your vehicle’s ignition.
Before you begin programming, make sure that
your
vehicle’s ignition is in RUN. To begin programming,
press the INFORMATION
(INFO) and RESET (INFO
RESET) buttons at the same time for about two seconds.
As mentioned, remote recall memory is the third feature
to appear. To “skip” past the first two personalization
features, press the INFORMATION
(INFO) button.
When REMOTE RECALL MEMORY appears, the
driver is able to recall memory settings when the unlock
button on the remote keyless entry transmitter is
pressed. Press the TRIP SET (TRIP RESET) button to
select or press the RESET (INFO RESET) button to
answer no and to continue on to the next prompt.
FEATURE ON displays when a yes response is made. If
a no response was made, the
KEY IN RECALL
MEMORY prompt will show next. This choice recalls
memory settings when the key is placed in your
vehicle’s ignition. FEATURE ON displays for a yes
response and FEATURE
OFF for a no response. A yes
or no response is required.
Curb View Mirror (If Equipped with
Memory Personalization)
If your vehicle has this personalization feature,
MIRROR TILT
IN REV will be the fourth
personalization prompt to display on the Driver
Information Center (DIC).
To program your vehicle, press the INFORMATION
(INFO) and RESET (INFO RESET) buttons at the same
time for about two seconds. When MIRROR TILT
IN
REV appears, a “yes” or “no” response is needed. Press
the TRIP SET (TRIP RESET) button to answer yes or
the RESET
(INFO RESET) button to answer no.
FEATURE ON displays when a yes response is made
and FEATURE
OFF shows after a no response. If
you
do not want to change the setting of this feature,
press the INFORMATION (INFO) button to skip to
the next personalization feature which is Storage
Mode Personalization.
Page 165 of 386
Downloaded from www.Manualslib.com manuals search engine Storage Mode Personalization
Before you begin programming, make sure that your vehicle’s ignition is
in RUN. To begin programming,
press the INFORMATION (INFO) and RESET (INFO
RESET) buttons at the same time for about two seconds.
The first message to appear
is DOORS LOCK IN
GEAR. Press the INFORMATION
(INFO) button after
this prompt is displayed until the STORAGE MODE
prompt appears on the Driver Information Center (DIC).
Press the TRIP (TRIP RESET) button to answer “yes” or press the RESET (INFO RESET) button to indicate a
“no” response.
FEATURE ON appears when a yes response is made
and FEATURE
OFF shows when a no response is made.
Since this is the last personalization feature available,
a
yes or no response will end out of the Driver
Information Center (DIC) display.
Once the battery guard has been programmed, your
vehicle will enter the storage mode about
20 minutes
after the ignition key has been turned off.
Your vehicle will stay in the storage mode until the
ignition key is turned out of LOCK. The system will
“wake-up” when the door key is inserted into the door,
however, your vehicle will remain in the storage mode.
The ignition must be out
of LOCK before the battery
guard is disabled.
Home and Away Feature
To program, hold two radio preset buttons at the same
time until
HOME PRESETS DRVR 1 ( DRVR 2)
appears on the Driver Information Center (DIC) display.
At this time, you are able to input your desired radio
stations. Holding the same
two radio preset buttons
again will display AWAY PRESETS DRVR
1 (or
DRVR
2). Radio stations that are out of your normal
operating range can be input at this time.
Climate Control Personalization
With this feature, your vehicle will recall the latest
climate control settings as adjusted the last time your
vehicle was operated. This feature allows two different
drivers to store and recall their own climate control
settings. The settings recalled by the climate control
system are determined by which remote keyless entry
transmitter
(“1” or “2”) was used to enter the vehicle.
The number on the back of the remote keyless entry
transmitter corresponds to driver
1 or to driver 2. After
the unlock button is pressed on the remote keyless entry
transmitter or the ignition key
is placed in the ignition,
the climate control settings will automatically adjust to
where they were last set. The settings can also be
changed by briefly pressing the memory seat buttons
1 or 2 located on the driver’s door.
Page 166 of 386
Downloaded from www.Manualslib.com manuals search engine Radio Personalization
With this feature, your vehicle will recall the latest radio
settings as adjusted the last time your vehicle was
operated. This feature allows two different drivers to
store and recall their own radio settings for
AM and FM
presets, last tuned station, volume, tone and audio
source (radio, cassette or CD). The settings recalled by
the radio are determined by which remote keyless entry
transmitter
(“1” or “2”) was used to enter the vehicle.
The number on the back
of the remote keyless entry
transmitter corresponds to driver
1 or to driver 2. After
the unlock button is pressed on the remote keyless entry
transmitter and the ignition is in RUN, the radio settings
will automatically adjust to where they were last set by
the identified driver. The settings can also be changed by
briefly pressing the memory seat buttons
1 or 2 located
on the driver’s door. The new settings will be saved for
the driver.
Continual Variable -- Roac ing
Suspension (CV-RSS) (DeVille Concours Only)
The CV-RSS automatically adjusts the ride of your
vehicle. Automatic ride control is achieved through a
computer controller used to control and monitor the
suspension system. The computer controller receives
inputs from various sensors to determine the proper
system response.
If the computer controller detects a
problem within the system, the Driver Information
Center (DIC) will display a SERVICE RIDE
CONTROL message.
If this message appears, have
your vehicle serviced at your dealership.
Page 170 of 386
Downloaded from www.Manualslib.com manuals search engine Driver’s Side Temperature Button
The red and blue temperature buttons adjust the air
temperature coming through the system. Press the
blue button for a cooler setting or the red button for a
warmer setting.
Passenger’s Side Temperature Knob
With this feature, the right front passenger can control
the temperature of air for hisher own zone. The
passenger can select a four degree warmer or cooler
temperature from the driver’s setting.
To turn the system on, press the knob on the passenger’s
side armrest. Rotate the knob to the right to increase
the temperature and turn to the left to decrease the
temperature. Press the knob again to turn the system
off.
Outside Temperature Display
The outside temperature is always displayed when your
vehicle is running. You can change it from Fahrenheit to
Celsius by pressing the ENG/MET (EnglisWmetric)
button on the Driver Information Center (DIC).
The outside temperature sensor is located near the
front grille. The sensor can be affected by road or
engine heat during idling, slow driving or when the engine
is first started after a
short trip. In order to ensure
proper automatic climate control operation, the outside
air temperature display may not update as quickly as
expected. This is to allow the air surrounding the outside
temperature sensor to be as close to the actual outside
conditions as possible. This is determined by how much
time has elapsed since the vehicle has been turned
off
and by vehicle speed.
Mode Controls
The AUTOECON button automatically controls the
direction
of air delivery for air conditioning and non-air
conditioning modes.
Automatic Operation
When the system is set for automatic operation, sensors
will control the air delivery mode. Air will come from
the floor, middle or windshield outlets. The fan speed
will
vary as the system maintains the selected
temperature setting.
Be careful not to put anything over the solar sensor
located in the middle of the instrument panel near the
windshield. This sensor is used by the automatic system
to regulate temperature.
Page 171 of 386
Downloaded from www.Manualslib.com manuals search engine To find your comfort zone, start with the 75 "F (24°C)
setting and allow about 30 minutes for the system to
regulate. Press the red or blue temperature buttons
to adjust the temperature if necessary. If you choose
60°F (16"C), the system will remain at that maximum
cooling setting and
will not regulate fan speed. If you
choose the temperature of
90°F (32" C), the system will
remain at that maximum heating setting and will not regulate fan speed. Choosing either maximum setting
will not cause the system to heat or cool any faster.
With the automatic setting, the air conditioning
compressor automatically cycles when needed to cool
the air. In cold weather, when the system senses the need for heat, the airflow will be directed out the floor
outlets.
As the interior temperature approaches a desired
setting, the blower speed will decrease.
To maintain
interior comfort, the airflow may move to the instrument
panel air outlets and floor outlets (bi-level mode). On
bright sunny days in cold weather, the airflow may come
out of the air conditioning outlets
(AC mode) to
maintain comfort and prevent stuffiness. If your vehicle is sitting
out on a hot day and you have
it set on
AUTO, the air will first flow out the floor air
outlets for a few seconds. That is normal.
This is to
expel hot air from the air outlets.
As the air is cooled,
the airflow will move through the air conditioning
outlets. If you start your vehicle with the
fan setting on
HI, it will
skip the air conditioning purge.
To avoid blowing cold
air in cold weather, the system will
delay turning on the fan until warm air is available. The
length of delay depends on the outside air temperature,
engine coolant temperature or the time since the engine
was last started.
As the coolant warrns up, the blower fan
speed
will gradually increase and air will flow from the
heater outlets, with some airflow to the windshield to
prevent fogging under most normal conditions.
If you leave your vehicle, the system will remember the
control setting the next time you start your engine,
except for recirculation and defrost. Each ignition cycle
cancels recirculation, whereas, DEFROST will change
to automatic operation when the ignition is shut off and
then turned back on.