check engine CADILLAC ESCALADE 2010 3.G Owner's Guide
[x] Cancel search | Manufacturer: CADILLAC, Model Year: 2010, Model line: ESCALADE, Model: CADILLAC ESCALADE 2010 3.GPages: 616, PDF Size: 39.41 MB
Page 454 of 616

Gasoline Octane
If the vehicle has the 6.0L V8 engine (VIN Code J), useregular unleaded gasoline with a posted octane ratingof 87 or higher. If the octane rating is less than 87, anaudible knocking noise, commonly referred to as sparkknock, might be heard when driving. If this occurs, usea gasoline rated at 87 octane or higher as soon aspossible. If heavy knocking is heard when usinggasoline rated at 87 octane or higher, the engineneeds service.
If the vehicle has the 6.2L V8 engine (VIN Code F), usepremium unleaded gasoline with a posted octane ratingof 91 or higher. You can also use regular unleadedgasoline rated at 87 octane or higher, but the vehicle'sacceleration could be slightly reduced, and a slightaudible knocking noise, commonly referred to as sparkknock, might be heard. If the octane is less than 87, youmight notice a heavy knocking noise when you drive.If this occurs, use a gasoline rated at 87 octane orhigher as soon as possible. Otherwise, you coulddamage the engine. If heavy knocking is heard whenusing gasoline rated at 87 octane or higher, the engineneeds service.
Gasoline Specifications
At a minimum, gasoline should meet ASTMspecification D 4814 in the United States orCAN/CGSB!3.5 or 3.511 in Canada. Some gasolinescontain an octane-enhancing additive calledmethylcyclopentadienyl manganese tricarbonyl (MMT).We recommend against the use of gasolines containingMMT. SeeAdditiveso n p a g e 7!9for additionalinformation.
California Fuel
If the vehicle is certified to meet California EmissionsStandards, it is designed to operate on fuels that meetCalifornia specifications. See the underhood emissioncontrol label. If this fuel is not available in statesadopting California emissions standards, the vehiclewill operate satisfactorily on fuels meeting federalspecifications, but emission control system performancemight be affected. The malfunction indicator lamp couldturn on and the vehicle might fail a smog!check test.SeeMalfunction Indicator Lampon page 4!36. If thisoccurs, return to your authorized dealer/retailer fordiagnosis. If it is determined that the condition is causedby the type of fuel used, repairs might not be coveredby the vehicle warranty.
7-8
Page 460 of 616

Checking Things Under
the Hood
{WARNING:
An electric fan under the hood can start up and
injure you even when the engine is not running.
Keep hands, clothing, and tools away from any
underhood electric fan.
{WARNING:
Things that burn can get on hot engine parts and
start a fire. These include liquids like fuel, oil,
coolant, brake fluid, windshield washer and other
fluids, and plastic or rubber. You or others could
be burned. Be careful not to drop or spill things
that will burn onto a hot engine.
7-14
Page 463 of 616

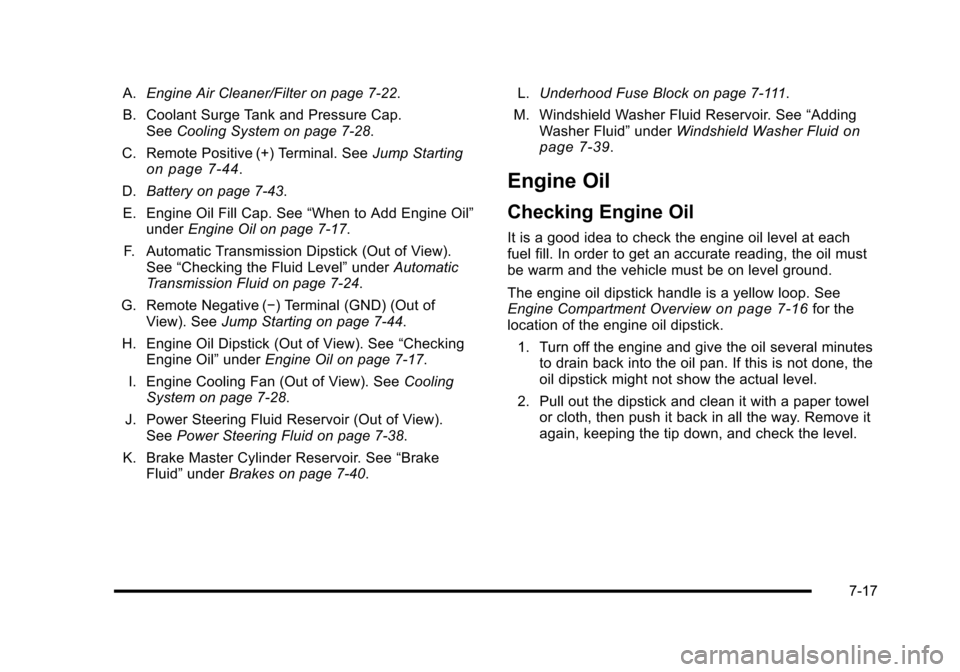
A.Engine Air Cleaner/Filter on page 7!22.
B. Coolant Surge Tank and Pressure Cap.SeeCooling System on page 7!28.
C. Remote Positive (+) Terminal. SeeJump Startingon page 7!44.
D.Battery on page 7!43.
E. Engine Oil Fill Cap. See“When to Add Engine Oil”underEngine Oil on page 7!17.
F. Automatic Transmission Dipstick (Out of View).See“Checking the Fluid Level”underAutomaticTransmission Fluid on page 7!24.
G. Remote Negative (!) Terminal (GND) (Out ofView). SeeJump Starting on page 7!44.
H. Engine Oil Dipstick (Out of View). See“CheckingEngine Oil”underEngine Oil on page 7!17.
I. Engine Cooling Fan (Out of View). SeeCoolingSystem on page 7!28.
J. Power Steering Fluid Reservoir (Out of View).SeePower Steering Fluid on page 7!38.
K. Brake Master Cylinder Reservoir. See“BrakeFluid”underBrakes on page 7!40.
L.Underhood Fuse Block on page 7!111.
M. Windshield Washer Fluid Reservoir. See“AddingWasher Fluid”underWindshield Washer Fluidonpage 7!39.
Engine Oil
Checking Engine Oil
It is a good idea to check the engine oil level at eachfuel fill. In order to get an accurate reading, the oil mustbe warm and the vehicle must be on level ground.
The engine oil dipstick handle is a yellow loop. SeeEngine Compartment Overviewon page 7!16for thelocation of the engine oil dipstick.
1. Turn off the engine and give the oil several minutesto drain back into the oil pan. If this is not done, theoil dipstick might not show the actual level.
2. Pull out the dipstick and clean it with a paper towelor cloth, then push it back in all the way. Remove itagain, keeping the tip down, and check the level.
7-17
Page 466 of 616

Engine Oil Additives / Engine Oil
Flushes
Do not add anything to the oil. The recommended oilswith the starburst symbol that meet GM standards areall that is needed for good performance and engineprotection.
Engine oil system flushes are not recommended andcould cause engine damage not covered by the vehiclewarranty.
Engine Oil Life System
When to Change Engine Oil
This vehicle has a computer system that indicates whento change the engine oil and filter. This is based onengine revolutions and engine temperature, and not onmileage. Based on driving conditions, the mileage atwhich an oil change is indicated can vary considerably.For the oil life system to work properly, the system mustbe reset every time the oil is changed.
When the system has calculated that oil life has beendiminished, it indicates that an oil change is necessary.A CHANGE ENGINE OIL SOON message comes on.SeeDIC Warnings and Messageson page 4!48.Change the oil as soon as possible within the next600 miles (1 000 km). It is possible that, if driving underthe best conditions, the oil life system might not indicatethat an oil change is necessary for over a year.However, the engine oil and filter must be changed atleast once a year and at this time the system must bereset. Your dealer/retailer has trained service peoplewho will perform this work using genuine parts andreset the system. It is also important to check the oilregularly and keep it at the proper level.
If the system is ever reset accidentally, the oil must bechanged at 3,000 miles (5 000 km) since the last oilchange. Remember to reset the oil life systemwhenever the oil is changed.
7-20
Page 470 of 616

Automatic Transmission Fluid
When to Check and Change Automatic
Transmission Fluid
It is usually not necessary to check the transmissionfluid level. The only reason for fluid loss is atransmission leak or overheating the transmission.If you suspect a small leak, then use the followingchecking procedures to check the fluid level. However,if there is a large leak, then it may be necessary to havethe vehicle towed to a dealer/retailer service departmentand have it repaired before driving the vehicle further.
Notice:Use of the incorrect automatic transmissionfluid may damage the vehicle, and the damages maynot be covered by the vehicle's warranty. Alwaysuse the automatic transmission fluid listed inRecommended Fluids and Lubricants on page 8!10.
Change the fluid and filter at the intervals listed in theMaintenance Schedule. SeeScheduled Maintenanceo n p a g e 8!3. Be sure to use the transmission fluidlisted inRecommended Fluids and Lubricantsonpage 8!10.
How to Check Automatic Transmission
Fluid
Notice:Too much or too little fluid can damage yourtransmission. Too much can mean that some of thefluid could come out and fall on hot engine parts orexhaust system parts, starting a fire. Too little fluidcould cause the transmission to overheat. Be sureto get an accurate reading if you check yourtransmission fluid.
Before checking the fluid level, prepare the vehicle asfollows:
1. Start the engine and park the vehicle on a levelsurface. Keep the engine running.
2. Apply the parking brake and place the shiftlever in P (Park).
3. With your foot on the brake pedal, move the shiftlever through each gear range, pausing for aboutthree seconds in each range. Then, move the shiftlever back to P (Park).
7-24
Page 471 of 616

4. Allow the engine to idle (500–800 rpm) for at leastone minute. Slowly release the brake pedal.
5. Keep the engine running and press the Trip/Fuelbutton or trip odometer reset stem until TRANSTEMP (Transmission Temperature) displays on theDriver Information Center (DIC).
6. Using the TRANS TEMP reading, determine andperform the appropriate check procedure. If theTRANS TEMP reading is not within the requiredtemperature ranges, allow the vehicle to cool,or operate the vehicle until the appropriatetransmission fluid temperature is reached.
Cold Check Procedure
Use this procedure only as a reference to determine ifthe transmission has enough fluid to be operated safelyuntil a hot check procedure can be made. The hotcheck procedure is the most accurate method to checkthe fluid level. Perform the hot check procedure at the
first opportunity. Use this cold check procedure to checkfluid level when the transmission temperature isbetween 80°F and 90°F (27°C and 32°C).
1. Locate thetransmission dipstick atthe rear of the enginecompartment, on thepassenger side of thevehicle.
SeeEngine Compartment Overviewon page 7!16for more information.
2. Flip the handle up and then pull out the dipstickand wipe it with a clean rag or paper towel.
3. Install the dipstick by pushing it back in all the way,wait three seconds, and then pull it back out again.
4. Check both sides of the dipstick and read the lowerlevel. Repeat the check procedure to verify thereading.
7-25
Page 472 of 616

5. If the fluid level is below the COLD check band,add only enough fluid as necessary to bring thelevel into the COLD band. It does not take muchfluid, generally less than one pint (0.5L). Do notoverfill.
6. Perform a hot check at the first opportunity afterthe transmission reaches a normal operatingtemperature between 160°F to 200°F (71°Cto 93°C).
7. If the fluid level is in the acceptable range, pushthe dipstick back in all the way, then flip the handledown to lock the dipstick in place.
Hot Check Procedure
Use this procedure to check the transmission fluid levelwhen the transmission fluid temperature is between160°F and 200°F (71°C and 93°C).
The hot check is the most accurate method to check thefluid level. The hot check should be performed at thefirst opportunity in order to verify the cold check. Thefluid level rises as fluid temperature increases, so it isimportant to ensure the transmission temperature iswithin range.
1. Locate thetransmission dipstick atthe rear of the enginecompartment, on thepassenger side of thevehicle.
SeeEngine Compartment Overviewon page 7!16for more information.
2. Flip the handle up and then pull out the dipstickand wipe it with a clean rag or paper towel.
3. Install the dipstick by pushing it back in all the way,wait three seconds, and then pull it back out again.
7-26
Page 475 of 616

{WARNING:
Heater and radiator hoses, and other engine
parts, can be very hot. Do not touch them.
If you do, you can be burned.
Do not run the engine if there is a leak. If you run
the engine, it could lose all coolant. That could
cause an engine fire, and you could be burned.
Get any leak fixed before you drive the vehicle.
Notice:Using coolant other than DEX-COOL®cancause premature engine, heater core, or radiatorcorrosion. In addition, the engine coolant couldrequire changing sooner, at 50 000 km (30,000 miles)or 24 months, whichever occurs first. Any repairswould not be covered by the vehicle warranty.Always use DEX-COOL®(silicate-free) coolantin the vehicle.
Engine Coolant
The cooling system in the vehicle is filled withDEX-COOL®engine coolant. This coolant is designedto remain in the vehicle for five years or 150,000 miles(240 000 km), whichever occurs first.
The following explains the cooling system and how tocheck and add coolant when it is low. If there is aproblem with engine overheating, seeEngineOverheating on page 7!34.
7-29
Page 477 of 616

Checking Coolant
The vehicle must be on a level surface when checkingthe coolant level.
Check to see if coolant is visible in the coolant surgetank. If the coolant inside the coolant surge tank isboiling, do not do anything else until it cools down.If coolant is visible but the coolant level is not at orabove the FULL COLD mark, add a 50/50 mixture ofclean, drinkable water and DEX-COOL®coolant at thecoolant surge tank, but be sure the cooling system iscool before this is done.
The coolant surge tank is located in the enginecompartment on the passenger side of the vehicle.SeeEngine Compartment Overviewon page 7!16formore information on location.
The coolant level should be at or above the FULLCOLD mark. If it is not, you may have a leak in thecooling system.
7-31
Page 481 of 616

If you do decide to lift the hood , make sure the vehicleis parked on a level surface.
Then check to see if the engine cooling fans arerunning. If the engine is overheating, both fans shouldbe running. If they are not, do not continue to run theengine and have the vehicle serviced.
Notice:Engine damage from running your enginewithout coolant is not covered by your warranty.SeeOverheated Engine Protection Operating Modeon page 7!37for information on driving to a safeplace in an emergency.
Notice:If the engine catches fire while driving withno coolant, the vehicle can be badly damaged. Thecostly repairs would not be covered by the vehiclewarranty. SeeOverheated Engine ProtectionOperating Modeon page 7!37for information ondriving to a safe place in an emergency.
If Steam Is Coming From The Engine
Compartment
{WARNING:
Steam from an overheated engine can burn you
badly, even if you just open the hood. Stay away
from the engine if you see or hear steam coming
from it. Turn it off and get everyone away from the
vehicle until it cools down. Wait until there is no
sign of steam or coolant before you open
the hood.
If you keep driving when the vehicles engine is
overheated, the liquids in it can catch fire. You or
others could be badly burned. Stop the engine if it
overheats, and get out of the vehicle until the
engine is cool.
SeeOverheated Engine Protection Operating
Modeon page 7!37for information on driving to
a safe place in an emergency.
7-35