display CADILLAC ESCALADE EXT 2010 3.G Owners Manual
[x] Cancel search | Manufacturer: CADILLAC, Model Year: 2010, Model line: ESCALADE EXT, Model: CADILLAC ESCALADE EXT 2010 3.GPages: 580, PDF Size: 6.23 MB
Page 323 of 580
Category 3, Incidents:
p(Alert):Object in the roadway, disabled vehicle,
or dangerous road conditions.
t(Accident): Roadway obstructed due to accident.
s(Road Works): Delayed traffic due to construction.
Category 4, Advisories:
j/r(Road Condition): Delayed or stopped traffic,
lane blocked or closed due to a road condition.
k(Weather): Heavy rain, snow, or fog weather
condition.
m(Parking): Available parking area.
l(Information): Special event, general information,
or warning.
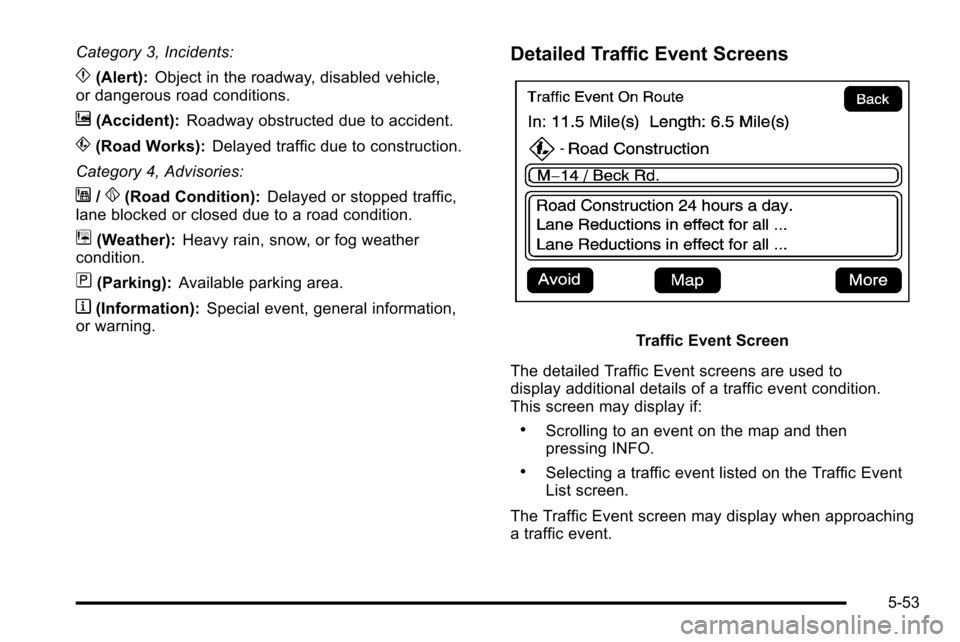
Detailed Traffic Event Screens
Traffic Event Screen
The detailed Traffic Event screens are used to
display additional details of a traffic event condition.
This screen may display if:
.Scrolling to an event on the map and then
pressing INFO.
.Selecting a traffic event listed on the Traffic Event
List screen.
The Traffic Event screen may display when approaching
a traffic event.
5-53
Page 324 of 580
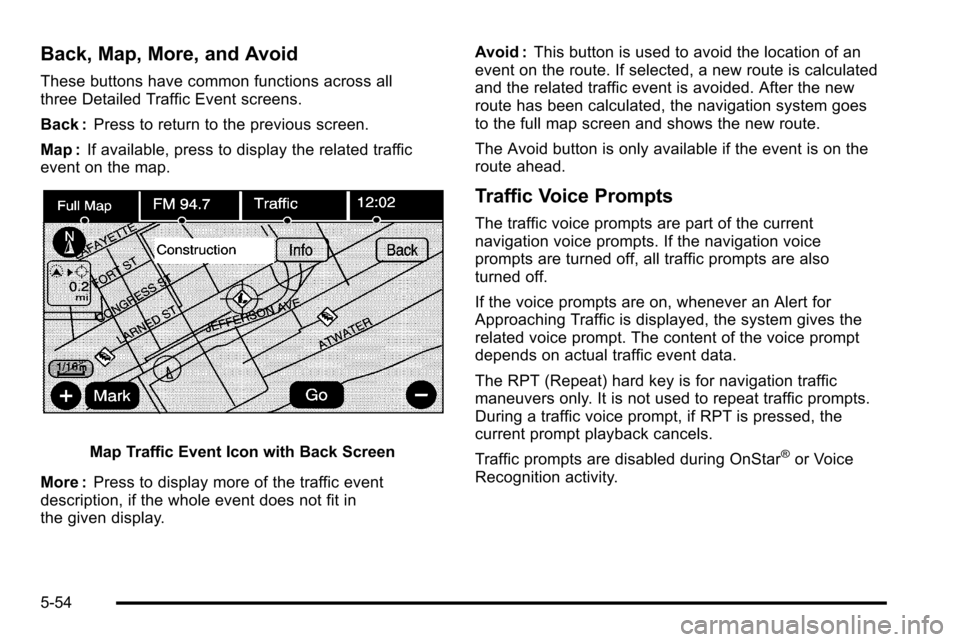
Back, Map, More, and Avoid
These buttons have common functions across all
three Detailed Traffic Event screens.
Back :Press to return to the previous screen.
Map : If available, press to display the related traffic
event on the map.
Map Traffic Event Icon with Back Screen
More : Press to display more of the traffic event
description, if the whole event does not fit in
the given display. Avoid :
This button is used to avoid the location of an
event on the route. If selected, a new route is calculated
and the related traffic event is avoided. After the new
route has been calculated, the navigation system goes
to the full map screen and shows the new route.
The Avoid button is only available if the event is on the
route ahead.
Traffic Voice Prompts
The traffic voice prompts are part of the current
navigation voice prompts. If the navigation voice
prompts are turned off, all traffic prompts are also
turned off.
If the voice prompts are on, whenever an Alert for
Approaching Traffic is displayed, the system gives the
related voice prompt. The content of the voice prompt
depends on actual traffic event data.
The RPT (Repeat) hard key is for navigation traffic
maneuvers only. It is not used to repeat traffic prompts.
During a traffic voice prompt, if RPT is pressed, the
current prompt playback cancels.
Traffic prompts are disabled during OnStar
®or Voice
Recognition activity.
5-54
Page 325 of 580
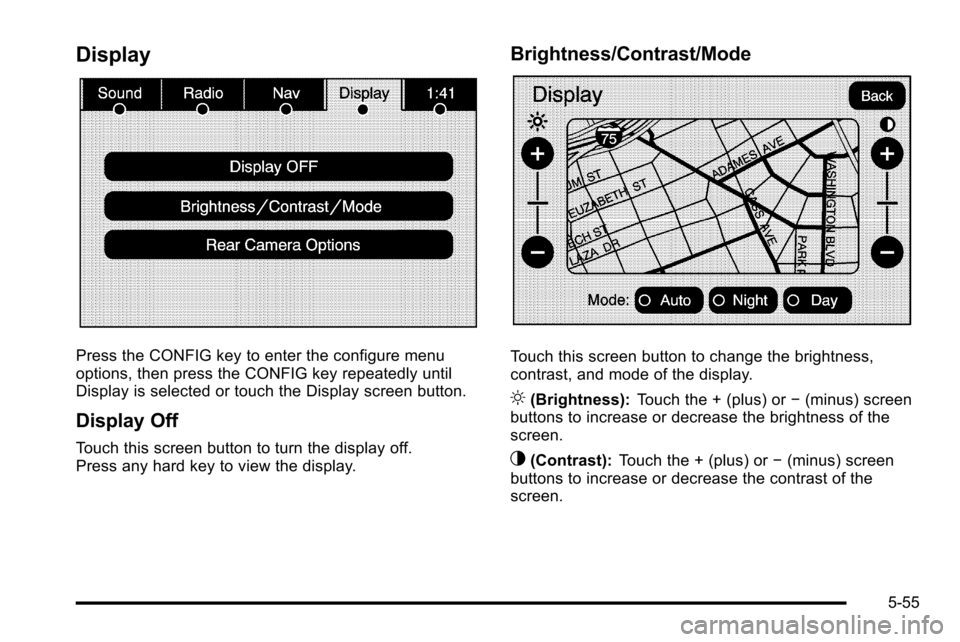
Display
Press the CONFIG key to enter the configure menu
options, then press the CONFIG key repeatedly until
Display is selected or touch the Display screen button.
Display Off
Touch this screen button to turn the display off.
Press any hard key to view the display.
Brightness/Contrast/Mode
Touch this screen button to change the brightness,
contrast, and mode of the display.
](Brightness):Touch the + (plus) or −(minus) screen
buttons to increase or decrease the brightness of the
screen.
_(Contrast): Touch the + (plus) or −(minus) screen
buttons to increase or decrease the contrast of the
screen.
5-55
Page 328 of 580
Problems with Route Guidance
Inappropriate route guidance may occur under one or
more of the following conditions:
.You have not turned onto the road indicated.
.Route guidance may not be available when using
automatic rerouting for the next right or left turn.
.The route may not be changed when using
automatic rerouting.
.There is no route guidance when turning at an
intersection.
.Plural names of places may be announced
occasionally.
.It may take a long time to operate automatic
rerouting during high-speed driving.
.Automatic rerouting may display a route returning
to the set stopover if you are heading for a
destination without passing through a set stopover.
.The route prohibits the entry of a vehicle due to a
regulation by time or season or any other
regulation which may be given.
.Some routes may not be searched.
.The route to the destination may not be shown if
there are new roads, if roads have recently
changed, or if certain roads are not listed on the
map DVD. SeeOrdering Map DVDs on page 5‑58.
To recalibrate the vehicle's position on the map, see
your dealer/retailer.
If the System Needs Service
If your system needs service and you have followed the
steps listed here and still are experiencing problems,
see your dealer/retailer for assistance.
Ordering Map DVDs
The map DVD in your vehicle is the most up-to-date
information available when your vehicle was produced.
The map DVD is updated periodically, provided that the
map information has changed.
5-58
Page 330 of 580
Playing the Radio
O
/n(Power/Volume):Press to turn the audio
system on and off. Turn to increase or to decrease the
volume.
Press and hold for more than two seconds to turn off
the navigation system, the Rear Seat Entertainment
(RSE) video screen, and Rear Seat Audio (RSA). If the
vehicle has not been turned off, press this knob to turn
RSE and RSA back on and to continue playback of the
last active source.
w(Tuning Knob): Turn to go to the next or previous
frequency or disc track or chapter. See CD Playeron
page 5‑68or DVD Playeron page 5‑75for more
information.
AUDIO : Press to display the audio screen. Press to
switch between AM, FM, or XM, if equipped, DISC,
or AUX (Auxiliary), or touch the screen button. See CD
Player
on page 5‑68, DVD Playeron page 5‑75, and
Auxiliary Deviceson page 5‑86for more information.
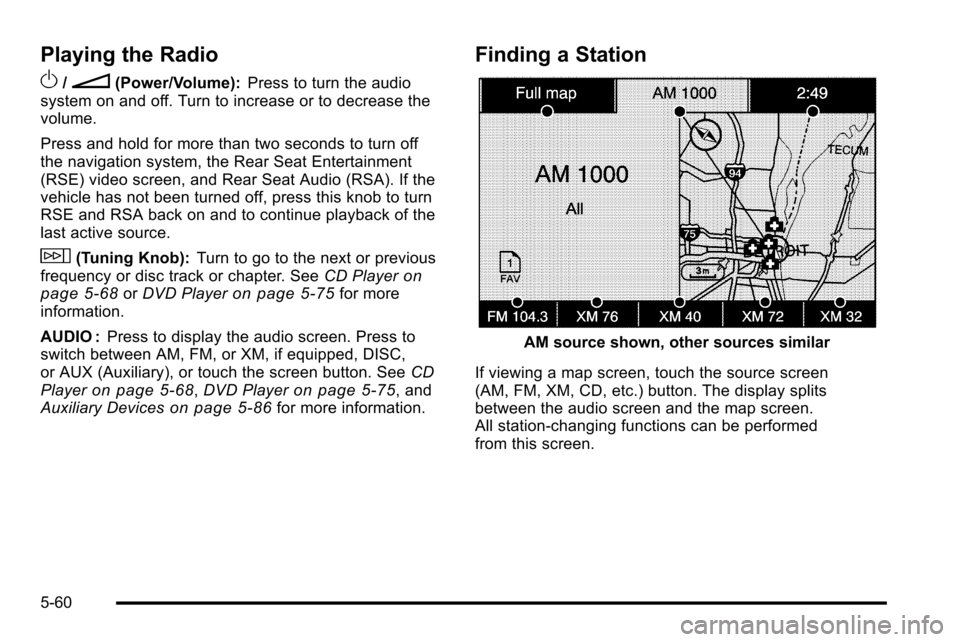
Finding a Station
AM source shown, other sources similar
If viewing a map screen, touch the source screen
(AM, FM, XM, CD, etc.) button. The display splits
between the audio screen and the map screen.
All station-changing functions can be performed
from this screen.
5-60
Page 332 of 580
XM lists also contain a category to select and the
stations or channels that have broadcasts that relate
to that category. For XM, touch the left and right arrow
screen buttons to change categories. The station
information appears on the display. See“Radio Menu”
later in this section to add and remove XM categories
from the category list. Removed categories do not
appear on the category list screen or when the right
and left arrow category screen buttons are used.
FM lists may also contain a category to select if
stations in the broadcast area support Radio Data
Systems (RDS).
2Refresh List: Touch to refresh the list of AM or
FM stations.
When viewing a map screen, the name of the station or
channel displays.
y © ¨ z(Seek): To seek stations, press the up or
down arrows to go to the next or previous station.
To scan stations, press and hold either arrow for more
than two seconds. The radio goes to a station, plays for
a few seconds, then goes to the next station. To stop
scanning, press either arrow again.
Storing Radio Station Presets
This feature stores a mix of up to 30 AM, FM, and
XM (if equipped) preset stations. To store presets:
1. Press
Oto turn the system on.
2. If viewing a map screen, touch the source screen button, press the AUDIO key, or press
the FAV (favorite) key.
3. Select the band.
4. Seek, scan, or tune to the desired station, to select the station.
5. Press and hold one of the preset screen buttons for more than two seconds or until a beep is heard.
6. Repeat the steps for each preset.
5-62
Page 334 of 580
Digital Signal Processing (DSP)
The system has Digital Signal Processing (DSP).
DSP provides a choice of four different listening
experiences. DSP can be used while listening to the
audio system. Not all DSP modes are available for all
source types. The type of DSP selected is displayed on
the status line.
Select from the following DSP settings:
Normal :Adjusts the audio for normal mode. This
provides the best sound quality for all seating positions.
Surround (Centerpoint
®) : Enables Bose Centerpoint
signal processing that produces a surround sound
listening experience from a CD or XM stereo digital
audio source. Centerpoint delivers five independent
audio channels from conventional two channel stereo
recordings (not available for AM or FM).
Driver : Adjusts the audio to give the driver the best
possible sound quality.
Rear : Adjusts the audio to give the rear seat occupants
the best possible sound quality.
2 CH. (Channel) : Enhances surround sound.
5.1 CH. (Channel) : Gives a full affect of surround
sound listening. This button is only available when
playing DVD video and DVD audio discs that support
5.1 audio and the RSA is off.
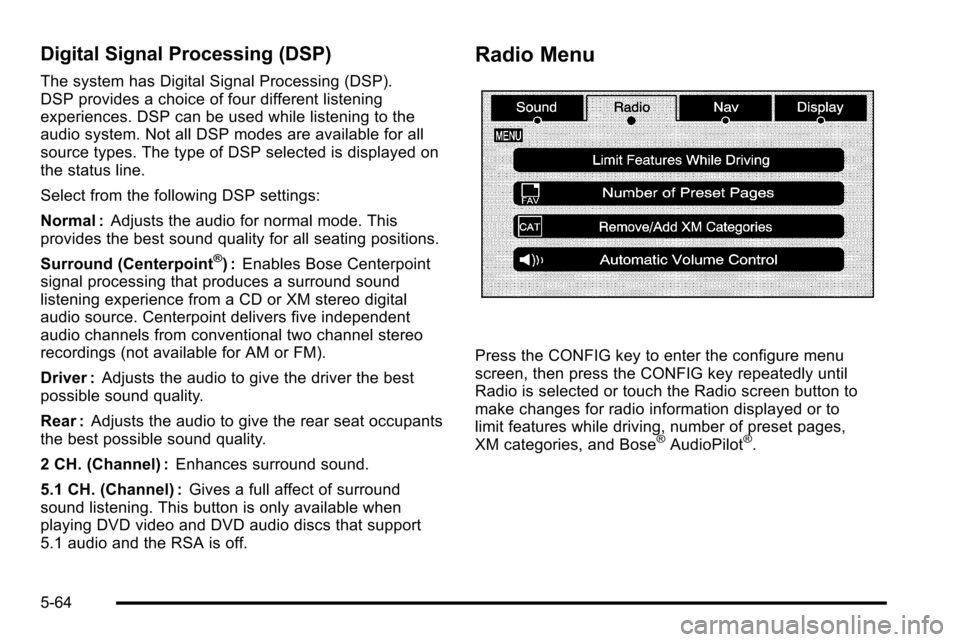
Radio Menu
Press the CONFIG key to enter the configure menu
screen, then press the CONFIG key repeatedly until
Radio is selected or touch the Radio screen button to
make changes for radio information displayed or to
limit features while driving, number of preset pages,
XM categories, and Bose
®AudioPilot®.
5-64
Page 336 of 580
Radio Data System (RDS)
The audio system has a Radio Data System (RDS).
RDS features are available for use only on FM stations
that broadcast RDS information. With RDS, the radio
can do the following:
.Receive announcements concerning local and
national emergencies
.Display messages from radio stations
This system relies on receiving specific information from
these stations and only works when the information is
available. In rare cases, a radio station may broadcast
incorrect information that causes the radio features to
work improperly. If this happens, contact the radio
station.
The RDS system is always on. When information is
broadcast from the FM station that is playing, the station
name or call letters displays on the audio screen.
XM™ Satellite Radio Service
XM™ is a satellite radio service that is based in the
48 contiguous United States and 10 Canadian
provinces. XM Satellite Radio has a wide variety
of programming and commercial-free music,
coast-to-coast, and in digital-quality sound. During your
trial or when you subscribe, you will get unlimited
access to XM Radio Online while not in the vehicle.
A service fee is required to receive the XM service.
For more information, contact XM at xmradio.com or
call 1-800-929-2100 in the U.S. and xmradio.ca or
call 1-877-438-9677 in Canada.
When XM™ is active, the channel name and number,
song title, and artist displays on the screen.
XM™ Radio Messages
XL (Explicit Language Channels) : XL on the radio
display, after the channel name, indicates content
with explicit language. These channels, or any others,
can be blocked at a customer's request by calling
1‐800‐852‐XMXM (9696).
XM Updating : The encryption code in the receiver is
being updated and no action is required.
5-66
Page 338 of 580
CD Player
The player can be used for CD, MP3, DVD audio, and
as a DVD video player. SeeDVD Playeron page 5‑75for more information about DVD audio and video.
Six-Disc CD Player
While playing a CD, the navigation system is available.
When you insert a CD, the CD tab displays. If a DSP
setting is selected for the CD, it activates each time you
play a CD.
If the ignition or radio is turned off with a CD in the
player, it stays in the player. When the ignition or radio
is turned on, the CD starts playing where it stopped,
if it was the last selected audio source.
As each new track starts to play, the track number
displays.
If an error appears on the display, see “CD Messages”
later in this section.
If viewing a map screen, touch the CD screen button.
The display will split between the audio screen and the
map screen. If you do not want to view a split screen or
you are not on a map screen, press the AUDIO key
then press the AUDIO key repeatedly until CD is
selected or touch the CD screen button.
M(Load): To load one disc, do the following:
1. Press the load hard key and follow the screen message displayed.
2. When the system displays “Insert Disc (number)”,
insert the disc partway into the slot, label side up.
The system will pull it into the first available slot
and start playing. The system will display the type
of disc inserted.
To load multiple discs, do the following: 1. Press and hold the load hard key and follow the screen message displayed.
2. When the system displays “Insert Disc (number)”,
insert the disc partway into the slot, label side up.
The system will pull it in.
3. Once a disc is loaded, the system will display “Insert Disc (number)” again. Load the next disc.
Repeat this procedure for each disc. The player
takes up to six discs, do not try to load more than
six. The system does not display the disc types
when loading all, until the discs have been read by
the system.
5-68
Page 339 of 580
Z(Eject):To eject a disc, do the following:
1. Press the eject hard key.
2. The system displays “Ejecting Disc”.
Press the DISC screen button to display the Disc
Changer screen. Select the disc to eject. If a
selection is not made, the system will eject the disc
from the current slot. If the disc is not removed
from the slot, the system pulls it back in after
10 seconds and starts playing it.
To eject all discs, press and hold the eject hard key.
The system displays the disc number being ejected.Playing an Audio CD
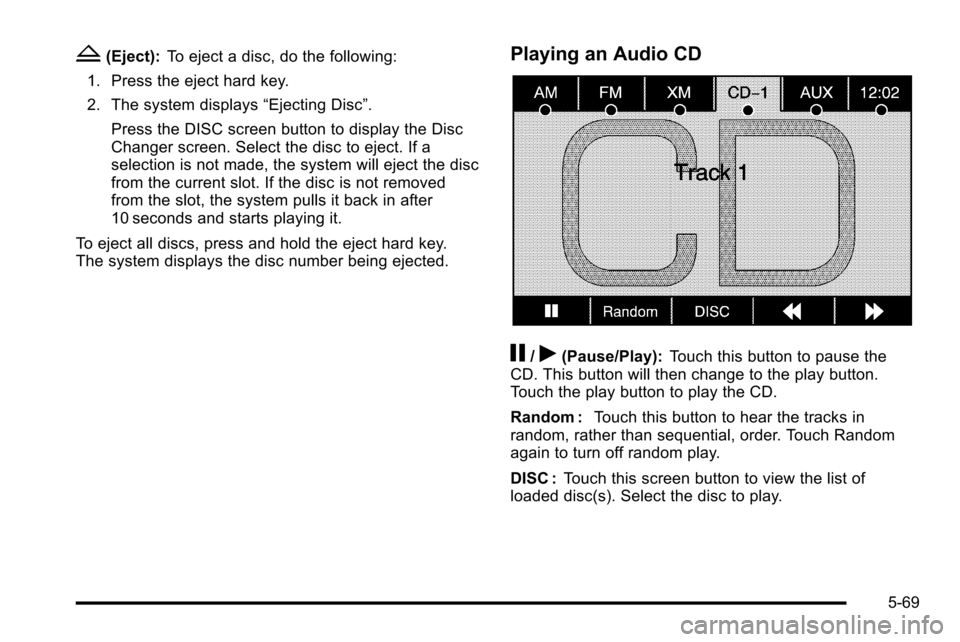
j/r(Pause/Play): Touch this button to pause the
CD. This button will then change to the play button.
Touch the play button to play the CD.
Random : Touch this button to hear the tracks in
random, rather than sequential, order. Touch Random
again to turn off random play.
DISC : Touch this screen button to view the list of
loaded disc(s). Select the disc to play.
5-69