height CADILLAC SEVILLE 2003 5.G Owners Manual
[x] Cancel search | Manufacturer: CADILLAC, Model Year: 2003, Model line: SEVILLE, Model: CADILLAC SEVILLE 2003 5.GPages: 408, PDF Size: 2.72 MB
Page 9 of 408
Heated Seats
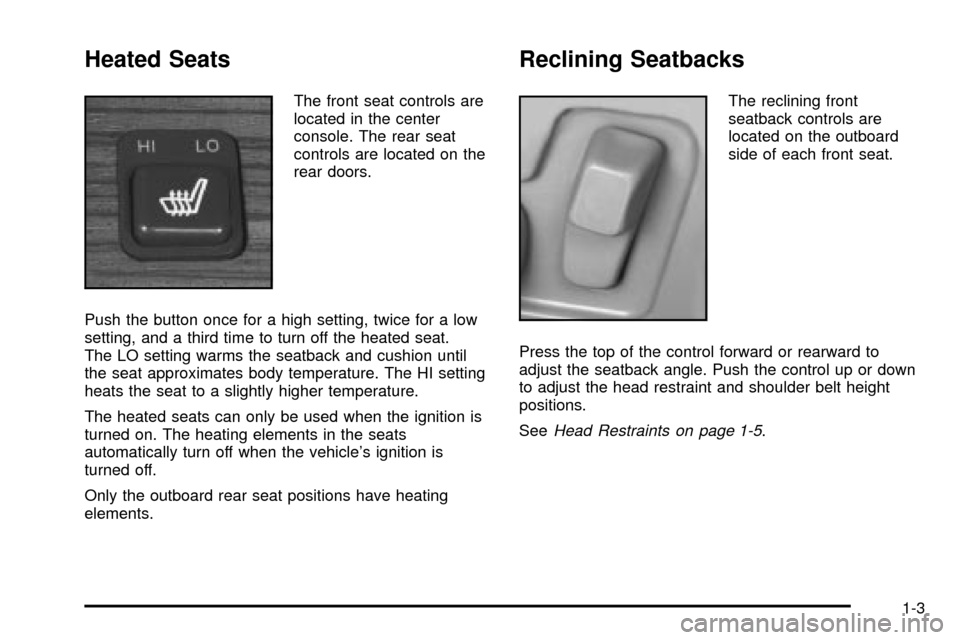
The front seat controls are
located in the center
console. The rear seat
controls are located on the
rear doors.
Push the button once for a high setting, twice for a low
setting, and a third time to turn off the heated seat.
The LO setting warms the seatback and cushion until
the seat approximates body temperature. The HI setting
heats the seat to a slightly higher temperature.
The heated seats can only be used when the ignition is
turned on. The heating elements in the seats
automatically turn off when the vehicle's ignition is
turned off.
Only the outboard rear seat positions have heating
elements.
Reclining Seatbacks
The reclining front
seatback controls are
located on the outboard
side of each front seat.
Press the top of the control forward or rearward to
adjust the seatback angle. Push the control up or down
to adjust the head restraint and shoulder belt height
positions.
See
Head Restraints on page 1-5.
1-3
Page 11 of 408
Head Restraints
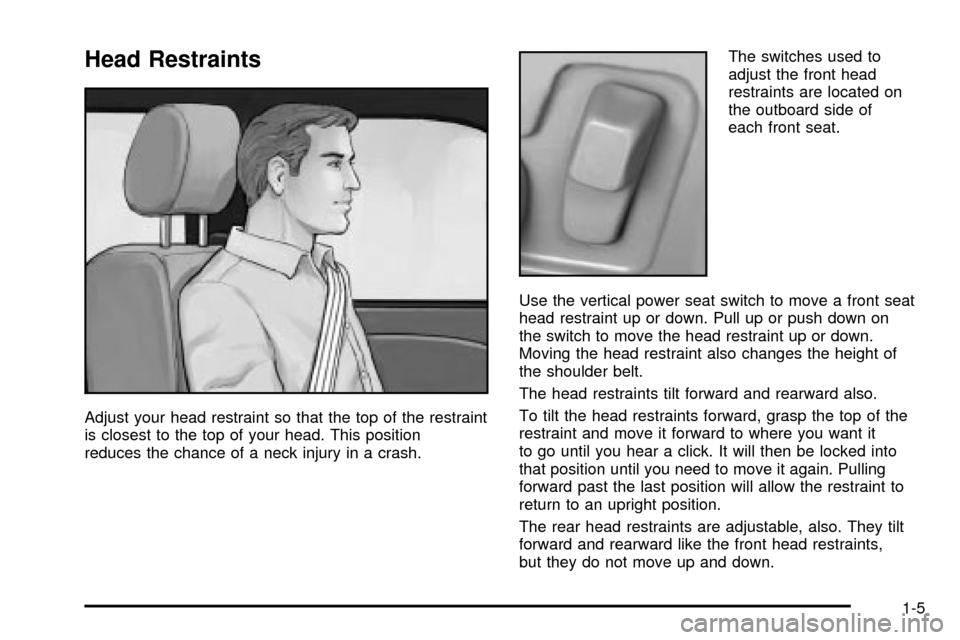
Adjust your head restraint so that the top of the restraint
is closest to the top of your head. This position
reduces the chance of a neck injury in a crash.The switches used to
adjust the front head
restraints are located on
the outboard side of
each front seat.
Use the vertical power seat switch to move a front seat
head restraint up or down. Pull up or push down on
the switch to move the head restraint up or down.
Moving the head restraint also changes the height of
the shoulder belt.
The head restraints tilt forward and rearward also.
To tilt the head restraints forward, grasp the top of the
restraint and move it forward to where you want it
to go until you hear a click. It will then be locked into
that position until you need to move it again. Pulling
forward past the last position will allow the restraint to
return to an upright position.
The rear head restraints are adjustable, also. They tilt
forward and rearward like the front head restraints,
but they do not move up and down.
1-5
Page 19 of 408
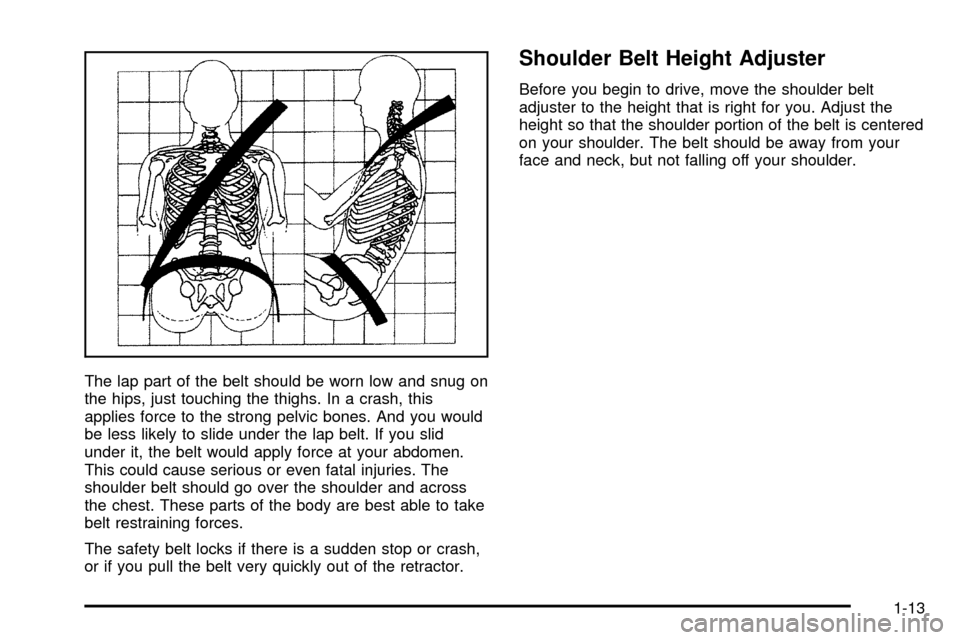
The lap part of the belt should be worn low and snug on
the hips, just touching the thighs. In a crash, this
applies force to the strong pelvic bones. And you would
be less likely to slide under the lap belt. If you slid
under it, the belt would apply force at your abdomen.
This could cause serious or even fatal injuries. The
shoulder belt should go over the shoulder and across
the chest. These parts of the body are best able to take
belt restraining forces.
The safety belt locks if there is a sudden stop or crash,
or if you pull the belt very quickly out of the retractor.
Shoulder Belt Height Adjuster
Before you begin to drive, move the shoulder belt
adjuster to the height that is right for you. Adjust the
height so that the shoulder portion of the belt is centered
on your shoulder. The belt should be away from your
face and neck, but not falling off your shoulder.
1-13
Page 34 of 408
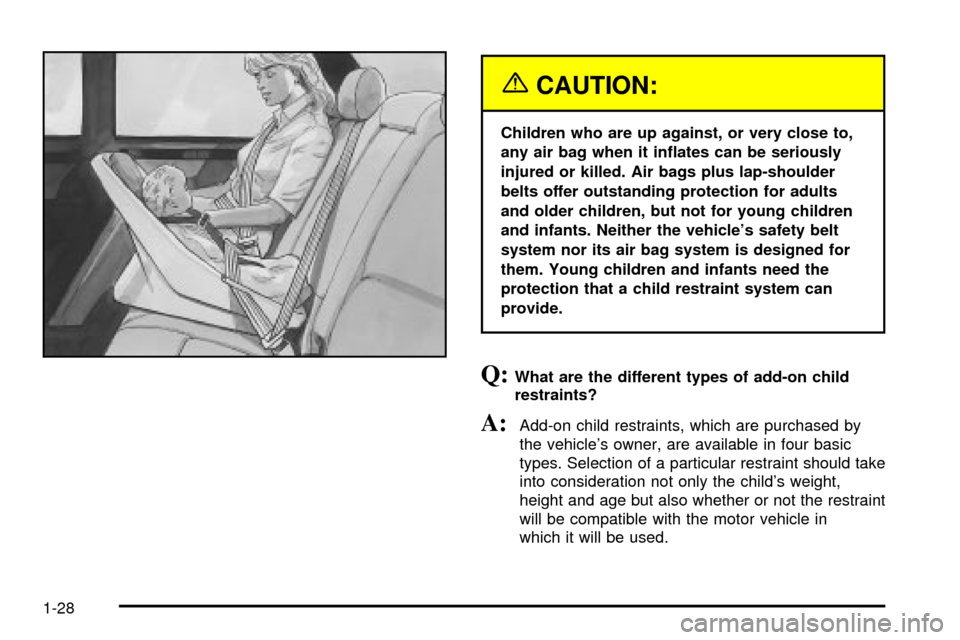
{CAUTION:
Children who are up against, or very close to,
any air bag when it in¯ates can be seriously
injured or killed. Air bags plus lap-shoulder
belts offer outstanding protection for adults
and older children, but not for young children
and infants. Neither the vehicle's safety belt
system nor its air bag system is designed for
them. Young children and infants need the
protection that a child restraint system can
provide.
Q:What are the different types of add-on child
restraints?
A:Add-on child restraints, which are purchased by
the vehicle's owner, are available in four basic
types. Selection of a particular restraint should take
into consideration not only the child's weight,
height and age but also whether or not the restraint
will be compatible with the motor vehicle in
which it will be used.
1-28
Page 35 of 408
For most basic types of child restraints, there are
many different models available. When purchasing a
child restraint, be sure it is designed to be used
in a motor vehicle. If it is, the restraint will have a
label saying that it meets federal motor vehicle
safety standards.
The restraint manufacturer's instructions that come
with the restraint state the weight and height
limitations for a particular child restraint. In addition,
there are many kinds of restraints available for
children with special needs.
{CAUTION:
Newborn infants need complete support,
including support for the head and neck. This
is necessary because a newborn infant's neck
is weak and its head weighs so much
compared with the rest of its body. In a crash,
an infant in a rear-facing seat settles into the
restraint, so the crash forces can be
distributed across the strongest part of an
infant's body, the back and shoulders. Infants
always should be secured in appropriate infant
restraints.
{CAUTION:
The body structure of a young child is quite
unlike that of an adult or older child, for whom
the safety belts are designed. A young child's
hip bones are still so small that the vehicle's
regular safety belt may not remain low on the
hip bones, as it should. Instead, it may settle
up around the child's abdomen. In a crash, the
belt would apply force on a body area that's
unprotected by any bony structure. This alone
could cause serious or fatal injuries. Young
children always should be secured in
appropriate child restraints.
1-29
Page 111 of 408
Vehicle Personalization
Memory Seat, Mirrors and Steering
Wheel
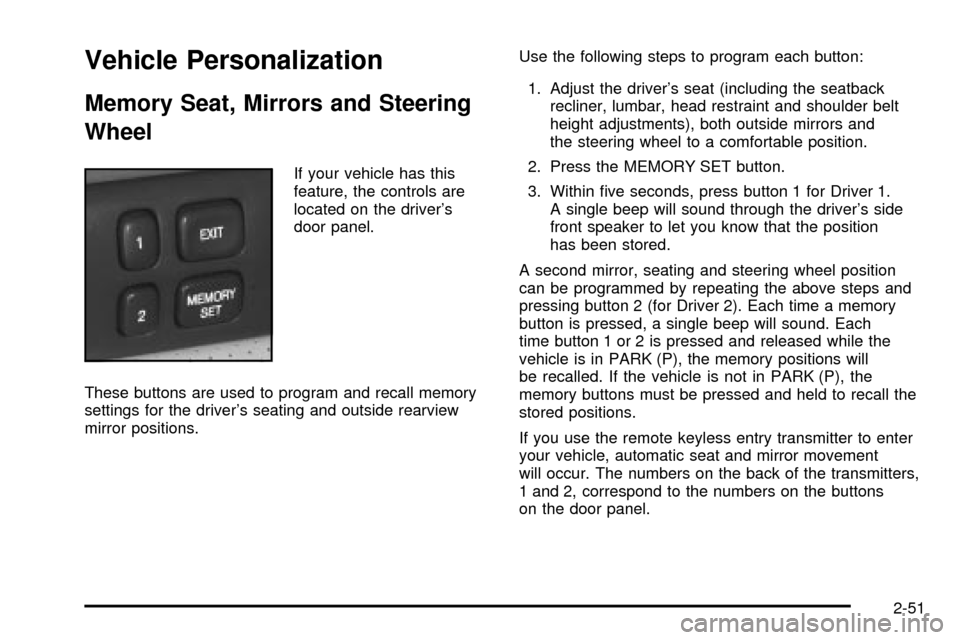
If your vehicle has this
feature, the controls are
located on the driver's
door panel.
These buttons are used to program and recall memory
settings for the driver's seating and outside rearview
mirror positions.Use the following steps to program each button:
1. Adjust the driver's seat (including the seatback
recliner, lumbar, head restraint and shoulder belt
height adjustments), both outside mirrors and
the steering wheel to a comfortable position.
2. Press the MEMORY SET button.
3. Within ®ve seconds, press button 1 for Driver 1.
A single beep will sound through the driver's side
front speaker to let you know that the position
has been stored.
A second mirror, seating and steering wheel position
can be programmed by repeating the above steps and
pressing button 2 (for Driver 2). Each time a memory
button is pressed, a single beep will sound. Each
time button 1 or 2 is pressed and released while the
vehicle is in PARK (P), the memory positions will
be recalled. If the vehicle is not in PARK (P), the
memory buttons must be pressed and held to recall the
stored positions.
If you use the remote keyless entry transmitter to enter
your vehicle, automatic seat and mirror movement
will occur. The numbers on the back of the transmitters,
1 and 2, correspond to the numbers on the buttons
on the door panel.
2-51
Page 112 of 408

When the key is placed in the ignition in OFF and you
have entered the vehicle without using the remote
keyless entry transmitter, the seats and mirrors
will automatically adjust to the programmed position of
the last driver.
To stop recall movement of the memory feature at any
time, press one of the power seat controls or memory
buttons.
Two personalized exit positions can be set by ®rst
recalling the driving position (by pressing 1 or 2), then
positioning the steering wheel and seat in the desired
exit positions. Then press and release the
MEMORY SET button and, within ®ve seconds, press
the EXIT button. With the vehicle in PARK (P), the
exit position for the previously set driver can be recalled
by pressing the EXIT button. The mirrors, power
lumbar and shoulder belt height positions will not be
stored or recalled for the exit positions.Further programming for automatic seat and mirror
movement can be done using the Driver Information
Center (DIC). You can select or not select the following:
·Automatic seat and mirror movement when the
vehicle is unlocked with the remote keyless
entry transmitter, or
·automatic seat and mirror movement when a key is
placed in the ignition.
For programming information, see
DIC Vehicle
Personalization on page 3-64.
2-52
Page 302 of 408
Brake Wear
Your vehicle has four-wheel disc brakes.
Disc brake pads have built-in wear indicators that make
a high-pitched warning sound when the brake pads
are worn and new pads are needed. The sound
may come and go or be heard all the time your vehicle
is moving (except when you are pushing on the
brake pedal ®rmly).
{CAUTION:
The brake wear warning sound means that
soon your brakes will not work well. That
could lead to an accident. When you hear the
brake wear warning sound, have your vehicle
serviced.
Notice:Continuing to drive with worn-out brake
pads could result in costly brake repair.Some driving conditions or climates may cause a brake
squeal when the brakes are ®rst applied or lightly
applied. This does not mean something is wrong with
your brakes.
Properly torqued wheel nuts are necessary to help
prevent brake pulsation. When tires are rotated, inspect
brake pads for wear and evenly tighten wheel nuts in
the proper sequence to GM torque speci®cations.
Brake linings should always be replaced as complete
axle sets.
See
Brake System Inspection on page 6-14.
Brake Pedal Travel
See your dealer if the brake pedal does not return to
normal height, or if there is a rapid increase in
pedal travel. This could be a sign of brake trouble.
Brake Adjustment
Every time you apply the brakes, with or without the
vehicle moving, your brakes adjust for wear.
5-42
Page 331 of 408
Wheel Alignment and Tire Balance
The wheels on your vehicle were aligned and balanced
carefully at the factory to give you the longest tire life
and best overall performance.
Scheduled wheel alignment and wheel balancing are
not needed. However, if you notice unusual tire wear or
your vehicle pulling one way or the other, the alignment
may need to be reset. If you notice your vehicle
vibrating when driving on a smooth road, your wheels
may need to be rebalanced.
Wheel Replacement
Replace any wheel that is bent, cracked or badly rusted
or corroded. If wheel nuts keep coming loose, the
wheel, wheel bolts and wheel nuts should be replaced.
If the wheel leaks air, replace it (except some
aluminum wheels, which can sometimes be repaired).
See your dealer if any of these conditions exist.
Your dealer will know the kind of wheel you need.
Each new wheel should have the same load-carrying
capacity, diameter, width, offset and be mounted
the same way as the one it replaces.If you need to replace any of your wheels, wheel bolts
or wheel nuts, replace them only with new GM
original equipment parts. This way, you will be sure to
have the right wheel, wheel bolts and wheel nuts
for your vehicle.
{CAUTION:
Using the wrong replacement wheels, wheel
bolts or wheel nuts on your vehicle can be
dangerous. It could affect the braking and
handling of your vehicle, make your tires lose
air and make you lose control. You could have
a collision in which you or others could be
injured. Always use the correct wheel, wheel
bolts and wheel nuts for replacement.
Notice:The wrong wheel can also cause problems
with bearing life, brake cooling, speedometer or
odometer calibration, headlamp aim, bumper height,
vehicle ground clearance and tire or tire chain
clearance to the body and chassis.
See
Changing a Flat Tire on page 5-74for more
information.
5-71
Page 405 of 408

Safety Belt (cont.)
Reminder Light............................................3-41
Safety Belts...................................................5-86
Care of......................................................5-86
Driver Position............................................1-12
How to Wear Safety Belts Properly................1-11
Questions and Answers About Safety Belts.....1-10
Rear Seat Passengers.................................1-19
Right Front Passenger Position......................1-19
Safety Belt Extender....................................1-23
Safety Belt Use During Pregnancy.................1-18
Safety Belts Are for Everyone......................... 1-6
Safety Chains.................................................4-38
Safety Warnings and Symbols.............................. iii
Scheduled Maintenance..................................... 6-4
Seat............................................................... 1-5
Head Restraints............................................ 1-5
Seats.............................................................. 1-3
Heated Seats............................................... 1-3
Memory.....................................................2-51
Power Lumbar.............................................. 1-2
Power Seats................................................. 1-2
Reclining Seatbacks...................................... 1-3
Securing a Child Restraint................................1-38
Designed for the LATCH System...................1-38
Rear Seat Position......................................1-38
Right Front Seat Position..............................1-41
Security Light.................................................3-51
Sensors.........................................................3-31
Service Bulletins.............................................7-10Service Engine Soon Light in the United States
or Check Engine Light in Canada..................3-47
Service Manuals.............................................7-10
Service........................................................... 5-3
Adding Equipment to the Outside of Your
Vehicle..................................................... 5-4
Doing Your Own Work................................... 5-3
Engine Soon Light.......................................3-47
Publications Ordering Information...................7-10
Setting Preset Stations............................3-80, 3-89
Setting the Time.............................................3-78
Radios with Radio Data Systems (RDS).........3-78
Radios without Radio Data Systems (RDS).....3-78
Setting the Tone (Bass/Treble)..................3-81, 3-90
Sheet Metal Damage.......................................5-88
Shifting Into Park (P).......................................2-32
Shifting Out of Park (P)...................................2-34
Shoulder Belt Height Adjuster...........................1-13
Skidding........................................................4-16
Some Other Rainy Weather Tips.......................4-20
Speci®cations, Capacities...............................5-100
Speedometer..................................................3-39
Starter Switch Check.......................................6-11
Starting Your Engine.......................................2-25
Steering in Emergencies..................................4-13
Steering, Suspension and Front Drive Axle
Boot and Seal Inspection..............................6-13
Steering Tips..................................................4-11
Steering Wheel Climate Controls.......................3-35
Steering Wheel Controls, Audio.......................3-103
13