light CADILLAC SEVILLE 2003 5.G Owners Manual
[x] Cancel search | Manufacturer: CADILLAC, Model Year: 2003, Model line: SEVILLE, Model: CADILLAC SEVILLE 2003 5.GPages: 408, PDF Size: 2.72 MB
Page 1 of 408

Seats and Restraint Systems........................... 1-1
Front Seats
............................................... 1-2
Safety Belts
.............................................. 1-6
Child Restraints
.......................................1-24
Supplemental In¯atable Restraint (SIR)
........1-44
Restraint System Check
............................1-52
Features and Controls..................................... 2-1
Keys
........................................................ 2-3
Doors and Locks
....................................... 2-9
Windows
.................................................2-15
Theft-Deterrent Systems
............................2-19
Starting and Operating Your Vehicle
...........2-23
Mirrors
....................................................2-37
OnStar
žSystem
......................................2-42
HomeLinkžTransmitter
.............................2-44
Storage Areas
.........................................2-48
Sunroof
..................................................2-50
Vehicle Personalization
.............................2-51
Instrument Panel............................................. 3-1
Instrument Panel Overview
.......................... 3-4
Climate Controls
......................................3-28
Warning Lights, Gages and Indicators
.........3-37
Driver Information Center (DIC)
..................3-53Trip Computer
.........................................3-77
Audio System(s)
.......................................3-78
Driving Your Vehicle....................................... 4-1
Your Driving, the Road, and Your Vehicle
..... 4-2
Towing
...................................................4-31
Service and Appearance Care.......................... 5-1
Service
..................................................... 5-3
Fuel
......................................................... 5-4
Checking Things Under the Hood
...............5-10
Headlamp Aiming
.....................................5-51
Bulb Replacement
....................................5-55
Windshield Wiper Blade Replacement
.........5-62
Tires
......................................................5-63
Appearance Care
.....................................5-83
Vehicle Identi®cation
.................................5-91
Electrical System
......................................5-92
Capacities and Speci®cations
...................5-100
Normal Maintenance Replacement Parts
....5-101
Maintenance Schedule..................................... 6-1
Maintenance Schedule
................................ 6-2
Customer Assistance Information.................... 7-1
Customer Assistance Information
.................. 7-2
Reporting Safety Defects
............................ 7-9
Index................................................................ 1
2003 Cadillac Seville Owner ManualM
Page 4 of 408

Vehicle Damage Warnings
Also, in this book you will ®nd these notices:
Notice:These mean there is something that could
damage your vehicle.
A notice will tell you about something that can damage
your vehicle. Many times, this damage would not be
covered by your warranty, and it could be costly. But the
notice will tell you what to do to help avoid the
damage.
When you read other manuals, you might see
CAUTION and NOTICE warnings in different colors or in
different words.
You'll also see warning labels on your vehicle. They use
the same words, CAUTION or NOTICE.
Vehicle Symbols
Your vehicle has components and labels that use
symbols instead of text. Symbols, used on your vehicle,
are shown along with the text describing the operation
or information relating to a speci®c component, control,
message, gage or indicator.
If you need help ®guring out a speci®c name of a
component, gage or indicator, reference the following
topics:
·Seats and Restraint Systems in Section 1
·Features and Controls in Section 2
·Instrument Panel Overview in Section 3
·Climate Controls in Section 3
·Warning Lights, Gages and Indicators in Section 3
·Audio System(s) in Section 3
·Engine Compartment Overview in Section 5
iv
Page 9 of 408
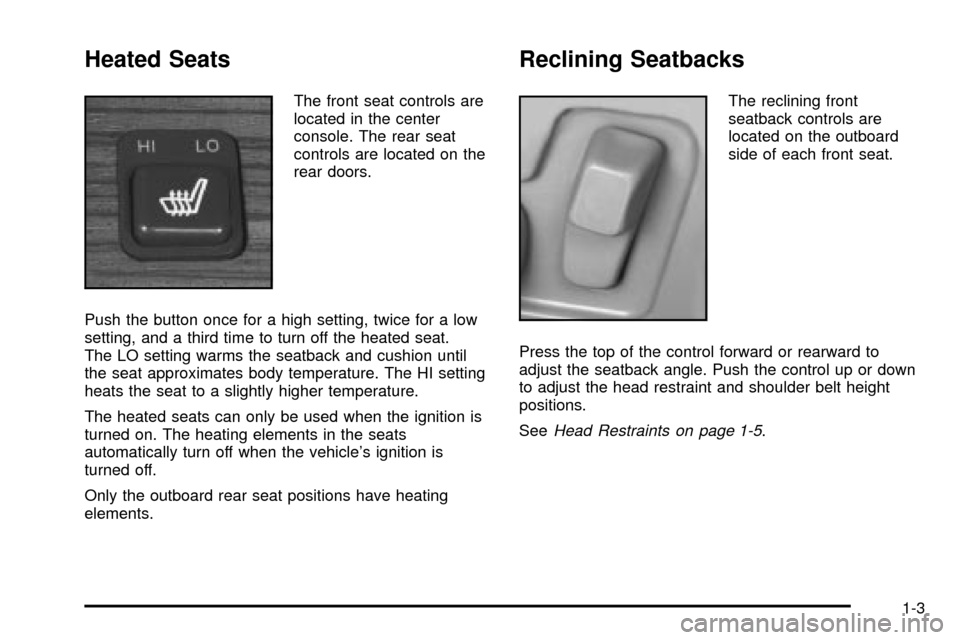
Heated Seats
The front seat controls are
located in the center
console. The rear seat
controls are located on the
rear doors.
Push the button once for a high setting, twice for a low
setting, and a third time to turn off the heated seat.
The LO setting warms the seatback and cushion until
the seat approximates body temperature. The HI setting
heats the seat to a slightly higher temperature.
The heated seats can only be used when the ignition is
turned on. The heating elements in the seats
automatically turn off when the vehicle's ignition is
turned off.
Only the outboard rear seat positions have heating
elements.
Reclining Seatbacks
The reclining front
seatback controls are
located on the outboard
side of each front seat.
Press the top of the control forward or rearward to
adjust the seatback angle. Push the control up or down
to adjust the head restraint and shoulder belt height
positions.
See
Head Restraints on page 1-5.
1-3
Page 13 of 408
Your vehicle has a light
that comes on as a
reminder to buckle up. See
Safety Belt Reminder
Light on page 3-41.
In most states and all Canadian provinces, the law says
to wear safety belts. Here's why:
They work.
You never know if you'll be in a crash. If you do have a
crash, you don't know if it will be a bad one.
A few crashes are mild, and some crashes can be so
serious that even buckled up a person wouldn't survive.
But most crashes are in between. In many of them,
people who buckle up can survive and sometimes walk
away. Without belts they could have been badly hurt
or killed.
After more than 30 years of safety belts in vehicles, the
facts are clear. In most crashes buckling up does
matter... a lot!
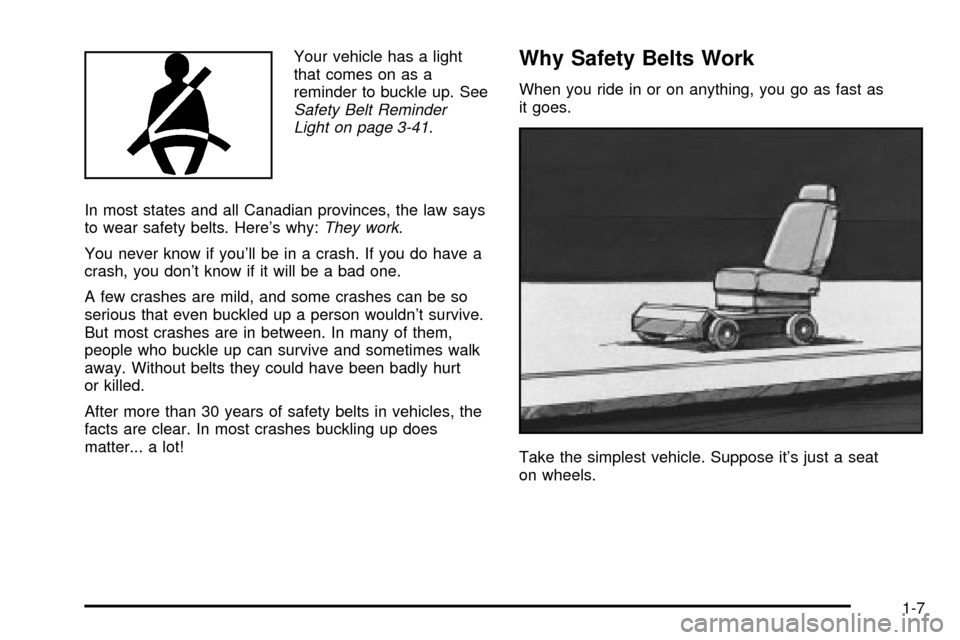
Why Safety Belts Work
When you ride in or on anything, you go as fast as
it goes.
Take the simplest vehicle. Suppose it's just a seat
on wheels.
1-7
Page 18 of 408
Driver Position
This part describes the driver's restraint system.
Lap-Shoulder Belt
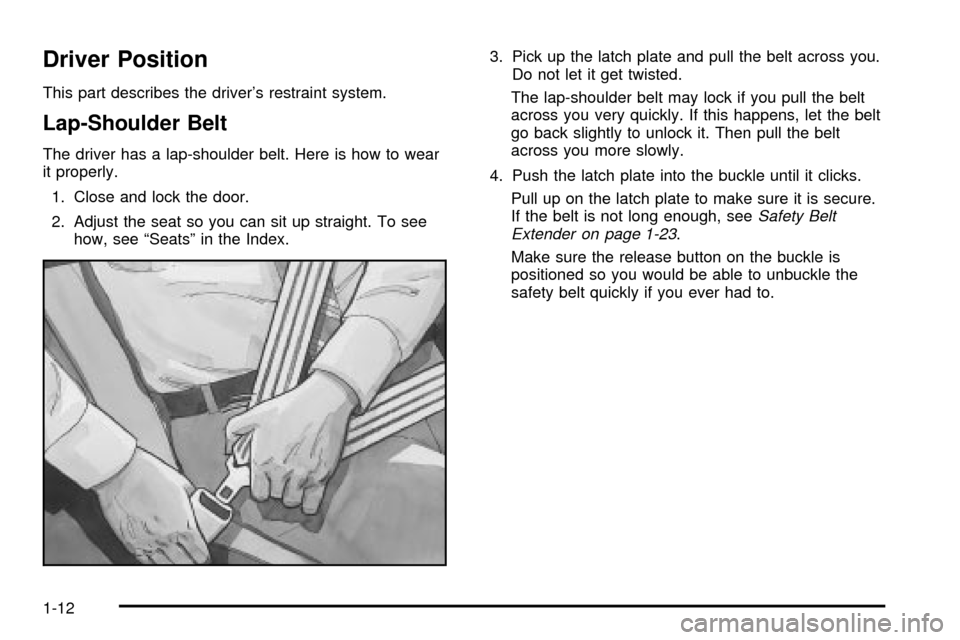
The driver has a lap-shoulder belt. Here is how to wear
it properly.
1. Close and lock the door.
2. Adjust the seat so you can sit up straight. To see
how, see ªSeatsº in the Index.3. Pick up the latch plate and pull the belt across you.
Do not let it get twisted.
The lap-shoulder belt may lock if you pull the belt
across you very quickly. If this happens, let the belt
go back slightly to unlock it. Then pull the belt
across you more slowly.
4. Push the latch plate into the buckle until it clicks.
Pull up on the latch plate to make sure it is secure.
If the belt is not long enough, see
Safety Belt
Extender on page 1-23.
Make sure the release button on the buckle is
positioned so you would be able to unbuckle the
safety belt quickly if you ever had to.
1-12
Page 26 of 408
Lap-Shoulder Belt
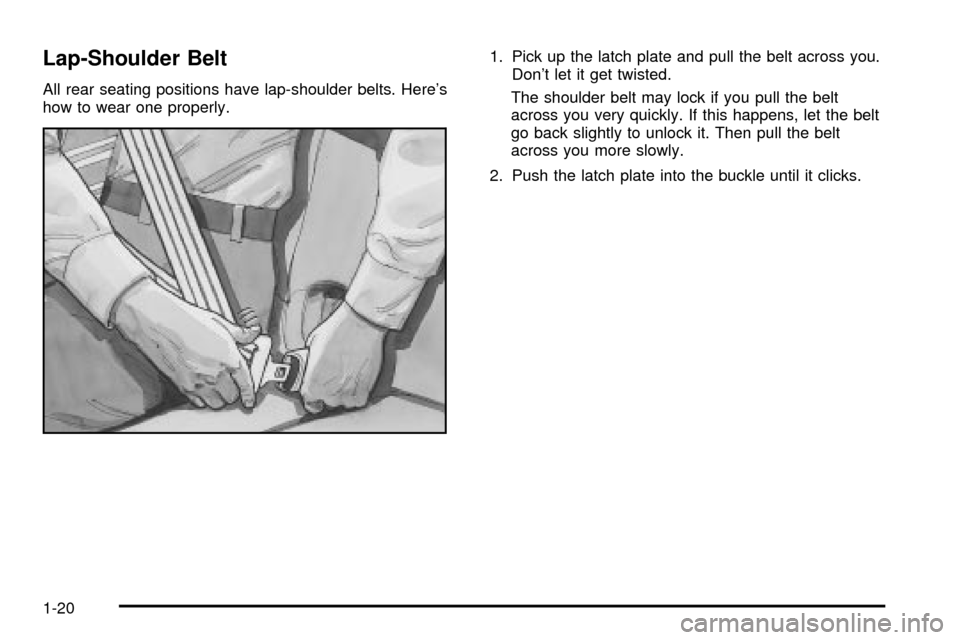
All rear seating positions have lap-shoulder belts. Here's
how to wear one properly.1. Pick up the latch plate and pull the belt across you.
Don't let it get twisted.
The shoulder belt may lock if you pull the belt
across you very quickly. If this happens, let the belt
go back slightly to unlock it. Then pull the belt
across you more slowly.
2. Push the latch plate into the buckle until it clicks.
1-20
Page 52 of 408
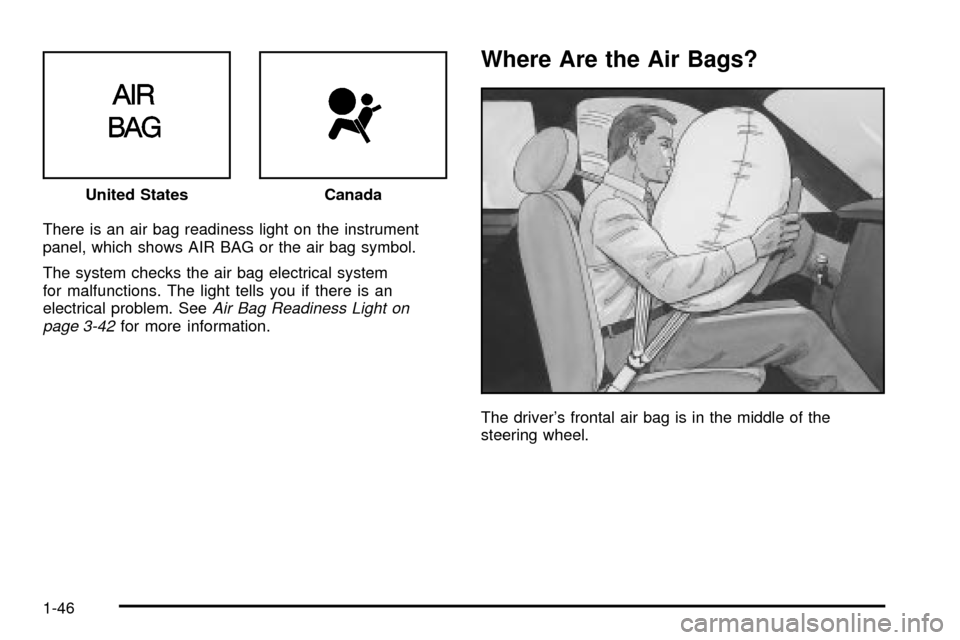
There is an air bag readiness light on the instrument
panel, which shows AIR BAG or the air bag symbol.
The system checks the air bag electrical system
for malfunctions. The light tells you if there is an
electrical problem. See
Air Bag Readiness Light on
page 3-42for more information.
Where Are the Air Bags?
The driver's frontal air bag is in the middle of the
steering wheel. United States
Canada
1-46
Page 58 of 408
Servicing Your Air Bag-Equipped
Vehicle
Air bags affect how your vehicle should be serviced.
There are parts of the air bag systems in several places
around your vehicle. Your dealer and the service
manual have information about servicing your vehicle
and the air bag systems. To purchase a service manual,
see
Service Publications Ordering Information on
page 7-10.
{CAUTION:
For up to 10 seconds after the ignition key is
turned off and the battery is disconnected, an
air bag can still in¯ate during improper
service. You can be injured if you are close to
an air bag when it in¯ates. Avoid yellow
connectors. They are probably part of the air
bag system. Be sure to follow proper service
procedures, and make sure the person
performing work for you is quali®ed to do so.
The air bag systems do not need regular maintenance.
Restraint System Check
Checking Your Restraint Systems
Now and then, make sure the safety belt reminder light
and all your belts, buckles, latch plates, retractors
and anchorages are working properly. Look for any other
loose or damaged safety belt system parts. If you see
anything that might keep a safety belt system from doing
its job, have it repaired.
Torn or frayed safety belts may not protect you in a
crash. They can rip apart under impact forces. If a belt
is torn or frayed, get a new one right away.
Also look for any opened or broken air bag covers, and
have them repaired or replaced. (The air bag system
does not need regular maintenance.)
1-52
Page 74 of 408
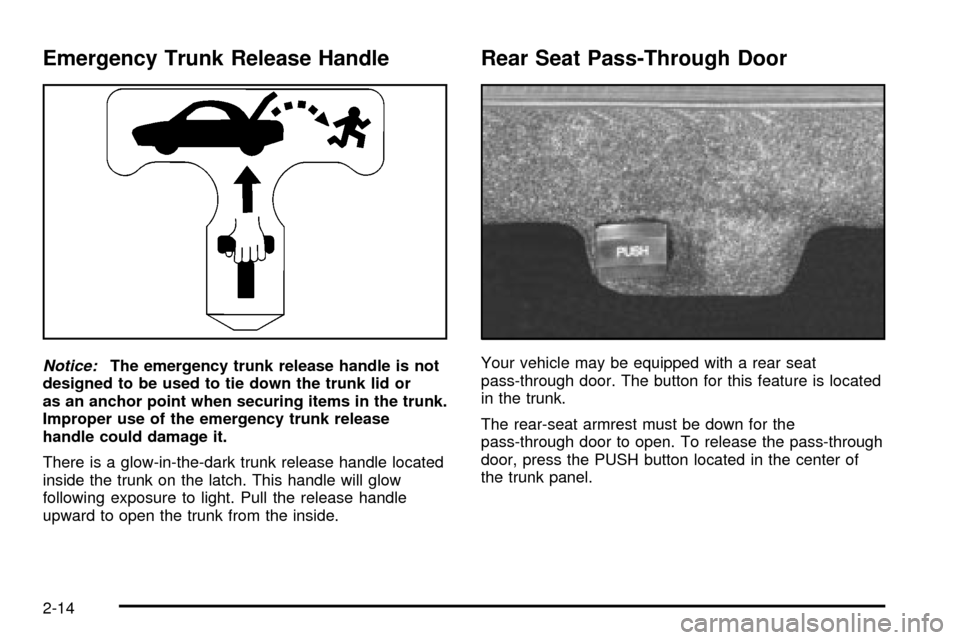
Emergency Trunk Release Handle
Notice:The emergency trunk release handle is not
designed to be used to tie down the trunk lid or
as an anchor point when securing items in the trunk.
Improper use of the emergency trunk release
handle could damage it.
There is a glow-in-the-dark trunk release handle located
inside the trunk on the latch. This handle will glow
following exposure to light. Pull the release handle
upward to open the trunk from the inside.
Rear Seat Pass-Through Door
Your vehicle may be equipped with a rear seat
pass-through door. The button for this feature is located
in the trunk.
The rear-seat armrest must be down for the
pass-through door to open. To release the pass-through
door, press the PUSH button located in the center of
the trunk panel.
2-14
Page 78 of 408
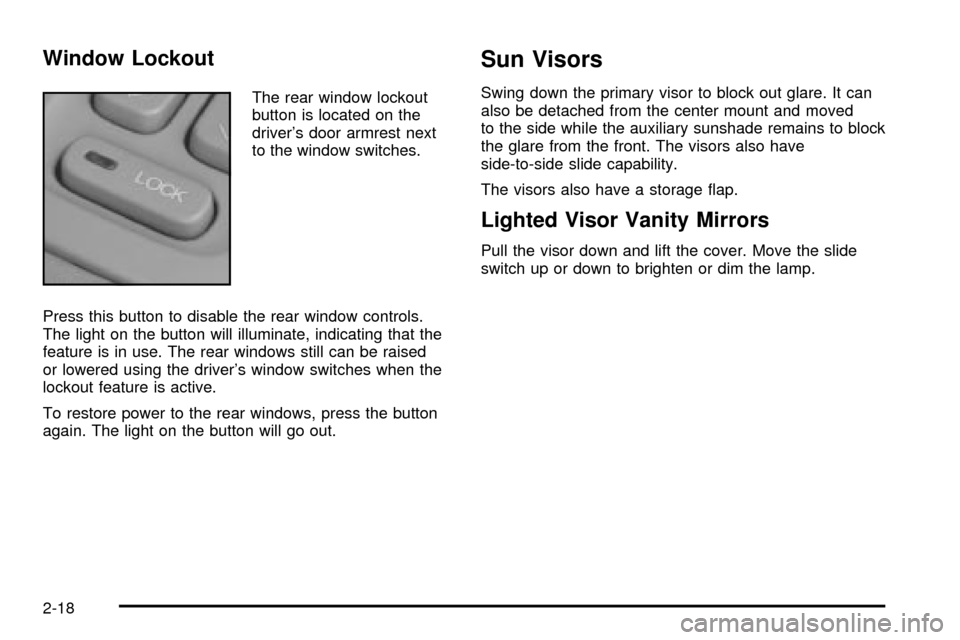
Window Lockout
The rear window lockout
button is located on the
driver's door armrest next
to the window switches.
Press this button to disable the rear window controls.
The light on the button will illuminate, indicating that the
feature is in use. The rear windows still can be raised
or lowered using the driver's window switches when the
lockout feature is active.
To restore power to the rear windows, press the button
again. The light on the button will go out.
Sun Visors
Swing down the primary visor to block out glare. It can
also be detached from the center mount and moved
to the side while the auxiliary sunshade remains to block
the glare from the front. The visors also have
side-to-side slide capability.
The visors also have a storage ¯ap.
Lighted Visor Vanity Mirrors
Pull the visor down and lift the cover. Move the slide
switch up or down to brighten or dim the lamp.
2-18