brake light CADILLAC STS 2011 1.G Owners Manual
[x] Cancel search | Manufacturer: CADILLAC, Model Year: 2011, Model line: STS, Model: CADILLAC STS 2011 1.GPages: 528, PDF Size: 4.96 MB
Page 5 of 528
Black plate (5,1)Cadillac STS Owner Manual - 2011
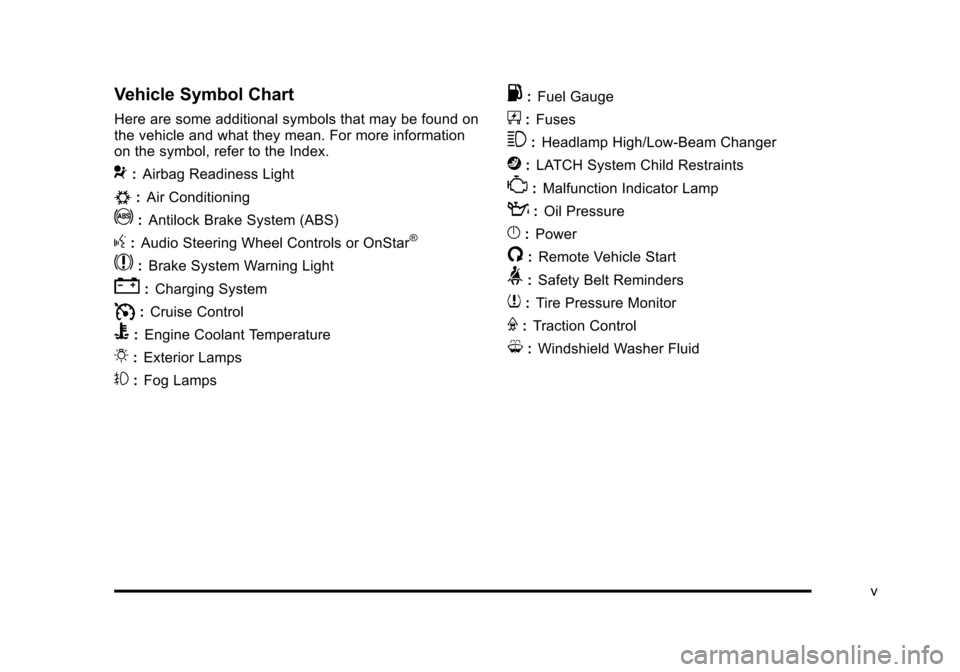
Vehicle Symbol Chart
Here are some additional symbols that may be found on
the vehicle and what they mean. For more information
on the symbol, refer to the Index.
9:Airbag Readiness Light
#:Air Conditioning
!:Antilock Brake System (ABS)
g:Audio Steering Wheel Controls or OnStar®
$: Brake System Warning Light
":Charging System
I:Cruise Control
B: Engine Coolant Temperature
O:Exterior Lamps
#:Fog Lamps
.: Fuel Gauge
+:Fuses
3: Headlamp High/Low-Beam Changer
j:LATCH System Child Restraints
*: Malfunction Indicator Lamp
::Oil Pressure
}:Power
/:Remote Vehicle Start
>:Safety Belt Reminders
7:Tire Pressure Monitor
F:Traction Control
M:Windshield Washer Fluid
v
Page 29 of 528
Black plate (23,1)Cadillac STS Owner Manual - 2011
Resetting the Oil Life System
1. Press the up or down arrow to scroll the DIC toshow OIL LIFE.
2. Once the XXX% ENGINE OIL LIFE menu item is highlighted, press and hold the RESET button until
the percentage shows 100%.
If the percentage does not return to 100% or if the
CHANGE ENGINE OIL SOON message comes
back on when the vehicle is started, the engine oil
life system has not reset. Repeat the procedure.
See Engine Oil Life System on page 6‑20.
Driving for Better Fuel Economy
Driving habits can affect fuel mileage. Here are some
driving tips to get the best fuel economy possible.
.Avoid fast starts and accelerate smoothly.
.Brake gradually and avoid abrupt stops.
.Avoid idling the engine for long periods of time.
.When road and weather conditions are
appropriate, use cruise control, if equipped.
.Always follow posted speed limits or drive more
slowly when conditions require.
.Keep vehicle tires properly inflated.
.Combine several trips into a single trip.
.Replace the vehicle's tires with the same TPC
Spec number molded into the tire's sidewall near
the size.
.Follow recommended scheduled maintenance.
Roadside Service
U.S. or Canada: 1-800-882-1112
TTY Users: 1-888-889-2438
As the owner of a new Cadillac, you are automatically
enrolled in the Roadside Service program which is
available 24 hours a day, 365 days a year to give minor
repair information or make towing arrangements.
For more information see Roadside Service
on
page 1‑23.
Roadside Service and OnStar
If you have a current OnStar subscription, press
the
Qbutton and the current GPS location will be sent
to an OnStar Advisor who will assess your problem,
contact Roadside Service, and relay exact location to
get you the help you need.
1-23
Page 139 of 528
Black plate (33,1)Cadillac STS Owner Manual - 2011
If shifting is prevented for any reason, the selected gear
will flash multiple times, indicating that the transmission
has not shifted gears.
The transmission will allow you to shift to the gear
selected and will automatically downshift when the
vehicle comes to a stop. This will allow for more power
during take-off and passing.
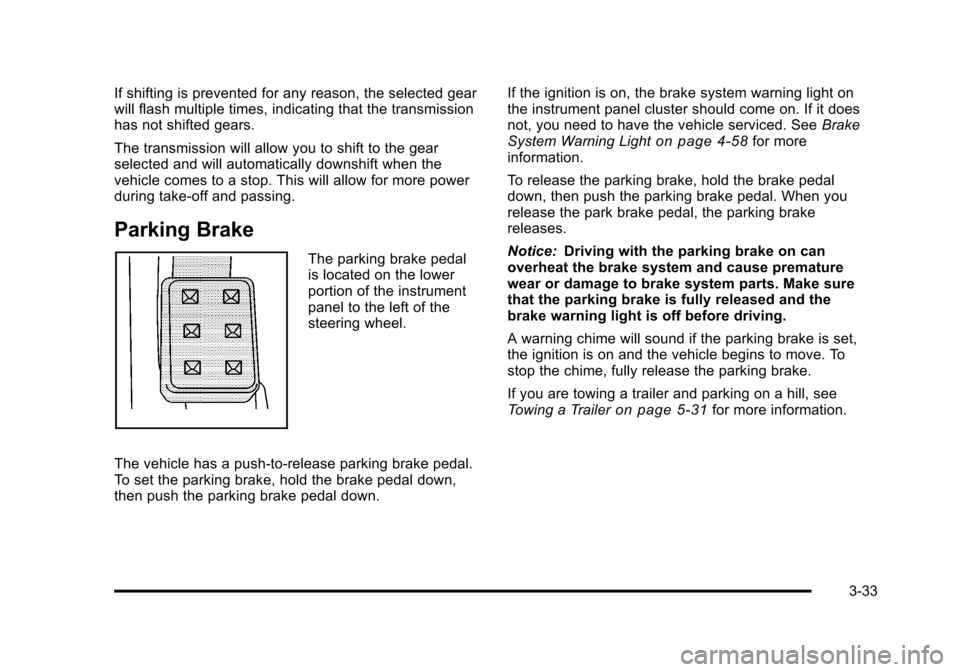
Parking Brake
The parking brake pedal
is located on the lower
portion of the instrument
panel to the left of the
steering wheel.
The vehicle has a push-to-release parking brake pedal.
To set the parking brake, hold the brake pedal down,
then push the parking brake pedal down. If the ignition is on, the brake system warning light on
the instrument panel cluster should come on. If it does
not, you need to have the vehicle serviced. See
Brake
System Warning Light
on page 4‑58for more
information.
To release the parking brake, hold the brake pedal
down, then push the parking brake pedal. When you
release the park brake pedal, the parking brake
releases.
Notice: Driving with the parking brake on can
overheat the brake system and cause premature
wear or damage to brake system parts. Make sure
that the parking brake is fully released and the
brake warning light is off before driving.
A warning chime will sound if the parking brake is set,
the ignition is on and the vehicle begins to move. To
stop the chime, fully release the parking brake.
If you are towing a trailer and parking on a hill, see
Towing a Trailer
on page 5‑31for more information.
3-33
Page 143 of 528
Black plate (37,1)Cadillac STS Owner Manual - 2011
WARNING: (Continued)
death. Never run the engine in an enclosed area
that has no fresh air ventilation. For more
information, seeEngine Exhaust on page 3‑36.
{WARNING:
It can be dangerous to get out of the vehicle if the
automatic transmission shift lever is not fully in
P (Park) with the parking brake firmly set. The
vehicle can roll. Do not leave the vehicle when the
engine is running unless you have to. If you have
left the engine running, the vehicle can move
suddenly. You or others could be injured. To be
sure the vehicle will not move, even when you are
on fairly level ground, always set the parking
brake after you move the shift lever to P (Park).
Follow the proper steps to be sure the vehicle will not
move. See Shifting Into Park on page 3‑34.
If parking on a hill and pulling a trailer, see Towing a
Trailer on page 5‑31.
Mirrors
Automatic Dimming Rearview Mirror
The vehicle may have an inside rearview mirror with
automatic dimming and OnStar®controls; or it may
have OnStar®and a compass display. See the OnStar®
owner guide and/or Compasson page 3‑38for more
information.
O(On/Off): Press to turn the dimming feature on or off.
Automatic Dimming Mirror Operation
Automatic dimming reduces the glare of lights from
behind the vehicle. The dimming feature comes on and
the indicator light illuminates each time the vehicle is
started.
Cleaning the Mirror
Do not spray glass cleaner directly on the mirror. Use a
soft towel dampened with water.
3-37
Page 149 of 528
Black plate (43,1)Cadillac STS Owner Manual - 2011
When the System Does Not Seem to
Work Properly
If the URPA system will not activate due to a temporary
condition a red light will be shown on the rear URPA
display when the shift lever is moved into R (Reverse).
This occurs under the following conditions:
.The ultrasonic sensors are not clean. Keep the
vehicle's rear bumper free of mud, dirt, snow, ice
and slush. For cleaning instructions, seeWashing
Your Vehicle on page 6‑109.
.A trailer was attached to the vehicle, or a bicycle or
an object was hanging out of the trunk during the
last drive cycle, the red light may illuminate in the
rear display. Once the attached object is removed,
URPA will return to normal operation.
.The vehicle's bumper is damaged. Take the vehicle
to your dealer to repair the system.
.Other conditions may affect system performance,
such as vibrations from a jackhammer or the
compression of air brakes on a very large truck.
If the system is still disabled, after driving forward at
least 15 mph (25 km/h), take the vehicle to your dealer.
3-43
Page 162 of 528
Black plate (56,1)Cadillac STS Owner Manual - 2011
Using Universal Home Remote
Press and hold the appropriate button for at least half of
a second. The indicator light will come on while the
signal is being transmitted.
Reprogramming Universal Home
Remote Buttons
Any of the three buttons can be reprogrammed by
repeating the instructions.
Erasing Universal Home Remote
Buttons
The programmed buttons should be erased when the
vehicle is sold or the lease ends.
To erase either Rolling Code or Fixed Code on the
Universal Home Remote device:1. Press and hold the two outside buttons at the same time for approximately 20 seconds, until the
indicator lights, located directly above the buttons,
begin to blink rapidly.
2. Once the indicator lights begin to blink, release both buttons. The codes from all buttons will be
erased.
For help or information on the Universal Home Remote
System, call the customer assistance phone number
under Customer Assistance Offices on page 8‑6.
Storage Areas
Glove Box
Lift up on the glove box lever to open it.
Cupholders
The vehicle has two cupholders in the center
console area.
Center Console Storage
The vehicle has a center console storage area located
between the front seats. It includes storage areas, and
accessory power outlet(s) on the rear of the console.
Floor Mats
{WARNING:
If a floor mat is the wrong size or is not properly
installed, it can interfere with the accelerator pedal
and/or brake pedal. Interference with the pedals
can cause unintended acceleration and/or
(Continued)
3-56
Page 187 of 528
Black plate (1,1)Cadillac STS Owner Manual - 2011
Section 4 Instrument Panel
Instrument Panel Overview. . . . . . . . . . . . . . . . . . . . . . . .4-3
Hazard Warning Flashers . . . . . . . . . . . . . . . . . . . . . . . 4-3
Horn . . . . . . . . . . . . . . . . . . . . . . . . . . . . . . . . . . . . . . . . . . . . 4-3
Power Tilt Wheel and Telescopic Steering Column . . . . . . . . . . . . . . . . . . . . . . . . . . . . . . . . . . . . . . . 4-3
Heated Steering Wheel . . . . . . . . . . . . . . . . . . . . . . . . . 4-4
Turn Signal/Multifunction Lever . . . . . . . . . . . . . . . . . . 4-4
Turn and Lane-Change Signals . . . . . . . . . . . . . . . . . 4-4
Headlamp High/Low-Beam Changer . . . . . . . . . . . . 4-5
Forward Collision Alert (FCA) System . . . . . . . . . . . 4-6
Flash-to-Pass . . . . . . . . . . . . . . . . . . . . . . . . . . . . . . . . . . . 4-9
Windshield Wipers . . . . . . . . . . . . . . . . . . . . . . . . . . . . . 4-10
Windshield Washer . . . . . . . . . . . . . . . . . . . . . . . . . . . . 4-11
Headlamp Washer . . . . . . . . . . . . . . . . . . . . . . . . . . . . . 4-11
Cruise Control . . . . . . . . . . . . . . . . . . . . . . . . . . . . . . . . . 4-12
Adaptive Cruise Control . . . . . . . . . . . . . . . . . . . . . . . 4-15
Headlamps . . . . . . . . . . . . . . . . . . . . . . . . . . . . . . . . . . . . 4-27
Wiper Activated Headlamps . . . . . . . . . . . . . . . . . . . 4-31
Headlamps on Reminder . . . . . . . . . . . . . . . . . . . . . . 4-31
Daytime Running Lamps (DRL) . . . . . . . . . . . . . . . . 4-32
Fog Lamps . . . . . . . . . . . . . . . . . . . . . . . . . . . . . . . . . . . . 4-33
Twilight Sentinel
®. . . . . . . . . . . . . . . . . . . . . . . . . . . . . . 4-34
Exterior Lighting Battery Saver . . . . . . . . . . . . . . . . . 4-35
Instrument Panel Brightness . . . . . . . . . . . . . . . . . . . 4-35
Entry Lighting . . . . . . . . . . . . . . . . . . . . . . . . . . . . . . . . . . 4-36
Parade Dimming . . . . . . . . . . . . . . . . . . . . . . . . . . . . . . . 4-36 Reading Lamps . . . . . . . . . . . . . . . . . . . . . . . . . . . . . . . . 4-36
Battery Load Management . . . . . . . . . . . . . . . . . . . . . 4-36
Electric Power Management . . . . . . . . . . . . . . . . . . . 4-37
Inadvertent Power Battery Saver . . . . . . . . . . . . . . . 4-37
Head-Up Display (HUD) . . . . . . . . . . . . . . . . . . . . . . . 4-38
Accessory Power Outlet(s) . . . . . . . . . . . . . . . . . . . . . 4-42
Climate Controls . . . . . . . . . . . . . . . . . . . . . . . . . . . . . . . . . . 4-43
Dual Climate Control System . . . . . . . . . . . . . . . . . . 4-43
Outlet Adjustment . . . . . . . . . . . . . . . . . . . . . . . . . . . . . . 4-48
Rear Climate Control System . . . . . . . . . . . . . . . . . . 4-49
Passenger Compartment Air Filter . . . . . . . . . . . . . 4-50
Warning Lights, Gauges, and Indicators . . . . . . . .4-51
Instrument Panel Cluster . . . . . . . . . . . . . . . . . . . . . . . 4-52
Speedometer and Odometer . . . . . . . . . . . . . . . . . . . 4-53
Tachometer . . . . . . . . . . . . . . . . . . . . . . . . . . . . . . . . . . . . 4-53
Safety Belt Reminders . . . . . . . . . . . . . . . . . . . . . . . . . 4-53
Airbag Readiness Light . . . . . . . . . . . . . . . . . . . . . . . . 4-54
Passenger Airbag Status Indicator . . . . . . . . . . . . . 4-55
Charging System Light . . . . . . . . . . . . . . . . . . . . . . . . 4-57
Brake System Warning Light . . . . . . . . . . . . . . . . . . . 4-58
Antilock Brake System (ABS) Warning Light . . . 4-59
Traction Control System (TCS) Warning Light . . . . . . . . . . . . . . . . . . . . . . . . . . . . . . . . . . . . . . . . . 4-60
Lane Departure Warning (LDW) Light . . . . . . . . . . 4-60
Engine Coolant Temperature Warning Light . . . . 4-61
4-1
Page 199 of 528
Black plate (13,1)Cadillac STS Owner Manual - 2011
T(Set/Decrease): Press to set the speed or to
decrease the speed when cruise is already active.
[(Cancel): Press to disengage cruise control without
erasing the set speed from memory.
Setting Cruise Control
If the cruise button is on when not in use, it could get
bumped and go into cruise when not desired. Keep the
cruise control switch off when cruise is not being used.
1. Move the cruise control switch to on.
2. Get up to the speed desired.
3. Press
Tat the end of the lever and release it.
4. Take your foot off the accelerator pedal.
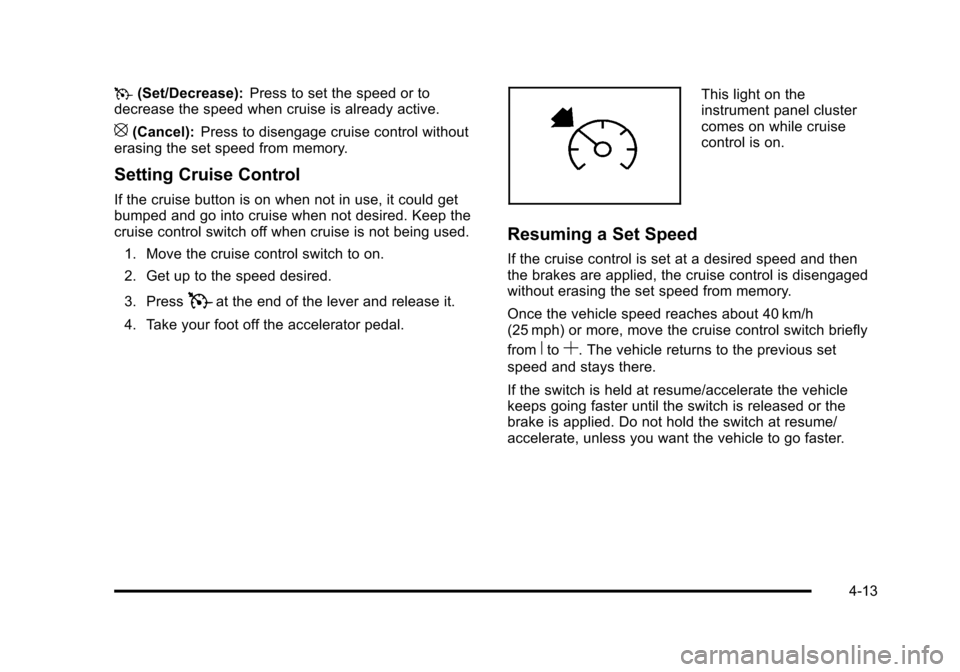
This light on the
instrument panel cluster
comes on while cruise
control is on.
Resuming a Set Speed
If the cruise control is set at a desired speed and then
the brakes are applied, the cruise control is disengaged
without erasing the set speed from memory.
Once the vehicle speed reaches about 40 km/h
(25 mph) or more, move the cruise control switch briefly
from
RtoS. The vehicle returns to the previous set
speed and stays there.
If the switch is held at resume/accelerate the vehicle
keeps going faster until the switch is released or the
brake is applied. Do not hold the switch at resume/
accelerate, unless you want the vehicle to go faster.
4-13
Page 201 of 528
Black plate (15,1)Cadillac STS Owner Manual - 2011
When going downhill, you might have to brake to keep
the vehicle speed down. When the brakes are applied
the cruise control is disengaged.
Ending Cruise Control
There are three ways to end cruise control.
.To disengage cruise control; step lightly on the
brake pedal.
.Press the[button on the steering wheel.
.To turn off cruise control, move the cruise control
switch to
9.
Erasing Speed Memory
The cruise control set speed is erased from memory by
moving the cruise control switch to
9or if the ignition
is turned off.
Adaptive Cruise Control
If the vehicle has adaptive cruise control, read the
Radio Frequency Statementon page 8‑20before using
this feature.
Changes or modifications to this system by other than
an authorized service facility could void authorization to
use this equipment.
Adaptive Cruise Control is an enhancement to
traditional cruise control and is not a safety system.
It allows you to keep cruise control engaged in
moderate traffic conditions without having to constantly
be reset. Adaptive Cruise Control uses radar to
detect a vehicle directly ahead in your path, within a
distance of 100 m (328 ft), and operates at speeds
above 48 km/h (30 mph). When it is engaged by
the driver, the system can apply limited braking or
acceleration of the vehicle, automatically, to maintain
a selected following distance to the vehicle ahead.
4-15
Page 208 of 528
Black plate (22,1)Cadillac STS Owner Manual - 2011
Approaching and Following a Vehicle
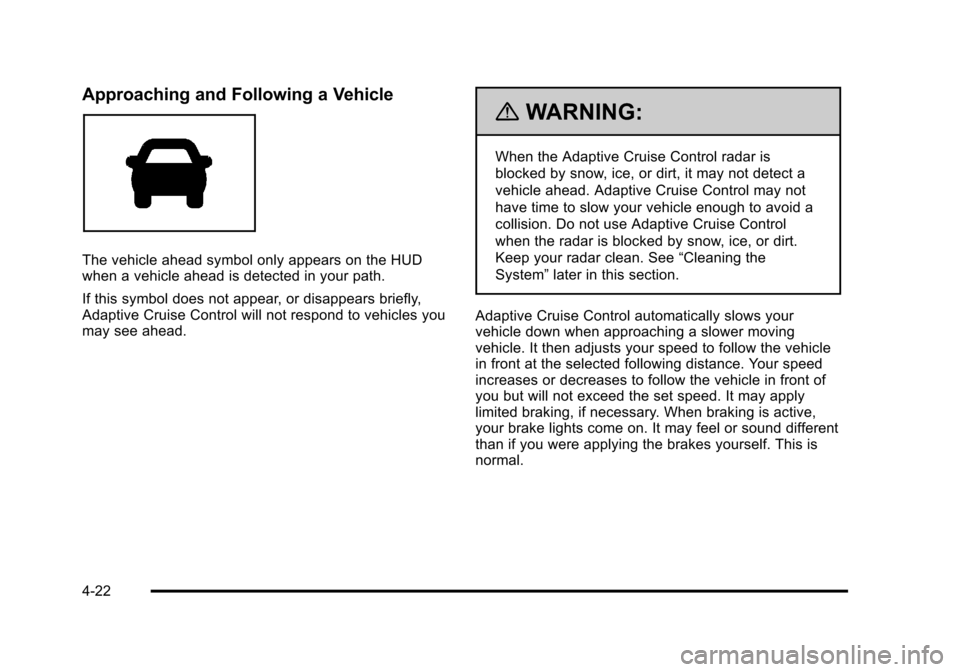
The vehicle ahead symbol only appears on the HUD
when a vehicle ahead is detected in your path.
If this symbol does not appear, or disappears briefly,
Adaptive Cruise Control will not respond to vehicles you
may see ahead.
{WARNING:
When the Adaptive Cruise Control radar is
blocked by snow, ice, or dirt, it may not detect a
vehicle ahead. Adaptive Cruise Control may not
have time to slow your vehicle enough to avoid a
collision. Do not use Adaptive Cruise Control
when the radar is blocked by snow, ice, or dirt.
Keep your radar clean. See“Cleaning the
System” later in this section.
Adaptive Cruise Control automatically slows your
vehicle down when approaching a slower moving
vehicle. It then adjusts your speed to follow the vehicle
in front at the selected following distance. Your speed
increases or decreases to follow the vehicle in front of
you but will not exceed the set speed. It may apply
limited braking, if necessary. When braking is active,
your brake lights come on. It may feel or sound different
than if you were applying the brakes yourself. This is
normal.
4-22