2-2 CADILLAC XLR 2005 1.G User Guide
[x] Cancel search | Manufacturer: CADILLAC, Model Year: 2005, Model line: XLR, Model: CADILLAC XLR 2005 1.GPages: 438, PDF Size: 3.69 MB
Page 80 of 438
Engine Coolant Heater
Your vehicle may be equipped with an engine
coolant heater.
In very cold weather, 0°F (−18°C) or colder, the engine
coolant heater can help. You will get easier starting
and better fuel economy during engine warm-up.
Usually, the coolant heater should be plugged in a
minimum of four hours prior to starting your vehicle.
At temperatures above 32°F (0°C), use of the coolant
heater is not required.
To Use the Engine Coolant Heater
1. Turn off the engine.
2. Open the hood and unwrap the electrical cord.
The electrical cord is located on the driver’s side
of the engine compartment, in front of the engine
coolant surge tank.
3. Plug it into a normal, grounded 110-volt AC outlet.
{CAUTION:
Plugging the cord into an ungrounded outlet
could cause an electrical shock. Also, the
wrong kind of extension cord could overheat
and cause a �re. You could be seriously
injured. Plug the cord into a properly grounded
three-prong 110-volt AC outlet. If the cord will
not reach, use a heavy-duty three-prong
extension cord rated for at least 15 amps.
4. Before starting the engine, be sure to unplug and
store the cord as it was before to keep it away
from moving engine parts. If you do not, it could
be damaged.
How long should you keep the coolant heater plugged
in? The answer depends on the outside temperature, the
kind of oil you have, and some other things. Instead
of trying to list everything here, we ask that you contact
your dealer in the area where you will be parking
your vehicle. The dealer can give you the best advice
for that particular area.
2-24
Page 81 of 438
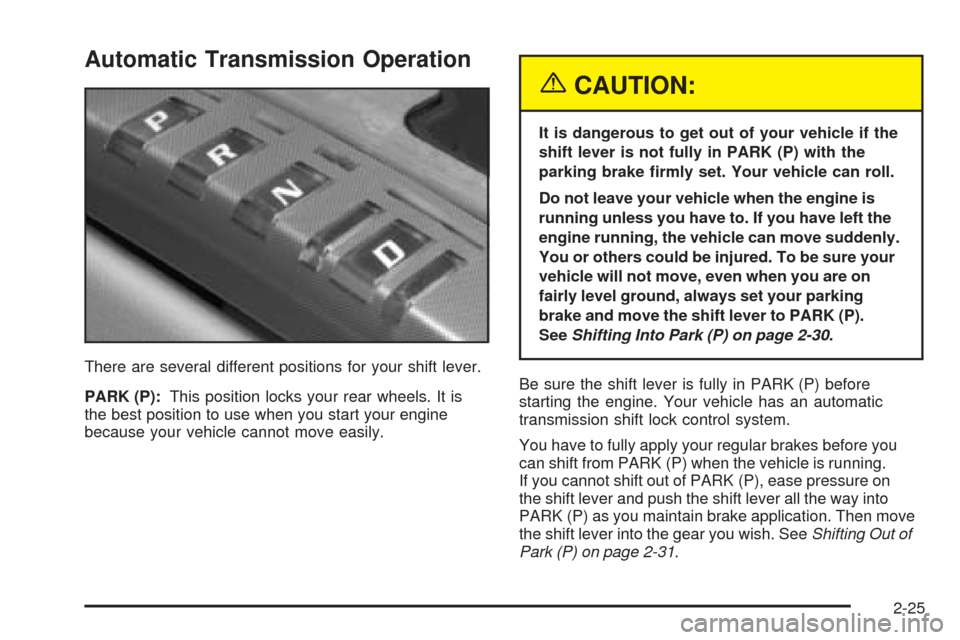
Automatic Transmission Operation
There are several different positions for your shift lever.
PARK (P):This position locks your rear wheels. It is
the best position to use when you start your engine
because your vehicle cannot move easily.
{CAUTION:
It is dangerous to get out of your vehicle if the
shift lever is not fully in PARK (P) with the
parking brake �rmly set. Your vehicle can roll.
Do not leave your vehicle when the engine is
running unless you have to. If you have left the
engine running, the vehicle can move suddenly.
You or others could be injured. To be sure your
vehicle will not move, even when you are on
fairly level ground, always set your parking
brake and move the shift lever to PARK (P).
SeeShifting Into Park (P) on page 2-30.
Be sure the shift lever is fully in PARK (P) before
starting the engine. Your vehicle has an automatic
transmission shift lock control system.
You have to fully apply your regular brakes before you
can shift from PARK (P) when the vehicle is running.
If you cannot shift out of PARK (P), ease pressure on
the shift lever and push the shift lever all the way into
PARK (P) as you maintain brake application. Then move
the shift lever into the gear you wish. SeeShifting Out of
Park (P) on page 2-31.
2-25
Page 82 of 438
REVERSE (R):Use this gear to back up.
Notice:Shifting to REVERSE (R) while your vehicle
is moving forward could damage the transmission.
The repairs would not be covered by your warranty.
Shift to REVERSE (R) only after your vehicle is
stopped.
To rock your vehicle back and forth to get out of snow,
ice or sand without damaging your transmission,
seeIf You Are Stuck: In Sand, Mud, Ice or Snow on
page 5-29.
NEUTRAL (N):In this position, your engine does not
connect with the wheels. To restart when you are
already moving, use NEUTRAL (N) only. Also, use
NEUTRAL (N) when your vehicle is being towed.
{CAUTION:
Shifting into a drive gear while your engine is
running at high speed is dangerous. Unless
your foot is �rmly on the brake pedal, your
vehicle could move very rapidly. You could
lose control and hit people or objects. Do not
shift into a drive gear while your engine is
running at high speed.Notice:Shifting out of PARK (P) or NEUTRAL (N)
with the engine running at high speed may damage
the transmission. The repairs would not be covered
by your warranty. Be sure the engine is not running
at high speed when shifting your vehicle.
AUTOMATIC OVERDRIVE (D):This position is for
normal driving.
Notice:Spinning the tires or holding the vehicle in
one place on a hill using only the accelerator pedal
may damage the transmission. If you are stuck, do
not spin the tires. When stopping on a hill, use the
brakes to hold the vehicle in place.
Maximum engine speed is limited to protect driveline
components from improper operation.
2-26
Page 83 of 438
Driver Shift Control
The driver shift control feature gives you more manual
control over the operation of the transmission.
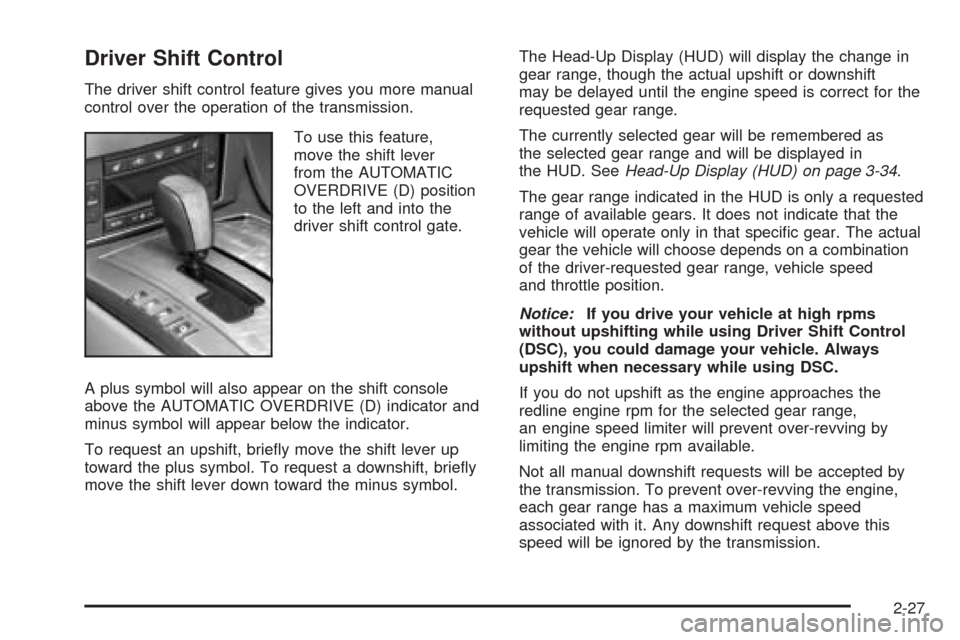
To use this feature,
move the shift lever
from the AUTOMATIC
OVERDRIVE (D) position
to the left and into the
driver shift control gate.
A plus symbol will also appear on the shift console
above the AUTOMATIC OVERDRIVE (D) indicator and
minus symbol will appear below the indicator.
To request an upshift, brie�y move the shift lever up
toward the plus symbol. To request a downshift, brie�y
move the shift lever down toward the minus symbol.The Head-Up Display (HUD) will display the change in
gear range, though the actual upshift or downshift
may be delayed until the engine speed is correct for the
requested gear range.
The currently selected gear will be remembered as
the selected gear range and will be displayed in
the HUD. SeeHead-Up Display (HUD) on page 3-34.
The gear range indicated in the HUD is only a requested
range of available gears. It does not indicate that the
vehicle will operate only in that speci�c gear. The actual
gear the vehicle will choose depends on a combination
of the driver-requested gear range, vehicle speed
and throttle position.
Notice:If you drive your vehicle at high rpms
without upshifting while using Driver Shift Control
(DSC), you could damage your vehicle. Always
upshift when necessary while using DSC.
If you do not upshift as the engine approaches the
redline engine rpm for the selected gear range,
an engine speed limiter will prevent over-revving by
limiting the engine rpm available.
Not all manual downshift requests will be accepted by
the transmission. To prevent over-revving the engine,
each gear range has a maximum vehicle speed
associated with it. Any downshift request above this
speed will be ignored by the transmission.
2-27
Page 84 of 438
Some automatic downshifts may occur to maintain
minimum engine speed. This will only occur if you leave
the vehicle in too high of a gear range for the speed
the vehicle is traveling. For example, if you have been
driving in �fth gear range and come to a stop without
manually downshifting, �fth gear range will continue to
display in the HUD. The transmission will automatically
downshift to second gear. As you begin to drive
and accelerate, the transmission will automatically
upshift as quickly as possible to the selected �fth
gear range.
In higher gear ranges, an automatic downshift will
occur if you press the accelerator pedal to the �oor.
This feature provides you with adequate acceleration
capabilities if you forget to downshift manually.
Automatic upshifts and downshifts will not display in
the HUD.
Driver shift control is available while the cruise control is
engaged. The shift behavior of the transmission will
react differently than when cruise control is not engaged.
This is not a malfunction and is necessary to allow
proper operation of the cruise control.
To return to fully automatic operation, move the shift
lever to the right and back into the AUTOMATIC
OVERDRIVE (D).Parking Brake
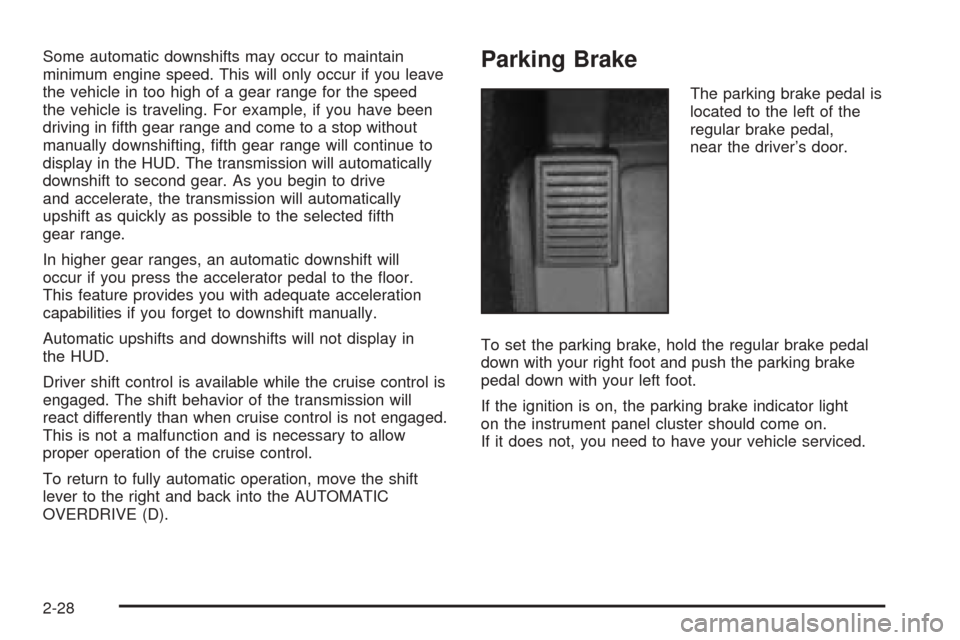
The parking brake pedal is
located to the left of the
regular brake pedal,
near the driver’s door.
To set the parking brake, hold the regular brake pedal
down with your right foot and push the parking brake
pedal down with your left foot.
If the ignition is on, the parking brake indicator light
on the instrument panel cluster should come on.
If it does not, you need to have your vehicle serviced.
2-28
Page 85 of 438
When you move out of PARK (P) or NEUTRAL (N) and
the engine is running, the parking brake should
release. If the parking brake has not been fully released
and you try to drive off with the parking brake on, the
parking brake indicator light will come on and stay on.
If the parking brake does not fully release, you can
manually release the pedal. However, be sure to read
the following paragraphs:
{CAUTION:
Always shift to PARK (P) before pulling the
manual release lever. If your hand or arm is
in the way of the pedal you could be hurt.
The pedal springs back quickly. Keep your
hand and arm away when you use the manual
release lever.
Before releasing the manual parking brake, be sure to
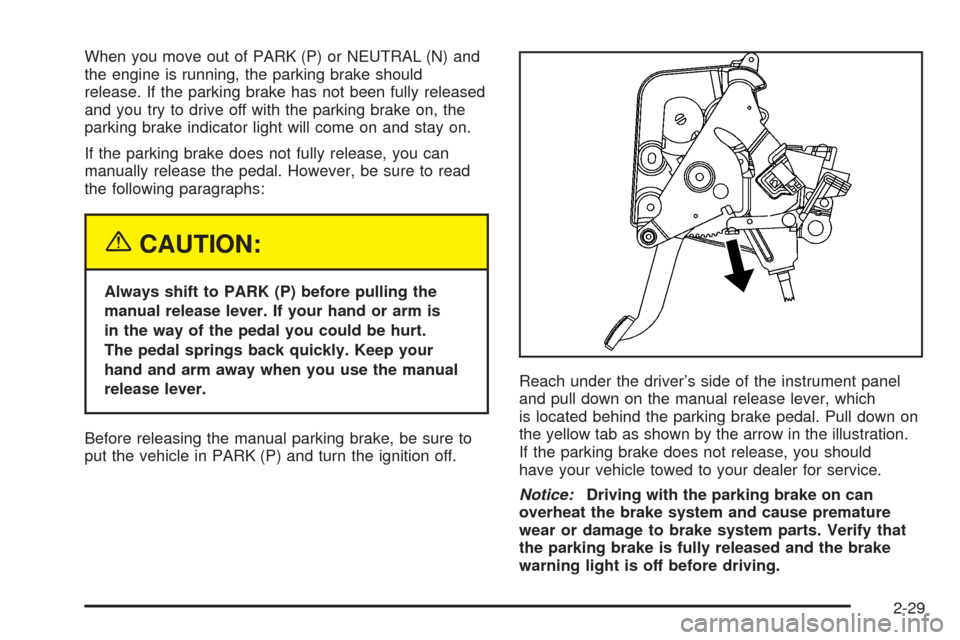
put the vehicle in PARK (P) and turn the ignition off.Reach under the driver’s side of the instrument panel
and pull down on the manual release lever, which
is located behind the parking brake pedal. Pull down on
the yellow tab as shown by the arrow in the illustration.
If the parking brake does not release, you should
have your vehicle towed to your dealer for service.
Notice:Driving with the parking brake on can
overheat the brake system and cause premature
wear or damage to brake system parts. Verify that
the parking brake is fully released and the brake
warning light is off before driving.
2-29
Page 87 of 438
Torque Lock
If you are parking on a hill and you do not shift your
transmission into PARK (P) properly, the weight of the
vehicle may put too much force on the parking pawl
in the transmission. You may �nd it difficult to pull the
shift lever out of PARK (P). This is called “torque lock.”
To prevent torque lock, set the parking brake and
then shift into PARK (P) properly before you leave the
driver’s seat. To �nd out how, see “Shifting Into
PARK (P)” listed previously in this section.
When you are ready to drive, move the shift lever out of
PARK (P) before you release the parking brake.
If torque lock does occur, you may need to have another
vehicle push yours a little uphill to take some of the
pressure from the parking pawl in the transmission,
so you can pull the shift lever out of PARK (P).
Shifting Out of Park (P)
Your vehicle has an automatic transmission shift lock
control system. You have to fully apply your regular
brake before you can shift from PARK (P) when
the vehicle is running. SeeAutomatic Transmission
Operation on page 2-25.
If you cannot shift out of PARK (P), ease pressure on
the shift lever – push the shift lever all the way into
PARK (P) and release the shift lever button as you
maintain brake application. Then press the shift lever
button and move the shift lever into the gear you wish.
If you ever hold the brake pedal down but still cannot
shift out of PARK (P), try this:
1. Press the ACC button twice to place the ignition in
accessory mode.
2. Apply and hold the brake until the end of Step 4.
3. Shift to NEUTRAL (N).
4. Start the engine and then shift to the drive gear
you want.
5. Have your vehicle inspected by your dealer as soon
as possible.
2-31
Page 103 of 438
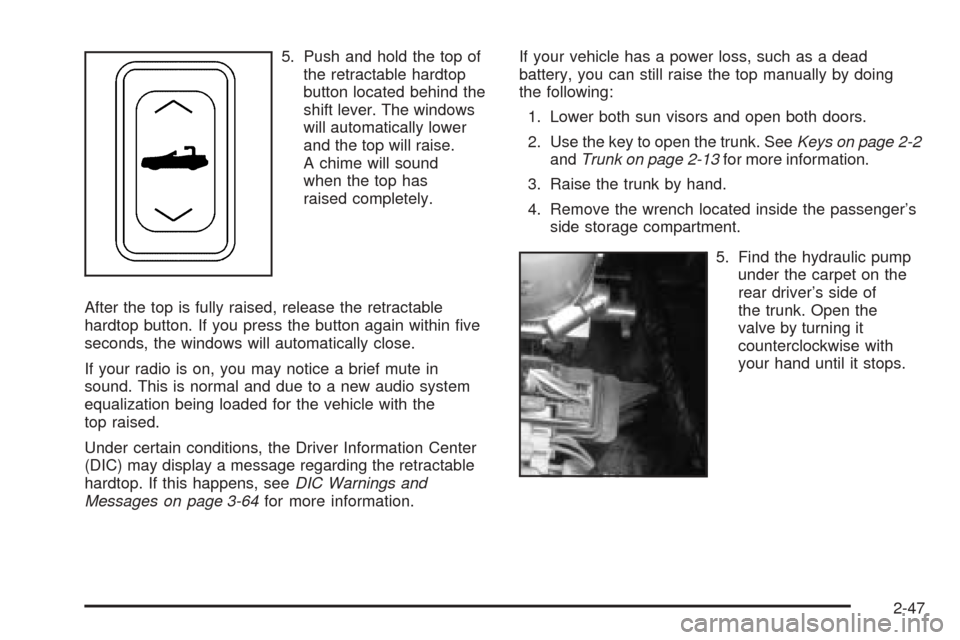
5. Push and hold the top of
the retractable hardtop
button located behind the
shift lever. The windows
will automatically lower
and the top will raise.
A chime will sound
when the top has
raised completely.
After the top is fully raised, release the retractable
hardtop button. If you press the button again within �ve
seconds, the windows will automatically close.
If your radio is on, you may notice a brief mute in
sound. This is normal and due to a new audio system
equalization being loaded for the vehicle with the
top raised.
Under certain conditions, the Driver Information Center
(DIC) may display a message regarding the retractable
hardtop. If this happens, seeDIC Warnings and
Messages on page 3-64for more information.If your vehicle has a power loss, such as a dead
battery, you can still raise the top manually by doing
the following:
1. Lower both sun visors and open both doors.
2. Use the key to open the trunk. SeeKeys on page 2-2
andTrunk on page 2-13for more information.
3. Raise the trunk by hand.
4. Remove the wrench located inside the passenger’s
side storage compartment.
5. Find the hydraulic pump
under the carpet on the
rear driver’s side of
the trunk. Open the
valve by turning it
counterclockwise with
your hand until it stops.
2-47
Page 117 of 438
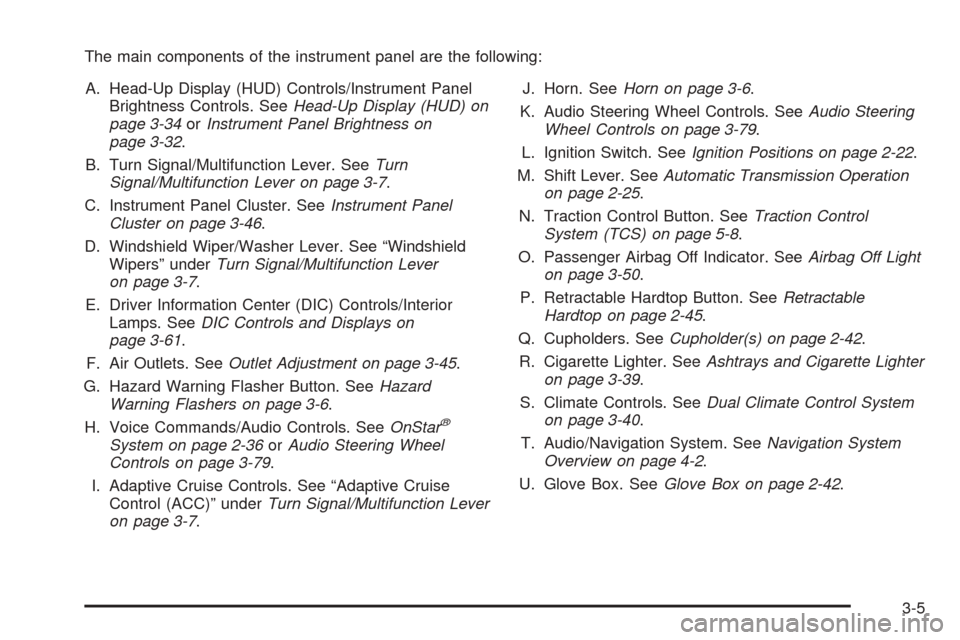
The main components of the instrument panel are the following:
A. Head-Up Display (HUD) Controls/Instrument Panel
Brightness Controls. SeeHead-Up Display (HUD) on
page 3-34orInstrument Panel Brightness on
page 3-32.
B. Turn Signal/Multifunction Lever. SeeTurn
Signal/Multifunction Lever on page 3-7.
C. Instrument Panel Cluster. SeeInstrument Panel
Cluster on page 3-46.
D. Windshield Wiper/Washer Lever. See “Windshield
Wipers” underTurn Signal/Multifunction Lever
on page 3-7.
E. Driver Information Center (DIC) Controls/Interior
Lamps. SeeDIC Controls and Displays on
page 3-61.
F. Air Outlets. SeeOutlet Adjustment on page 3-45.
G. Hazard Warning Flasher Button. SeeHazard
Warning Flashers on page 3-6.
H. Voice Commands/Audio Controls. SeeOnStar
®
System on page 2-36orAudio Steering Wheel
Controls on page 3-79.
I. Adaptive Cruise Controls. See “Adaptive Cruise
Control (ACC)” underTurn Signal/Multifunction Lever
on page 3-7.J. Horn. SeeHorn on page 3-6.
K. Audio Steering Wheel Controls. SeeAudio Steering
Wheel Controls on page 3-79.
L. Ignition Switch. SeeIgnition Positions on page 2-22.
M. Shift Lever. SeeAutomatic Transmission Operation
on page 2-25.
N. Traction Control Button. SeeTraction Control
System (TCS) on page 5-8.
O. Passenger Airbag Off Indicator. SeeAirbag Off Light
on page 3-50.
P. Retractable Hardtop Button. SeeRetractable
Hardtop on page 2-45.
Q. Cupholders. SeeCupholder(s) on page 2-42.
R. Cigarette Lighter. SeeAshtrays and Cigarette Lighter
on page 3-39.
S. Climate Controls. SeeDual Climate Control System
on page 3-40.
T. Audio/Navigation System. SeeNavigation System
Overview on page 4-2.
U. Glove Box. SeeGlove Box on page 2-42.
3-5
Page 164 of 438
Brake System Warning Light
Your vehicle’s hydraulic brake system is divided into
two parts. If one part is not working, the other part can
still work and stop you. For good braking, though,
you need both parts working well.
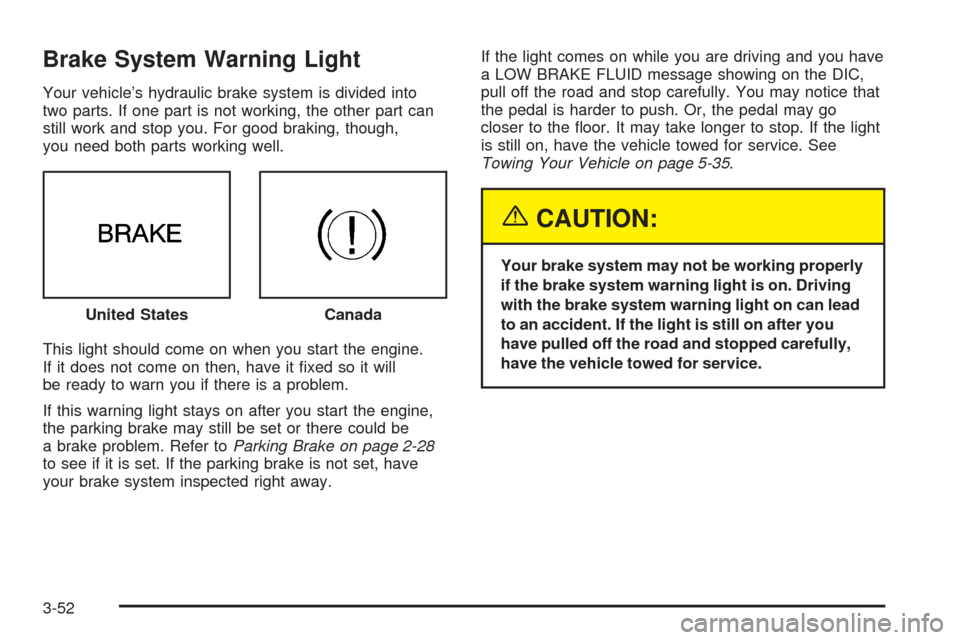
This light should come on when you start the engine.
If it does not come on then, have it �xed so it will
be ready to warn you if there is a problem.
If this warning light stays on after you start the engine,
the parking brake may still be set or there could be
a brake problem. Refer toParking Brake on page 2-28
to see if it is set. If the parking brake is not set, have
your brake system inspected right away.If the light comes on while you are driving and you have
a LOW BRAKE FLUID message showing on the DIC,
pull off the road and stop carefully. You may notice that
the pedal is harder to push. Or, the pedal may go
closer to the �oor. It may take longer to stop. If the light
is still on, have the vehicle towed for service. See
Towing Your Vehicle on page 5-35.
{CAUTION:
Your brake system may not be working properly
if the brake system warning light is on. Driving
with the brake system warning light on can lead
to an accident. If the light is still on after you
have pulled off the road and stopped carefully,
have the vehicle towed for service. United States
Canada
3-52