CADILLAC XLR 2005 1.G Owners Manual
Manufacturer: CADILLAC, Model Year: 2005, Model line: XLR, Model: CADILLAC XLR 2005 1.GPages: 438, PDF Size: 3.69 MB
Page 261 of 438
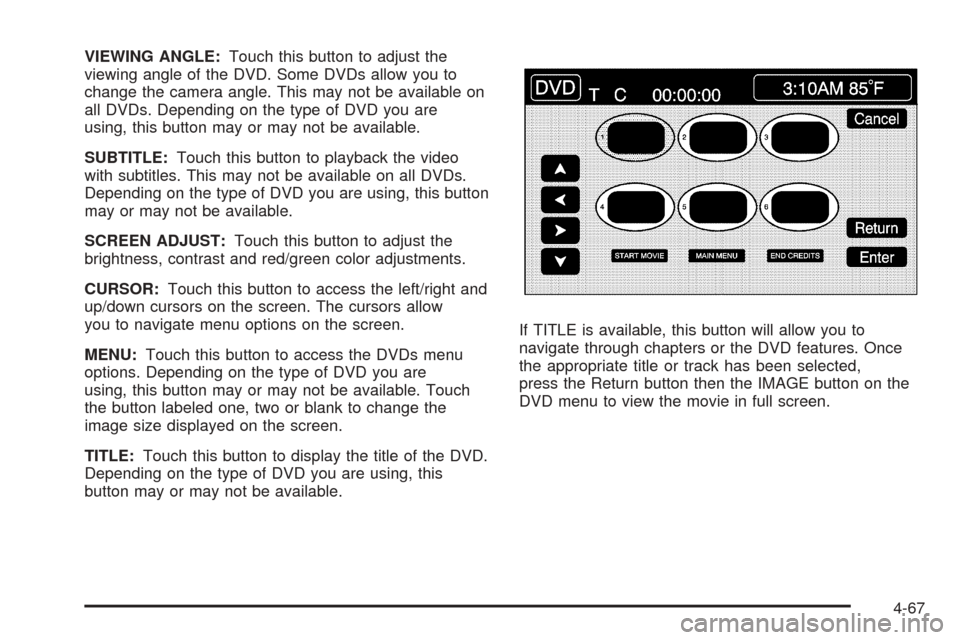
VIEWING ANGLE:Touch this button to adjust the
viewing angle of the DVD. Some DVDs allow you to
change the camera angle. This may not be available on
all DVDs. Depending on the type of DVD you are
using, this button may or may not be available.
SUBTITLE:Touch this button to playback the video
with subtitles. This may not be available on all DVDs.
Depending on the type of DVD you are using, this button
may or may not be available.
SCREEN ADJUST:Touch this button to adjust the
brightness, contrast and red/green color adjustments.
CURSOR:Touch this button to access the left/right and
up/down cursors on the screen. The cursors allow
you to navigate menu options on the screen.
MENU:Touch this button to access the DVDs menu
options. Depending on the type of DVD you are
using, this button may or may not be available. Touch
the button labeled one, two or blank to change the
image size displayed on the screen.
TITLE:Touch this button to display the title of the DVD.
Depending on the type of DVD you are using, this
button may or may not be available.If TITLE is available, this button will allow you to
navigate through chapters or the DVD features. Once
the appropriate title or track has been selected,
press the Return button then the IMAGE button on the
DVD menu to view the movie in full screen.
4-67
Page 262 of 438
SETTING:Touch this button to adjust the following:
LANGUAGE PREFERENCES
PARENTAL LOCK
Under LANGUAGE PREFERENCES, you can select
different languages for AUDIO, SUBTITLE and
DVD MENUS.
1. To change languages, �rst select the option you
wish to change.
2. Select a language from the list given.
3. Touch RETURN to end out the menu. Your
language is now saved.
Under PARENTAL LOCK, you can select SET RATING
LIMIT and SET PIN.
To SET RATING, �rst touch the button. Then, make
your selection. Touch RETURN to end out the menu.
Your selection is now saved.
To use PARENTAL LOCK, �rst touch the button. Then,
enter a four-digit numeric password. Touch RETURN
to end out the menu.SEARCH:Touch this button to search to a certain
scene on the DVD. Depending on the type of DVD you
are using, this button may or may not be available.r(Rewind):Touch this button to rewind through a
scene during playback.
r(Resume):Touch this button to resume playing a
DVD.
c(Stop):Touch this button to stop the DVD.
j(Pause):Touch this button to pause the DVD.
[(Forward):Touch this button to advance rapidly
during playback.
L(Frame Advance):Touch this button to advance by
chapter during playback.
4-68
Page 263 of 438
Radio Personalization with Home
and Away Feature
With this feature, you can recall the latest audio system
settings as adjusted the last time your vehicle was
operated. This feature allows two different drivers to store
and recall their own audio system settings. The settings
recalled by the audio system are determined by which
RKE transmitter (1 or 2) was used to enter the vehicle.
The number on the back of the RKE transmitter
corresponds to driver 1 or to driver 2. The audio system
settings will automatically adjust to where they were last
set by the identi�ed driver. The settings can also be
recalled by brie�y pressing the MEMORY seat switches 1
or 2 located on the driver’s door.
Your audio system can store HOME and AWAY preset
stations. HOME and AWAY preset stations allow
you to use one set of preset radio settings in the area
where you live, and another set when you go out of
town. That way, you will not need to reprogram
your preset stations every time you travel.To select HOME and AWAY preset stations, do the
following:
1. With the audio system on, touch the Audio hard key
and turn the audio system off.
2. Touch the HOME or AWAY button from the main
audio screen.
The next time the audio system is turned on, the
system will recall the last active preset selection.
When battery power is removed and later applied, you
will not have to reset your home audio system preset
stations because the audio system remembers
them. However, you will have to reset your away radio
preset stations.
Voice Recognition
The navigation system’s voice recognition allows for
hands-free operation of navigation and audio system
features. Voice recognition can be used when the ignition
is in on or when Retained Accessory Power (RAP)
is active.
This feature only works if the map DVD is inserted and
I AGREE has been selected. If you try to use voice
recognition without the map DVD inserted, the system
will display “Please insert the navigation map DVD
to use the voice recognition feature.”
4-69
Page 264 of 438
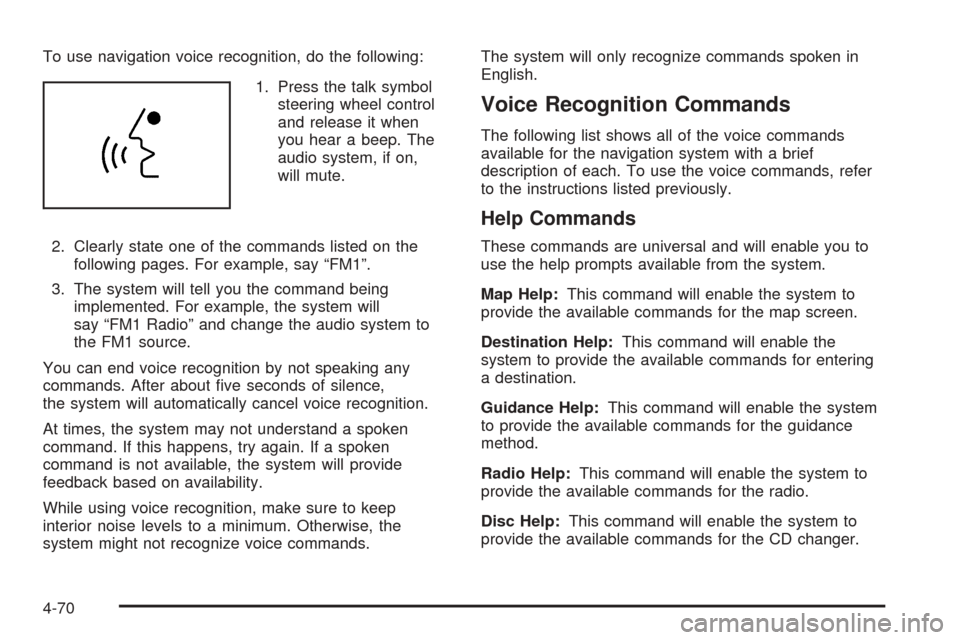
To use navigation voice recognition, do the following:
1. Press the talk symbol
steering wheel control
and release it when
you hear a beep. The
audio system, if on,
will mute.
2. Clearly state one of the commands listed on the
following pages. For example, say “FM1”.
3. The system will tell you the command being
implemented. For example, the system will
say “FM1 Radio” and change the audio system to
the FM1 source.
You can end voice recognition by not speaking any
commands. After about �ve seconds of silence,
the system will automatically cancel voice recognition.
At times, the system may not understand a spoken
command. If this happens, try again. If a spoken
command is not available, the system will provide
feedback based on availability.
While using voice recognition, make sure to keep
interior noise levels to a minimum. Otherwise, the
system might not recognize voice commands.The system will only recognize commands spoken in
English.
Voice Recognition Commands
The following list shows all of the voice commands
available for the navigation system with a brief
description of each. To use the voice commands, refer
to the instructions listed previously.
Help Commands
These commands are universal and will enable you to
use the help prompts available from the system.
Map Help:This command will enable the system to
provide the available commands for the map screen.
Destination Help:This command will enable the
system to provide the available commands for entering
a destination.
Guidance Help:This command will enable the system
to provide the available commands for the guidance
method.
Radio Help:This command will enable the system to
provide the available commands for the radio.
Disc Help:This command will enable the system to
provide the available commands for the CD changer.
4-70
Page 265 of 438
Radio Commands
Radio:This command will change the audio system to
the next radio audio source.
AM:This command will change the audio system to the
AM audio source.
FM1:This command will change the audio system to
the FM1 audio source.
FM2:This command will change the audio system to
the FM2 audio source.
XM1:This command will change the audio system to
the XM1 audio source.
XM2:This command will change the audio system to
the XM2 audio source.
CD Changer:This command will change the audio
system to the CD changer audio source.
WX, Weather Band:These commands will change the
audio system to the weather band audio source.
Power On, Audio On:These commands will turn the
system’s power on.
Power Off, Audio Off:These commands will turn the
system’s power off.Seek Up:This command will cause the selected audio
source to seek up to the next strongest signal.
Seek Down:This command will cause the selected
audio source to seek down to the next strongest signal.
Stop Scan:This command will cause the audio
source to stop scanning for the next strongest signal.
CD Changer Commands
Track Up:This command will cause the CD changer to
skip up to the next track.
Previous Track, Track Down:This command will
cause the CD changer to go to the previous track.
Screen Commands
Screen Day Mode, Day Mode On:These commands
will adjust the system’s screen setting to the day mode.
Screen Night Mode, Night Mode On:These
commands will adjust the system’s screen setting to the
night mode.
Screen Auto Mode, Auto Mode On:These commands
will adjust the system’s screen setting to auto mode.
Screen Off:This command will turn the system’s
screen display off.
4-71
Page 266 of 438
Position Commands
Current Position, Current Location, Show Current
Position, Show Current Location:These commands
will cause the system to display the vehicle’s current
location on the map screen.
Map:This command will cause the system to display
the map screen.
Map Commands
Zoom In:This command will cause the system to zoom
in when on the map screen.
Zoom Out:This command will cause the system to
zoom out when on the map screen.
Maximum Scale:This command will cause the system
to zoom out to the maximum available map scale
when on the map screen.
Minimum Scale:This command will cause the system
to zoom in to the minimum available map scale when
on the map screen.
Heading Up, Change to Heading Up:These
commands will cause the system to display the Vehicle
Up heading when on the map screen. The map scale
should be set for under 2 miles (4 km).North Up, Change to North Up:These commands will
cause the system to display the North Up heading
when on the map screen if the map scale is set
to 2 miles (4 km) or less.
Map Direction, Change Map Direction:These
commands will cause the system to change the vehicle’s
direction from North Up to Heading Up or Heading Up
to North Up on the map screen if the map scale is set to
2 miles (4 km) or less.
Mark, Mark This Point:These commands will cause
the system to mark the location as a memory point while
on the map screen.
Destination Commands
Home, Go Home:These commands will cause the
system to enter the Home destination, if one is set.
Go To Starting Point, Previous Starting Point:These
commands will cause the system to enter the last
available starting point as a destination.
4-72
Page 267 of 438

Guidance Commands
Repeat Guidance, Repeat Voice:These commands
will cause the system to repeat the last available
voice prompt guidance command if a destination has
been set.
Louder:This command will cause the system to
increase the volume of the navigation voice prompts if a
destination has been set.
Softer:This command will cause the system to
decrease the volume of the navigation voice prompts if
a destination has been set.
Voice Guidance Off:This command will cause the
system to turn off the navigation voice prompts if
a destination has been set.
Voice Guidance On:This command will cause the
system to turn on the navigation voice prompts if
a destination has been set.
Open Guidance, Open Guidance Screen, Open
Guide, Open Guide Screen:These commands will
cause the system to open the Guidance Appearance
menu if a destination has been set.
Close Guidance, Close Guidance Screen, Close
Guide, Close Guide Screen:These commands
will cause the system to close the Guidance Appearance
menu if a destination has been set.Arrow Guidance, Arrow Guide, Change To Arrow
Guidance, Change To Arrow Guide:These
commands will cause the system to change to Arrow
Guidance screen view in the Guidance Menu if a
destination has been set.
Turn List Guidance, Turn List Guide, Change to
Turn List Guidance, Change to Turn List
Guide:These commands will cause the system to
change to Turn List Guidance screen view in the
Guidance Menu if a destination has been set.
Entire Route, Entire Route Map, Route Overview:
These commands will cause the system to display the
entire route if a destination has been set.
Reroute:This command will cause the system to
generate an alternate route to a set destination while on
a planned route.
Detour, Detour Entire Route:These commands will
cause the system to activate the detour feature
when driving a planned route.
Delete Destination, Cancel Destination:These
commands will cancel a destination if one has been set.
Next Waypoint Map:This command will cause the
system to display the map view of the next waypoint
location if one has been set.
4-73
Page 268 of 438
First Waypoint Map:This command will cause the
system to display the map view of the �rst waypoint
location if one has been set.
Second Waypoint Map:This command will cause the
system to display the map view of the second waypoint
location if more than one waypoint has been set.
Third Waypoint Map:This command will cause the
system to display the map view of the third waypoint
location if more than two waypoints have been set.
Fourth Waypoint Map:This command will cause the
system to display the map view of the fourth waypoint
location if more than three waypoints have been set.
Fifth Waypoint Map:This command will cause
the system to display the map view of the �fth waypoint
location if more than four waypoints have been set.
Destination Map:This command will cause the system
to display the map view of the �nal destination location
if one has been set.Point of Interest (POI) Commands
The following commands will cause the system to display
icons if they are available on the map screen when the
map scale is set to a half mile (eight-tenths km) or less.
Restaurant, I’m Hungry:These commands will cause
the system to display restaurant POI icons.
American Restaurant, American Food:These
commands will cause the system to display American
restaurant POI icons.
Chinese Restaurant, Chinese Food:These
commands will cause the system to display Chinese
restaurant POI icons.
Continental Restaurant, Continental Food:These
commands will cause the system to display Continental
restaurant POI icons.
French Restaurant, French Food:These commands
will cause the system to display French restaurant
POI icons.
Italian Restaurant, Italian Food:These commands will
cause the system to display Italian restaurant POI icons.
4-74
Page 269 of 438
Japanese Restaurant, Japanese Food:These
commands will cause the system to display Japanese
restaurant POI icons.
Mexican Restaurant, Mexican Food:These
commands will cause the system to display Mexican
restaurant POI icons.
Seafood Restaurant, Seafood:These commands will
cause the system to display Seafood restaurant POI
icons.
Other Restaurant, Other Food:These commands will
cause the system to display other types of restaurant
POI icons.
Shopping, Shopping Mall:These commands will
cause the system to display mall POI icons.
Grocery Store:This command will cause the system to
display grocery store POI icons.
Gas Station, Gas:These commands will cause the
system to display gas station POI icons.
Parking Garage:This command will cause the system
to display parking garage POI icons.
Parking Lot:This command will cause the system to
display parking lot POI icons.Rental Car Agency:This command will cause the
system to display rental car POI icons.
Automobile Club, Triple A:These commands will
cause the system to display auto club POI icons.
Auto Service And Maintenance, Auto Service,
Maintenance:These commands will cause the system
to display auto service POI icons.
Hotel:This command will cause the system to display
hotel POI icons.
Golf Course:This command will cause the system to
display golf course POI icons.
Ski Resort, Skiing:These commands will cause the
system to display ski resort POI icons.
Amusement Park:This command will cause the
system to display amusement park POI icons.
Sport Complex, Stadium:These commands will cause
the system to display sports complex POI icons.
Casino:This command will cause the system to display
casino POI icons.
Marina:This command will cause the system to display
marina POI icons.
4-75
Page 270 of 438
Tourist Attraction:This command will cause the
system to display tourist attraction POI icons.
Winery:This command will cause the system to
display winery POI icons.
City Hall:This command will cause the system to
display city hall POI icons.
Police Station:This command will cause the system to
display police station POI icons.
Library:This command will cause the system to
display library POI icons.
Hospital:This command will cause the system to
display hospital POI icons.
Park & Recreation, Parks & Recreation:These
commands will cause the system to display parks and
recreation POI icons.
Civic Center, Community Center:These commands
will cause the system to display community center
POI icons.
Convention Center, Exhibition Center:These
commands will cause the system to display convention
center POI icons.
Court House:This command will cause the system to
display court house POI icons.Train Station:This command will cause the system to
display train station POI icons.
Airport:This command will cause the system to
display airport POI icons.
Bus Station:This command will cause the system to
display bus station POI icons.
Commuter Rail Station:This command will cause the
system to display commuter rail station POI icons.
Ferry Terminal:This command will cause the system
to display ferry terminal POI icons.
Park & Ride:This command will cause the system to
display park & ride POI icons.
Rest Area, Rest Stop:These commands will cause
the system to display rest area POI icons.
Tourist Information:This command will cause the
system to display tourist information POI icons.
Historical Monument:This command will cause the
system to display historical monument POI icons.
Performing Arts:This command will cause the system
to display performing arts POI icons.
Museum:This command will cause the system to
display museum POI icons.
4-76