display CADILLAC XT6 2023 User Guide
[x] Cancel search | Manufacturer: CADILLAC, Model Year: 2023, Model line: XT6, Model: CADILLAC XT6 2023Pages: 507, PDF Size: 6.49 MB
Page 24 of 507
Cadillac XT6 Owner Manual (GMNA-Localizing-U.S./Canada-16405819) -
2023 - CRC - 3/23/22
Keys, Doors, and Windows 23
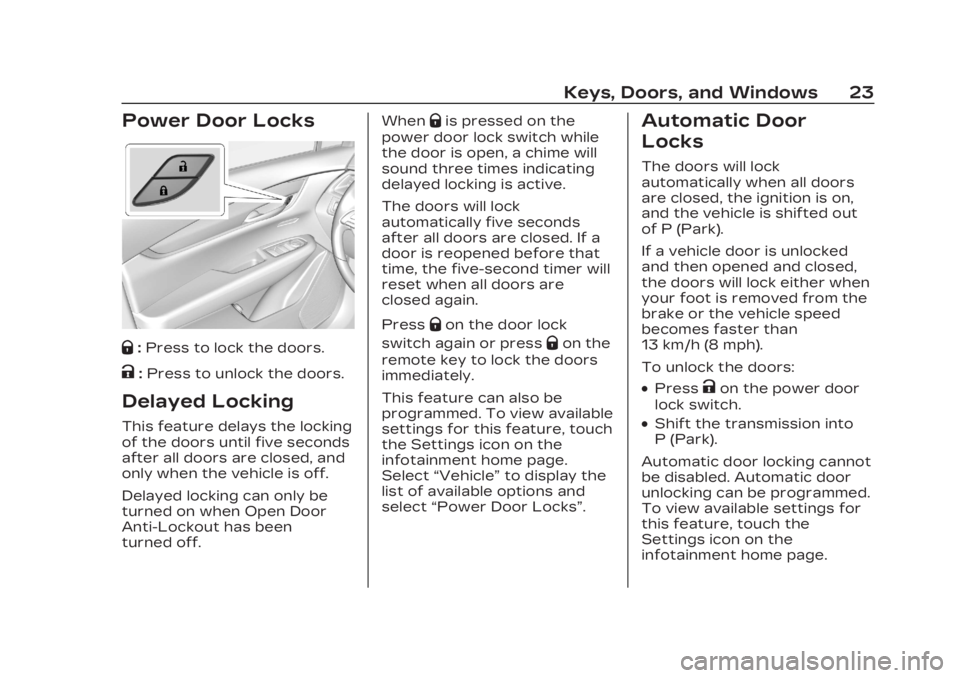
Power Door Locks
Q:Press to lock the doors.
K:Press to unlock the doors.
Delayed Locking
This feature delays the locking
of the doors until five seconds
after all doors are closed, and
only when the vehicle is off.
Delayed locking can only be
turned on when Open Door
Anti-Lockout has been
turned off. When
Qis pressed on the
power door lock switch while
the door is open, a chime will
sound three times indicating
delayed locking is active.
The doors will lock
automatically five seconds
after all doors are closed. If a
door is reopened before that
time, the five-second timer will
reset when all doors are
closed again.
Press
Qon the door lock
switch again or press
Qon the
remote key to lock the doors
immediately.
This feature can also be
programmed. To view available
settings for this feature, touch
the Settings icon on the
infotainment home page.
Select “Vehicle” to display the
list of available options and
select “Power Door Locks”.
Automatic Door
Locks
The doors will lock
automatically when all doors
are closed, the ignition is on,
and the vehicle is shifted out
of P (Park).
If a vehicle door is unlocked
and then opened and closed,
the doors will lock either when
your foot is removed from the
brake or the vehicle speed
becomes faster than
13 km/h (8 mph).
To unlock the doors:
.PressKon the power door
lock switch.
.Shift the transmission into
P (Park).
Automatic door locking cannot
be disabled. Automatic door
unlocking can be programmed.
To view available settings for
this feature, touch the
Settings icon on the
infotainment home page.
Page 25 of 507
Cadillac XT6 Owner Manual (GMNA-Localizing-U.S./Canada-16405819) -
2023 - CRC - 3/23/22
24 Keys, Doors, and Windows
Select“Vehicle” to display the
list of available options and
select “Power Door Locks”.
Lockout Protection
If the ignition is on or in
accessory mode and the
power door lock switch is
pressed with the driver door
open, all the doors will lock and
only the driver door will unlock.
If the vehicle is off and locking
is requested while a door is
open, when all doors are
closed the vehicle will check
for remote keys inside. If an
remote key is detected and
the number of remote keys
inside has not reduced, the
driver door will unlock and the
horn will chirp three times.
Lockout Protection can be
manually overridden by
pressing and holding
Qon the
power door lock switch. Open Door Anti-Lockout
If Open Door Anti-Lockout is
turned on and the vehicle is
off, the driver door is open,
and locking is requested, all
the doors will lock and the
driver door will unlock. The
Open Door Anti-Lockout
feature can be turned on or
off. To view available settings
from the infotainment screen,
touch Settings > Vehicle >
Power Door Locks > Open
Door Anti-Lockout.
Safety Locks
The rear door safety locks
prevent passengers from
opening the rear doors from
inside the vehicle.
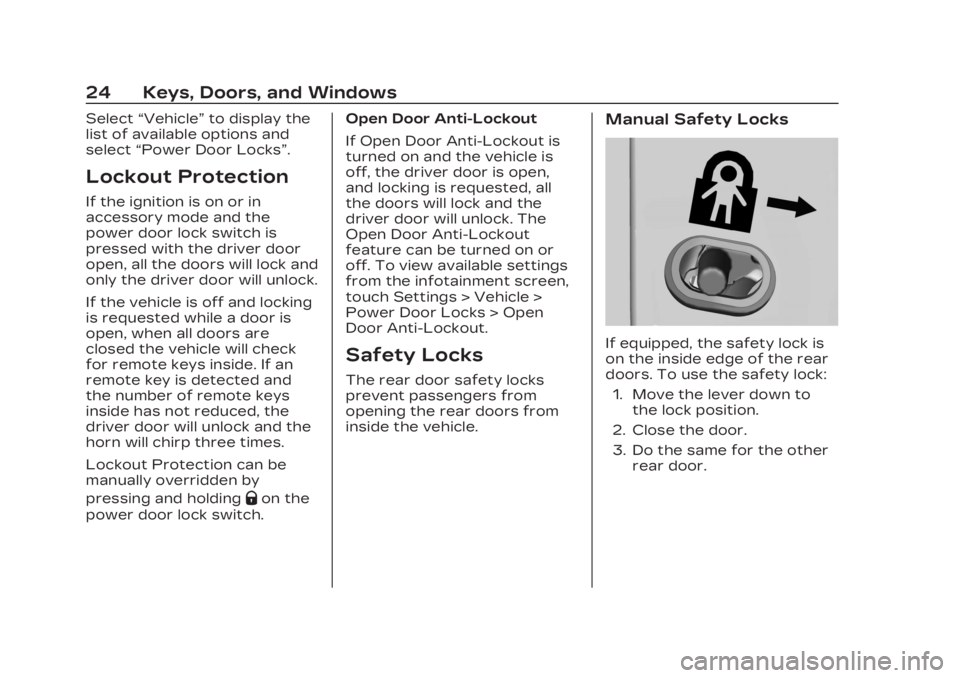
Manual Safety Locks
If equipped, the safety lock is
on the inside edge of the rear
doors. To use the safety lock:
1. Move the lever down to the lock position.
2. Close the door.
3. Do the same for the other rear door.
Page 30 of 507

Cadillac XT6 Owner Manual (GMNA-Localizing-U.S./Canada-16405819) -
2023 - CRC - 3/23/22
Keys, Doors, and Windows 29
To open the liftgate, press the
touch pad under the liftgate
handle and lift up.
Do not press the touch pad
while closing the liftgate. This
may cause the liftgate to be
unlatched.
If equipped with Keyless
Access, the liftgate can be
opened when locked if the
remote key is within 1 m (3 ft)
of the touch pad. See Remote
Key Operation09. The liftgate has an electric
latch. If the battery is
disconnected or has low
voltage, the liftgate will not
open. The liftgate will resume
operation when the battery is
reconnected and charged.
Always close the liftgate
before driving.
Hands-Free Operation
If equipped, the liftgate may
be operated with a kicking
motion near the center of the
rear bumper at the location of
the projected logo.
The remote key must be within
1 m (3 ft) of the rear bumper to
operate the power liftgate
hands-free.
The hands-free feature will
not work while the liftgate is
moving. To stop the liftgate
while in motion use one of the
liftgate switches.
The hands-free feature can be
customized.To view available
settings for this feature, touch
the Settings icon on the
infotainment home page.
Select
“Vehicle” to display the
list of available options and
select “Comfort and
Convenience”. Choose from
the following:
On-Open and Close : The
kicking motion is activated to
both open and close the
liftgate.
On-Open Only : The kicking
motion is activated to only
open the liftgate.
Off : The feature is disabled.
Page 32 of 507
Cadillac XT6 Owner Manual (GMNA-Localizing-U.S./Canada-16405819) -
2023 - CRC - 3/23/22
Keys, Doors, and Windows 31
If an remote key is again
detected within approximately
2 m (6 ft) of the liftgate,
or another kick has been
detected, the one-minute
timer will be reset.
The projected logo will not
work under these conditions:
.The vehicle battery is low.
.The transmission is not in
P (Park).
.Hands Free Liftgate/Trunk
Control is set to Off in
vehicle settings. To view
available settings for this
feature, touch the Settings
icon on the infotainment
home page. Select“Vehicle”
to display the list of available
options and select “Comfort
and Convenience”.
.Power liftgate is turned off.
.The vehicle remains parked
for 72 hours or more, with
no remote key use or
Keyless Access operation.
To re-enable, press any
button on the remote key or
open and close a
vehicle door.
The projected logo will not
work for a single remote key
when a remote key:
.Has been left within
approximately 5 m (15 ft) of
the liftgate for several
minutes.
.Has been left inside the
vehicle and all vehicle doors
are closed.
.Has approached the area
outside of the liftgate five
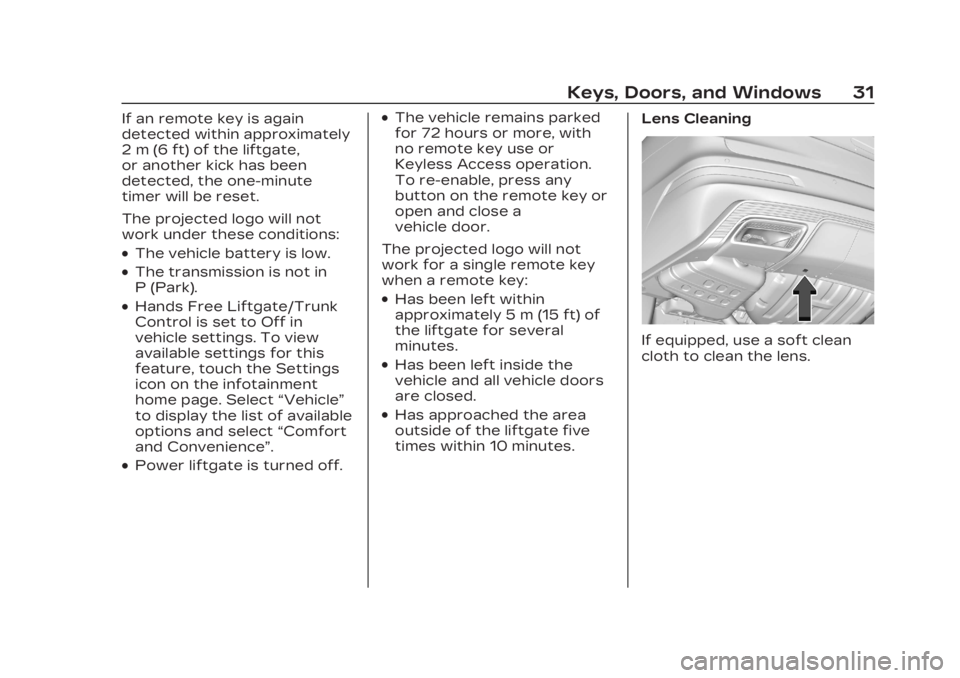
times within 10 minutes. Lens Cleaning
If equipped, use a soft clean
cloth to clean the lens.
Page 36 of 507
Cadillac XT6 Owner Manual (GMNA-Localizing-U.S./Canada-16405819) -
2023 - CRC - 3/23/22
Keys, Doors, and Windows 35
Inclination and Intrusion
Sensors Disable Switch
It is recommended that the
inclination and intrusion
sensors be deactivated if pets
are left in the vehicle or if the
vehicle is being transported.
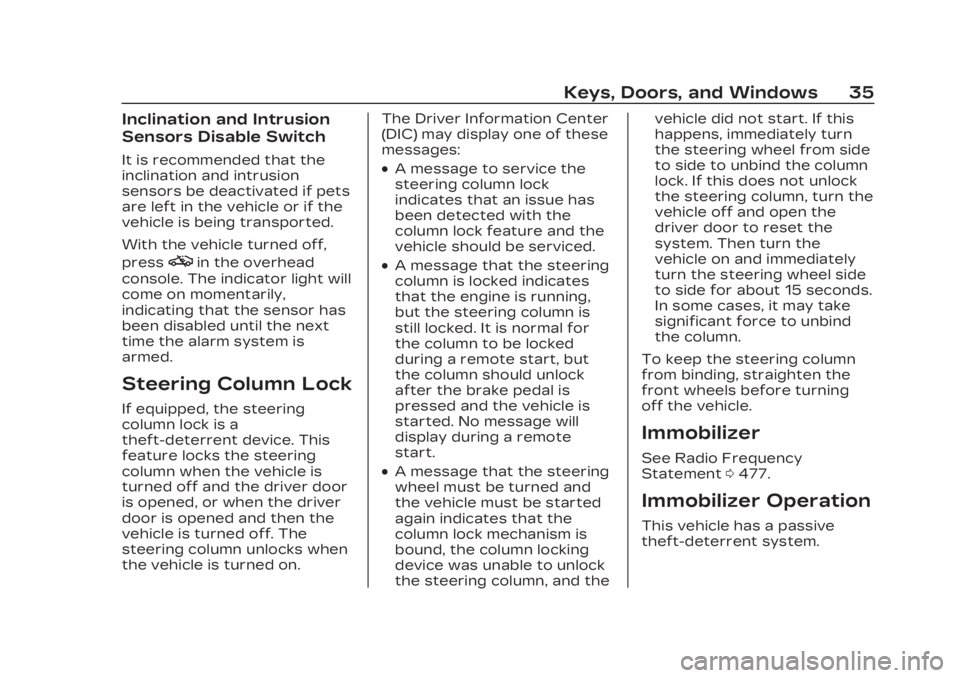
With the vehicle turned off,
press
oin the overhead
console. The indicator light will
come on momentarily,
indicating that the sensor has
been disabled until the next
time the alarm system is
armed.
Steering Column Lock
If equipped, the steering
column lock is a
theft-deterrent device. This
feature locks the steering
column when the vehicle is
turned off and the driver door
is opened, or when the driver
door is opened and then the
vehicle is turned off. The
steering column unlocks when
the vehicle is turned on. The Driver Information Center
(DIC) may display one of these
messages:
.A message to service the
steering column lock
indicates that an issue has
been detected with the
column lock feature and the
vehicle should be serviced.
.A message that the steering
column is locked indicates
that the engine is running,
but the steering column is
still locked. It is normal for
the column to be locked
during a remote start, but
the column should unlock
after the brake pedal is
pressed and the vehicle is
started. No message will
display during a remote
start.
.A message that the steering
wheel must be turned and
the vehicle must be started
again indicates that the
column lock mechanism is
bound, the column locking
device was unable to unlock
the steering column, and thevehicle did not start. If this
happens, immediately turn
the steering wheel from side
to side to unbind the column
lock. If this does not unlock
the steering column, turn the
vehicle off and open the
driver door to reset the
system. Then turn the
vehicle on and immediately
turn the steering wheel side
to side for about 15 seconds.
In some cases, it may take
significant force to unbind
the column.
To keep the steering column
from binding, straighten the
front wheels before turning
off the vehicle.
Immobilizer
See Radio Frequency
Statement 0477.
Immobilizer Operation
This vehicle has a passive
theft-deterrent system.
Page 39 of 507

Cadillac XT6 Owner Manual (GMNA-Localizing-U.S./Canada-16405819) -
2023 - CRC - 3/23/22
38 Keys, Doors, and Windows
Power Folding Mirrors
If equipped, press{to power
fold the mirrors. Press
{again
to unfold.
Resetting the Power
Folding Mirrors
Reset the power folding
mirrors if:
.The mirrors are accidentally
obstructed while folding.
.They are accidentally
manually folded/unfolded.
.The mirrors do not stay in
the unfolded position.
.The mirrors vibrate at
normal driving speeds.
Fold and unfold the mirrors
one time using the mirror
controls to reset them to their
normal position. A noise may
be heard during the resetting
of the power folding mirrors.
This sound is normal after a
manual folding operation.
Remote Mirror Folding
If equipped, press and holdQ
on the remote key for
approximately one second to
remotely fold the exterior
mirrors. Press and hold
Kon
the remote key for
approximately one second to
unfold. See Remote Key
Operation 09.
This feature is turned on or off
through vehicle settings. To
view available settings for this
feature, touch the Settings
icon on the infotainment home
page. Select “Vehicle”to display the list of available
options and select
“Comfort
and Convenience”.
Heated Mirrors
K: Press to heat the mirrors.
See “Rear Window Defogger”
under Dual Automatic Climate
Control System 0228.
Automatic Dimming
Mirror
If the vehicle has the
automatic dimming mirror, the
driver outside mirror
automatically adjusts for the
glare of headlamps
behind you.
Reverse Tilt Mirrors
If equipped with reverse tilt
mirrors and memory seats, the
passenger and/or driver
mirror tilts to a preselected
position when the vehicle is in
R (Reverse). This allows the
curb to be seen when parallel
parking.
Page 40 of 507

Cadillac XT6 Owner Manual (GMNA-Localizing-U.S./Canada-16405819) -
2023 - CRC - 3/23/22
Keys, Doors, and Windows 39
The mirror(s) may move from
their tilted position when:
.The vehicle is shifted out of
R (Reverse), or remains in
R (Reverse) for about
30 seconds.
.The vehicle is turned off.
.The vehicle is driven in
R (Reverse) above a set
speed.
To view available settings
from the infotainment screen,
touch Settings > Vehicle >
Comfort and Convenience.
Interior Mirrors
Interior Rearview
Mirrors
Adjust the rearview mirror for
a clear view of the area behind
the vehicle.
Do not spray glass cleaner
directly on the mirror. Use a
soft towel dampened with
water.
Automatic Dimming
Rearview Mirror
If equipped, automatic
dimming reduces the glare of
headlamps from behind. The
dimming feature comes on
when the vehicle is started.
Rear Camera Mirror
If equipped, this automatic
dimming mirror provides a
wide angle camera view of the
area behind the vehicle.
Pull the tab to turn on the
display. Push the tab to turn it
off. When off the mirror is automatic dimming. Adjust the
mirror for a clear view of the
area behind the vehicle while
the display is off.
PressVto scroll through the
adjustment options.
Press
tanduto adjust the
settings using the indicators
on the mirror. The indicators
will remain visible for
five seconds after the last
button activation, and the
settings will remain saved.
Page 42 of 507

Cadillac XT6 Owner Manual (GMNA-Localizing-U.S./Canada-16405819) -
2023 - CRC - 3/23/22
Keys, Doors, and Windows 41
Troubleshooting
See your dealer for service if a
blue screen and
3are
displayed in the mirror, and
the display shuts off. Also,
push the tab as indicated to
return to the automatic
dimming mode.
The Rear Camera Mirror may
not work properly or display a
clear image if:
.There is glare from the sun
or headlamps. This may
obstruct objects from view.
.Dirt, snow, or other debris
blocks the camera lens.
Clean the lens with a soft
damp cloth, or if equipped,
with the Rear Camera
Washer. See Rear Window
Wiper/Washer 0120.
.The camera’s mounting on
the vehicle has been
damaged, and/or the
position or the mounting
angle of the camera has
changed.
Windows
{
Warning
Never leave a child, a
helpless adult, or a pet alone
in a vehicle, especially with
the windows closed in warm
or hot weather. They can be
overcome by the extreme
heat and suffer permanent
injuries or even death from
heat stroke.
The vehicle aerodynamics are
designed to improve fuel
economy performance. This
Page 45 of 507
Cadillac XT6 Owner Manual (GMNA-Localizing-U.S./Canada-16405819) -
2023 - CRC - 3/23/22
44 Keys, Doors, and Windows
display the list of available
options and select“Remote
Lock, Unlock, Start”.
Sun Visors
Pull the sun visor down to
block glare. Detach the sun
visor from the center mount to
pivot to the side window and,
if equipped, extend along
the rod.
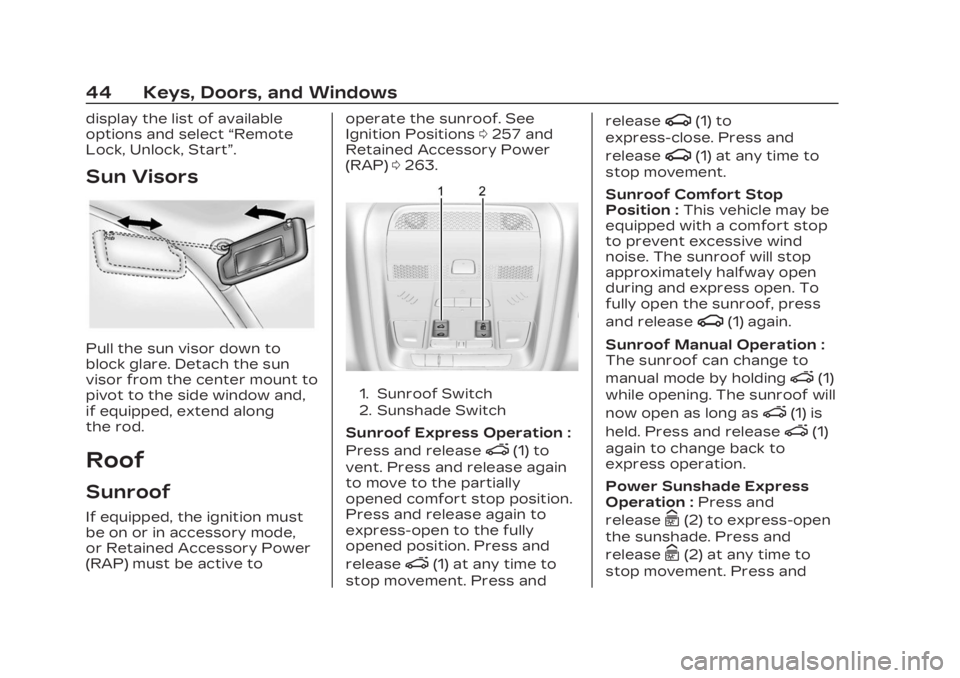
Roof
Sunroof
If equipped, the ignition must
be on or in accessory mode,
or Retained Accessory Power
(RAP) must be active to operate the sunroof. See
Ignition Positions
0257 and
Retained Accessory Power
(RAP) 0263.
1. Sunroof Switch
2. Sunshade Switch
Sunroof Express Operation :
Press and release
e(1) to
vent. Press and release again
to move to the partially
opened comfort stop position.
Press and release again to
express-open to the fully
opened position. Press and
release
e(1) at any time to
stop movement. Press and release
g(1) to
express-close. Press and
release
g(1) at any time to
stop movement.
Sunroof Comfort Stop
Position : This vehicle may be
equipped with a comfort stop
to prevent excessive wind
noise. The sunroof will stop
approximately halfway open
during and express open. To
fully open the sunroof, press
and release
g(1) again.
Sunroof Manual Operation :
The sunroof can change to
manual mode by holding
e(1)
while opening. The sunroof will
now open as long as
e(1) is
held. Press and release
e(1)
again to change back to
express operation.
Power Sunshade Express
Operation : Press and
release
C(2) to express-open
the sunshade. Press and
release
C(2) at any time to
stop movement. Press and
Page 52 of 507

Cadillac XT6 Owner Manual (GMNA-Localizing-U.S./Canada-16405819) -
2023 - CRC - 3/22/22
Seats and Restraints 51
Seat Exit Memory Recall”later
in this section. To enable
automatic recalls, turn on Seat
Entry Memory and/or Seat
Exit Memory. See “Enabling
Automatic Recalls” later in this
section. The memory recalls
may be cancelled at any time
during the recall. See “Cancel
Memory Seating Recalls” later
in this section.
Identifying Driver Number
The vehicle identifies the
current driver by their remote
key number 1–8. The current
remote key number may be
identified by Driver
Information Center (DIC)
welcome message, “You are
driver x for memory recalls.”
This message is displayed the
first few times the vehicle is
turned on when a different
remote key is used. For Seat
Entry Memory to work
properly, save positions to the
1 or 2 memory button
matching the driver number of
this welcome message. To aid in identifying remote key IDs, it
is recommended to only carry
one remote key when entering
the vehicle. Perform the
following if the welcome
message is not displayed:
1. Move all keys and remote keys away from the
vehicle.
2. Start the vehicle with another remote key. A DIC
welcome message should
display indicating the
driver number of the other
remote key. Turn the
vehicle off and remove the
other key or remote key
from the vehicle.
3. Start the vehicle with the initial key or remote key.
The DIC welcome message
should display the driver
number of the initial
remote key.
Saving Seating Positions
Read these instructions
completely before saving
memory positions. To save preferred driving
positions to 1 and 2:
1. Turn the vehicle on or to accessory mode. A DIC
welcome message may
indicate the driver number
of the current remote key.
See “Identifying Driver
Number” previously in this
section.
2. Adjust all available memory features to the desired
driving position.
3. Press and release SET; a beep will sound.
4. Immediately upon releasing SET, press and hold
memory button 1 or
2 matching the current
Driver’s remote key
number until two beeps
sound. If too much time
passes between releasing
SET and pressing 1 or 2,
the two beeps will not
sound indicating memory
position were not saved.
Repeat Steps 3 and 4 to
try again.