seats CADILLAC XT6 2023 Owners Manual
[x] Cancel search | Manufacturer: CADILLAC, Model Year: 2023, Model line: XT6, Model: CADILLAC XT6 2023Pages: 507, PDF Size: 6.49 MB
Page 2 of 507
Cadillac XT6 Owner Manual (GMNA-Localizing-U.S./Canada-16405819) -
2023 - CRC - 3/22/22
Contents
Introduction . . . . . . . . . . . . . . . . . . . . . . . .1
Keys, Doors, and Windows . . . . .8
Seats and Restraints . . . . . . . . . .46
Storage . . . . . . . . . . . . . . . . . . . . . . . . . .108
Instruments and Controls . . . .116
Lighting . . . . . . . . . . . . . . . . . . . . . . . . . .156
Infotainment System . . . . . . . . . .164
Climate Controls . . . . . . . . . . . . . . .228
Driving and Operating . . . . . . . .238
Vehicle Care . . . . . . . . . . . . . . . . . . . .362
Service and Maintenance . . .452
Technical Data . . . . . . . . . . . . . . . . .462
Customer Information . . . . . . .466
Reporting Safety Defects . . .478
OnStar . . . . . . . . . . . . . . . . . . . . . . . . . . .482
Connected Services . . . . . . . . . .489
Index . . . . . . . . . . . . . . . . . . . . . . . . 492
Introduction
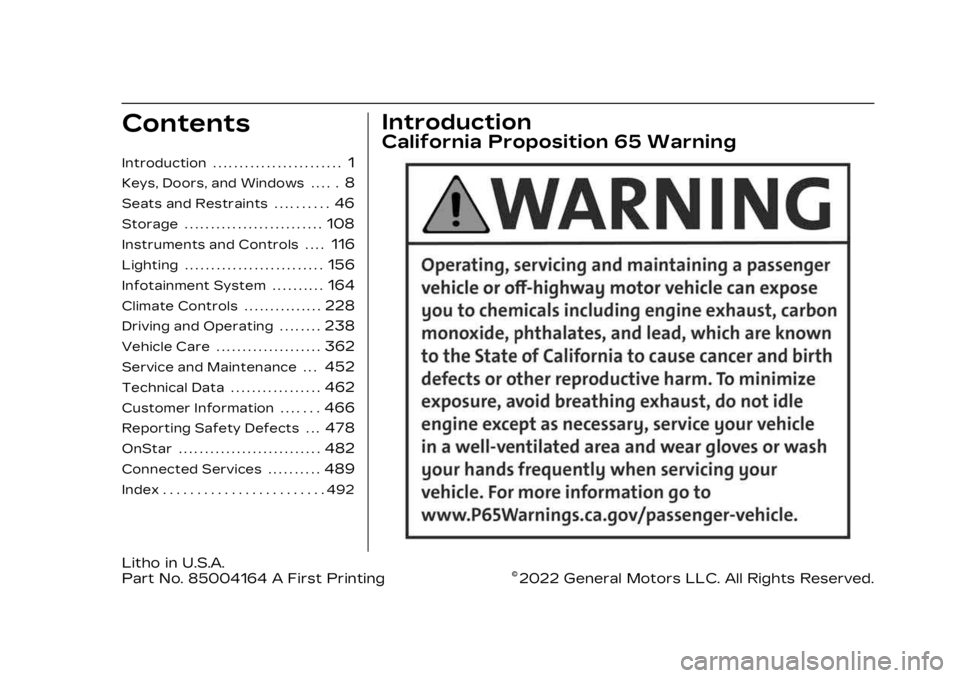
California Proposition 65 Warning
Litho in U.S.A.
Part No. 85004164 A First Printing©2022 General Motors LLC. All Rights Reserved.
Page 7 of 507

Cadillac XT6 Owner Manual (GMNA-Localizing-U.S./Canada-16405819) -
2023 - CRC - 3/22/22
6 Introduction
1. Air Vents0236.
2. Exterior Lamp Controls 0156.
Turn Signal Lever. See
Turn and Lane-Change
Signals 0160.
IntelliBeam System Button
(If Equipped). See Exterior
Lamp Controls 0156.
3. Instrument Cluster 0127.
Driver Information Center
(DIC) Display. See Driver
Information Center (DIC)
0 144.
4. Windshield Wiper/Washer 0118.
Rear Window Wiper/
Washer 0120.
5. ENGINE START/STOP Button. See Ignition
Positions 0257.
6. Park Assist Button. See Park Assist 0318.
Automatic Parking Assist
(APA) Button. See Park
Assist 0318. 7. Stop/Start Disable Switch.
See Stop/Start System
0259.
8. Light Sensor. See Automatic Headlamp
System 0159.
9. Hazard Warning Flashers 0160.
Lane Keep Assist (LKA)
0 338 (If Equipped).
10. Infotainment Controls. See Overview 0165.
11. Heated and Ventilated Front Seats 054 (If
Equipped).
12. Dual Automatic Climate Control System 0228.
13. MODE Switch. See Driver Mode Control 0278.
Traction Control/
Electronic Stability Control
0 276.
14. Infotainment Controls. See Overview 0165.
15. Shift Lever. See Automatic Transmission 0266. 16. Steering Wheel Controls
0167.
17. Steering Wheel Controls 0167.
Driver Information Center
(DIC) Controls. See Driver
Information Center (DIC)
0 144.
18. Horn 0118.
19. Steering Wheel Adjustment 0117 (Out
of View).
20. Forward Collision Alert (FCA) System 0326 (If
Equipped).
Heated Steering Wheel
0 118 (If Equipped).
21. Cruise Control 0280.
Adaptive Cruise Control
(Advanced) 0283 (If
Equipped).
Phone Button. See
Steering Wheel Controls
0 167.
Page 12 of 507

Cadillac XT6 Owner Manual (GMNA-Localizing-U.S./Canada-16405819) -
2023 - CRC - 3/23/22
Keys, Doors, and Windows 11
If equipped with remote
folding mirrors, press and hold
Kfor one second to unfold the
mirrors, if enabled. To view
available settings for this
feature, touch the Settings
icon on the infotainment home
page. Select “Vehicle”to
display the list of available
options and select “Comfort
and Convenience”.
If equipped with remote
windows, press and hold
K
until the windows fully open,
if enabled. To view available
settings for this feature, touch
the Settings icon on the
infotainment home page.
Select “Vehicle” to display the
list of available options and
select “Remote Lock, Unlock,
Start”.
/: Press and releaseQand
then immediately press and
hold
/for at least
four seconds to start the
engine from outside the
vehicle using the remote key.
See Remote Vehicle Start 019.
7:Press and release one time
to initiate vehicle locator. The
exterior lamps flash and the
horn chirps three times. Press
and hold
7for three seconds
to sound the panic alarm. The
horn sounds and the turn
signal lamps flash for
30 seconds, or until
7is
pressed again or the vehicle is
started.
b: Press twice quickly to
open or close the liftgate.
Press once to stop the liftgate
from moving.
Keyless Access Operation
With the Keyless Access
system, you can lock and
unlock the doors and access
the liftgate without removing
the remote key from your
pocket, purse, briefcase, etc.
The remote key should be
within 1 m (3 ft) of the liftgate
or door being opened. Keyless Access can be
programmed to unlock all
doors on the first lock/unlock
press from the driver door.
Keyless unlocking can also be
turned off. To view available
settings for this feature, touch
the Settings icon on the
infotainment home page.
Select
“Vehicle” to display the
list of available options and
select “Remote Lock, Unlock,
Start”.
If equipped with memory
seats, remote keys 1 and 2 are
linked to seating positions of
memory 1 or 2. See Memory
Seats 050.
Keyless Unlocking/Locking
from the Driver Door
When the doors are locked
and the remote key is within
1 m (3 ft) of the driver door
handle, pressing the lock/
unlock button on the driver
door handle will unlock the
driver door. If the lock/unlock
Page 15 of 507
Cadillac XT6 Owner Manual (GMNA-Localizing-U.S./Canada-16405819) -
2023 - CRC - 3/23/22
14 Keys, Doors, and Windows
To view available settings for
this feature, touch the
Settings icon on the
infotainment home page.
Select“Vehicle” to display the
list of available options and
select “Remote Lock, Unlock,
Start”.
Keyless Liftgate Opening
Press the touch pad on the
liftgate handle to open the
liftgate if the remote key is
within 1 m (3 ft).
Key Access
To access a vehicle with a
weak remote key battery, see
Door Locks 020.
Programming Remote
Keys to the Vehicle
Only remote keys programmed
to the vehicle will work. If a
remote key is lost or stolen, a
replacement can be purchased
and programmed through your
dealer. The vehicle can be
reprogrammed so that lost or
stolen remote keys no longer
work. Each vehicle can have
up to eight remote keys
matched to it.
Programming with
Recognized Remote Keys
A new remote key can be
programmed to the vehicle
when there are two
recognized remote keys.
To program, the vehicle must
be off and all of the remote
keys, both currently
recognized and new, must be
with you.
1. Place the two recognized remote keys in the
cupholder.
2. Remove the key lock cylinder cap on the driver
door handle. See Door
Locks 020. Insert the
vehicle key of the remote
key into the key lock
cylinder on the driver door
and turn the key counterclockwise, to the
unlock position, five times
within 10 seconds.
The DIC displays READY
FOR REMOTE #3, 4,
5, ETC.
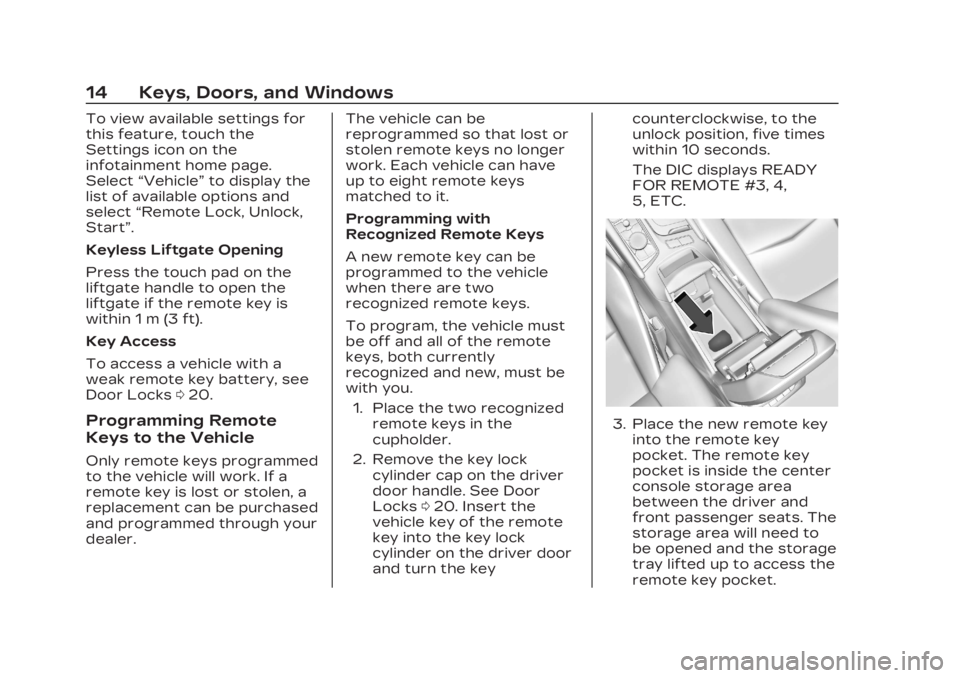
3. Place the new remote key
into the remote key
pocket. The remote key
pocket is inside the center
console storage area
between the driver and
front passenger seats. The
storage area will need to
be opened and the storage
tray lifted up to access the
remote key pocket.
Page 17 of 507

Cadillac XT6 Owner Manual (GMNA-Localizing-U.S./Canada-16405819) -
2023 - CRC - 3/23/22
16 Keys, Doors, and Windows
4. Place the new remote keyinto the remote key
pocket. The remote key
pocket is inside the center
console storage area
between the driver and
front passenger seats. The
storage area will need to
be opened and the storage
tray lifted up to access the
remote key pocket.
5. Press ENGINE START/ STOP. When the remote
key is learned the DIC
display will show that it is
ready to program the next
remote key. 6. Remove the remote key
from the remote key
pocket and press the
remote key
KorQbutton.
To program additional
remote keys, repeat
Steps 4–6.
When all additional remote
keys are programmed,
press and hold ENGINE
START/STOP for
12 seconds to exit
programming mode.
7. Return the key back into the remote key.
8. Replace the key lock cylinder cap. See Door
Locks 020.
Starting the Vehicle with a
Low Remote Key Battery
When the vehicle is started,
if the remote key battery is
depleted, there is signal
interference, or the remote
key has been idle for a while,
the DIC may display NO
REMOTE DETECTED or NO
REMOTE KEY WAS DETECTED PLACE KEY IN
TRANSMITTER POCKET
THEN START YOUR VEHICLE.
For improved vehicle security,
the remote key is equipped
with a motion sensor. First,
move the remote key slightly
and try starting the vehicle.
If the vehicle still does not
start, and the DIC displays the
same warnings above, follow
the steps shown below.
To start the vehicle:
1. Open the center console storage area and the
storage tray.
Page 20 of 507
Cadillac XT6 Owner Manual (GMNA-Localizing-U.S./Canada-16405819) -
2023 - CRC - 3/23/22
Keys, Doors, and Windows 19
Remote Vehicle Start
This feature allows the engine
to be started from outside of
the vehicle.
/:This button is on the
remote key for remote start.
The climate control system will
use the previous settings
during a remote start. The
rear window defogger may
come on during remote start
based on cold ambient
conditions. The rear window
defogger indicator light does
not come on during remote
start.
If the vehicle has auto heated
or ventilated seats they may
come on during a remote start.
See Heated and Ventilated
Front Seats 054.
Laws in some local
communities may restrict the
use of remote starters. For
example, some laws may
require a person using remote start to have the vehicle in
view. Check local regulations
for any requirements.
Do not use the remote start
feature if the vehicle is low on
fuel. The vehicle could run out
of fuel.
Other conditions can affect
the performance of the
remote key. See Remote Key
0
9.
Starting the Engine Using
Remote Start
1. Press and release
Qon the
remote key.
2. Immediately press and hold
/for at least four seconds
or until the turn signal
lamps flash. The turn signal
lamps flashing confirms
the request to remote
start the vehicle has been
received.
During the remote start
the doors will be locked
and the parking lamps will
remain on as long as the
engine is running. The engine will shut off
after 15 minutes unless a
time extension is done or
the ignition is turned on.
3. With the remote key in the vehicle, press the brake
pedal and start the vehicle
to drive.
Extending Engine Run Time
The engine run time can also
be extended by another
15 minutes, if during the first
15 minutes Steps 1 and 2 are
repeated while the engine is
still running. An extension can
be requested 30 seconds
after starting. This provides a
total of 30 minutes.
The remote start can only be
extended once.
When the remote start is
extended, the second
15-minute period is added on
to the first 15 minutes for a
total of 30 minutes.
Page 38 of 507

Cadillac XT6 Owner Manual (GMNA-Localizing-U.S./Canada-16405819) -
2023 - CRC - 3/23/22
Keys, Doors, and Windows 37
Exterior Mirrors
Convex Mirrors
{Warning
A convex mirror can make
things, like other vehicles,
look farther away than they
really are. If you cut too
sharply into the right lane,
you could hit a vehicle on
the right. Check the inside
mirror or glance over your
shoulder before changing
lanes.
The passenger side mirror is
convex shaped. A convex
mirror surface is curved so
more can be seen from the
driver seat.
Power Mirrors
To adjust each mirror: 1. Press
jor|to select the
driver or passenger side
mirror. The indicator light
will illuminate.
2. Press the arrows on the control pad to move the
mirror in the desired
direction.
3. Adjust each outside mirror so that a little of the
vehicle and the area
behind it can be seen. 4. Press
jor|again to
deselect the mirror.
Memory Mirrors
The vehicle may have memory
mirrors. See Memory Seats
0 50.
Lane Change Alert (LCA)
The vehicle may have LCA.
See Lane Change Alert (LCA)
0 336.
Folding Mirrors
Manual Folding Mirrors
If equipped, manually fold the
mirrors inward toward the
vehicle to prevent damage
when going through an
automatic car wash. Push the
mirror outward to return it to
the original position.
Page 39 of 507

Cadillac XT6 Owner Manual (GMNA-Localizing-U.S./Canada-16405819) -
2023 - CRC - 3/23/22
38 Keys, Doors, and Windows
Power Folding Mirrors
If equipped, press{to power
fold the mirrors. Press
{again
to unfold.
Resetting the Power
Folding Mirrors
Reset the power folding
mirrors if:
.The mirrors are accidentally
obstructed while folding.
.They are accidentally
manually folded/unfolded.
.The mirrors do not stay in
the unfolded position.
.The mirrors vibrate at
normal driving speeds.
Fold and unfold the mirrors
one time using the mirror
controls to reset them to their
normal position. A noise may
be heard during the resetting
of the power folding mirrors.
This sound is normal after a
manual folding operation.
Remote Mirror Folding
If equipped, press and holdQ
on the remote key for
approximately one second to
remotely fold the exterior
mirrors. Press and hold
Kon
the remote key for
approximately one second to
unfold. See Remote Key
Operation 09.
This feature is turned on or off
through vehicle settings. To
view available settings for this
feature, touch the Settings
icon on the infotainment home
page. Select “Vehicle”to display the list of available
options and select
“Comfort
and Convenience”.
Heated Mirrors
K: Press to heat the mirrors.
See “Rear Window Defogger”
under Dual Automatic Climate
Control System 0228.
Automatic Dimming
Mirror
If the vehicle has the
automatic dimming mirror, the
driver outside mirror
automatically adjusts for the
glare of headlamps
behind you.
Reverse Tilt Mirrors
If equipped with reverse tilt
mirrors and memory seats, the
passenger and/or driver
mirror tilts to a preselected
position when the vehicle is in
R (Reverse). This allows the
curb to be seen when parallel
parking.
Page 47 of 507
Cadillac XT6 Owner Manual (GMNA-Localizing-U.S./Canada-16405819) -
2023 - CRC - 3/22/22
46 Seats and Restraints
Seats and
Restraints
Head Restraints
Head Restraints . . . . . . . . . . . . . 47
Front Seats
Power Seat Adjustment . . . 49
Reclining Seatbacks . . . . . . . . 49
Lumbar Adjustment . . . . . . . . 50
Memory Seats . . . . . . . . . . . . . . . 50
Heated and VentilatedFront Seats . . . . . . . . . . . . . . . . . 54
Rear Seats
Rear Seats . . . . . . . . . . . . . . . . . . . . 55
Heated Rear Seats . . . . . . . . . 58
Third Row Seats . . . . . . . . . . . . . 59
Seat Belts
Seat Belts . . . . . . . . . . . . . . . . . . . . . 62
How to Wear Seat BeltsProperly . . . . . . . . . . . . . . . . . . . . . . 63
Lap-Shoulder Belt . . . . . . . . . . 66
Seat Belt Use During Pregnancy . . . . . . . . . . . . . . . . . . . 69
Seat Belt Extender . . . . . . . . . 70
Safety System Check . . . . . . 70
Seat Belt Care . . . . . . . . . . . . . . . 70 Replacing Seat Belt
System Parts after a
Crash . . . . . . . . . . . . . . . . . . . . . . . . . . 71
Airbag System
Airbag System . . . . . . . . . . . . . . . . 71
Where Are theAirbags? . . . . . . . . . . . . . . . . . . . . . . 73
When Should an Airbag Inflate? . . . . . . . . . . . . . . . . . . . . . . . . 75
What Makes an Airbag Inflate? . . . . . . . . . . . . . . . . . . . . . . . . 76
How Does an Airbag Restrain? . . . . . . . . . . . . . . . . . . . . . 76
What Will You See after an Airbag Inflates? . . . . . . . . . . . . 76
Passenger Sensing
System . . . . . . . . . . . . . . . . . . . . . . . . 78
Servicing the Airbag-Equipped
Vehicle . . . . . . . . . . . . . . . . . . . . . . . . 82
Adding Equipment to the Airbag-Equipped
Vehicle . . . . . . . . . . . . . . . . . . . . . . . . 83
Airbag System Check . . . . . . 84
Replacing Airbag System Parts after a Crash . . . . . . . 84
Child Restraints
Older Children . . . . . . . . . . . . . . . . 85 Infants and Young
Children . . . . . . . . . . . . . . . . . . . . . . 86
Child Restraint Systems . . . . . . . . . . . . . . . . . . . . . . 89
Where to Put the
Restraint . . . . . . . . . . . . . . . . . . . . . . 91
Lower Anchors and Tethers for Children
(LATCH System) . . . . . . . . . . . 92
Replacing LATCH System Parts After a Crash . . . . . . 101
Securing Child Restraints (With the Seat Belt in
the Rear Seat) . . . . . . . . . . . . 102
Securing Child Restraints (With the Seat Belt in
the Front Seat) . . . . . . . . . . . 104
Page 48 of 507
Cadillac XT6 Owner Manual (GMNA-Localizing-U.S./Canada-16405819) -
2023 - CRC - 3/22/22
Seats and Restraints 47
Head Restraints
Front Seats
{Warning
With head restraints that
are not installed and
adjusted properly, there is a
greater chance that
occupants will suffer a neck/
spinal injury in a crash. Do
not drive until the head
restraints for all occupants
are installed and adjusted
properly.
The vehicle's front seats have
adjustable head restraints in
the outboard seating
positions.
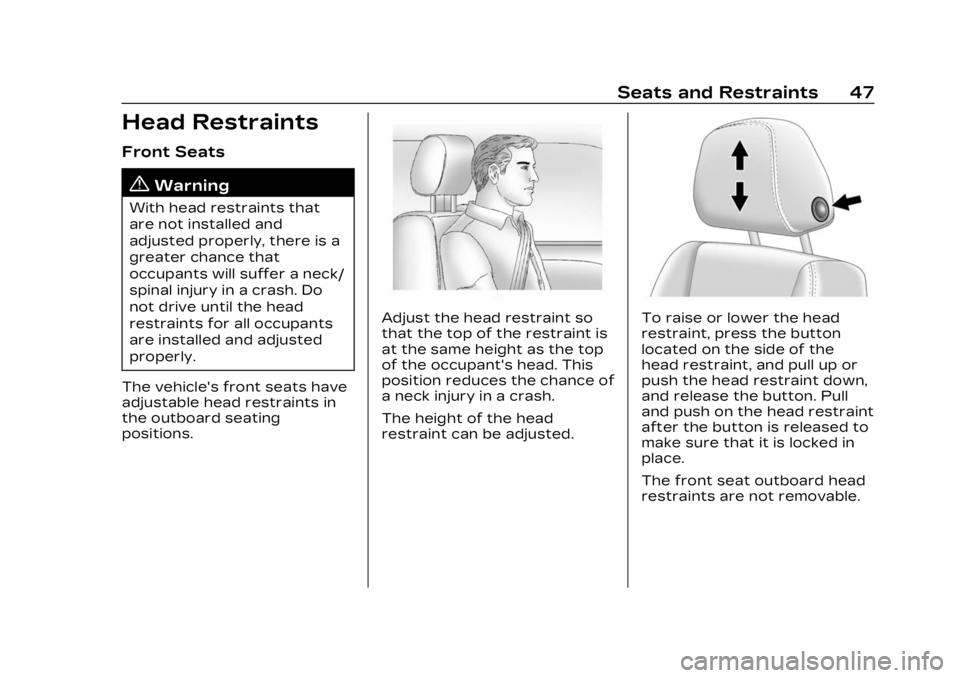
Adjust the head restraint so
that the top of the restraint is
at the same height as the top
of the occupant's head. This
position reduces the chance of
a neck injury in a crash.
The height of the head
restraint can be adjusted.To raise or lower the head
restraint, press the button
located on the side of the
head restraint, and pull up or
push the head restraint down,
and release the button. Pull
and push on the head restraint
after the button is released to
make sure that it is locked in
place.
The front seat outboard head
restraints are not removable.