CHEVROLET AVEO 2002 Service Repair Manual
Manufacturer: CHEVROLET, Model Year: 2002, Model line: AVEO, Model: CHEVROLET AVEO 2002Pages: 5127, PDF Size: 41.82 MB
Page 1551 of 5127
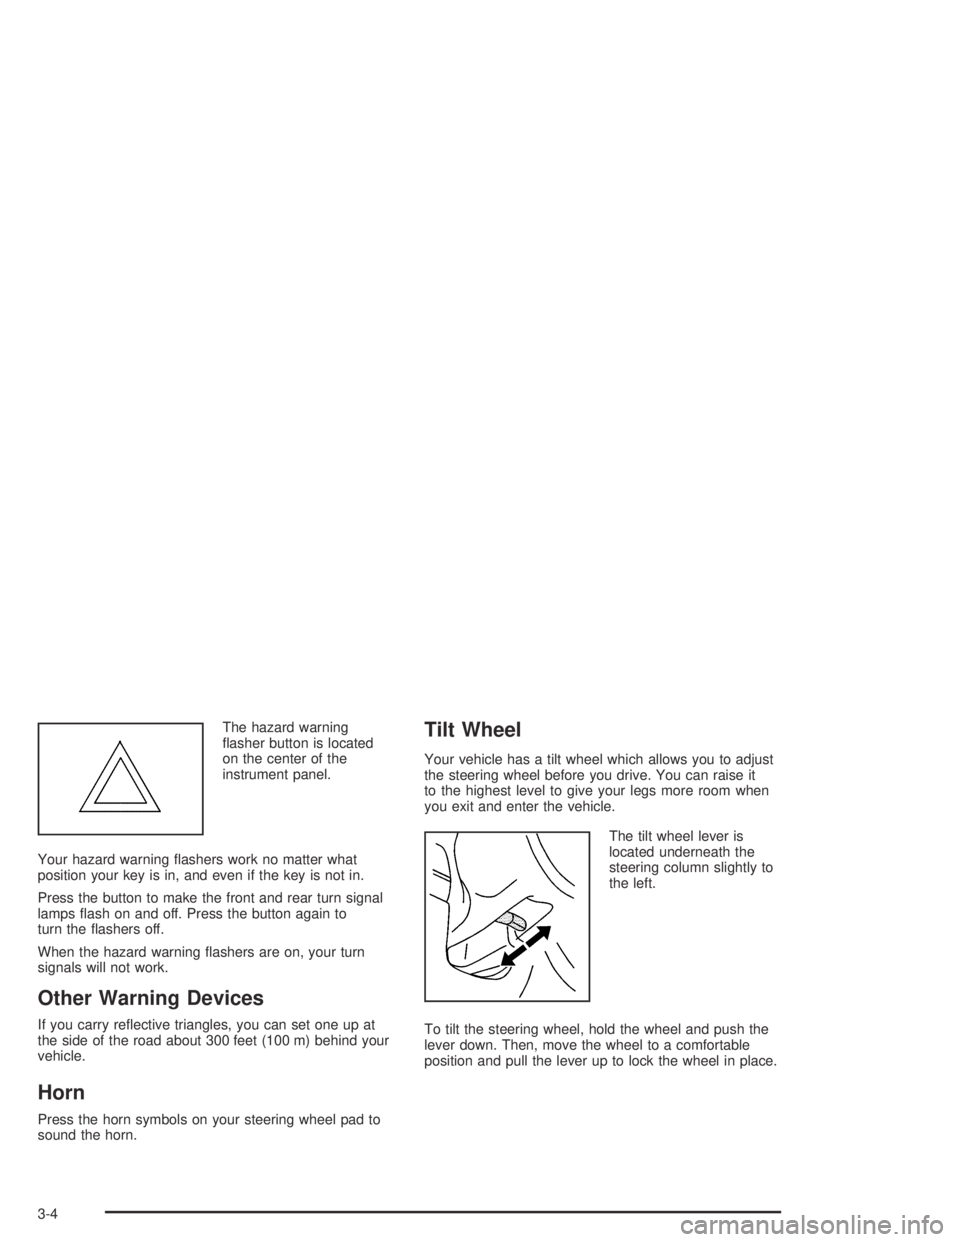
The hazard warning
flasher button is located
on the center of the
instrument panel.
Your hazard warning flashers work no matter what
position your key is in, and even if the key is not in.
Press the button to make the front and rear turn signal
lamps flash on and off. Press the button again to
turn the flashers off.
When the hazard warning flashers are on, your turn
signals will not work.
Other Warning Devices
If you carry reflective triangles, you can set one up at
the side of the road about 300 feet (100 m) behind your
vehicle.
Horn
Press the horn symbols on your steering wheel pad to
sound the horn.
Tilt Wheel
Your vehicle has a tilt wheel which allows you to adjust
the steering wheel before you drive. You can raise it
to the highest level to give your legs more room when
you exit and enter the vehicle.
The tilt wheel lever is
located underneath the
steering column slightly to
the left.
To tilt the steering wheel, hold the wheel and push the
lever down. Then, move the wheel to a comfortable
position and pull the lever up to lock the wheel in place.
3-4
Page 1552 of 5127
Turn Signal/Multifunction Lever
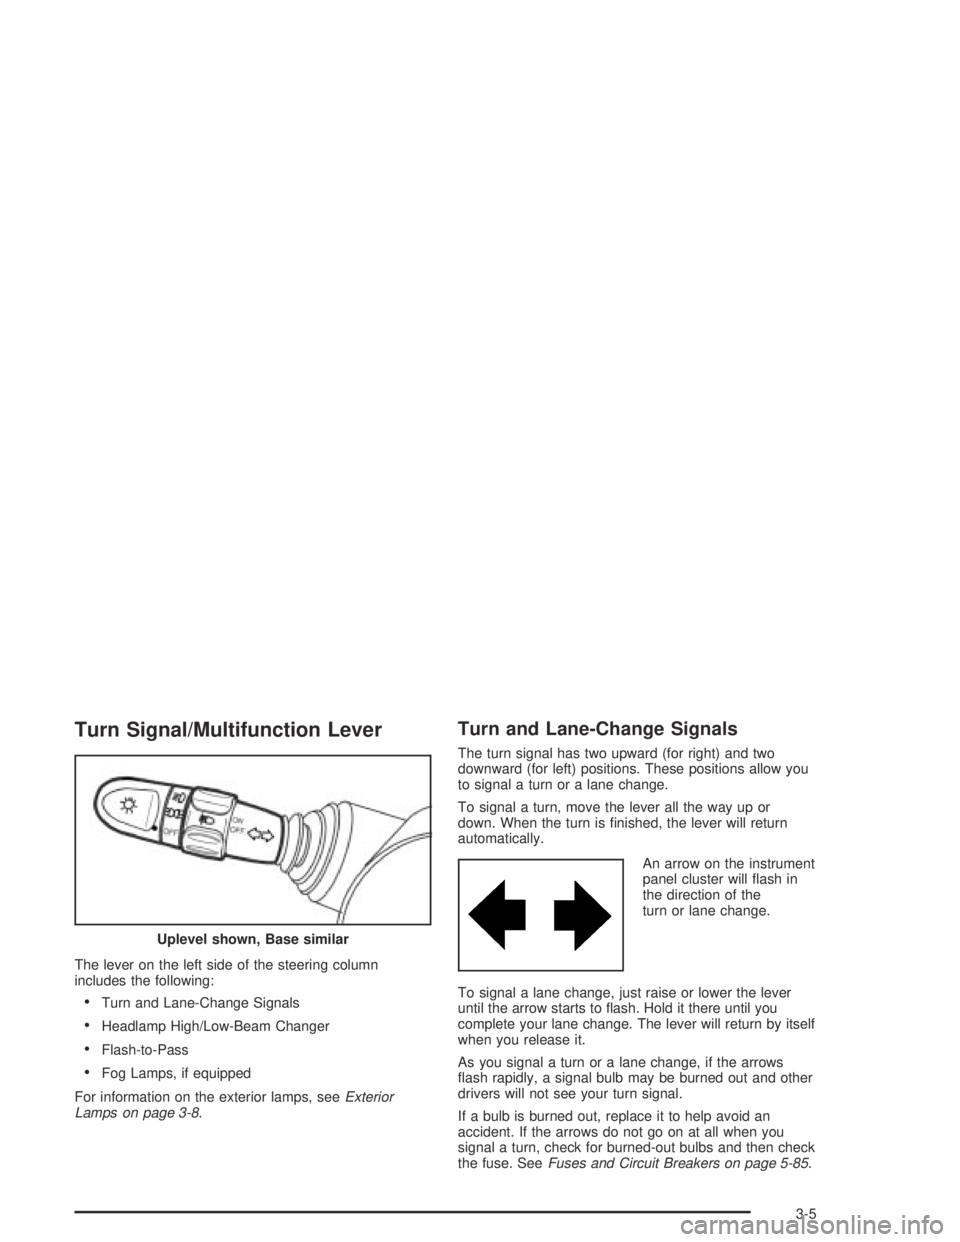
The lever on the left side of the steering column
includes the following:
•Turn and Lane-Change Signals
•Headlamp High/Low-Beam Changer
•Flash-to-Pass
•Fog Lamps, if equipped
For information on the exterior lamps, seeExterior
Lamps on page 3-8.
Turn and Lane-Change Signals
The turn signal has two upward (for right) and two
downward (for left) positions. These positions allow you
to signal a turn or a lane change.
To signal a turn, move the lever all the way up or
down. When the turn is finished, the lever will return
automatically.
An arrow on the instrument
panel cluster will flash in
the direction of the
turn or lane change.
To signal a lane change, just raise or lower the lever
until the arrow starts to flash. Hold it there until you
complete your lane change. The lever will return by itself
when you release it.
As you signal a turn or a lane change, if the arrows
flash rapidly, a signal bulb may be burned out and other
drivers will not see your turn signal.
If a bulb is burned out, replace it to help avoid an
accident. If the arrows do not go on at all when you
signal a turn, check for burned-out bulbs and then check
the fuse. SeeFuses and Circuit Breakers on page 5-85. Uplevel shown, Base similar
3-5
Page 1553 of 5127
Headlamp High/Low-Beam Changer
To change the headlamps from low beam to high beam,
push the turn signal/multifunction lever away from you.
When the high beams are
on, this light on the
instrument panel cluster
also will be on if the
ignition is turned to ON.
To change the headlamps from high beam to low beam,
pull the turn signal lever toward you.
Flash-to-Pass Feature
This feature lets you use your high-beam headlamps to
signal a driver in front of you that you want to pass.
To use it, pull the turn signal/multifunction lever toward
you until the high-beam headlamps come on, then
release the lever to turn them off.
Fog Lamps
If your vehicle has this feature, use your fog lamps
for better visibility in foggy or misty conditions.
See “Fog Lamps” underExterior Lamps on page 3-8for
further information.
Windshield Wiper Lever
Windshield Wipers
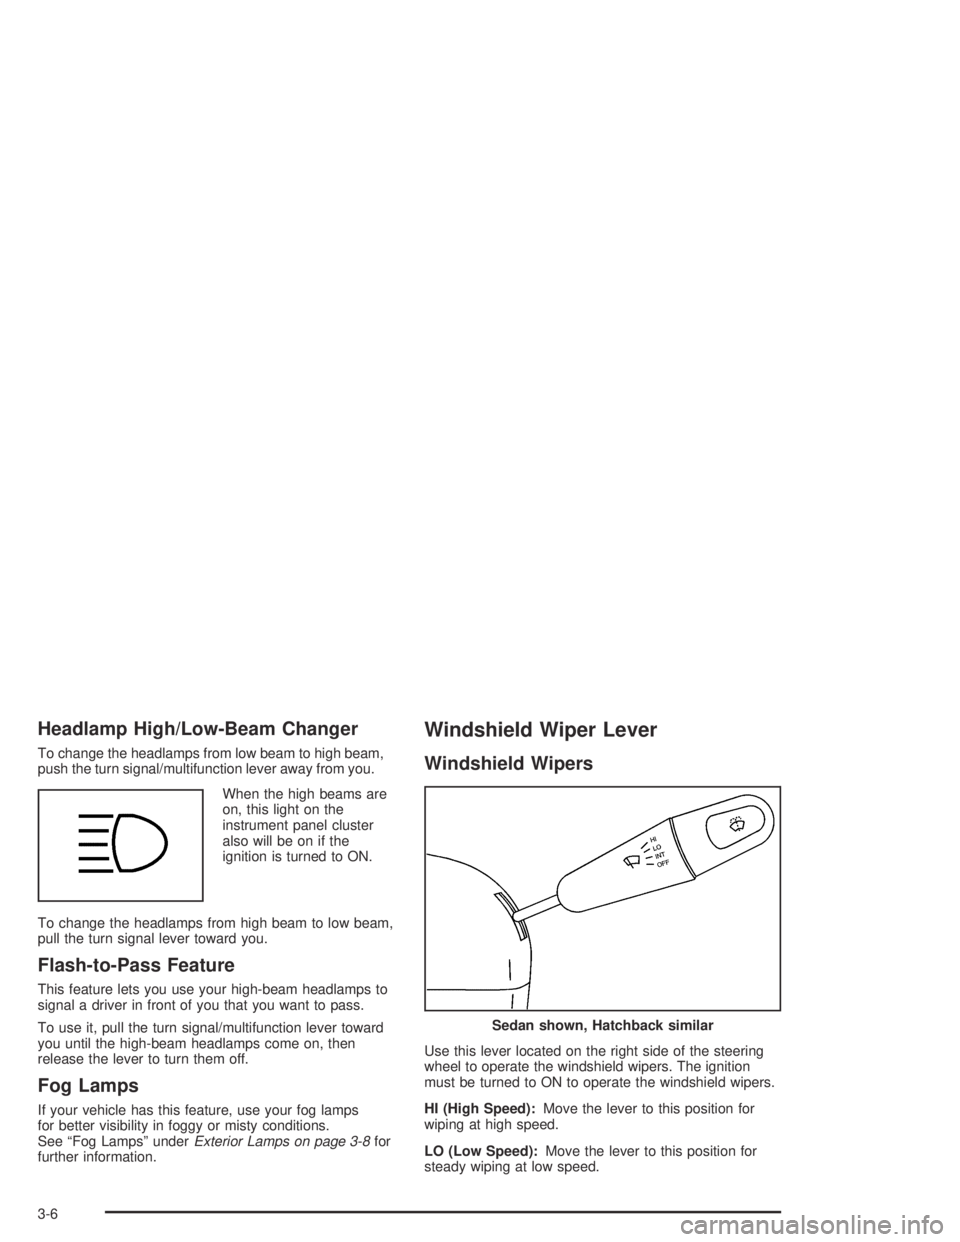
Use this lever located on the right side of the steering
wheel to operate the windshield wipers. The ignition
must be turned to ON to operate the windshield wipers.
HI (High Speed):Move the lever to this position for
wiping at high speed.
LO (Low Speed):Move the lever to this position for
steady wiping at low speed.
Sedan shown, Hatchback similar
3-6
Page 1554 of 5127
INT (Intermittent):Move the lever to this position to
choose a delayed wiping cycle.
OFF:Move the lever to this position to turn off the
windshield wipers.
Misting Function
Move the lever toward the INT position for a single
wiping cycle. Hold it there until the windshield wipers
start; then let go. The windshield wipers will stop
after one wipe. If you want more wipes, hold the band
toward INT longer.
Remember that damaged wiper blades may prevent you
from seeing well enough to drive safely. To avoid
damage, be sure to clear ice and snow from the wiper
blades before using them.
If they are frozen to the windshield, carefully loosen or
thaw them. If your blades do become damaged, get
new blades or blade inserts.
Heavy snow or ice can overload your wiper motor.
A circuit breaker will stop the motor until it cools.
Clear away snow or ice to prevent an overload.
Windshield Washer
To wash your windshield, pull the windshield wiper/
washer lever toward you with the ignition turned to ON.
{CAUTION:
In freezing weather, do not use your washer
until the windshield is warmed. Otherwise the
washer �uid can form ice on the windshield,
blocking your vision.
When you release the lever, the washers will stop, but
the wipers will continue to wipe for several cycles and
will either stop or will resume at the speed you were
using before.
Rear Window Washer/Wiper
Your vehicle may have a rear window washer/wiper.
Operate the rear window washer/wiper system by
pushing the windshield wiper/washer lever away from
you. The wiper operates continuously when the lever is
in the first position. Washer fluid sprays onto the rear
window and the wiper operates continuously when
the lever is pushed to the second position.
3-7
Page 1555 of 5127
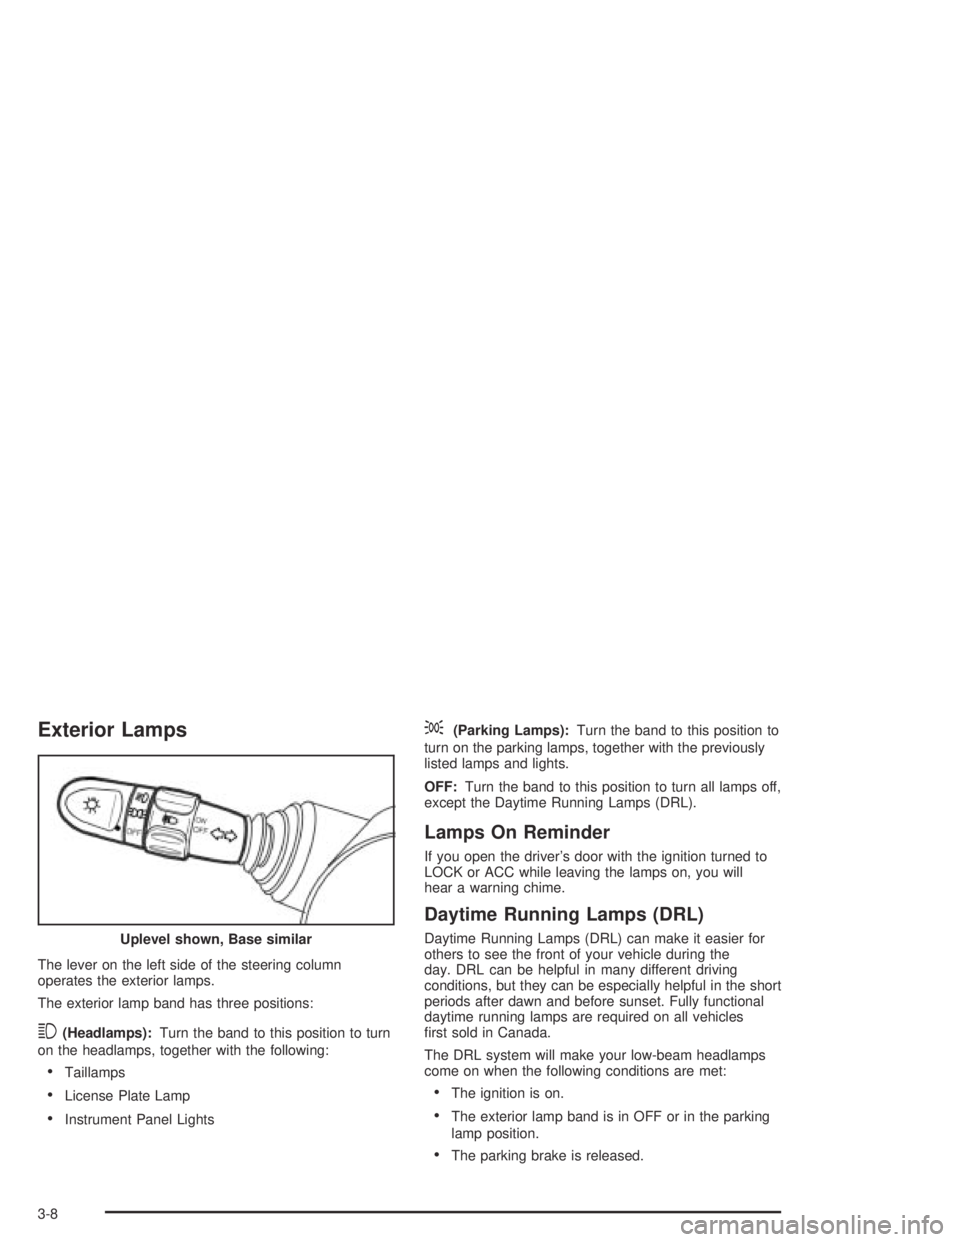
Exterior Lamps
The lever on the left side of the steering column
operates the exterior lamps.
The exterior lamp band has three positions:
3(Headlamps):Turn the band to this position to turn
on the headlamps, together with the following:
•Taillamps
•License Plate Lamp
•Instrument Panel Lights
;(Parking Lamps):Turn the band to this position to
turn on the parking lamps, together with the previously
listed lamps and lights.
OFF:Turn the band to this position to turn all lamps off,
except the Daytime Running Lamps (DRL).
Lamps On Reminder
If you open the driver’s door with the ignition turned to
LOCK or ACC while leaving the lamps on, you will
hear a warning chime.
Daytime Running Lamps (DRL)
Daytime Running Lamps (DRL) can make it easier for
others to see the front of your vehicle during the
day. DRL can be helpful in many different driving
conditions, but they can be especially helpful in the short
periods after dawn and before sunset. Fully functional
daytime running lamps are required on all vehicles
first sold in Canada.
The DRL system will make your low-beam headlamps
come on when the following conditions are met:
•The ignition is on.
•The exterior lamp band is in OFF or in the parking
lamp position.
•The parking brake is released. Uplevel shown, Base similar
3-8
Page 1556 of 5127
An indicator light on the secondary information center
will come on when the DRL system is on. SeeDaytime
Running Lamps Indicator Light on page 3-33.
When the DRL system is on, the taillamps, sidemarker
lamps, parking lamps and instrument panel lights
will not be illuminated unless you have turned the
exterior lamps control to the parking lamp or headlamp
position.
The DRL system will turn off when one of the following
conditions are met:
•The ignition is off.
•The parking brake is on.
•The high-beam headlamps are on.
•The low-beam headlamps are on.
•The flash-to-pass feature is used.
As with any vehicle, you should turn on the regular
headlamp system when you need it.
Fog Lamps
If your vehicle has this feature, the control for the fog
lamps is a band located on the middle of the turn
signal/multifunction lever.
While using the fog lamps, the ignition must be turned
to ON and the low-beam headlamps or parking
lamps must be on.
Turn the band to ON to turn the fog lamps on. An
indicator light on the secondary information center will
come on when the fog lamps are on. SeeFog Lamp
Light on page 3-32.
Turn the band to OFF to turn the fog lamps off. The fog
lamps will also turn off when the high-beam headlamps
are turned on. When the high-beam headlamps are
turned off, the fog lamps will turn on again.
3-9
Page 1557 of 5127
Interior Lamps
Instrument Panel Brightness
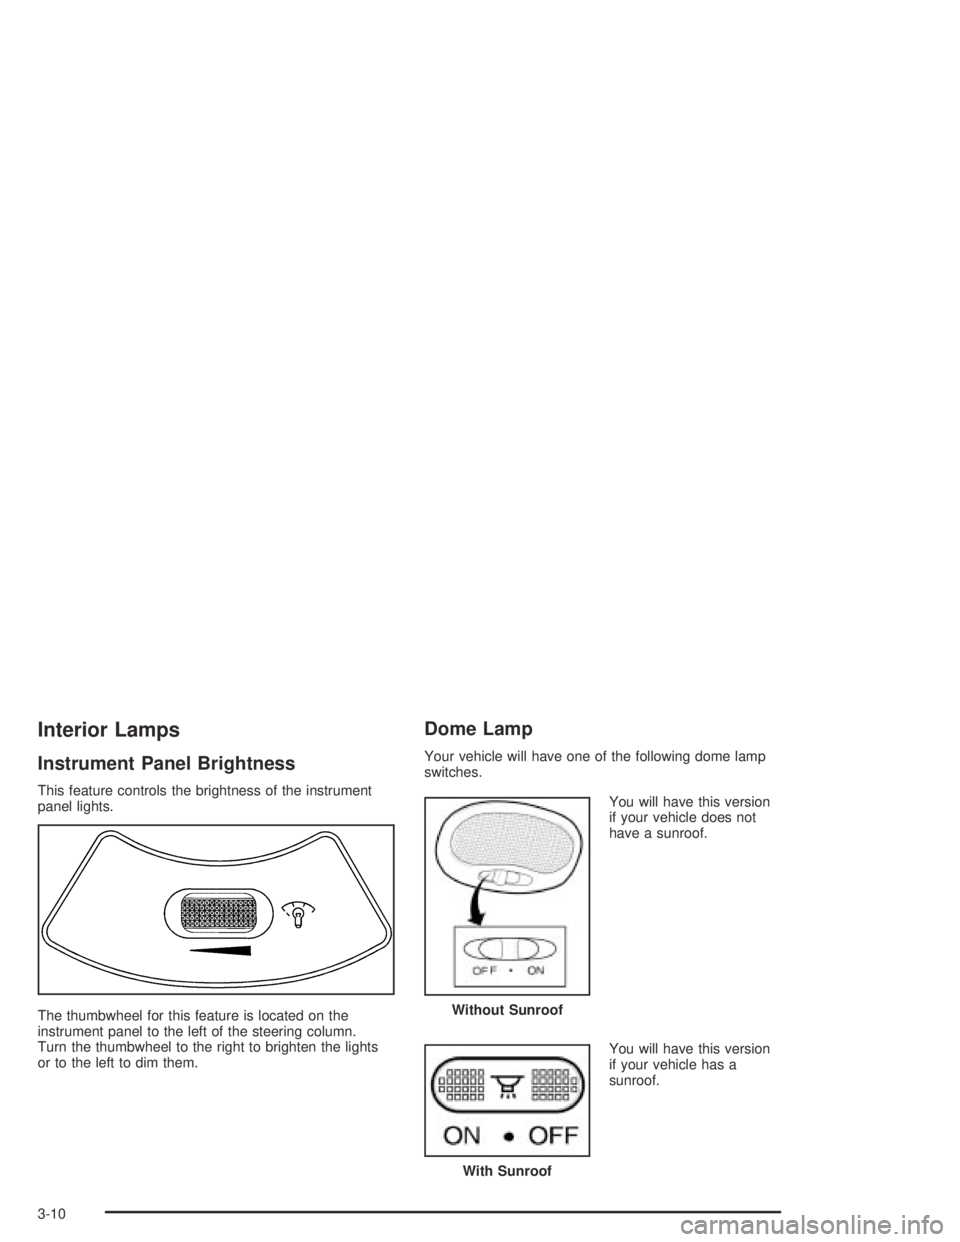
This feature controls the brightness of the instrument
panel lights.
The thumbwheel for this feature is located on the
instrument panel to the left of the steering column.
Turn the thumbwheel to the right to brighten the lights
or to the left to dim them.
Dome Lamp
Your vehicle will have one of the following dome lamp
switches.
You will have this version
if your vehicle does not
have a sunroof.
You will have this version
if your vehicle has a
sunroof.
Without Sunroof
With Sunroof
3-10
Page 1558 of 5127
The switches have three positions.
ON:The light comes on and stays on regardless of
whether a door is open or closed.
O(Door):The light comes on when a door is opened.
The light turns off when all the doors are shut.
OFF:The light remains off even when a door is opened.
Accessory Power Outlets
With the accessory power outlet, you can plug in
auxiliary electrical equipment such as a cellular
telephone or CB radio.
The accessory power outlet is located next to the
parking brake on the center console.
To use the outlet, remove the protective cap. When not
in use, always cover the outlet with the protective
cap. The accessory power outlet is operational when
the ignition is turned to ACC or ON.
Notice:Leaving electrical equipment on for
extended periods will drain the battery. Always turn
off electrical equipment when not in use and do
not plug in equipment that exceeds the maximum
amperage rating.Certain electrical accessories may not be compatible
with the accessory power outlet and could result
in blown vehicle or adapter fuses. If you experience a
problem, see your dealer for additional information
on accessory power outlets.
Notice:Adding any electrical equipment to your
vehicle may damage it or keep other components
from working as they should. The repairs would not
be covered by your warranty. Check with your
dealer before adding electrical equipment.
When adding electrical equipment, be sure to follow
the proper installation instructions included with
the equipment.
Notice:Improper use of the power outlet can cause
damage not covered by your warranty. Do not
hang any type of accessory or accessory bracket
from the plug because the power outlets are
designed for accessory power plugs only.
3-11
Page 1559 of 5127
Ashtrays and Cigarette Lighter
The ashtray is located at the lower part of the center
instrument panel. To remove the front ashtray for
cleaning, open the ashtray fully, press in the retaining
tab and pull the bin out.
Notice:If you put papers or other �ammable items
in the ashtray, hot cigarettes or other smoking
materials could ignite them and possibly damage
your vehicle. Never put �ammable items in the
ashtray.
The cigarette lighter is located to the right of the front
ashtray. To use it, turn the ignition to ACC or ON, push
the cigarette lighter in all the way and let go. When it
is ready, it will pop back out by itself.
Notice:Holding a cigarette lighter in while it is
heating will not allow the lighter to back away from
the heating element when it is hot. Damage from
overheating may occur to the lighter or heating
element. Do not hold a cigarette lighter in while it
is heating.
Climate Controls
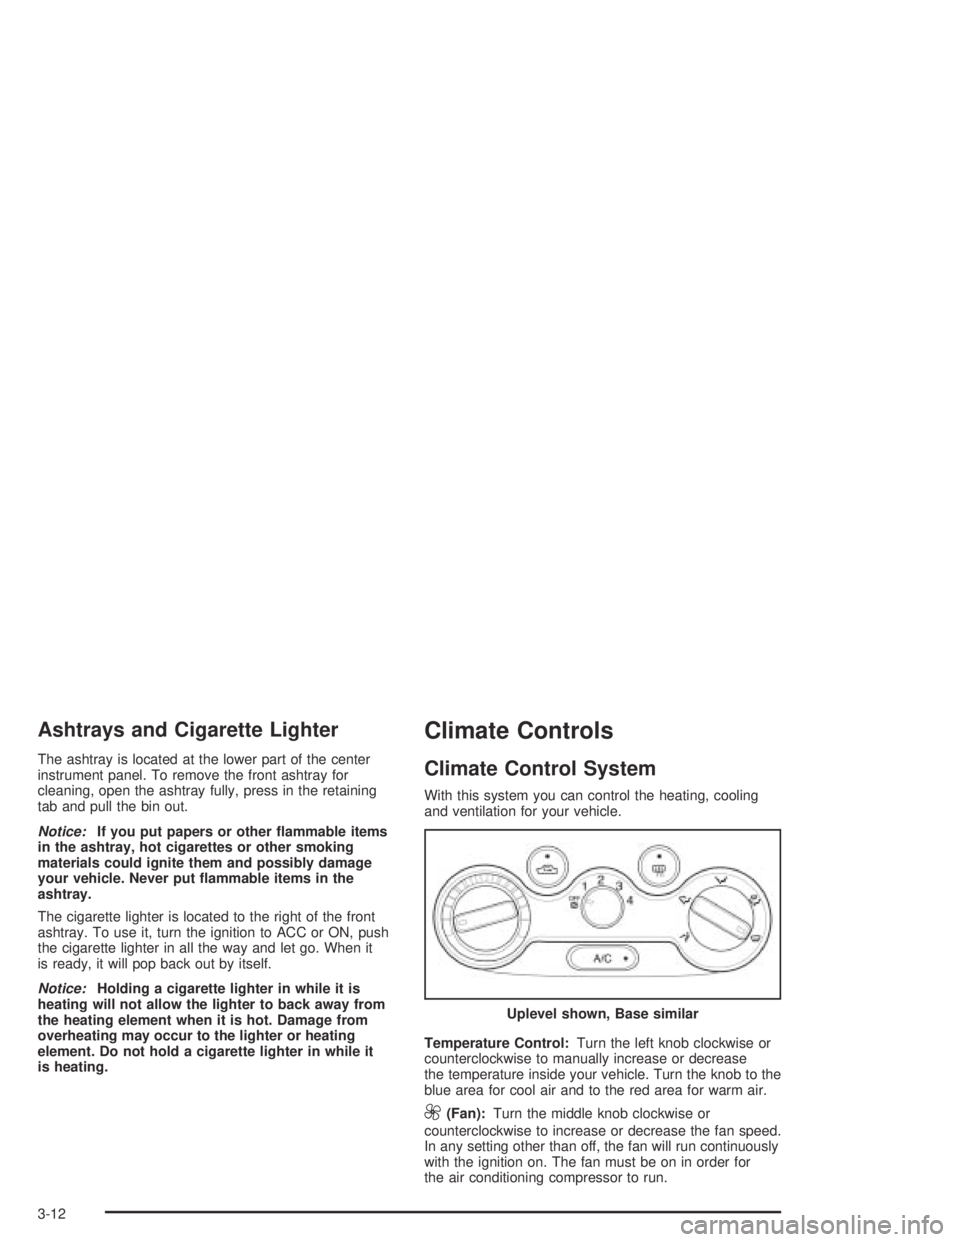
Climate Control System
With this system you can control the heating, cooling
and ventilation for your vehicle.
Temperature Control:Turn the left knob clockwise or
counterclockwise to manually increase or decrease
the temperature inside your vehicle. Turn the knob to the
blue area for cool air and to the red area for warm air.
9(Fan):Turn the middle knob clockwise or
counterclockwise to increase or decrease the fan speed.
In any setting other than off, the fan will run continuously
with the ignition on. The fan must be on in order for
the air conditioning compressor to run.Uplevel shown, Base similar
3-12
Page 1560 of 5127
To change the current mode, select one of the following
from the right knob:
E(Vent):This mode directs air to the instrument
panel outlets.
((Bi-Level):This mode directs about half of the air
to the instrument panel outlets, and then directs the
remaining air to the floor outlets.
5(Floor):This mode directs most of the air to the
floor outlets. Some of the air will also be directed to
the rear outlets. Be sure to keep the area under the
front seats clear to allow the flow of air to the rear
compartment.
The right knob can also be used to select the defog and
defrost modes. Information on defogging and defrosting
can be found later in this section.
?(Recirculation):This mode keeps outside air from
coming into the vehicle. It can be used to prevent outside
air and odors from entering your vehicle or to help heat or
cool the air inside your vehicle more quickly.
If your vehicle has a recirculation button (uplevel model),
press the button to turn the recirculation mode on.
When the button is pressed, an indicator light in the
button will come on. Press the button again to return to
outside air mode.If your vehicle has an air intake lever (base model),
move the lever to choose the recirculation mode.
Using the recirculation mode for extended periods may
cause your windows to fog. If this happens, select the
defrost mode.
:(Outside Air):This mode brings outside air into
the vehicle.
If your vehicle has a recirculation button (uplevel model),
press the button until the recirculation mode is turned off.
Your vehicle will then return to outside air mode.
If your vehicle has an air intake lever (base model),
move the lever to choose the outside air mode.
A/C (Air Conditioning):If your vehicle has air
conditioning, follow these steps to use the system.
Start the engine and set the fan control knob to
the desired speed. The air conditioning compressor
does not operate when the fan control knob is in the off
position. Press the A/C button to turn the air conditioning
compressor on and off. When the A/C button is
pressed, an indicator light in the button will come on to
let you know that air conditioning is activated.
On hot days, open the windows to let hot inside air
escape; then close them. This helps to reduce the time
it takes for your vehicle to cool down. It also helps
the system to operate more efficiently.
3-13