reset CHEVROLET AVEO 2008 1.G Owners Manual
[x] Cancel search | Manufacturer: CHEVROLET, Model Year: 2008, Model line: AVEO, Model: CHEVROLET AVEO 2008 1.GPages: 384, PDF Size: 6.67 MB
Page 128 of 384
3. Press the SET button and release it. The cruise
control light will come on in the instrument panel
cluster to show that the cruise control is on.
4. Take your foot off the accelerate pedal.
Resuming a Set Speed
Suppose the cruise control is set to a desired speed
and then the brakes are applied, or the clutch pedal
if you have a manual transmission. This shuts off
the cruise control. But it does not need to be reset.
Once the vehicle is going about 24 mph (39 km/h)
or more, briefly press the RESUME button.
The vehicle returns to the chosen speed and
stays there.
If the RESUME button is held longer, the vehicle keeps
going faster until the button is released or the brake
pedal is applied. Do not hold in the RESUME button,
unless you want the vehicle to go faster.
Increasing Speed While Using Cruise
Control
There are two ways to go to a higher speed.
•Use the accelerator pedal to get to a higher speed.
Press the SET button, then release the button and
the accelerator pedal. The vehicle will now
cruise at the higher speed.
•Press the RESUME button. Hold it there until the
desired speed is reached, and then release the
button. To increase the vehicle’s speed in very small
amounts, briefly press the RESUME button and
then release it. Each time this is done, the vehicle
goes about 1 mph (1.6 km/h) faster.
The accelerate feature only works after the cruise
control is turned on by pressing the SET button.
Reducing Speed While Using Cruise
Control
There are two ways to reduce the vehicle’s speed while
using cruise control:
•Press the SET button until the lower speed desired
is reached, then release it.
•To slow down in very small amounts, briefly press
the SET button. Each time this is done, the vehicle
goes about 1 mph (1.6 km/h) slower.
3-14
Page 134 of 384

Clock
If you have a sedan there is a digital clock located in
the center of the instrument panel, above the center air
outlets. When the ignition is turned to ACC/ACCESSORY
or ON/RUN, the time is displayed in the digital clock.
There are three adjusting buttons for the digital clock:
H (Hour):To go forward one hour, press the H button
once. To go forward more than one hour, press and hold
the button until the correct hour is reached.
M (Minute):To go forward one minute, press the
M button once. To go forward more than one minute,
press and hold the button until the correct minute
is reached.
S (Set):To reset the time to the nearest hour, press the
S button.
For example, if the set button is pressed while the time
is between 8:00 and 8:29, the display is set to 8:00.
If this button is pressed while the time is between 8:30
and 8:59, the display is set to 9:00.
After disconnecting the battery or replacing the fuse,
reset the clock.
If you have a hatchback there is a clock located in the
Secondary Information Center (SIC), seeSecondary
Information Center (SIC) (Hatchback Only) on
page 3-43.
Climate Controls
Climate Control System
The heating, cooling, and ventilation for your vehicle
can be controlled with this system.
Uplevel shown, Base similar, Hatchback only
3-20
Page 143 of 384
Speedometer and Odometer
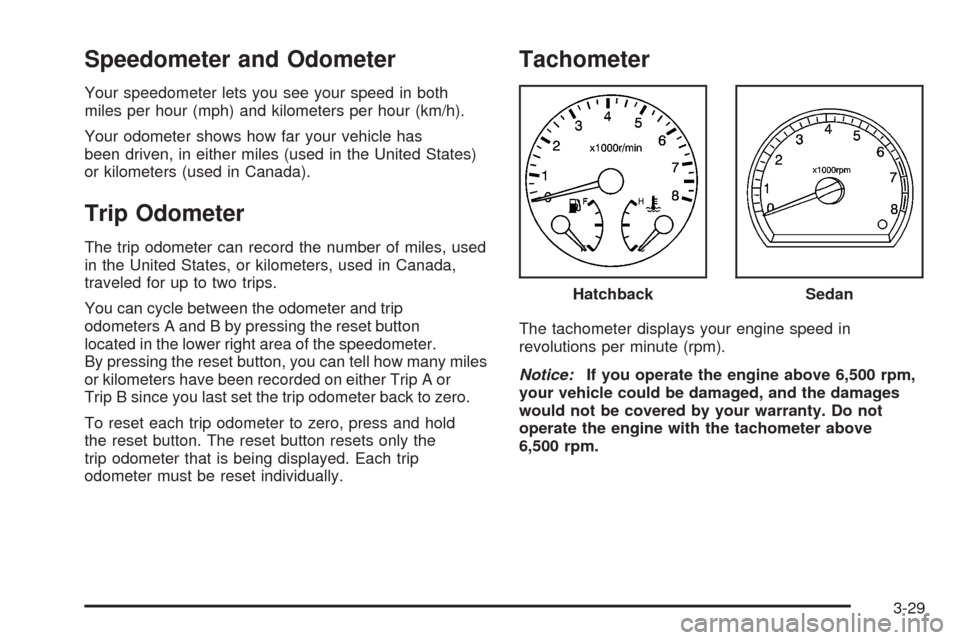
Your speedometer lets you see your speed in both
miles per hour (mph) and kilometers per hour (km/h).
Your odometer shows how far your vehicle has
been driven, in either miles (used in the United States)
or kilometers (used in Canada).
Trip Odometer
The trip odometer can record the number of miles, used
in the United States, or kilometers, used in Canada,
traveled for up to two trips.
You can cycle between the odometer and trip
odometers A and B by pressing the reset button
located in the lower right area of the speedometer.
By pressing the reset button, you can tell how many miles
or kilometers have been recorded on either Trip A or
Trip B since you last set the trip odometer back to zero.
To reset each trip odometer to zero, press and hold
the reset button. The reset button resets only the
trip odometer that is being displayed. Each trip
odometer must be reset individually.
Tachometer
The tachometer displays your engine speed in
revolutions per minute (rpm).
Notice:If you operate the engine above 6,500 rpm,
your vehicle could be damaged, and the damages
would not be covered by your warranty. Do not
operate the engine with the tachometer above
6,500 rpm.Hatchback
Sedan
3-29
Page 148 of 384
If the light comes on while you are driving, pull off the
road and stop carefully. You may notice that the pedal
is harder to push or the pedal may go closer to the
floor. It may take longer to stop. If the light is still on,
have the vehicle towed for service. SeeTowing
Your Vehicle on page 4-27.
{CAUTION:
Your brake system may not be working properly
if the brake system warning light is on. Driving
with the brake system warning light on can lead
to an accident. If the light is still on after you
have pulled off the road and stopped carefully,
have the vehicle towed for service.
Antilock Brake System Warning
Light
For vehicles with
the Antilock Brake
System (ABS), this light
will come on briefly
when the engine is started.
If the light stays on, turn the ignition to LOCK/OFF or if
the light comes on, stop as soon as possible and turn
the ignition off. Then start the engine again to reset the
system. If the light still stays on, or comes on again while
you are driving, your vehicle needs service. See your
dealer/retailer. If the regular brake system warning light is
not on, you still have brakes, but you do not have antilock
brakes. If the regular brake system warning light is also
on, you do not have antilock brakes and there is a
problem with your regular brakes. SeeBrake System
Warning Light on page 3-33.
The ABS warning light will come on briefly when you
turn the ignition to ON/RUN. This is normal. If the
light does not come on then, have it fixed so it will
be ready to warn you if there is a problem.
3-34
Page 158 of 384
Clock (Hatchback Only)
Your vehicle has a digital clock. The clock is located
in the secondary instrument cluster on the center of the
instrument panel, above the center air outlets. When
the ignition is turned to ACC/ACCESSORY or ON/RUN,
the time is displayed in the digital clock. There are
two adjusting buttons for the digital clock:
H (Hour):To go forward one hour, press the H button
once. To go forward more than one hour, press and
hold the button until the correct hour is reached.
M (Minute):To go forward one minute, press the
M button once. To go forward more than one minute,
press and hold the button until the correct minute
is reached.
After disconnecting the battery or replacing the fuse,
reset the clock.
Safety Belt Reminders
Safety Belt Reminder Light
The safety belt light will
come on and stay on until
the driver’s safety belt
is buckled.
This light will come on briefly when you turn on the
ignition as a check to show you it is working.
3-44
Page 162 of 384
Antilock Brake System
Warning Light
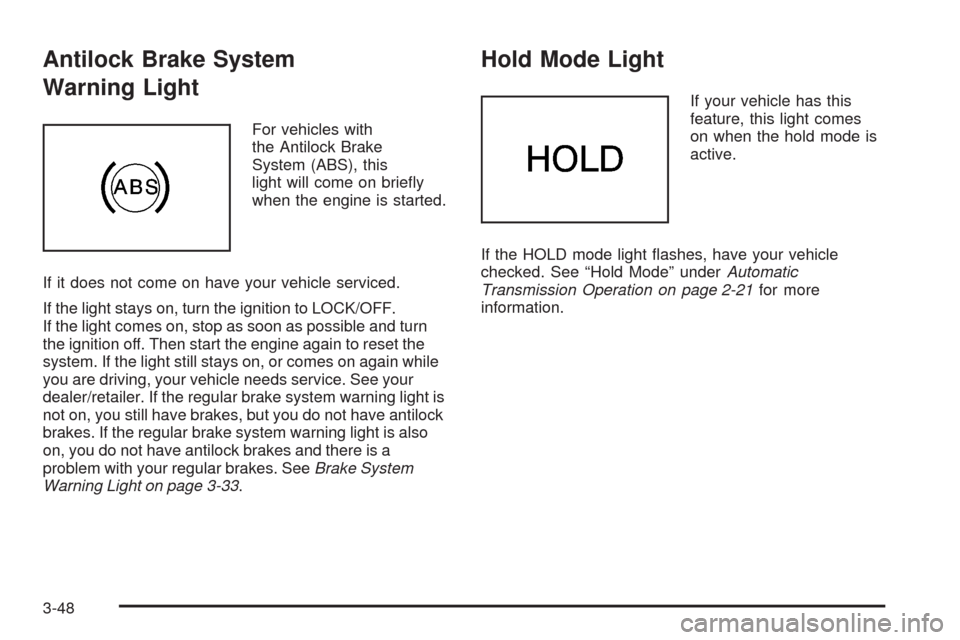
For vehicles with
the Antilock Brake
System (ABS), this
light will come on briefly
when the engine is started.
If it does not come on have your vehicle serviced.
If the light stays on, turn the ignition to LOCK/OFF.
If the light comes on, stop as soon as possible and turn
the ignition off. Then start the engine again to reset the
system. If the light still stays on, or comes on again while
you are driving, your vehicle needs service. See your
dealer/retailer. If the regular brake system warning light is
not on, you still have brakes, but you do not have antilock
brakes. If the regular brake system warning light is also
on, you do not have antilock brakes and there is a
problem with your regular brakes. SeeBrake System
Warning Light on page 3-33.
Hold Mode Light
If your vehicle has this
feature, this light comes
on when the hold mode is
active.
If the HOLD mode light flashes, have your vehicle
checked. See “Hold Mode” underAutomatic
Transmission Operation on page 2-21for more
information.
3-48
Page 168 of 384
Audio System(s)
Determine which radio your vehicle has and then read
the pages following to familiarize yourself with its
features.
{CAUTION:
This system provides you with far greater
access to audio stations and song listings.
Giving extended attention to entertainment
tasks while driving can cause a crash and you
or others can be injured or killed. Always keep
your eyes on the road and your mind on the
drive — avoid engaging in extended searching
while driving.
Keeping your mind on the drive is important for safe
driving. SeeDefensive Driving on page 4-2. Here
are some ways in which you can help avoid distraction
while driving.While your vehicle is parked:
•Familiarize yourself with all of its controls.
•Familiarize yourself with its operation.
•Set up your audio system by presetting your
favorite radio stations, setting the tone, and
adjusting the speakers. Then, when driving
conditions permit, you can tune to your favorite
radio stations using the presets and steering
wheel controls if the vehicle has them.
Notice:Before adding any sound equipment to
your vehicle, such as an audio system, CD player,
CB radio, mobile telephone, or two-way radio, make
sure that it can be added by checking with your
dealer/retailer. Also, check federal rules covering
mobile radio and telephone units. If sound equipment
can be added, it is very important to do it properly.
Added sound equipment may interfere with the
operation of your vehicle’s engine, radio, or other
systems, and even damage them. Your vehicle’s
systems may interfere with the operation of sound
equipment that has been added.
3-54
Page 169 of 384
AM-FM Radio (Single Display,
Base Level)
Playing the Radio
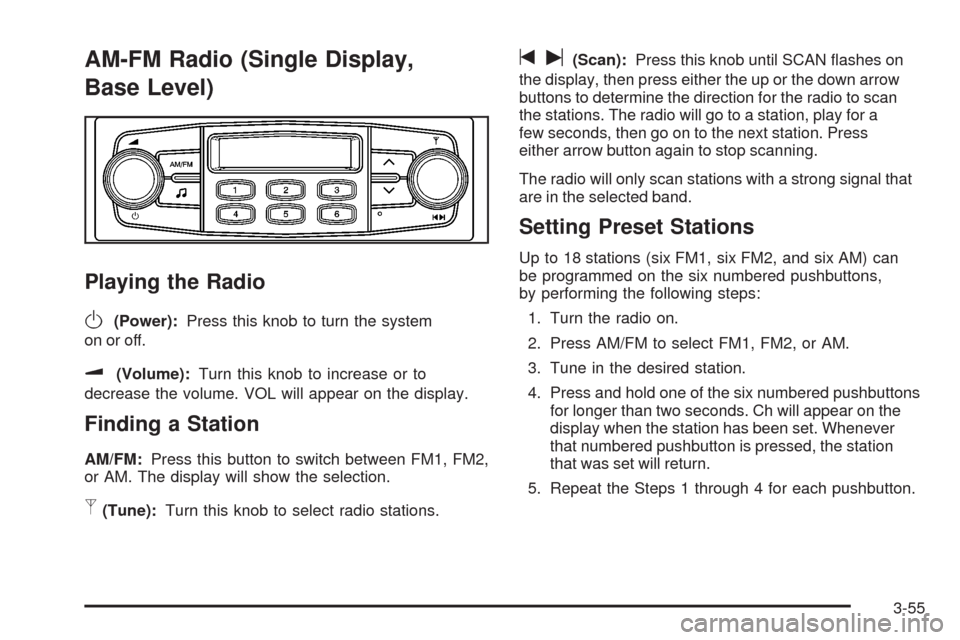
O
(Power):Press this knob to turn the system
on or off.
u(Volume):Turn this knob to increase or to
decrease the volume. VOL will appear on the display.
Finding a Station
AM/FM:Press this button to switch between FM1, FM2,
or AM. The display will show the selection.
p(Tune):Turn this knob to select radio stations.
tu(Scan):Press this knob until SCAN flashes on
the display, then press either the up or the down arrow
buttons to determine the direction for the radio to scan
the stations. The radio will go to a station, play for a
few seconds, then go on to the next station. Press
either arrow button again to stop scanning.
The radio will only scan stations with a strong signal that
are in the selected band.
Setting Preset Stations
Up to 18 stations (six FM1, six FM2, and six AM) can
be programmed on the six numbered pushbuttons,
by performing the following steps:
1. Turn the radio on.
2. Press AM/FM to select FM1, FM2, or AM.
3. Tune in the desired station.
4. Press and hold one of the six numbered pushbuttons
for longer than two seconds. Ch will appear on the
display when the station has been set. Whenever
that numbered pushbutton is pressed, the station
that was set will return.
5. Repeat the Steps 1 through 4 for each pushbutton.
3-55
Page 171 of 384
The previous volume setting is maintained whenever
the radio is turned on. The volume can be adjusted by
using the volume knob.
Finding a Station
AM/AUX:Press this button to play an AM station while
a portable audio device is playing. Press this button
again and the system will begin playing audio from the
connected portable audio player. If a portable audio
player is not connected, “no input device found” will be
displayed.
FM:Press this button to switch between FM1 or FM2.
The display will show the selection.
¦¥SEEK:Press the up or down SEEK arrow to go
to the next or to the previous station and stay there.
The radio will only seek stations with a strong signal that
are in the selected band.
¦¥TUNE:Press the up or down TUNE arrow to go
to the next or to the previous radio station.
SCAN:Push and release this button to scan radio
stations. The radio will go to a station, play for a
few seconds, then go on to the next station.
Push this button again to stop scanning.
The radio will only scan stations with a strong signal
that are in the selected band.
Setting Preset Stations
Up to 36 stations (six FM1, six FM2, six FM-A and
six AM1, six AM2, six AM-A), can be programmed on
the six numbered pushbuttons, by performing the
following steps:
1. Turn the radio on.
2. Press AM/AUX to select AM1, AM2, or AM-A.
Press FM to select FM1, FM2 or FM-A.
3. Tune in the desired station.
4. Press and hold one of the six numbered
pushbuttons for longer than two seconds.
The channel number (CH#1 through CH#6) will
flash on the display when the station has been set.
Whenever that numbered preset button is
pressed, the station that was set will return.
5. Repeat the first four steps for each preset button.
AST (Automatic Store):Six FM1 preset stations with
the strongest reception in the region can be automatically
stored. Press the AST button for longer than one second.
The display will show AUTO SCANNING and then
SCANNING will flash on display. Once the stations are
stored, the radio will switch to FM1 and the first preset
station will begin to play. FM-A will appear on the display
when listening to the automatic stored stations. Press the
AM or FM button to cancel automatic store.
3-57
Page 175 of 384
AST (Automatic Store)
Six FM1 preset stations with the strongest reception in
the region can be automatically stored. Press the AST
button for more than two seconds. The display shows
AUTO SCANNING and then SCANNING flashes on the
display. Once the stations are stored, the radio switches
to FM1 and the first preset station begins to play. FM-A
displays while listening to the automatic stored stations.
Press the AM or FM button to cancel automatic store.
Setting Preset Stations
Up to 24 stations (six FM1, six FM2, six AM1, and
six AM2), can be programmed on the six numbered
buttons, by performing the following steps:
1. Turn the radio on.
2. Press the AM or FM button to select FM1, FM2,
AM1 or AM2.
3. Tune in the desired station.
4. Press and hold one of the six numbered buttons for
more than two seconds. The preset button number
one through six flashes on the display when the
station has been set. When that numbered preset
button is pressed, that preset station returns.
5. Repeat the Steps 1 through 4 for each preset
button.
Order of Sound Function
The order for displayed sound function is BASS, TRE,
BAL, FADE, EQ OFF, and VOL (Bass, Treble, Fade,
Balance, Equalization Off, and Volume).
Setting the Tone (Bass/Treble)
SOUND (Bass/Treble):Press this button until
BAS (bass) displays. Turn the
Oknob to increase or
to decrease the bass. The display shows the bass level.
After making the selection, press this button to set the
bass level selection.
Press this button until TRE (treble) displays.
Turn the
Oknob to increase or to decrease the treble.
The display shows the treble level. After making the
selection, press this button to set the treble level
selection. If a station is weak or has static, decrease
the treble.
3-61