heating CHEVROLET BLAZER 1998 2.G Owners Manual
[x] Cancel search | Manufacturer: CHEVROLET, Model Year: 1998, Model line: BLAZER, Model: CHEVROLET BLAZER 1998 2.GPages: 416, PDF Size: 22.4 MB
Page 83 of 416
Downloaded from www.Manualslib.com manuals search engine EndgateLiftgate
It can be dangerous to drive with the rear
window, endgate or liftgate open because carbon
monoxide
(CO) gas can come into your vehicle.
You can’t see or smell
CO. It can cause
unconsciousness and even death.
If you must drive with the rear window, endgate
or liftgate open or
if electrical wiring or other
cable connections must pass through the seal
between the body and the
rear window, endgate
or liftgate:
Make sure all windows are shut.
lhrn the fan on your heating or cooling
system to its highest speed with the setting on
VENT. That will force outside air into your
vehicle. See
64C~~0~ Controls’’ in the Index.
instrument panel, open them all the way.
If you have air outlets on or under the
See “Engine Exhaust” in the Index.
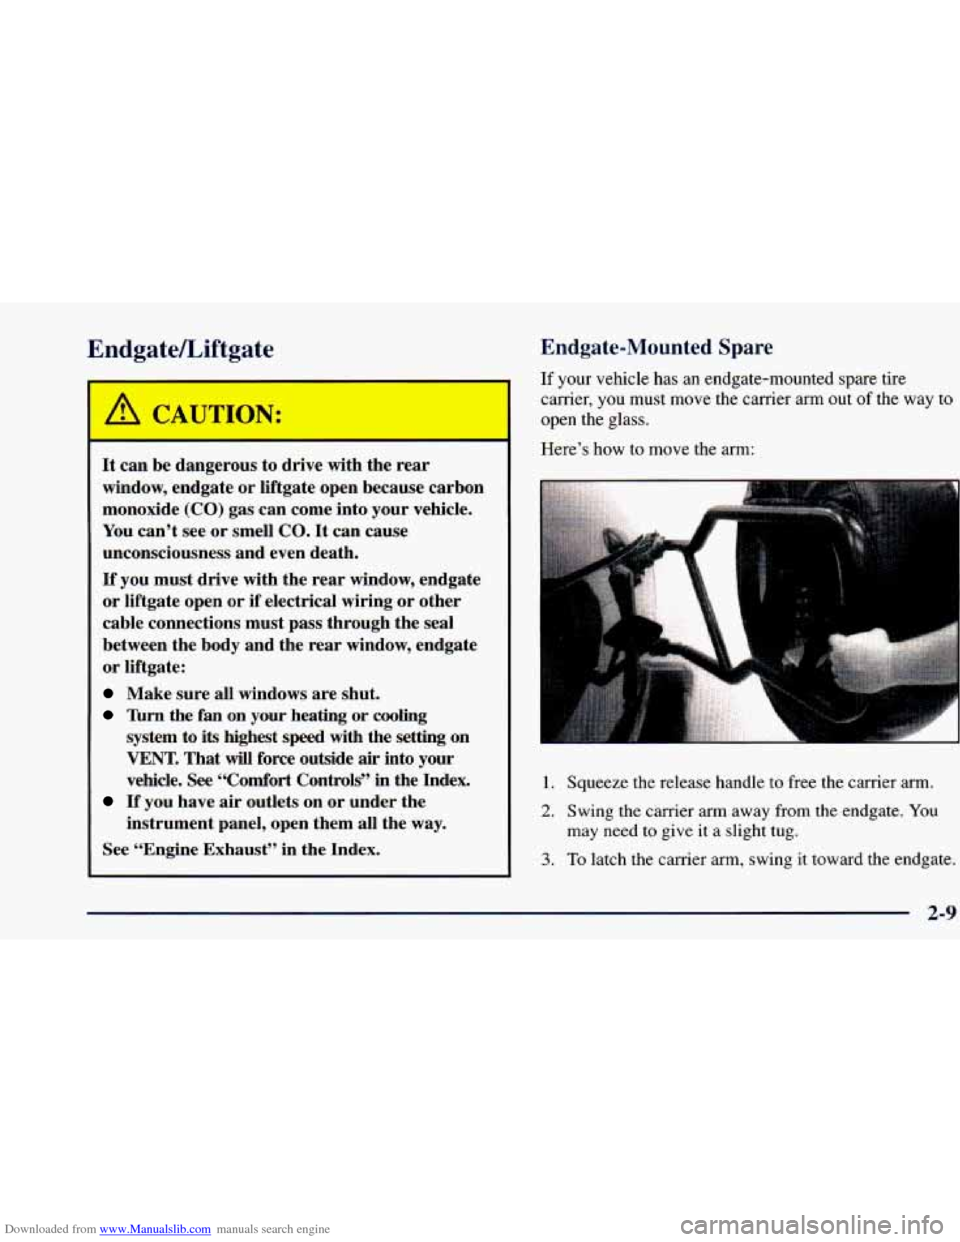
Endgate-Mounted Spare
If your vehicle has an endgate-mounted spare tire
carrier, you must move the carrier arm out
of the way to
open the glass.
Here’s how to move the arm:
1. Squeeze the release handle to free the carrier arm.
2. Swing the carrier arm away from the endgate. You
may need to give it a slight tug.
3. To latch the carrier arm, swing it toward the endgate.
2-9
Page 131 of 416
Downloaded from www.Manualslib.com manuals search engine Ashtrays and Cigarette Lighter
Rotate the front ashtray door down to open it.
I NOTICE:
~
Don’t put papers and other things that burn into
your ashtray.
If you do, cigarettes or other
smoking materials could set them on fire
causing damage.
To remove the front ashtray, pull the bin upward.
To use the lighter, press it in all the way, and let go.
When it’s ready, it will pop back by itself.
I NOTICE:
Don’t hold a cigarette lighter in with your hand
while
it is heating. If you do, it won’t be able to
back away from the heating element when it’s
ready. That can make it overload, damaging the
lighter and the heating element.
Four-door vehicles have smaller ashtrays inside the rear
doors. Press
PUSH to turn the ashtray around for use.
Sun Visors
To block out glare, you can swing down the top and
bottom visors
(if your vehicle has one). You can also
swing the bottom visor from side-to-side. Your visors
may have an extension that
can be pulled out for
additional glare protection and a strap for holding small
items, such as maps.
2-57
Page 146 of 416
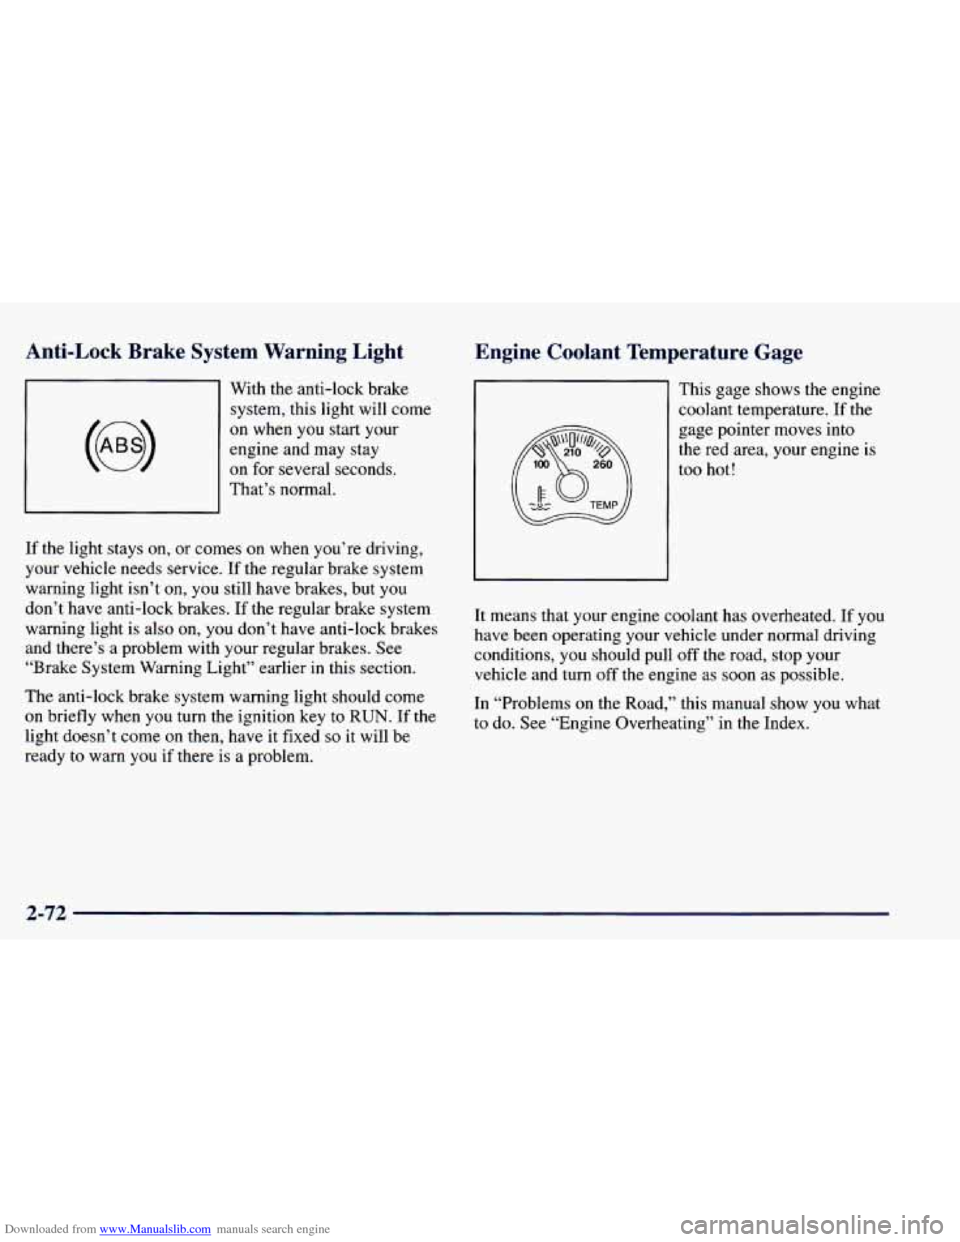
Downloaded from www.Manualslib.com manuals search engine Anti-Lock Brake System Warning Light
With the anti-lock brake system, this light will come
on when you start your
engine and may stay
on for several seconds.
That’s normal.
If the light stays
on, or comes on when you’re driving,
your vehicle needs service. If the regular brake system
warning light isn’t on,
you still have brakes, but you
don’t have anti-lock brakes. If the regular brake system
warning light is also on, you don’t have anti-lock brakes
and there’s a problem with your regular brakes.
See
“Brake System Warning Light” earlier in this section.
The anti-lock brake system warning light should come
on briefly when you turn the ignition key to RUN. If the
light doesn’t come on then, have it fixed
so it will be
ready to warn
you if there is a problem.
Engine Coolant Temperature Gage
This gage shows the engine
coolant temperature. If the
gage pointer moves into
the red area, your engine
is
too hot!
It means that your engine coolant has overheated. If
you
have been operating your vehicle under normal driving
conditions,
you should pull off the road, stop your
vehicle and turn off the engine as soon as possible.
In “Problems
on the Road,” this manual show you what
to do. See “Engine Overheating’’ in the Index.
2-72
Page 153 of 416
Downloaded from www.Manualslib.com manuals search engine Section 3 Cornfo-t Controls and Audio Systems
In this section, you’ll find out how to operate the comfort control and audio systems offered with your vehicle. Be
sure to read about the particular systems supplied with your vehicle.
3-2 3-2
3-3
3-7
3-7 3-7
3-8
3- 10
3- 10
3-10
3- 10
3-12 Comfort Controls
Standard Climate Control System
Electronic Climate Control (If Equipped)
Air Conditioning
Heating
Ventilation System
Defogging and Defrosting
Audio Systems
Setting the Clock for Systems without
Automatic Tone Control
Setting the Clock
for Systems with Automatic
Tone Control
AM-FM Stereo
AM-FM Stereo with Cassette Tape Player
(If Equipped) 3-15
3-20
3-24
3-26
3-28 3-28
3
-29
3-30
3-30
3-30 AM-FM
Stereo with Cassette Tape and
Automatic Tone Control (If Equipped)
AM-FM Stereo with Compact Disc Player and
Automatic Tone Control (If Equipped)
Remote Cassette Tape Player (If Equipped)
Theft-Deterrent Feature (If Equipped)
Understanding Radio Reception
Tips About Your Audio System
Care of Your Cassette Tape Player
Care of Your Compact Discs
Care of Your Compact Disc Player
Fixed Mast Antenna
Page 154 of 416
Downloaded from www.Manualslib.com manuals search engine Comfort Controls Temperature Knob
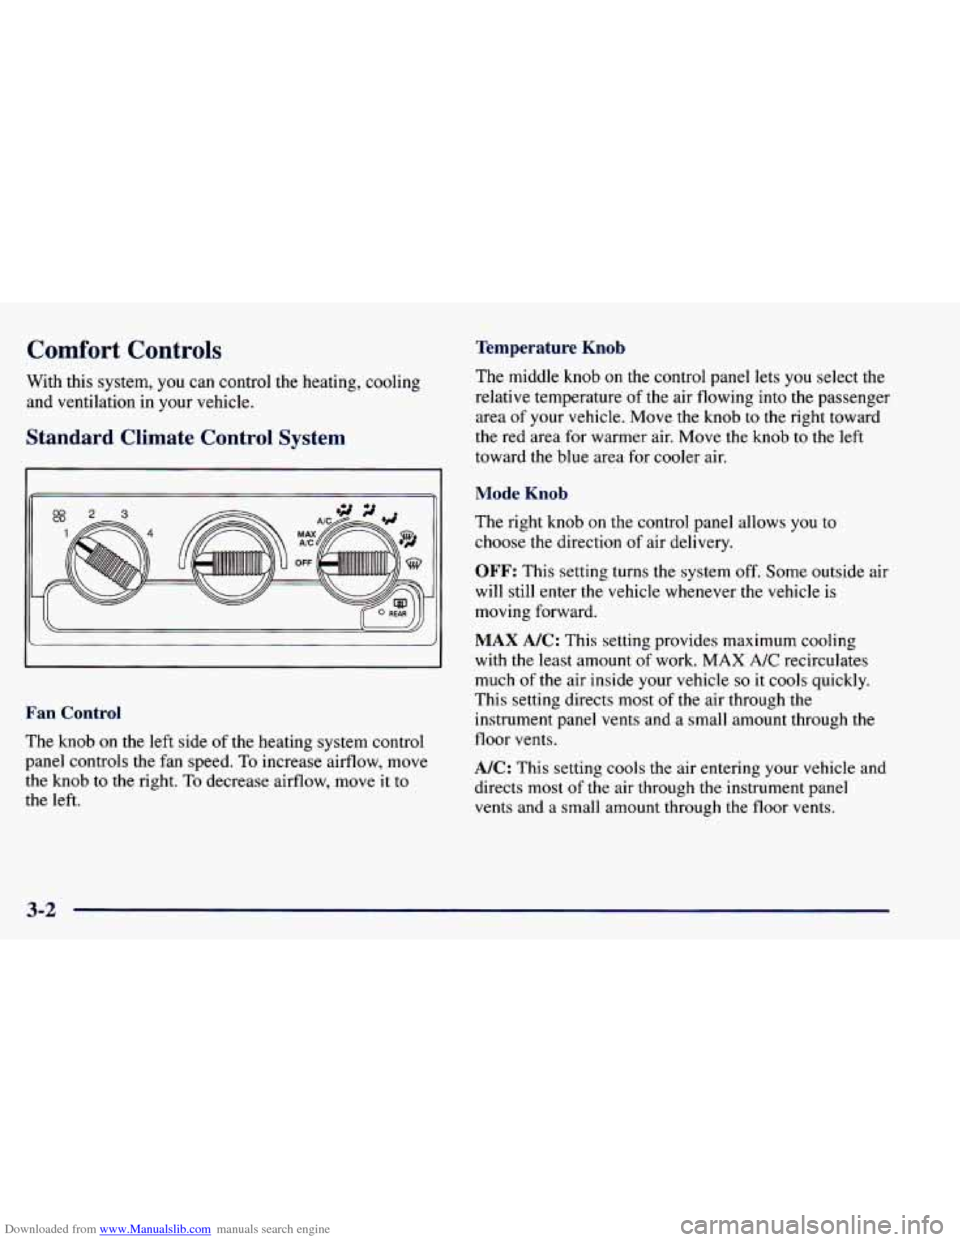
With this system, you can control the heating, cooling
and ventilation in your vehicle.
Standard Climate Control System
I' II
Fan Control
The knob on the left side of the heating system control
panel controls the fan speed.
To increase airflow, move
the
knob to the right. To decrease airflow, move it to
the left.
The middle knob on the control panel lets you select the
relative temperature
of the air flowing into the passenger
area
of your vehicle. Move the knob to the right toward
the red area for warmer air. Move the
knob to the left
toward the blue area for cooler air.
Mode Knob
The right knob on the control panel allows you to
choose the direction of air delivery.
OFF: This setting turns the system off. Some outside air
will still enter the vehicle whenever the vehicle is
moving forward.
MAX A/C: This setting provides maximum cooling
with the least amount of work. MAX A/C recirculates
much
of the air inside your vehicle so it cools quickly.
This setting directs most of the air through the
instrument panel vents and
a small amount through the
floor vents.
A/C: This setting cools the air entering your vehicle and
directs most of the air through the instrument panel
vents and
a small amount through the floor vents.
3-2
Page 156 of 416
Downloaded from www.Manualslib.com manuals search engine Temperature Knob Mode Knob - Automatic Operation
The middle knob on the control panel lets you select the
desired air temperature in your vehicle. This knob will
allow
you to adjust the interior air temperature
independently
of the function knob setting. Move the
knob to the right toward
82 for warmer air. Move the
knob to the left toward 66 for cooler air.
Full Hot: If you turn the temperature knob past 82°F
(28”C), the system will go into the
“full hot” mode. The
system will remain at that maximum heating setting and
the fan will blow at the speed the fan knob is set to. If
the fan is in AUTO, it will run at
full speed.
Full Cold: If you turn the temperature knob past 66°F
(1 9”C), the system will go into the “full cold” mode.
The system will remain at that maximum cooling setting
and the fan will blow at the speed the fan knob is set to. \
If the fan is in AUTO, it will run at
full speed.
Choosing either maximum setting will
not cause the
system to heat or cool any faster. The right knob
on the control panel allows you to
choose the direction of air delivery. When the system is
set for automatic operation, sensors will control the air
delivery mode. Air will come primarily from the floor or
instrument panel outlets, with some air directed to the
windshield
to prevent fogging.
When the system is
in AUTO mode, the air conditioning
light
will turn on, and the recirculation and outside air
lights turn off. With the system in full auto control (both
the fan and mode knobs in AUTO), you still have the ability to override any function. However, continually
overriding the outside air or the A/C compressor will
limit the ability of the system
to cool the
vehicle quickly.
If
you push a button for a function which is not
available,
the light next to that button will flash three
times
to alert you that it’s not available.
To find your comfort zone, start with the
74°F (23°C)
setting and allow about 20 minutes for the system to
adjust the temperature
if necessary.
3-4
Page 159 of 416
Downloaded from www.Manualslib.com manuals search engine Air Conditioning
On hot days, open the windows long enough to let hot
inside air escape. This reduces the time it takes for your
vehicle
to cool down. Then keep your windows closed
for the air conditioner to work its best.
For quick cool-down on very hot days, use MAX A/C
with the temperature knob turned to the left. This setting
should be used to keep odors and/or dust from entering
the vehicle. For normal cooling
on hot days, use A/C
with the temperature knob turned to the left.
On vehicles equipped with the Electronic Climate
Control system, this same performance can be achieved
as long as the A/C is enabled and the outside air button
is not active.
Heating
On cool but sunny days, use BI-LEVEL A/C to deliver
warm air to the
floor and cooler air to the instrument
panel outlets.
When the air conditioner is on, you may sometimes
notice slight changes in your vehicle’s engine speed and
power. This is normal because the system is designed
to cycle the compressor on and off to keep the
desired temperature.
The heater works best if you keep your windows closed
while using it. On cold days,
use HEATER with the
temperature knob turned
to the right. BLEND is useful
in cool weather when
you have fog or ice on the
windshield or side windows.
If you use the optional engine coolant heater before starting your engine, your heating system will produce
warmer air faster to heat the passenger compartment in
cold weather. See “Engine Coolant Heater” in the Index.
Ventilation System
For mild outside temperatures when little heating or
cooling is needed, use
VENT to direct outside air
through your vehicle. Airflow is through the instrument
panel outlets.
Your vehicle’s ventilation system supplies outside air to
the inside
of your vehicle when it is moving. When the
vehicle is
not moving, you can get outside air to flow
through by selecting any mode and any fan speed.
3-7
Page 229 of 416
Downloaded from www.Manualslib.com manuals search engine Driving with a Trailer
I
A GA ‘TION:
If you have a rear-most window open and you
pull a trailer with your vehicle, carbon monoxide
(CO) could come into your vehicle. You can’t see
or smell
CO. It can cause unconsciousness or
death. (See “Engine Exhaust” in the Index.) To
maximize your safety when towing
a trailer:
0 Have your exhaust system inspected for
leaks, and make necessary repairs before
starting on your trip.
Keep the rear-most windows closed.
0 If exhaust does come into your vehicle
through a window in the rear or another
opening, drive with your front, main
heating or cooling system on and with the
fan
on any speed. This will bring fresh,
outside air into your vehicle.
Do not use
MAX AfC because it only recirculates the
air inside your vehicle. (See “Comfort
Controls” in the Index.) Towing a
trailer requires
a certain amount of experience.
Before setting out for the open road, you’ll want to get
to know your rig. Acquaint yourself with the
feel of
handling and braking with the added weight of the
trailer. And always keep in mind that the vehicle you
are driving is now a
good deal longer and not nearly as
responsive as your vehicle is by itself.
Before
you start, check the trailer hitch and platform
(and attachments), safety chains, electrical connector,
lamps, tires and mirror adjustment.
If the trailer has
electric brakes, start your vehicle and trailer moving and
then apply the trailer brake controller by hand to be sure
the brakes are working. This lets you check your
electrical connection at the same time.
During your trip, check occasionally to be sure that the
load
is secure, and that the lamps and any trailer brakes
are still working.
Following Distance
Stay at least twice as far behind the vehicle ahead as you
would when driving your vehicle without a trailer. This
can help you avoid situations that require heavy braking
and sudden turns.
4-47
Page 230 of 416
Downloaded from www.Manualslib.com manuals search engine Passing
You’ll need more passing distance up ahead when
you’re towing a trailer. And, because you’re
a good
deal longer, you’ll need to go much farther beyond the
passed vehicle before
you can return to your lane.
Backing Up
Hold the bottom of the steering wheel with one hand.
Then, to move the trailer to the left, just move that hand
to the left. To move the trailer to the right, move your
hand to the right. Always back up slowly and, if
possible, have someone guide you.
Making Turns
NOTICE:
Making very sharp turns while trailering could
cause the trailer
to come in contact with the
vehicle. Your vehicle could be damaged. Avoid
making very sharp turns while trailering.
Turn Signals When Towing a Trailer
When you tow a trailer, your vehicle has to have extra
wiring and
a heavy-duty turn signal flasher (included in
the optional trailering package).
The arrows
on your instrument panel will flash
whenever
you signal a turn or lane change. Properly
hooked up, the trailer lamps will also flash, telling other
drivers you’re about to turn, change lanes or stop.
When towing a trailer, the arrows on your instrument
panel will flash for turns even if the bulbs on the trailer
are burned
out. Thus, you may think drivers behind you
are seeing your signal when they are not. It’s important
to check occasionally to be sure the trailer bulbs are
still working.
Driving On Grades
Reduce speed and shift to a lower gear before you start
down a long or steep downgrade. If
you don’t shift
down,
you might have to use your brakes so much that
they would get hot and no longer work well.
When you’re turning with
a trailer, make wider turns than
normal.
Do this so your trailer won’t strike soft shoulders,
curbs, road signs, trees
or other objects. Avoid jerky or
sudden maneuvers. Signal well
in advance. On
a long uphill grade, shift down and reduce your
speed
to around 45 mph (70 kmh) to reduce the
possibility of engine and transmission overheating.
4-48
Page 231 of 416
Downloaded from www.Manualslib.com manuals search engine If you have an automatic transmission, you should use
DRIVE
(D) when towing a trailer. Operating your
vehicle in DRIVE (D) when towing a trailer will
minimize heat buildup and extend the life
of your
transmission. Or, if
you have a manual transmission,
it’s better not to use
FIFTH (5) gear, just drive in
FOURTH
(4) gear (or, as you need to, a lower gear).
When towing at high altitude on steep uphill grades,
consider the following: Engine coolant will boil at a
lower temperature than at normal altitudes. If
you turn
your engine off immediately after towing at high altitude
on steep uphill grades, your vehicle may show signs
similar to engine overheating.
To avoid this, let the
engine run while parked (preferably
on level ground)
with the automatic transmission in PARK (P) (or the
manual transmission out
of gear and the parking brake
applied) for a few minutes before turning the engine
off.
If you do get the overheat warning, see “Engine
Overheating” in the Index.
Parking on Hills
You really should not park your vehicle, with a trailer
attached,
on a hill. If something goes wrong, your rig
could start
to move. People can be injured, and both
your vehicle and the trailer can be damaged. But if you ever have
to park your rig
on a hill, here’s
how
to do it:
1.
2.
3.
4.
5.
6.
Apply your regular brakes, but don’t shift into
PARK
(P) yet, or into gear for a manual
transmission. Then turn your wheels into the curb if
facing downhill or into traffic if facing uphill.
Have someone place chocks under the trailer wheels.
When the wheel chocks are in place, release the
regular brakes until the chocks absorb the load.
Reapply the regular brakes. Then apply your
parking brake, and then shift into PARK (P), or
REVERSE
(R) for a manual transmission.
If
you have a four-wheel-drive vehicle with a
manual transfer case shift lever, be sure the transfer
case is
in a drive gear -- not in NEUTRAL (N).
Release the regular brakes.
When You Are Ready to Leave After
Parking on a Hill
1. Apply your regular brakes and hold the pedal down
while you:
0 Start your engine;
0 Shift into a gear; and
0 R.elease the parking brake.
4-49