CHEVROLET CAMARO 1982 Repair Guide
CAMARO 1982
CHEVROLET
CHEVROLET
https://www.carmanualsonline.info/img/24/56854/w960_56854-0.png
CHEVROLET CAMARO 1982 Repair Guide
Trending: oil pressure, ECO mode, battery, coolant level, overheating, radio antenna, ESP
Page 431 of 875
GM – CAMARO 1982-1992 – Repair Guide (Checked by WxMax) 431
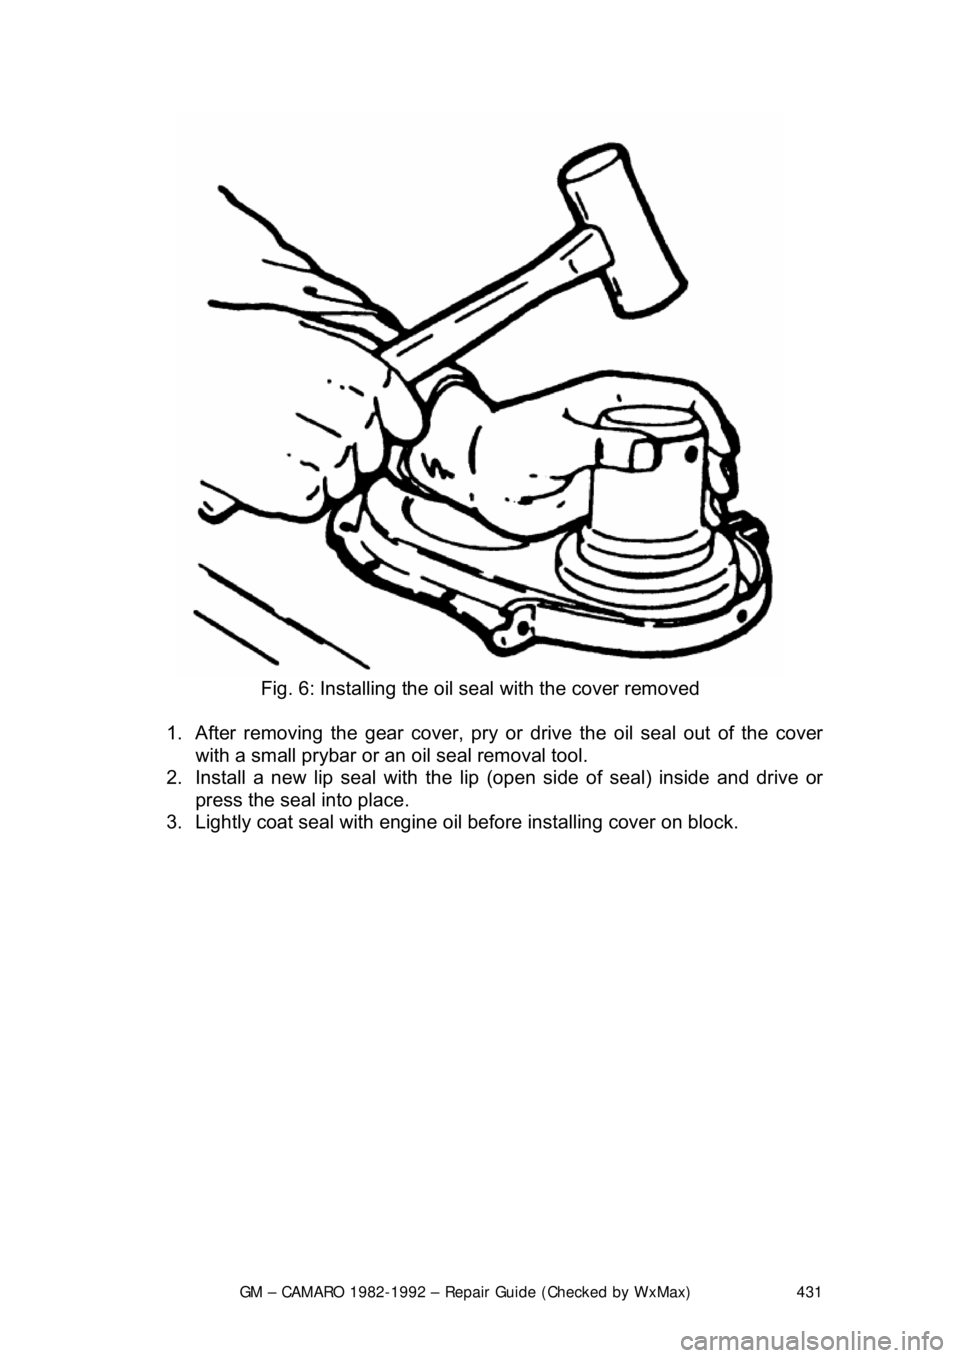
Fig. 6: Installing the oil seal with the cover removed
1. After removing the gear cover, pry or drive the oil seal out of the cover
with a small prybar or an oil seal removal tool.
2. Install a new lip seal with the lip (open side of seal) inside and drive or
press the seal into place.
3. Lightly coat seal with engine oil before installing cover on block.
Page 432 of 875
GM – CAMARO 1982-1992 – Repair Guide (Checked by WxMax) 432
TIMING CHAIN OR GEAR
REMOVAL & INSTALLATION
EXCEPT 2.5L ENGINE
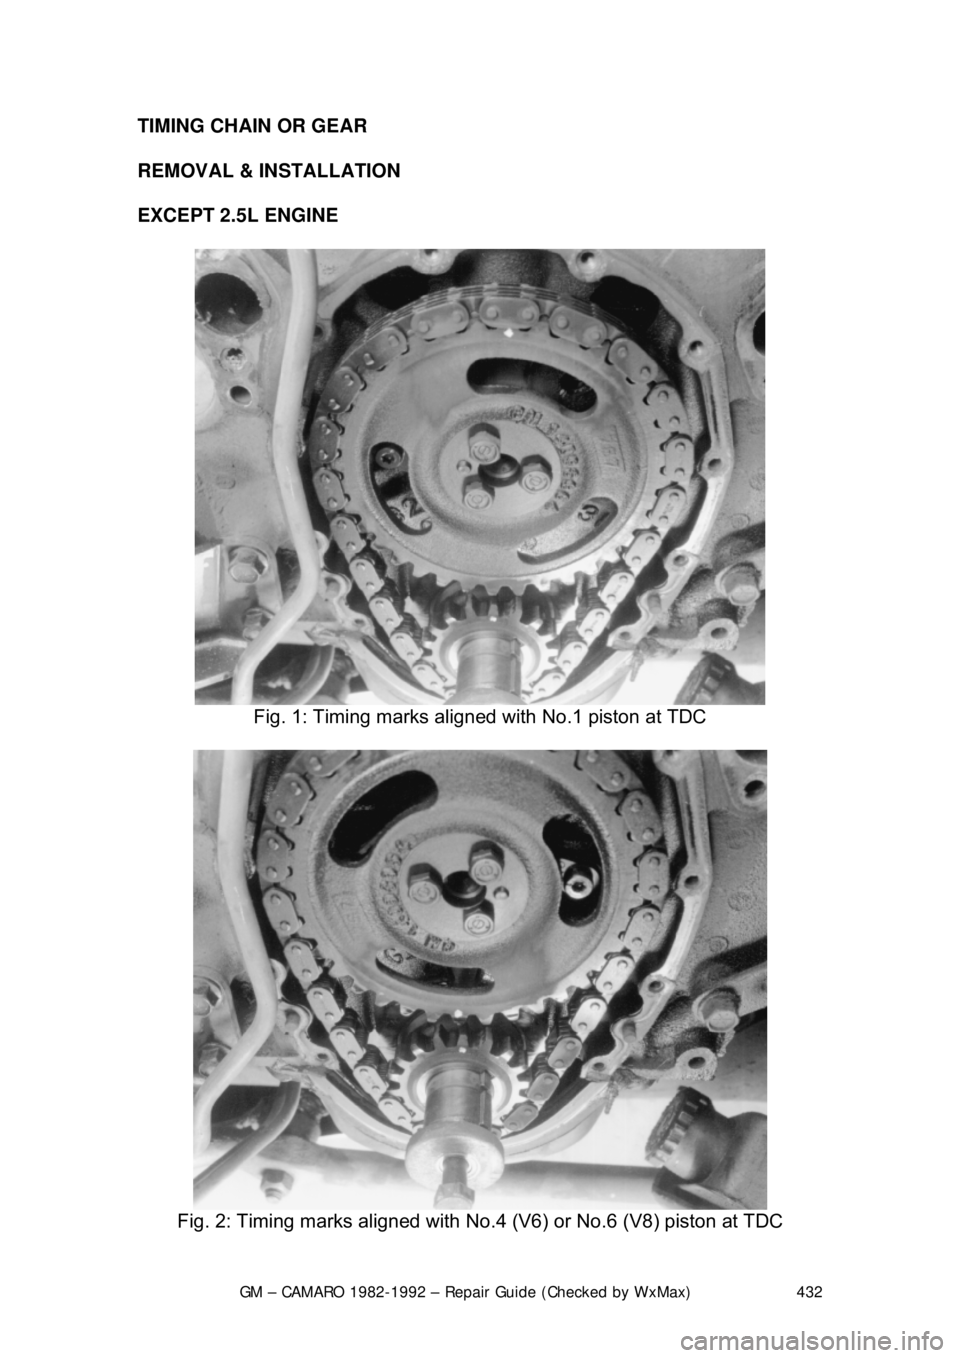
Fig. 1: Timing marks align ed with No.1 piston at TDC
Fig. 2: Timing marks aligned with No.4 (V6) or No.6 (V8) piston at TDC
Page 433 of 875
GM – CAMARO 1982-1992 – Repair Guide (Checked by WxMax) 433
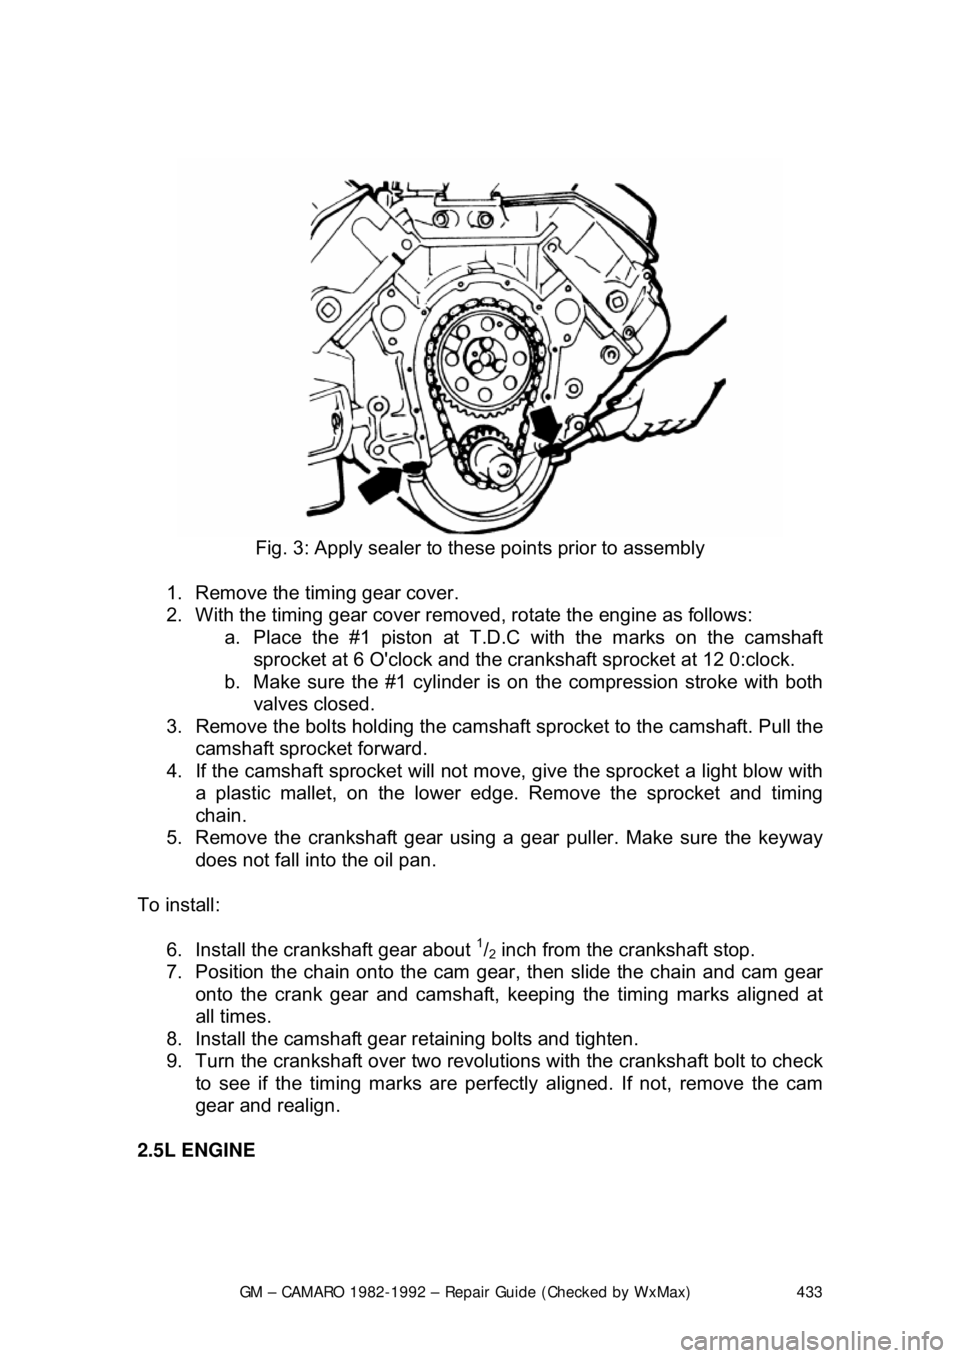
Fig. 3: Apply sealer to t hese points prior to assembly
1. Remove the timing gear cover.
2. With the timing gear cover remov ed, rotate the engine as follows:
a. Place the #1 piston at T.D. C with the marks on the camshaft
sprocket at 6 O'clock and the cranks haft sprocket at 12 0:clock.
b. Make sure the #1 cylinder is on the compression stroke with both
valves closed.
3. Remove the bolts holding the cams haft sprocket to the camshaft. Pull the
camshaft sprocket forward.
4. If the camshaft sprocket will not move, give the sprocket a light blow with
a plastic mallet, on the lower edge. Remove the sprocket and timing
chain.
5. Remove the crankshaft gear using a gear puller. Make sure the keyway
does not fall into the oil pan.
To install: 6. Install the crankshaft gear about
1/2 inch from the crankshaft stop.
7. Position the chain onto the cam gear, then slide the chain and cam gear
onto the crank gear and camshaft, keepi ng the timing marks aligned at
all times.
8. Install the camshaft gear retaining bolts and tighten.
9. Turn the crankshaft over two revolutions with the crankshaft bolt to check to see if the timing marks are perfectly aligned. If not, remove the cam
gear and realign.
2.5L ENGINE
Page 434 of 875
GM – CAMARO 1982-1992 – Repair Guide (Checked by WxMax) 434
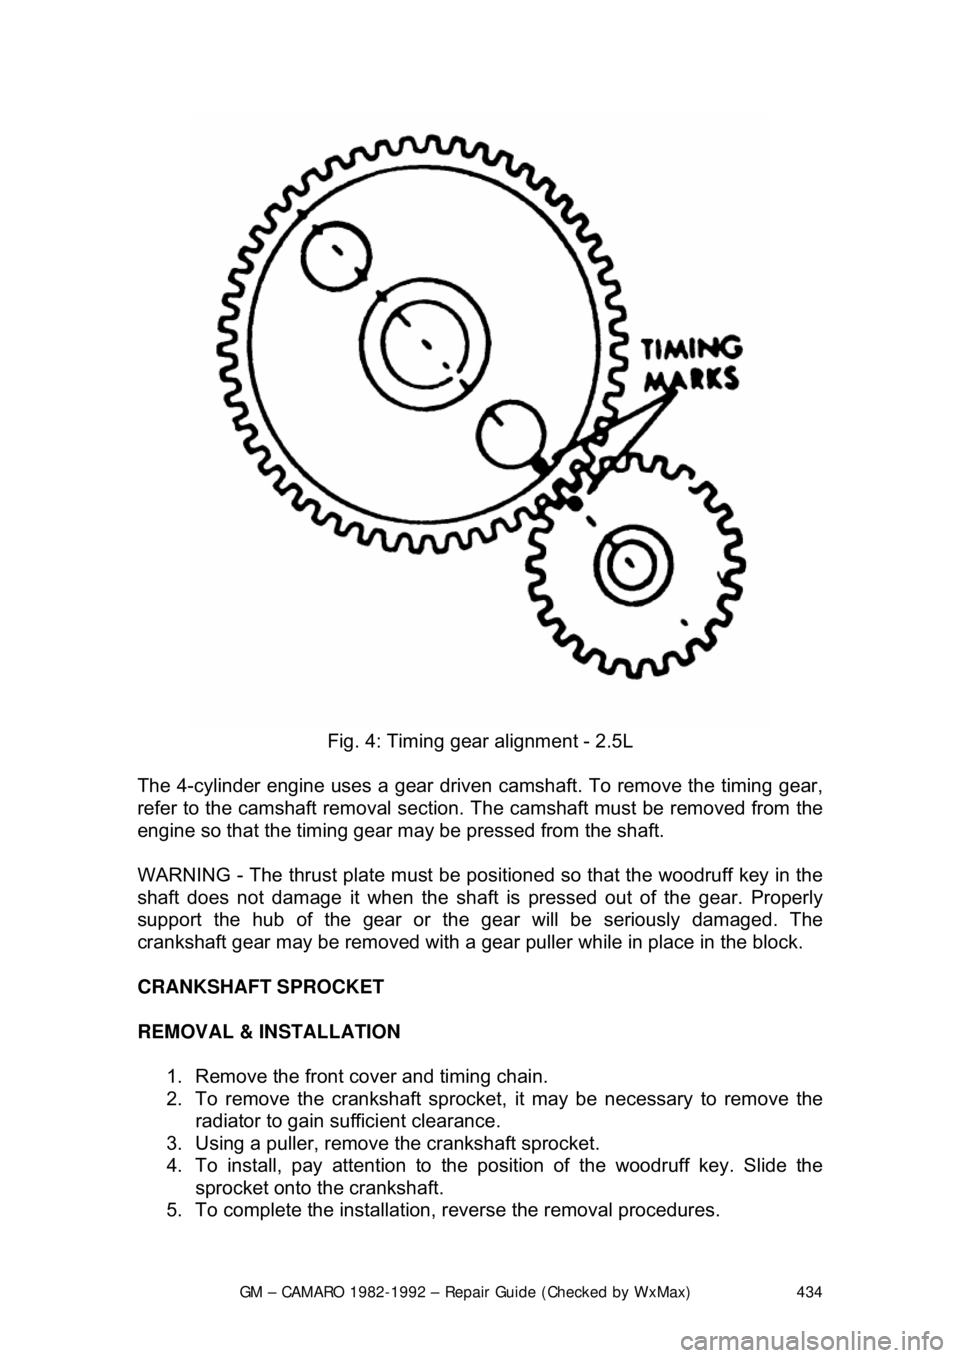
Fig. 4: Timing gear alignment - 2.5L
The 4-cylinder engine uses a gear driven camshaft. To remove the timing gear,
refer to the camshaft removal section. The camshaft must be removed from the
engine so that the timing gear ma y be pressed from the shaft.
WARNING - The thrust plate must be posit ioned so that the woodruff key in the
shaft does not damage it when the shaft is pressed out of the gear. Properly
support the hub of the gear or the gear will be seriously damaged. The
crankshaft gear may be removed with a gear puller while in place in the block.
CRANKSHAFT SPROCKET
REMOVAL & INSTALLATION 1. Remove the front cover and timing chain.
2. To remove the crankshaft sprocket, it may be necessary to remove the
radiator to gain su fficient clearance.
3. Using a puller, remove the crankshaft sprocket.
4. To install, pay attention to the position of the woodruff key. Slide the
sprocket onto the crankshaft.
5. To complete the installation, reverse the removal procedures.
Page 435 of 875
GM – CAMARO 1982-1992 – Repair Guide (Checked by WxMax) 435
CAMSHAFT AND BEARINGS
REMOVAL & INSTALLATION
CAUTION - When draining the coolant, keep in mind that cats and dogs are
attracted by the ethylene gl ycol antifreeze, and are quite likely to drink any that
is left in an uncovered container or in puddles on the ground. This will prove
fatal in sufficient quantity. Always drai n the coolant into a sealable container.
Coolant should be reused unless it is contaminated or several years old.
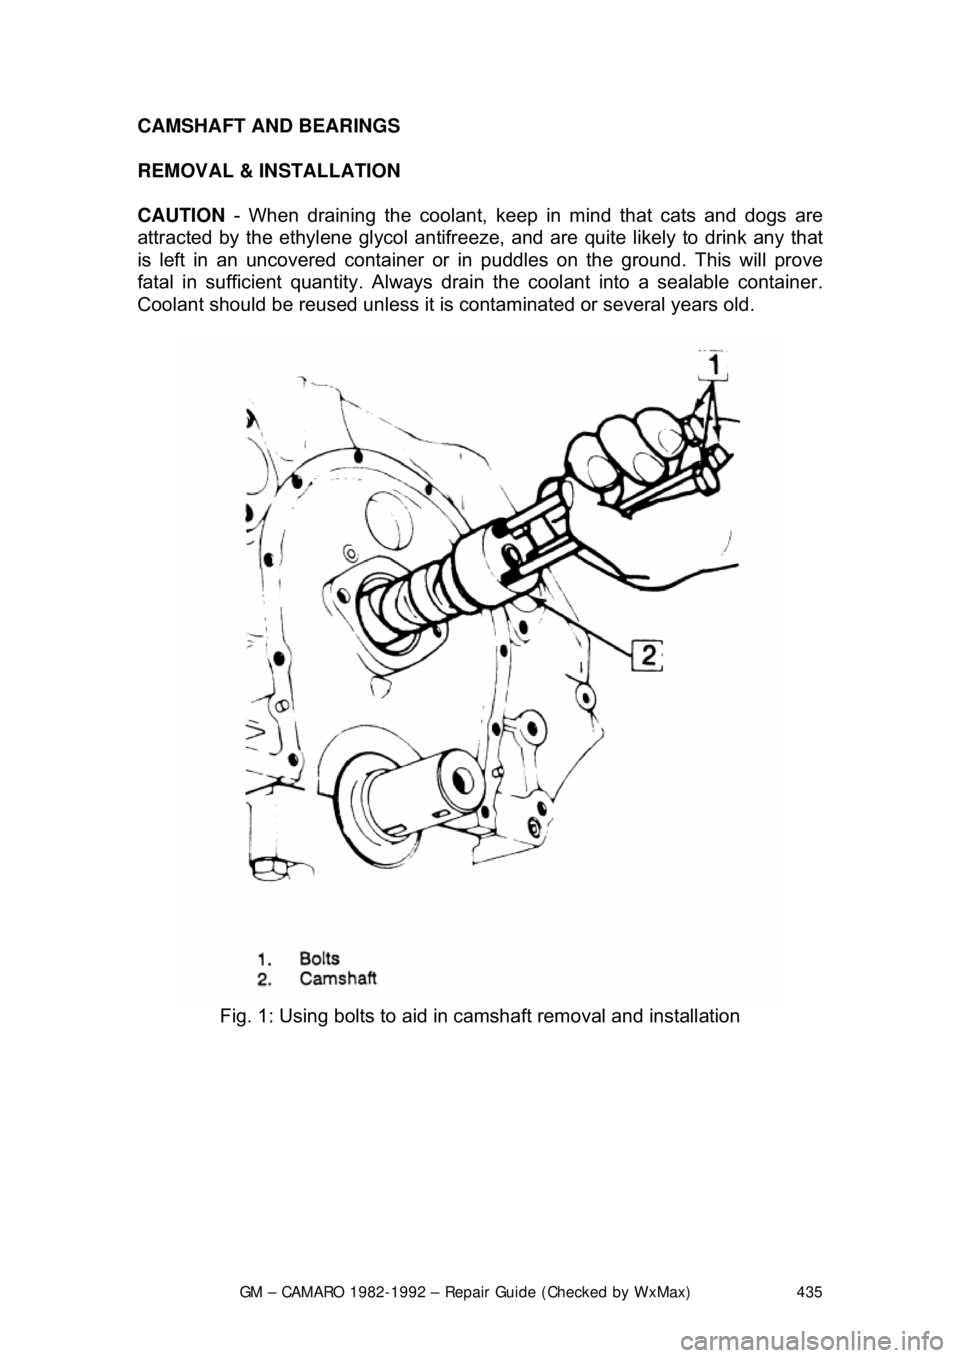
Fig. 1: Using bolts to aid in camshaft removal and installation
Page 436 of 875
GM – CAMARO 1982-1992 – Repair Guide (Checked by WxMax) 436
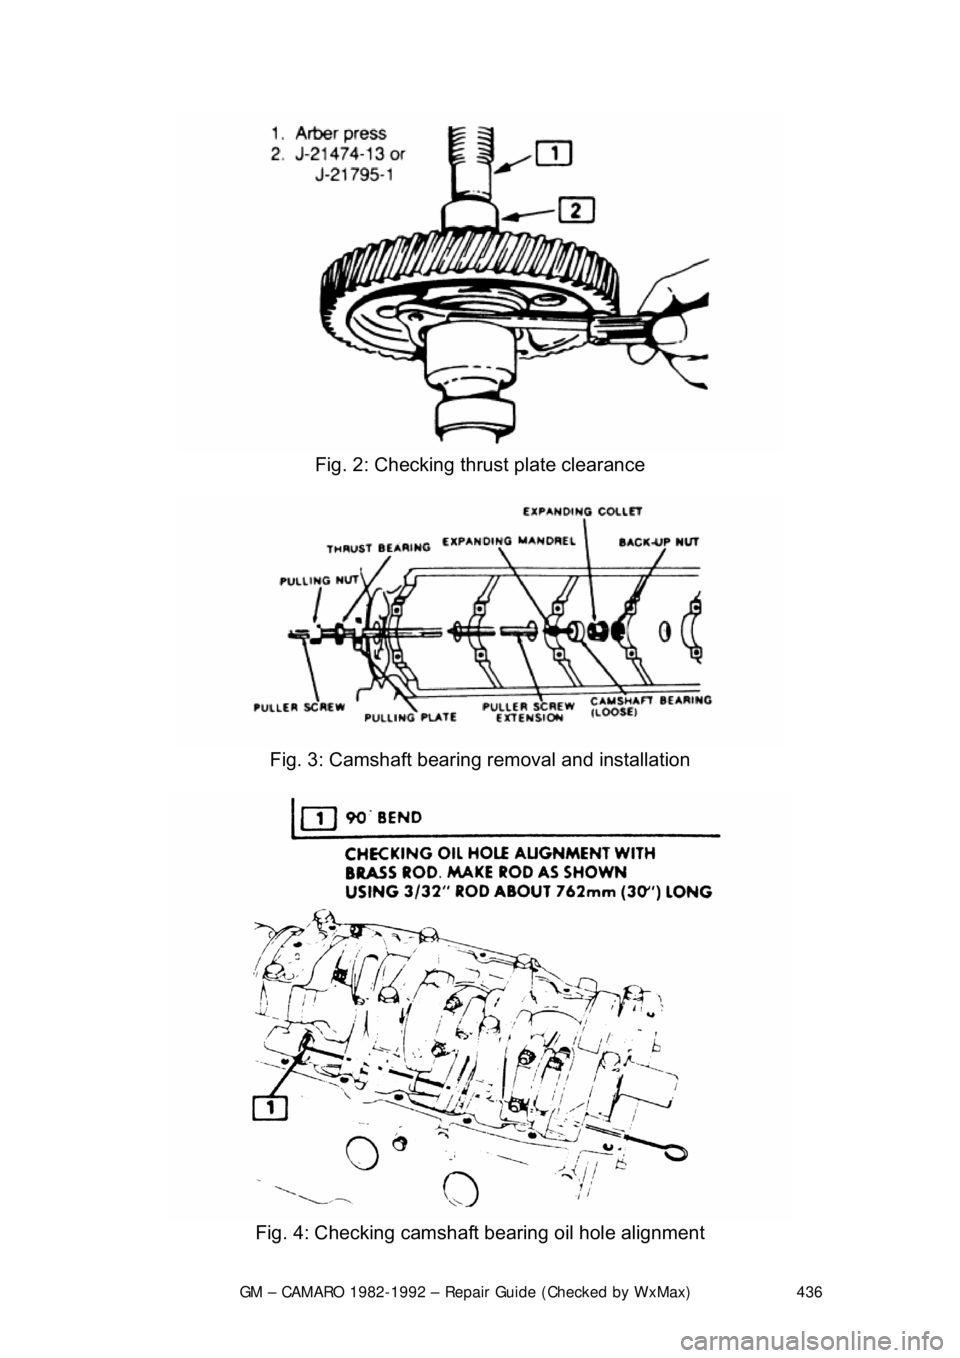
Fig. 2: Checking thrust plate clearance
Fig. 3: Camshaft bearing removal and installation
Fig. 4: Checking camshaft bearing oil hole alignment
Page 437 of 875
GM – CAMARO 1982-1992 – Repair Guide (Checked by WxMax) 437
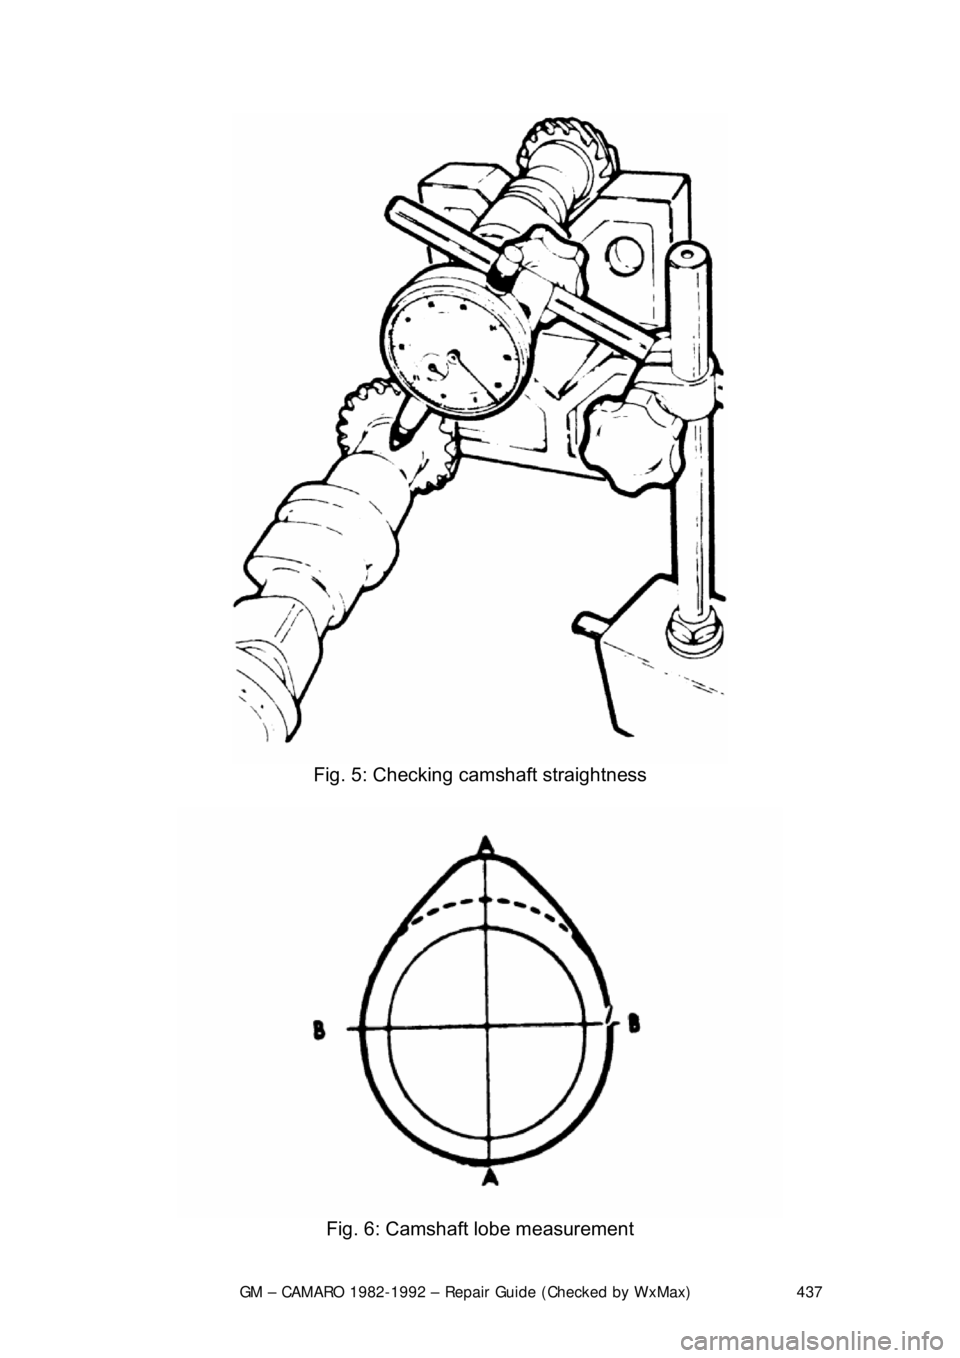
Fig. 5: Checking camshaft straightness
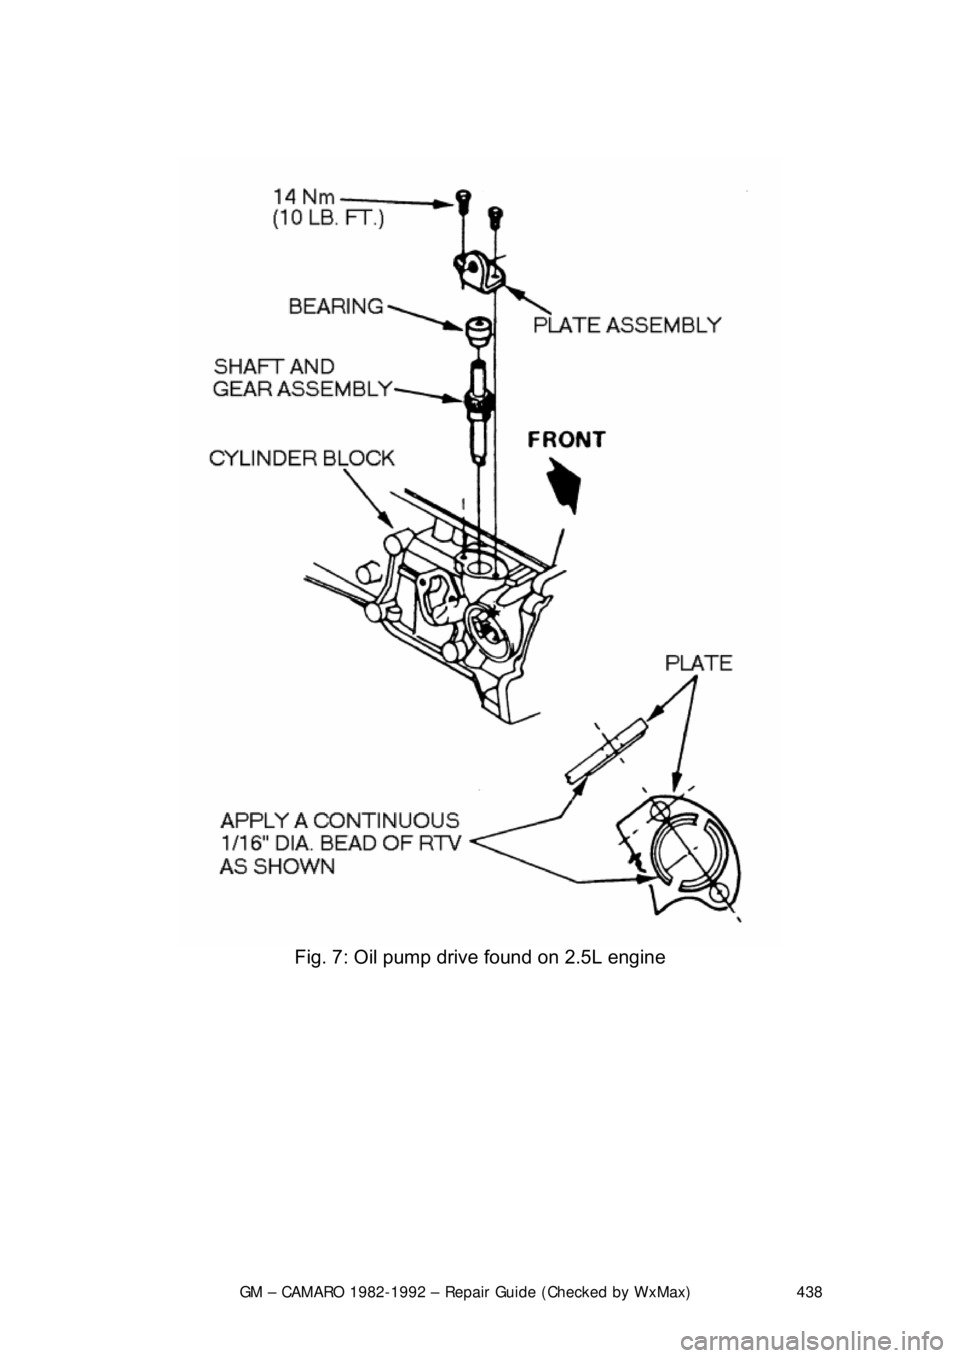
Fig. 6: Camshaft lobe measurement
Page 438 of 875
GM – CAMARO 1982-1992 – Repair Guide (Checked by WxMax) 438
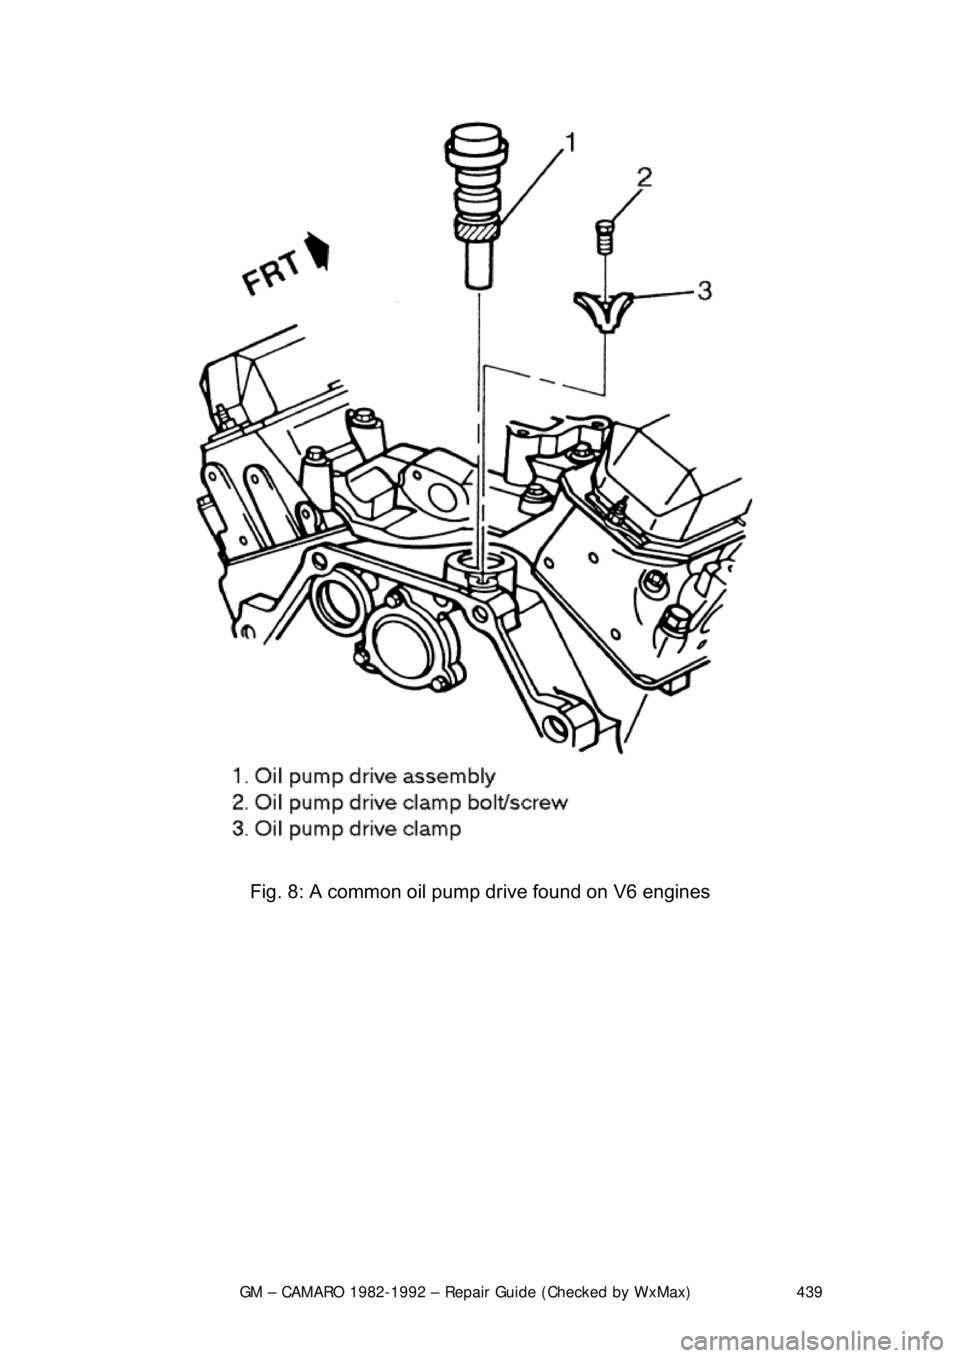
Fig. 7: Oil pump drive found on 2.5L engine
Page 439 of 875
GM – CAMARO 1982-1992 – Repair Guide (Checked by WxMax) 439
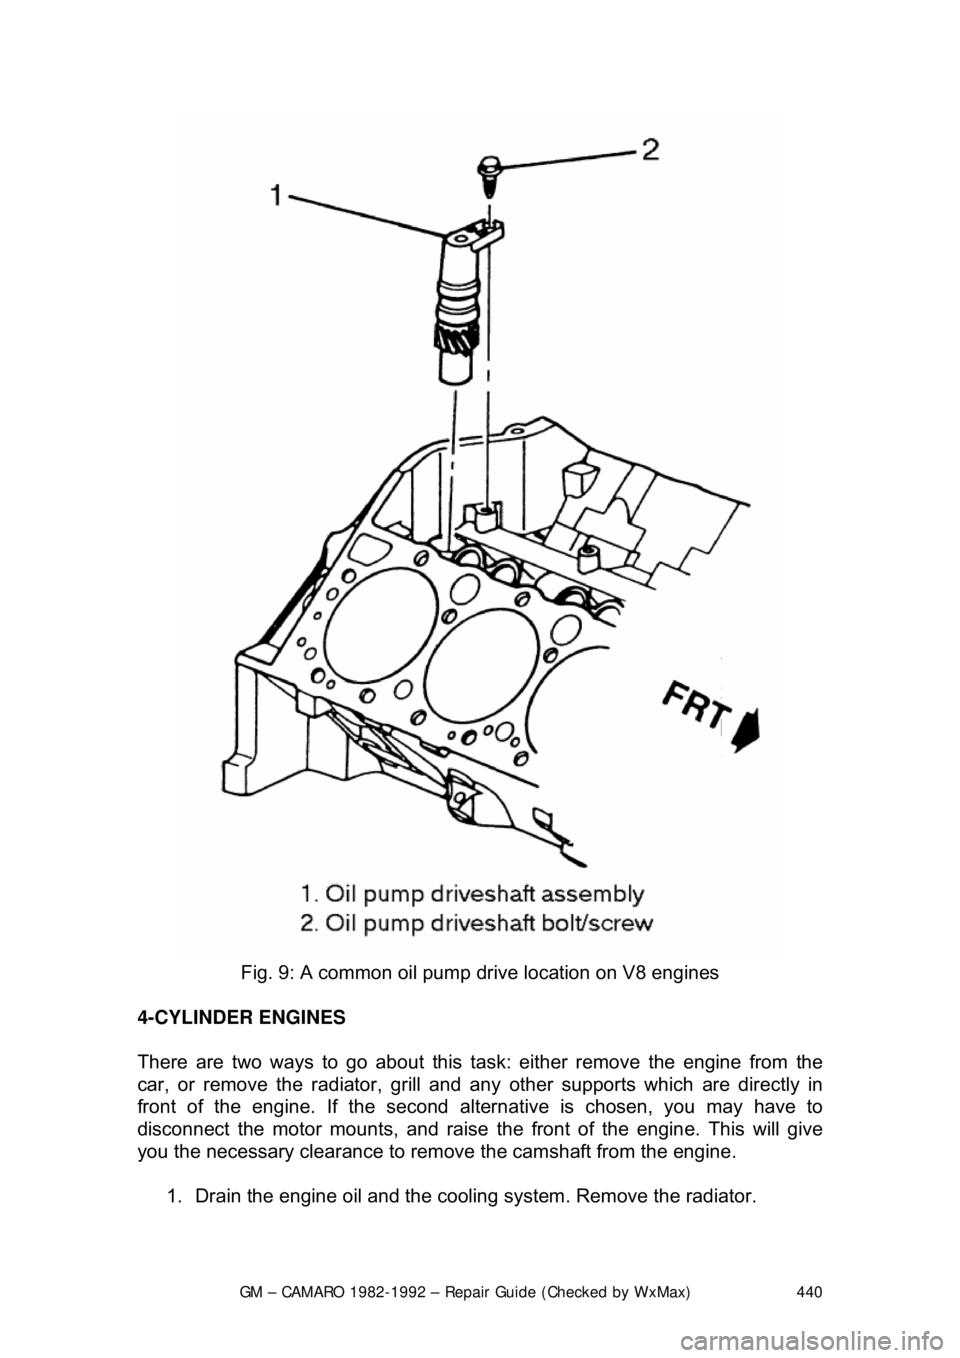
Fig. 8: A common oil pump drive found on V6 engines
Page 440 of 875
GM – CAMARO 1982-1992 – Repair Guide (Checked by WxMax) 440
Fig. 9: A common oil pump drive location on V8 engines
4-CYLINDER ENGINES
There are two ways to go about this task: either remove the engine from the
car, or remove the radiator, grill and any other supports which are directly in
front of the engine. If the second altern ative is chosen, you may have to
disconnect the motor mounts, and raise t he front of the engine. This will give
you the necessary clearance to remove the camshaft from the engine.
1. Drain the engine oil an d the cooling system. Remove the radiator.
Trending: reset, lug pattern, AUX, oil dipstick, wheel torque, battery capacity, compression ratio
