CHEVROLET CAMARO 2011 5.G Owners Manual
Manufacturer: CHEVROLET, Model Year: 2011, Model line: CAMARO, Model: CHEVROLET CAMARO 2011 5.GPages: 414, PDF Size: 6.24 MB
Page 291 of 414
Black plate (29,1)Chevrolet Camaro Owner Manual - 2011
Vehicle Care 10-29
Brakes
This vehicle has disc brakes.
Disc brake pads have built-in wear
indicators that make a high-pitched
warning sound when the brake pads
are worn and new pads are needed.
The sound can come and go or be
heard all the time the vehicle is
moving, except when applying
the brake pedal firmly.
{WARNING
The brake wear warning sound
means that soon the brakes will
not work well. That could lead to
a crash. When the brake wear
warning sound is heard, have
the vehicle serviced.
Notice: Continuing to drive with
worn-out brake pads could result
in costly brake repair. Some driving conditions or climates
can cause a brake squeal when the
brakes are first applied or lightly
applied. This does not mean
something is wrong with the brakes.
Properly torqued wheel nuts are
necessary to help prevent brake
pulsation. When tires are rotated,
inspect brake pads for wear and
evenly tighten wheel nuts in
the proper sequence to torque
specifications in
Capacities and
Specifications on page 12‑2.
Brake linings should always be
replaced as complete axle sets.
Brake Pedal Travel
See your dealer if the brake pedal
does not return to normal height,
or if there is a rapid increase in
pedal travel. This could be a
sign that brake service might
be required.
Brake Adjustment
Every time the brakes are applied,
with or without the vehicle moving,
the brakes adjust for wear.
Replacing Brake System Parts
The braking system on a vehicle is
complex. Its many parts have to be
of top quality and work well together
if the vehicle is to have really good
braking. The vehicle was designed
and tested with top-quality brake
parts. When parts of the braking
system are replaced, be sure to get
new, approved replacement parts.
If this is not done, the brakes might
not work properly. For example,
installing disc brake pads that are
wrong for the vehicle, can change
the balance between the front and
rear brakes —for the worse. The
braking performance expected can
change in many other ways if the
wrong replacement brake parts are
installed.
Page 292 of 414
Black plate (30,1)Chevrolet Camaro Owner Manual - 2011
10-30 Vehicle Care
Brake Fluid
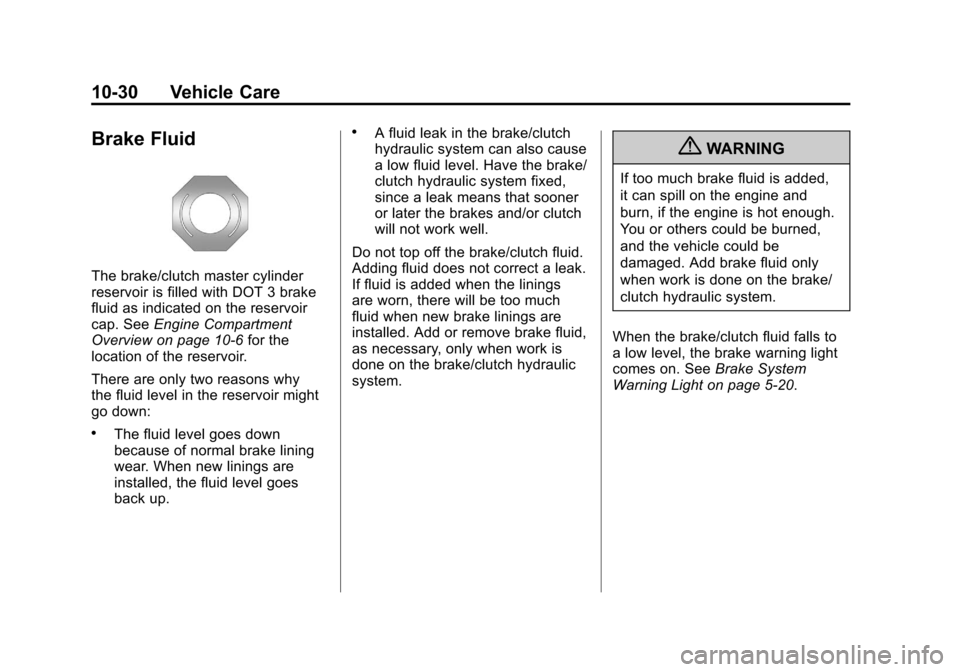
The brake/clutch master cylinder
reservoir is filled with DOT 3 brake
fluid as indicated on the reservoir
cap. SeeEngine Compartment
Overview on page 10‑6 for the
location of the reservoir.
There are only two reasons why
the fluid level in the reservoir might
go down:
.The fluid level goes down
because of normal brake lining
wear. When new linings are
installed, the fluid level goes
back up.
.A fluid leak in the brake/clutch
hydraulic system can also cause
a low fluid level. Have the brake/
clutch hydraulic system fixed,
since a leak means that sooner
or later the brakes and/or clutch
will not work well.
Do not top off the brake/clutch fluid.
Adding fluid does not correct a leak.
If fluid is added when the linings
are worn, there will be too much
fluid when new brake linings are
installed. Add or remove brake fluid,
as necessary, only when work is
done on the brake/clutch hydraulic
system.
{WARNING
If too much brake fluid is added,
it can spill on the engine and
burn, if the engine is hot enough.
You or others could be burned,
and the vehicle could be
damaged. Add brake fluid only
when work is done on the brake/
clutch hydraulic system.
When the brake/clutch fluid falls to
a low level, the brake warning light
comes on. See Brake System
Warning Light on page 5‑20.
Page 293 of 414
Black plate (31,1)Chevrolet Camaro Owner Manual - 2011
Vehicle Care 10-31
What to Add
Use only new DOT 3 brake
fluid from a sealed container.
SeeRecommended Fluids and
Lubricants on page 11‑7.
Always clean the brake/clutch
fluid reservoir cap and the area
around the cap before removing it.
This helps keep dirt from entering
the reservoir.
{WARNING
With the wrong kind of fluid in the
brake/clutch hydraulic system,
the brakes might not work well.
This could cause a crash. Always
use the proper brake/clutch fluid. Notice:
.Using the wrong fluid can
badly damage brake/clutch
hydraulic system parts.
For example, just a few
drops of mineral-based oil,
such as engine oil, in the
brake hydraulic system can
damage brake hydraulic
system parts so badly that
they will have to be replaced.
Do not let someone put in
the wrong kind of fluid.
.If brake fluid is spilled
on the vehicle's painted
surfaces, the paint finish
can be damaged. Be careful
not to spill brake fluid on the
vehicle. If you do, wash it off
immediately.
Battery
Refer to the replacement number
shown on the original battery label
when a new battery is needed.
See Engine Compartment Overview
on page 10‑6 for battery location.
{DANGER
Battery posts, terminals, and
related accessories contain lead
and lead compounds, chemicals
known to the State of California
to cause cancer and reproductive
harm. Wash hands after handling.
Page 294 of 414
Black plate (32,1)Chevrolet Camaro Owner Manual - 2011
10-32 Vehicle Care
Vehicle Storage
{WARNING
Batteries have acid that can burn
you and gas that can explode.
You can be badly hurt if you are
not careful. SeeJump Starting on
page 10‑91 for tips on working
around a battery without
getting hurt.
Infrequent Usage: Remove the
black, negative (−) cable from the
battery to keep the battery from
running down.
Extended Storage: Remove the
black, negative (−) cable from the
battery or use a battery trickle
charger.
Starter Switch Check
{WARNING
When you are doing this
inspection, the vehicle could
move suddenly. If the vehicle
moves, you or others could be
injured.
1. Before starting this check, be sure there is enough room
around the vehicle.
2. Firmly apply both the parking brake and the regular brake.
See Parking Brake on
page 9‑37.
Do not use the accelerator
pedal, and be ready to turn off
the engine immediately if it
starts. 3. For automatic transmission
vehicles, try to start the engine
in each gear. The vehicle
should start only in P (Park) or
N (Neutral). If the vehicle starts
in any other position, contact
your dealer for service.
For manual transmission
vehicles, put the shift lever in
Neutral, push the clutch pedal
down halfway, and try to start
the engine. The vehicle should
start only when the clutch pedal
is pushed down all the way to
the floor. If the vehicle starts
when the clutch pedal is not
pushed all the way down,
contact your dealer for service.
Page 295 of 414
Black plate (33,1)Chevrolet Camaro Owner Manual - 2011
Vehicle Care 10-33
Automatic Transmission
Shift Lock Control
Function Check
{WARNING
When you are doing this
inspection, the vehicle could
move suddenly. If the vehicle
moves, you or others could be
injured.
1. Before starting this check, be sure there is enough room
around the vehicle. It should
be parked on a level surface. 2. Firmly apply the parking
brake. See Parking Brake on
page 9‑37.
Be ready to apply the regular
brake immediately if the vehicle
begins to move.
3. With the engine off, turn the ignition on, but do not start the
engine. Without applying the
regular brake, try to move the
shift lever out of P (Park) with
normal effort. If the shift lever
moves out of P (Park), contact
your dealer for service.
Ignition Transmission
Lock Check
While parked, and with the parking
brake set, try to turn the ignition to
LOCK/OFF in each shift lever
position.
.The ignition should turn to
LOCK/OFF only when the shift
lever is in P (Park).
.The ignition key should come
out only in LOCK/OFF.
Contact your dealer if service is
required.
Page 296 of 414
Black plate (34,1)Chevrolet Camaro Owner Manual - 2011
10-34 Vehicle Care
Park Brake and P (Park)
Mechanism Check
{WARNING
When you are doing this check,
the vehicle could begin to move.
You or others could be injured
and property could be damaged.
Make sure there is room in front
of the vehicle in case it begins to
roll. Be ready to apply the regular
brake at once should the vehicle
begin to move.Park on a fairly steep hill, with the
vehicle facing downhill. Keeping
your foot on the regular brake,
set the parking brake.
.To check the parking brake's
holding ability: With the engine
running and the transmission in
N (Neutral), slowly remove foot
pressure from the regular brake
pedal. Do this until the vehicle is
held by the parking brake only.
.To check the P (Park)
mechanism's holding ability:
With the engine running, shift
to P (Park). Then release the
parking brake followed by the
regular brake.
Contact your dealer if service is
required.
Wiper Blade Replacement
Windshield wiper blades should be
inspected for wear and cracking.
See Scheduled Maintenance on
page 11‑2 for more information.
Replacement blades come in
different types and are removed
in different ways. For proper type
and length, see Maintenance
Replacement Parts on page 11‑9.
Page 297 of 414
Black plate (35,1)Chevrolet Camaro Owner Manual - 2011
Vehicle Care 10-35
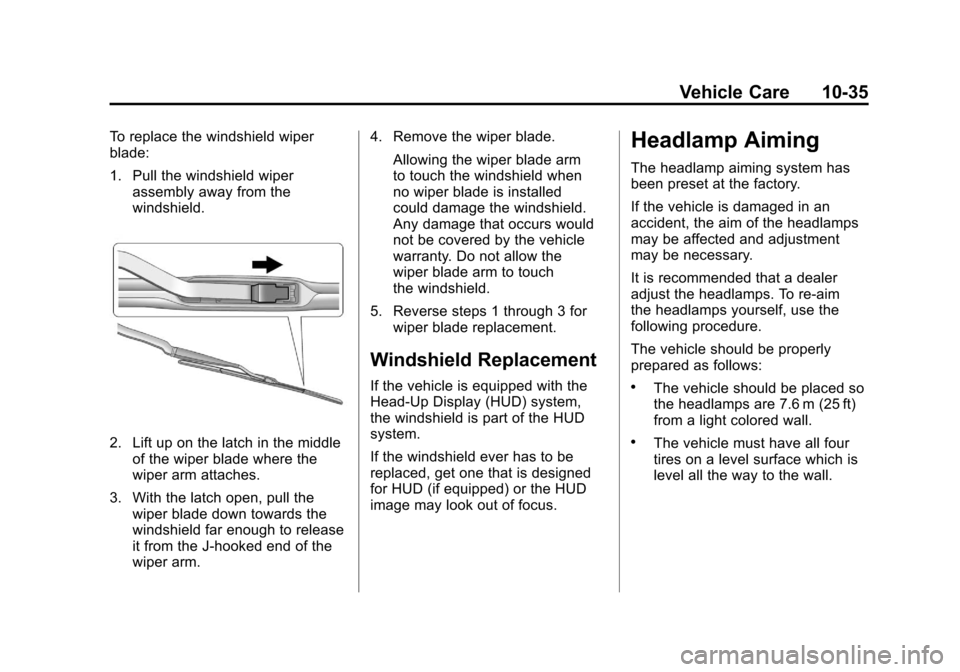
To replace the windshield wiper
blade:
1. Pull the windshield wiperassembly away from the
windshield.
2. Lift up on the latch in the middleof the wiper blade where the
wiper arm attaches.
3. With the latch open, pull the wiper blade down towards the
windshield far enough to release
it from the J-hooked end of the
wiper arm. 4. Remove the wiper blade.
Allowing the wiper blade arm
to touch the windshield when
no wiper blade is installed
could damage the windshield.
Any damage that occurs would
not be covered by the vehicle
warranty. Do not allow the
wiper blade arm to touch
the windshield.
5. Reverse steps 1 through 3 for wiper blade replacement.
Windshield Replacement
If the vehicle is equipped with the
Head-Up Display (HUD) system,
the windshield is part of the HUD
system.
If the windshield ever has to be
replaced, get one that is designed
for HUD (if equipped) or the HUD
image may look out of focus.
Headlamp Aiming
The headlamp aiming system has
been preset at the factory.
If the vehicle is damaged in an
accident, the aim of the headlamps
may be affected and adjustment
may be necessary.
It is recommended that a dealer
adjust the headlamps. To re-aim
the headlamps yourself, use the
following procedure.
The vehicle should be properly
prepared as follows:
.The vehicle should be placed so
the headlamps are 7.6 m (25 ft)
from a light colored wall.
.The vehicle must have all four
tires on a level surface which is
level all the way to the wall.
Page 298 of 414
Black plate (36,1)Chevrolet Camaro Owner Manual - 2011
10-36 Vehicle Care
.The vehicle should be placed so
it is perpendicular to the wall or
other flat surface.
.The vehicle should not have any
snow, ice, or mud on it.
.The vehicle should be fully
assembled and all other work
stopped while headlamp aiming
is being performed.
.The vehicle should be normally
loaded with a full tank of fuel and
one person or 75 kg (160 lbs)
sitting on the driver seat.
.Tires should be properly inflated.
Headlamp aiming is done with the
vehicle's low-beam headlamps.
The high-beam headlamps will be
correctly aimed if the low-beam
headlamps are aimed properly. To adjust the vertical aim:
1. Open the hood. See
Hood on
page 10‑5 for more information.
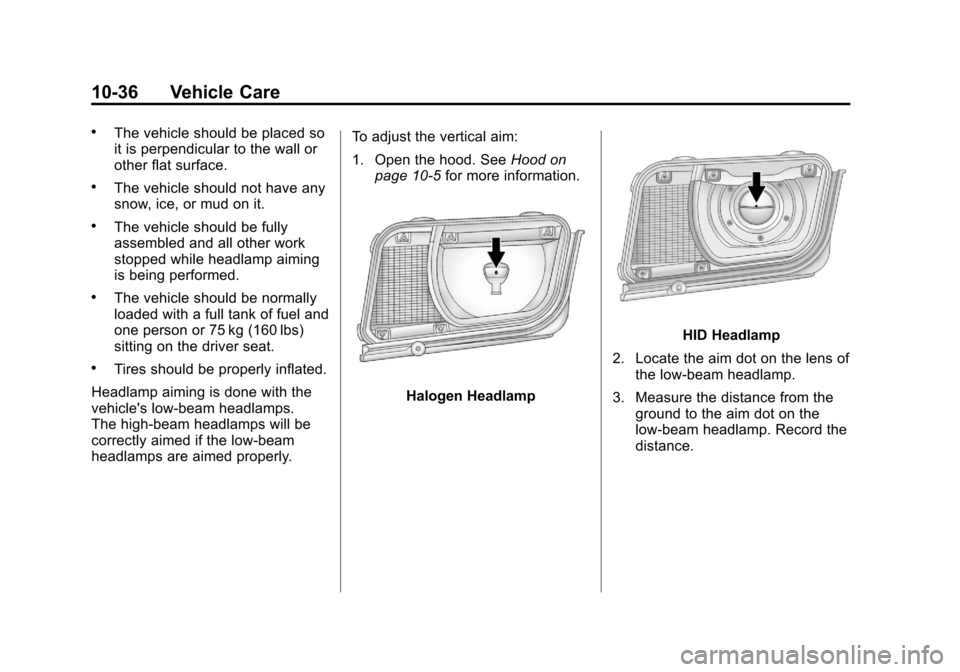
Halogen Headlamp
HID Headlamp
2. Locate the aim dot on the lens of the low‐beam headlamp.
3. Measure the distance from the ground to the aim dot on the
low‐beam headlamp. Record the
distance.
Page 299 of 414
Black plate (37,1)Chevrolet Camaro Owner Manual - 2011
Vehicle Care 10-37
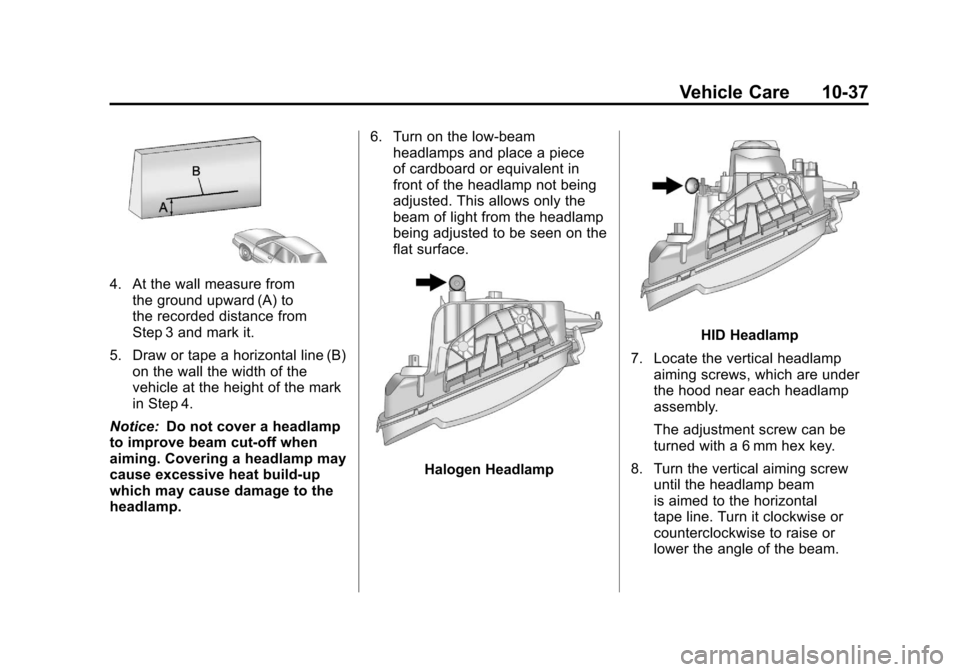
4. At the wall measure fromthe ground upward (A) to
the recorded distance from
Step 3 and mark it.
5. Draw or tape a horizontal line (B) on the wall the width of the
vehicle at the height of the mark
in Step 4.
Notice: Do not cover a headlamp
to improve beam cut-off when
aiming. Covering a headlamp may
cause excessive heat build-up
which may cause damage to the
headlamp. 6. Turn on the low-beam
headlamps and place a piece
of cardboard or equivalent in
front of the headlamp not being
adjusted. This allows only the
beam of light from the headlamp
being adjusted to be seen on the
flat surface.
Halogen Headlamp
HID Headlamp
7. Locate the vertical headlamp aiming screws, which are under
the hood near each headlamp
assembly.
The adjustment screw can be
turned with a 6 mm hex key.
8. Turn the vertical aiming screw until the headlamp beam
is aimed to the horizontal
tape line. Turn it clockwise or
counterclockwise to raise or
lower the angle of the beam.
Page 300 of 414
Black plate (38,1)Chevrolet Camaro Owner Manual - 2011
10-38 Vehicle Care
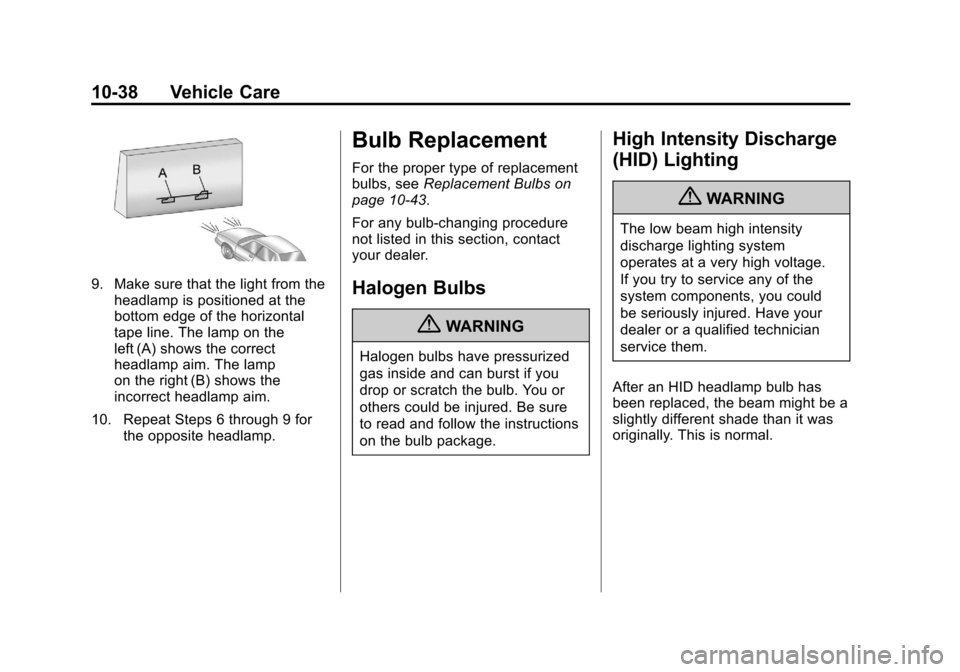
9. Make sure that the light from theheadlamp is positioned at the
bottom edge of the horizontal
tape line. The lamp on the
left (A) shows the correct
headlamp aim. The lamp
on the right (B) shows the
incorrect headlamp aim.
10. Repeat Steps 6 through 9 for the opposite headlamp.
Bulb Replacement
For the proper type of replacement
bulbs, see Replacement Bulbs on
page 10‑43.
For any bulb‐changing procedure
not listed in this section, contact
your dealer.
Halogen Bulbs
{WARNING
Halogen bulbs have pressurized
gas inside and can burst if you
drop or scratch the bulb. You or
others could be injured. Be sure
to read and follow the instructions
on the bulb package.
High Intensity Discharge
(HID) Lighting
{WARNING
The low beam high intensity
discharge lighting system
operates at a very high voltage.
If you try to service any of the
system components, you could
be seriously injured. Have your
dealer or a qualified technician
service them.
After an HID headlamp bulb has
been replaced, the beam might be a
slightly different shade than it was
originally. This is normal.