fuel cap CHEVROLET CAMARO 2016 6.G Owners Manual
[x] Cancel search | Manufacturer: CHEVROLET, Model Year: 2016, Model line: CAMARO, Model: CHEVROLET CAMARO 2016 6.GPages: 383, PDF Size: 6.46 MB
Page 112 of 383
Chevrolet Camaro Owner Manual-Convertible (GMNA-Localizing-U.S./Cana-
da/Mexico-9702260) - 2016 - CRC - 10/28/15
Instruments and Controls 111
Fuel Gauge
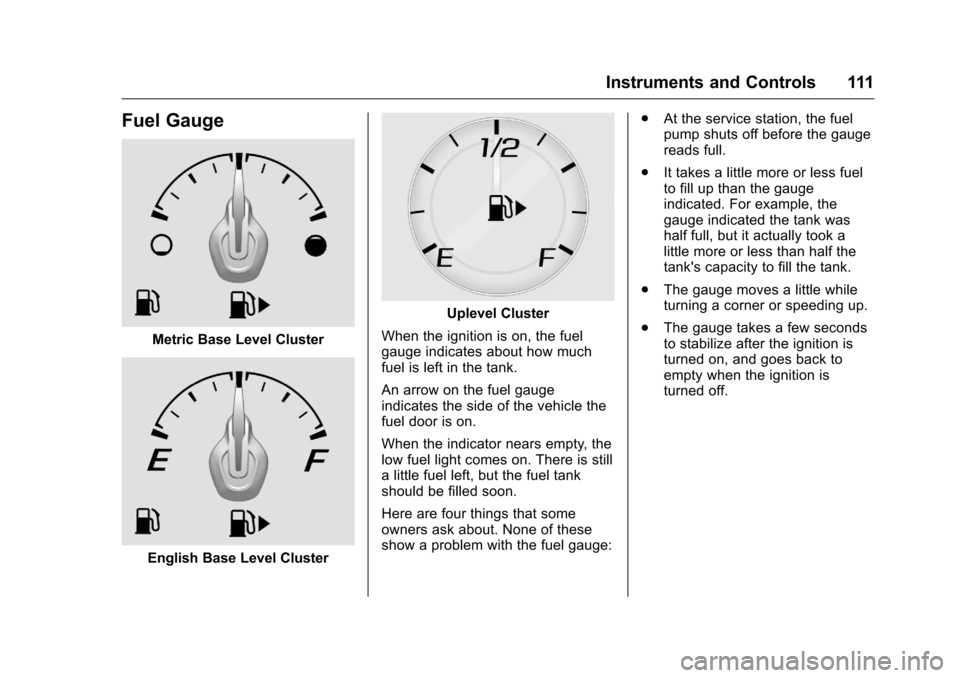
Metric Base Level Cluster
English Base Level Cluster
Uplevel Cluster
When the ignition is on, the fuel
gauge indicates about how much
fuel is left in the tank.
An arrow on the fuel gauge
indicates the side of the vehicle the
fuel door is on.
When the indicator nears empty, the
low fuel light comes on. There is still
a little fuel left, but the fuel tank
should be filled soon.
Here are four things that some
owners ask about. None of these
show a problem with the fuel gauge: .
At the service station, the fuel
pump shuts off before the gauge
reads full.
. It takes a little more or less fuel
to fill up than the gauge
indicated. For example, the
gauge indicated the tank was
half full, but it actually took a
little more or less than half the
tank's capacity to fill the tank.
. The gauge moves a little while
turning a corner or speeding up.
. The gauge takes a few seconds
to stabilize after the ignition is
turned on, and goes back to
empty when the ignition is
turned off.
Page 119 of 383
Chevrolet Camaro Owner Manual-Convertible (GMNA-Localizing-U.S./Cana-
da/Mexico-9702260) - 2016 - CRC - 10/28/15
118 Instruments and Controls
Malfunction Indicator
Lamp (Check Engine
Light)
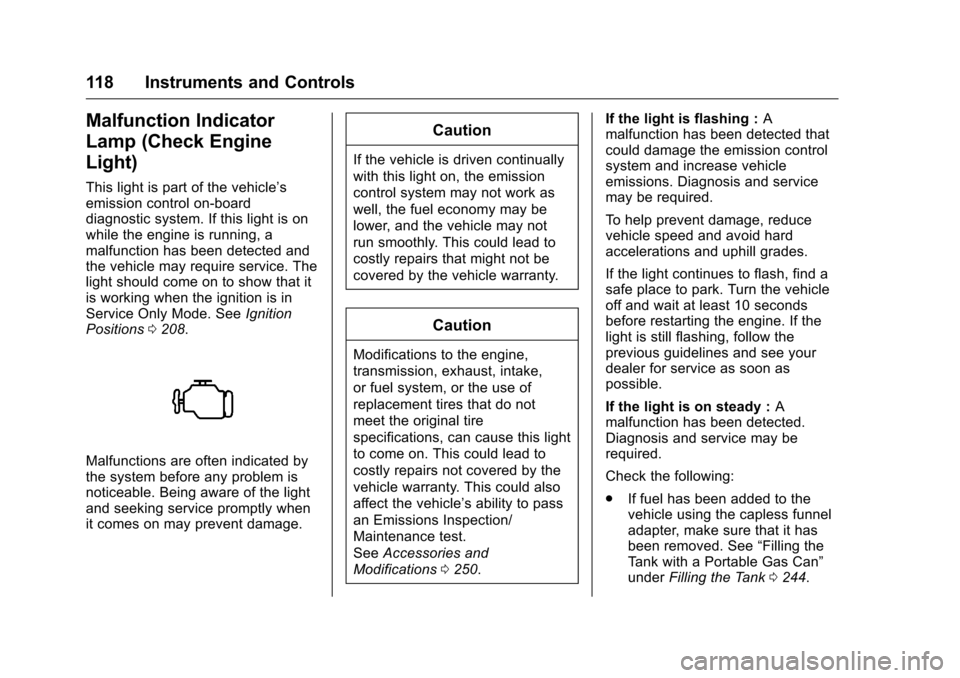
This light is part of the vehicle’s
emission control on-board
diagnostic system. If this light is on
while the engine is running, a
malfunction has been detected and
the vehicle may require service. The
light should come on to show that it
is working when the ignition is in
Service Only Mode. SeeIgnition
Positions 0208.
Malfunctions are often indicated by
the system before any problem is
noticeable. Being aware of the light
and seeking service promptly when
it comes on may prevent damage.
Caution
If the vehicle is driven continually
with this light on, the emission
control system may not work as
well, the fuel economy may be
lower, and the vehicle may not
run smoothly. This could lead to
costly repairs that might not be
covered by the vehicle warranty.
Caution
Modifications to the engine,
transmission, exhaust, intake,
or fuel system, or the use of
replacement tires that do not
meet the original tire
specifications, can cause this light
to come on. This could lead to
costly repairs not covered by the
vehicle warranty. This could also
affect the vehicle’s ability to pass
an Emissions Inspection/
Maintenance test.
See Accessories and
Modifications 0250. If the light is flashing :
A
malfunction has been detected that
could damage the emission control
system and increase vehicle
emissions. Diagnosis and service
may be required.
To help prevent damage, reduce
vehicle speed and avoid hard
accelerations and uphill grades.
If the light continues to flash, find a
safe place to park. Turn the vehicle
off and wait at least 10 seconds
before restarting the engine. If the
light is still flashing, follow the
previous guidelines and see your
dealer for service as soon as
possible.
If the light is on steady : A
malfunction has been detected.
Diagnosis and service may be
required.
Check the following:
. If fuel has been added to the
vehicle using the capless funnel
adapter, make sure that it has
been removed. See “Filling the
Tank with a Portable Gas Can”
under Filling the Tank 0244.
Page 208 of 383
Chevrolet Camaro Owner Manual-Convertible (GMNA-Localizing-U.S./Cana-
da/Mexico-9702260) - 2016 - CRC - 10/28/15
Driving and Operating 207
weight of the driver, passengers,
and cargo should never exceed
the vehicle's capacity weight.
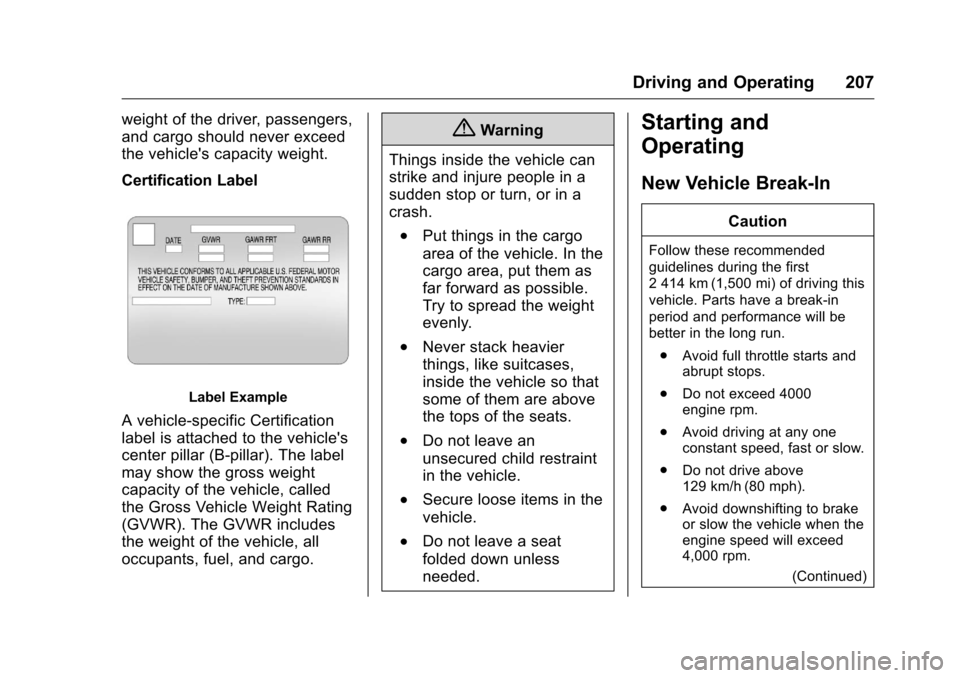
Certification Label
Label Example
A vehicle-specific Certification
label is attached to the vehicle's
center pillar (B-pillar). The label
may show the gross weight
capacity of the vehicle, called
the Gross Vehicle Weight Rating
(GVWR). The GVWR includes
the weight of the vehicle, all
occupants, fuel, and cargo.
{Warning
Things inside the vehicle can
strike and injure people in a
sudden stop or turn, or in a
crash.
.Put things in the cargo
area of the vehicle. In the
cargo area, put them as
far forward as possible.
Try to spread the weight
evenly.
.Never stack heavier
things, like suitcases,
inside the vehicle so that
some of them are above
the tops of the seats.
.Do not leave an
unsecured child restraint
in the vehicle.
.Secure loose items in the
vehicle.
.Do not leave a seat
folded down unless
needed.
Starting and
Operating
New Vehicle Break-In
Caution
Follow these recommended
guidelines during the first
2 414 km (1,500 mi) of driving this
vehicle. Parts have a break-in
period and performance will be
better in the long run. . Avoid full throttle starts and
abrupt stops.
. Do not exceed 4000
engine rpm.
. Avoid driving at any one
constant speed, fast or slow.
. Do not drive above
129 km/h (80 mph).
. Avoid downshifting to brake
or slow the vehicle when the
engine speed will exceed
4,000 rpm.
(Continued)
Page 245 of 383
Chevrolet Camaro Owner Manual-Convertible (GMNA-Localizing-U.S./Cana-
da/Mexico-9702260) - 2016 - CRC - 10/28/15
244 Driving and Operating
Treatment PLUS is the only
gasoline additive recommended by
General Motors. It is available at
your dealer.
Filling the Tank
{Warning
Fuel vapors and fuel fires burn
violently and can cause injury or
death.. To help avoid injuries to you
and others, read and follow
all the instructions on the
fuel pump island.
. Turn off the engine when
refueling.
. Keep sparks, flames, and
smoking materials away
from fuel.
. Do not leave the fuel pump
unattended.
. Do not use a cell phone
while refueling.
(Continued)
Warning (Continued)
.Do not reenter the vehicle
while pumping fuel.
. Keep children away from
the fuel pump and never let
children pump fuel.
. Fuel can spray out if the
refueling nozzle is inserted
too quickly. This spray can
happen if the tank is nearly
full, and is more likely in hot
weather. Insert the refueling
nozzle slowly and wait for
any hiss noise to stop prior
to beginning to flow fuel.
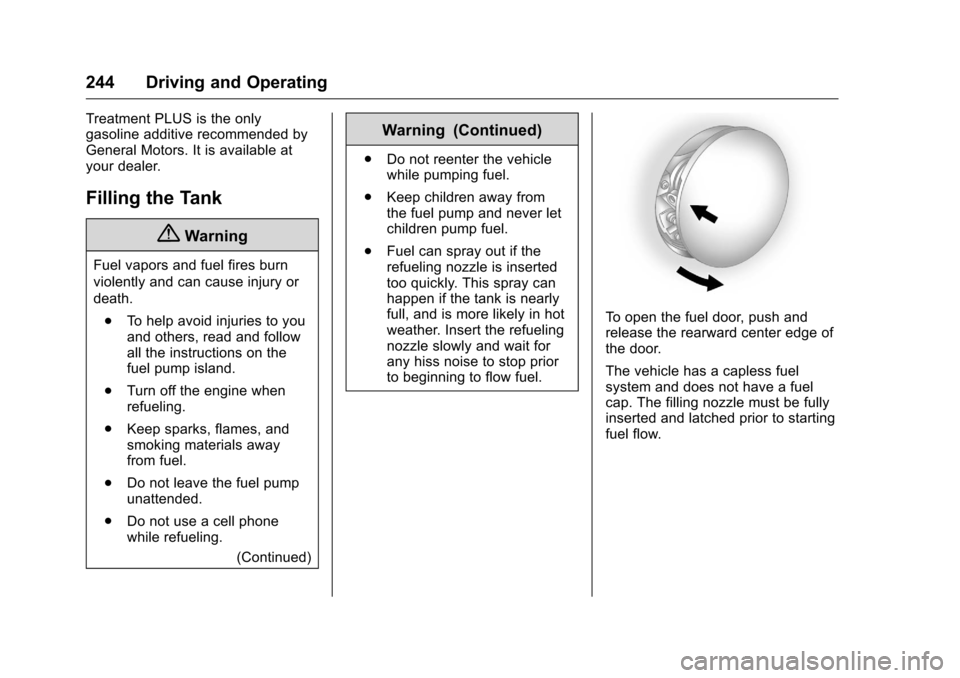
To open the fuel door, push and
release the rearward center edge of
the door.
The vehicle has a capless fuel
system and does not have a fuel
cap. The filling nozzle must be fully
inserted and latched prior to starting
fuel flow.
Page 246 of 383
Chevrolet Camaro Owner Manual-Convertible (GMNA-Localizing-U.S./Cana-
da/Mexico-9702260) - 2016 - CRC - 10/28/15
Driving and Operating 245
{Warning
Overfilling the fuel tank by more
than three clicks of a standard fill
nozzle may cause:. Vehicle performance issues,
including engine stalling and
damage to the fuel system.
. Fuel spills.
. Potential fuel fires.
Be careful not to spill fuel. Wait a
few seconds after you have finished
pumping before removing the
nozzle. Clean fuel from painted
surfaces as soon as possible.
See Exterior Care 0317.
{Warning
If a fire starts while you are
refueling, do not remove the
nozzle. Shut off the flow of fuel by
shutting off the pump or by
notifying the station attendant.
Leave the area immediately. Filling the Tank with a Portable
Gas Can
If the vehicle runs out of fuel and
must be filled from a portable
gas can:
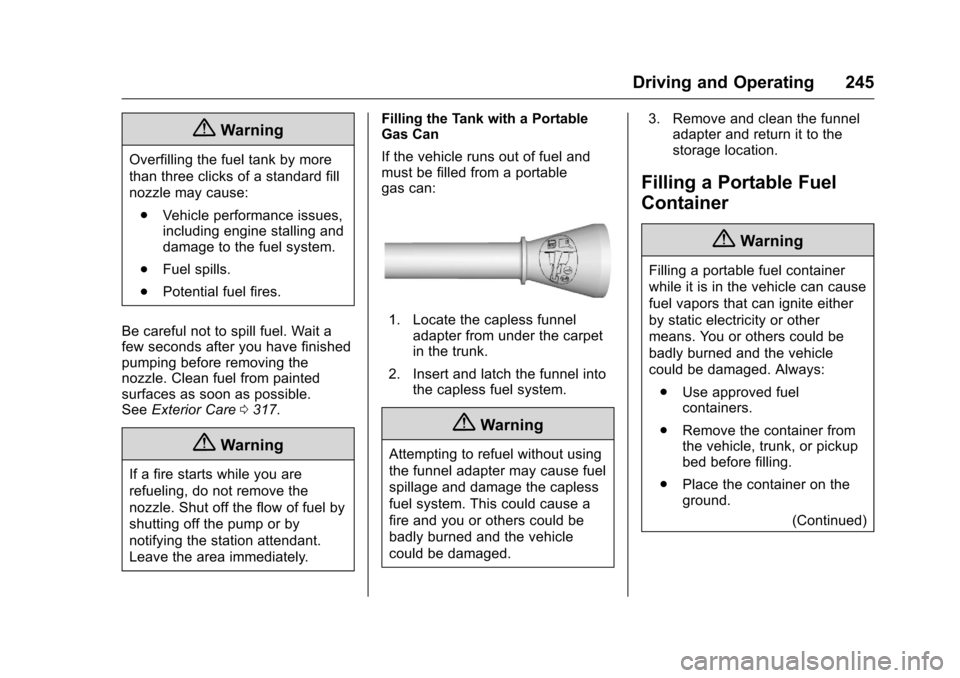
1. Locate the capless funnel
adapter from under the carpet
in the trunk.
2. Insert and latch the funnel into the capless fuel system.
{Warning
Attempting to refuel without using
the funnel adapter may cause fuel
spillage and damage the capless
fuel system. This could cause a
fire and you or others could be
badly burned and the vehicle
could be damaged. 3. Remove and clean the funnel
adapter and return it to the
storage location.
Filling a Portable Fuel
Container
{Warning
Filling a portable fuel container
while it is in the vehicle can cause
fuel vapors that can ignite either
by static electricity or other
means. You or others could be
badly burned and the vehicle
could be damaged. Always:
. Use approved fuel
containers.
. Remove the container from
the vehicle, trunk, or pickup
bed before filling.
. Place the container on the
ground.
(Continued)
Page 258 of 383
Chevrolet Camaro Owner Manual-Convertible (GMNA-Localizing-U.S./Cana-
da/Mexico-9702260) - 2016 - CRC - 10/28/15
Vehicle Care 257
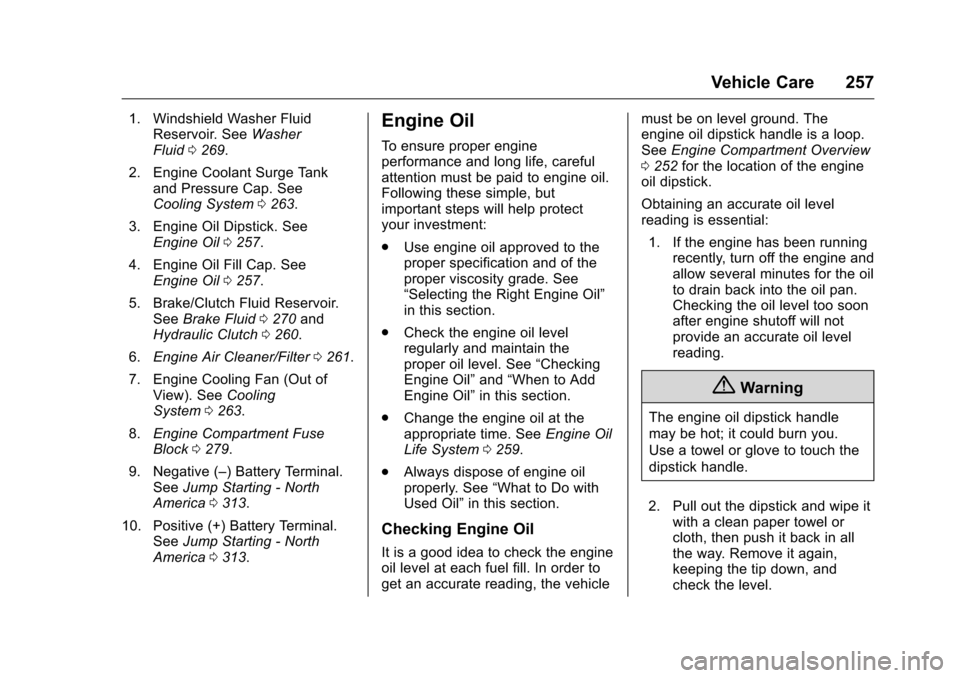
1. Windshield Washer FluidReservoir. See Washer
Fluid 0269.
2. Engine Coolant Surge Tank and Pressure Cap. See
Cooling System 0263.
3. Engine Oil Dipstick. See Engine Oil 0257.
4. Engine Oil Fill Cap. See Engine Oil 0257.
5. Brake/Clutch Fluid Reservoir. See Brake Fluid 0270 and
Hydraulic Clutch 0260.
6. Engine Air Cleaner/Filter 0261.
7. Engine Cooling Fan (Out of View). See Cooling
System 0263.
8. Engine Compartment Fuse
Block 0279.
9. Negative (–) Battery Terminal. See Jump Starting - North
America 0313.
10. Positive (+) Battery Terminal. SeeJump Starting - North
America 0313.Engine Oil
To ensure proper engine
performance and long life, careful
attention must be paid to engine oil.
Following these simple, but
important steps will help protect
your investment:
.
Use engine oil approved to the
proper specification and of the
proper viscosity grade. See
“Selecting the Right Engine Oil”
in this section.
. Check the engine oil level
regularly and maintain the
proper oil level. See “Checking
Engine Oil” and“When to Add
Engine Oil” in this section.
. Change the engine oil at the
appropriate time. See Engine Oil
Life System 0259.
. Always dispose of engine oil
properly. See “What to Do with
Used Oil” in this section.
Checking Engine Oil
It is a good idea to check the engine
oil level at each fuel fill. In order to
get an accurate reading, the vehicle must be on level ground. The
engine oil dipstick handle is a loop.
See
Engine Compartment Overview
0 252 for the location of the engine
oil dipstick.
Obtaining an accurate oil level
reading is essential:
1. If the engine has been running recently, turn off the engine and
allow several minutes for the oil
to drain back into the oil pan.
Checking the oil level too soon
after engine shutoff will not
provide an accurate oil level
reading.
{Warning
The engine oil dipstick handle
may be hot; it could burn you.
Use a towel or glove to touch the
dipstick handle.
2. Pull out the dipstick and wipe it with a clean paper towel or
cloth, then push it back in all
the way. Remove it again,
keeping the tip down, and
check the level.
Page 291 of 383
Chevrolet Camaro Owner Manual-Convertible (GMNA-Localizing-U.S./Cana-
da/Mexico-9702260) - 2016 - CRC - 10/28/15
290 Vehicle Care
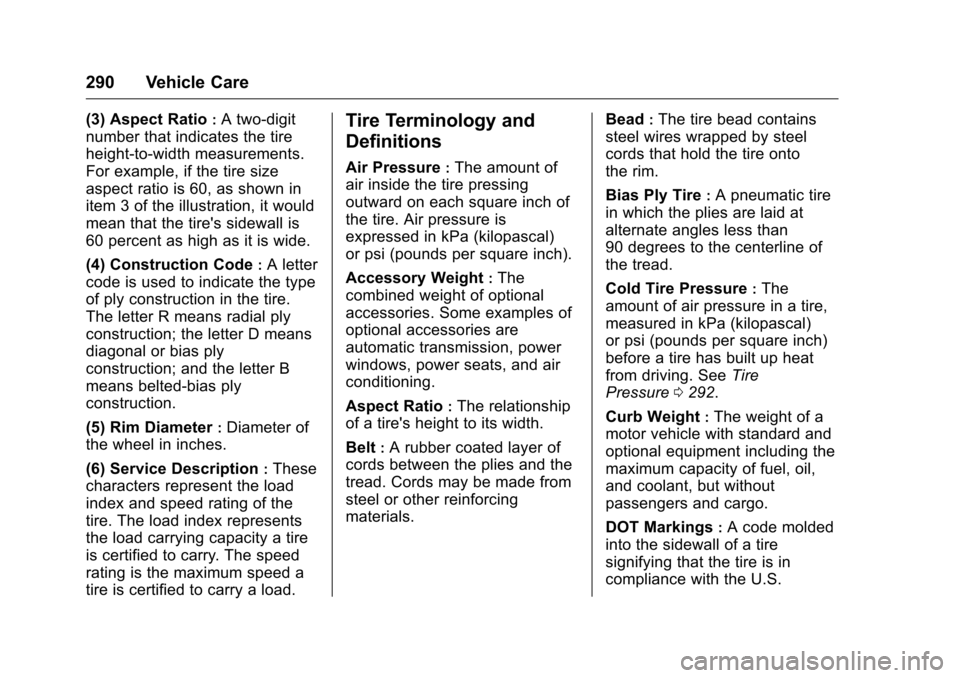
(3) Aspect Ratio:A two-digit
number that indicates the tire
height-to-width measurements.
For example, if the tire size
aspect ratio is 60, as shown in
item 3 of the illustration, it would
mean that the tire's sidewall is
60 percent as high as it is wide.
(4) Construction Code
:A letter
code is used to indicate the type
of ply construction in the tire.
The letter R means radial ply
construction; the letter D means
diagonal or bias ply
construction; and the letter B
means belted-bias ply
construction.
(5) Rim Diameter
:Diameter of
the wheel in inches.
(6) Service Description
:These
characters represent the load
index and speed rating of the
tire. The load index represents
the load carrying capacity a tire
is certified to carry. The speed
rating is the maximum speed a
tire is certified to carry a load.
Tire Terminology and
Definitions
Air Pressure:The amount of
air inside the tire pressing
outward on each square inch of
the tire. Air pressure is
expressed in kPa (kilopascal)
or psi (pounds per square inch).
Accessory Weight
:The
combined weight of optional
accessories. Some examples of
optional accessories are
automatic transmission, power
windows, power seats, and air
conditioning.
Aspect Ratio
:The relationship
of a tire's height to its width.
Belt
:A rubber coated layer of
cords between the plies and the
tread. Cords may be made from
steel or other reinforcing
materials. Bead
:The tire bead contains
steel wires wrapped by steel
cords that hold the tire onto
the rim.
Bias Ply Tire
:A pneumatic tire
in which the plies are laid at
alternate angles less than
90 degrees to the centerline of
the tread.
Cold Tire Pressure
:The
amount of air pressure in a tire,
measured in kPa (kilopascal)
or psi (pounds per square inch)
before a tire has built up heat
from driving. See Tire
Pressure 0292.
Curb Weight
:The weight of a
motor vehicle with standard and
optional equipment including the
maximum capacity of fuel, oil,
and coolant, but without
passengers and cargo.
DOT Markings
:A code molded
into the sidewall of a tire
signifying that the tire is in
compliance with the U.S.
Page 294 of 383
Chevrolet Camaro Owner Manual-Convertible (GMNA-Localizing-U.S./Cana-
da/Mexico-9702260) - 2016 - CRC - 10/28/15
Vehicle Care 293
Caution
Neither tire underinflation nor
overinflation is good.
Underinflated tires, or tires
that do not have enough air,
can result in:
.Tire overloading and
overheating which could
lead to a blowout.
.Premature or
irregular wear.
.Poor handling.
.Reduced fuel economy.
Overinflated tires, or tires that
have too much air, can
result in:
.Unusual wear.
.Poor handling.
.Rough ride.
.Needless damage from
road hazards. The Tire and Loading
Information label on the vehicle
indicates the original equipment
tires and the correct cold tire
inflation pressures. The
recommended pressure is the
minimum air pressure needed to
support the vehicle's maximum
load carrying capacity. See
Vehicle Load Limits
0204.
How the vehicle is loaded
affects vehicle handling and ride
comfort. Never load the vehicle
with more weight than it was
designed to carry.
When to Check
Check the tires once a month
or more.
How to Check
Use a good quality pocket-type
gauge to check the tire
pressure. Proper tire inflation
cannot be determined by looking
at the tire. Check the tire
inflation pressure when the tires
are cold, meaning the vehicle has not been driven for at least
three hours or no more than
1.6 km (1 mi).
Remove the valve cap from the
tire valve stem. Press the tire
gauge firmly onto the valve to
get the pressure measurement.
If the cold tire inflation pressure
matches the recommended
pressure on the Tire and
Loading Information label, no
further adjustment is necessary.
If the inflation pressure is low,
add air until the recommended
pressure is reached. If the
inflation pressure in high, press
on the metal stem in the center
of the tire valve to release air.
Re-check the tire pressure with
the tire gauge.
Put the valve caps back on the
valve stems to keep out dirt and
moisture and prevent leaks. Use
only valve caps designed for the
vehicle by GM. TPMS sensors
Page 295 of 383
Chevrolet Camaro Owner Manual-Convertible (GMNA-Localizing-U.S./Cana-
da/Mexico-9702260) - 2016 - CRC - 10/28/15
294 Vehicle Care
could be damaged and would
not be covered by the vehicle
warranty.
Tire Pressure for
High-Speed Operation
{Warning
Driving at high speeds, 160 km/h
(100 mph) or higher, puts
additional strain on tires.
Sustained high-speed driving
causes excessive heat buildup
and can cause sudden tire failure.
This could cause a crash, and
you or others could be killed.
Some high-speed rated tires
require inflation pressure
adjustment for high-speed
operation. When speed limits and
road conditions allow the vehicle
to be driven at high speeds, make
sure the tires are rated for
high-speed operation, are in
excellent condition, and are set to
the correct cold tire inflation
pressure for the vehicle load.Vehicles with 245/40ZR20 95Y and
275/35ZR20 98Y size tires, have
tires capable of high-speed use.
Make sure vehicles with 245/
40ZR20 95Y and 275/35ZR20 98Y
size tires are inflated to the
recommended cold inflation
pressures before operating the
vehicle at speeds over 160 km/h
(100 mph). See
Vehicle Load Limits
0 204 andTire Pressure 0292.
Return the tires to the
recommended cold tire inflation
pressure when high-speed driving
has ended. See Vehicle Load Limits
0 204 andTire Pressure 0292.
Tire Pressure Monitor
System
The Tire Pressure Monitor System
(TPMS) uses radio and sensor
technology to check tire pressure
levels. The TPMS sensors monitor
the air pressure in your tires and
transmit tire pressure readings to a
receiver located in the vehicle. Each tire, including the spare (if
provided), should be checked
monthly when cold and inflated to
the inflation pressure recommended
by the vehicle manufacturer on the
vehicle placard or tire inflation
pressure label. (If your vehicle has
tires of a different size than the size
indicated on the vehicle placard or
tire inflation pressure label, you
should determine the proper tire
inflation pressure for those tires.)
As an added safety feature, your
vehicle has been equipped with a
tire pressure monitoring system
(TPMS) that illuminates a low tire
pressure telltale when one or more
of your tires is significantly
under-inflated.
Accordingly, when the low tire
pressure telltale illuminates, you
should stop and check your tires as
soon as possible, and inflate them
to the proper pressure. Driving on a
significantly under-inflated tire
causes the tire to overheat and can
lead to tire failure. Under-inflation
also reduces fuel efficiency and tire
Page 321 of 383
Chevrolet Camaro Owner Manual-Convertible (GMNA-Localizing-U.S./Cana-
da/Mexico-9702260) - 2016 - CRC - 10/28/15
320 Vehicle Care
of the panel. If wax, debris, or other
materials create stains on the air
extractor, see your dealer for the
recommended cleaner.
The air extractor may have vent
screens in the openings. Keep
leaves or other debris out of the
vent screens.
Caution
Pushing on the vent screens
could damage them. Do not push
on the screens when clearing.
There is a water deflector on the
underside of the air extractor.
Do not remove it.
Cleaning Exterior Lamps/
Lenses, Emblems, Decals, and
Stripes
Use only lukewarm or cold water, a
soft cloth, and a car washing soap
to clean exterior lamps, lenses,
emblems, decals, and stripes.
Follow instructions under "Washing
the Vehicle" previously in this
section. Lamp covers are made of plastic,
and some have a UV protective
coating. Do not clean or wipe them
when dry.
Do not use any of the following on
lamp covers:
.
Abrasive or caustic agents.
. Washer fluids and other cleaning
agents in higher concentrations
than suggested by the
manufacturer.
. Solvents, alcohols, fuels,
or other harsh cleaners.
. Ice scrapers or other hard items.
. Aftermarket appearance caps or
covers while the lamps are
illuminated, due to excessive
heat generated.
Caution
Failure to clean lamps properly
can cause damage to the lamp
cover that would not be covered
by the vehicle warranty.
Caution
Using wax on low gloss black
finish stripes can increase the
gloss level and create a
non-uniform finish. Clean low
gloss stripes with soap and
water only.
Air Intakes
Clear debris from the air intakes,
between the hood and windshield,
when washing the vehicle.
Windshield and Wiper Blades
Clean the outside of the windshield
with glass cleaner.
Clean rubber blades using lint-free
cloth or paper towel soaked with
windshield washer fluid or a mild
detergent. Wash the windshield
thoroughly when cleaning the
blades. Bugs, road grime, sap, and
a buildup of vehicle wash/wax
treatments may cause wiper
streaking.