driver CHEVROLET CAMARO SS 2010 Owners Manual
[x] Cancel search | Manufacturer: CHEVROLET, Model Year: 2010, Model line: CAMARO SS, Model: CHEVROLET CAMARO SS 2010Pages: 372, PDF Size: 1.91 MB
Page 10 of 372
If the driver door is open whenQis
pressed, all doors lock except
the driver door, if enabled through
the vehicle personalization.
Pressing
Qmay also arm the
theft-deterrent system. See
Anti-Theft Alarm System on
page 1-10.
K(Unlock):Press to unlock
the driver door or all doors, see
“Remote Unlock” underVehicle
Personalization on page 4-38.
The turn signal indicators may flash
and/or the horn may sound to
indicate unlocking, see “Remote
Feedback” underVehicle
Personalization on page 4-38.
Pressing
Kwill disarm the
theft-deterrent system. See
Anti-Theft Alarm System on
page 1-10.
V(Remote Trunk Release):
Press and hold to unlock the trunk.
7(Vehicle Locator/Panic Alarm):
Press and release one time to locate
the vehicle. The exterior lamps flash
and the horn chirps.
Press and hold
7for at least
two seconds to sound the panic
alarm. The horn sounds and the turn
signals flash until
7is pressed again
or the key is placed in the ignition
and turned to ON/RUN.
/(Remote Vehicle Start):For
vehicles with this feature, press
Q
and then/to start the engine from
outside the vehicle using the RKE
transmitter. SeeRemote Vehicle
Start on page 1-5for additional
information.
Programming Transmitters to
the Vehicle
Only RKE transmitters programmed
to this vehicle will work. If a
transmitter is lost or stolen, a
replacement can be purchased
and programmed through your
dealer/retailer. When the
replacement transmitter is
programmed to this vehicle, all
remaining transmitters must also be
reprogrammed. Any lost or stolen
transmitters will no longer work once
the new transmitter is programmed.
Battery Replacement
Replace the battery if the Replace
Battery in Remote Key message
displays in the DIC. See “Replace
Battery in Remote Key” under
Key and Lock Messages on
page 4-33.
The battery is not rechargeable.
See your dealer/retailer to replace
the battery.
1-4 Keys, Doors and Windows
Page 14 of 372

Lockout Protection
The vehicle can be programmed to
prevent lockout if set in
personalization.
If the driver door is open and the
RKE lock button is pressed,
the driver door will not lock.
When the driver door is opened,
and the key is in the ignition,
a reminder chime sounds
continuously. The vehicle remains
locked only when both doors
are closed. SeeVehicle
Personalization on page 4-38.
Doors
Trunk
{WARNING
Exhaust gases can enter the
vehicle if it is driven with the
liftgate, trunk/hatch open, or with
any objects that pass through the
seal between the body and the
trunk/hatch or liftgate. Engine
exhaust contains Carbon
Monoxide (CO) which cannot be
seen or smelled. It can cause
unconsciousness and even death.
(Continued)
WARNING (Continued)
If the vehicle must be driven with
the liftgate, or trunk/hatch open:
•Close all of the windows.
•Fully open the air outlets on
or under the instrument
panel.
•Adjust the Climate Control
system to a setting that
brings in only outside air and
set the fan speed to the
highest setting. See Climate
Control System in the Index.
•If the vehicle has a power
liftgate, disable the power
liftgate function.
For more information about
carbon monoxide, seeEngine
Exhaust on page 8-25.
1-8 Keys, Doors and Windows
Page 15 of 372
Remote Trunk Release
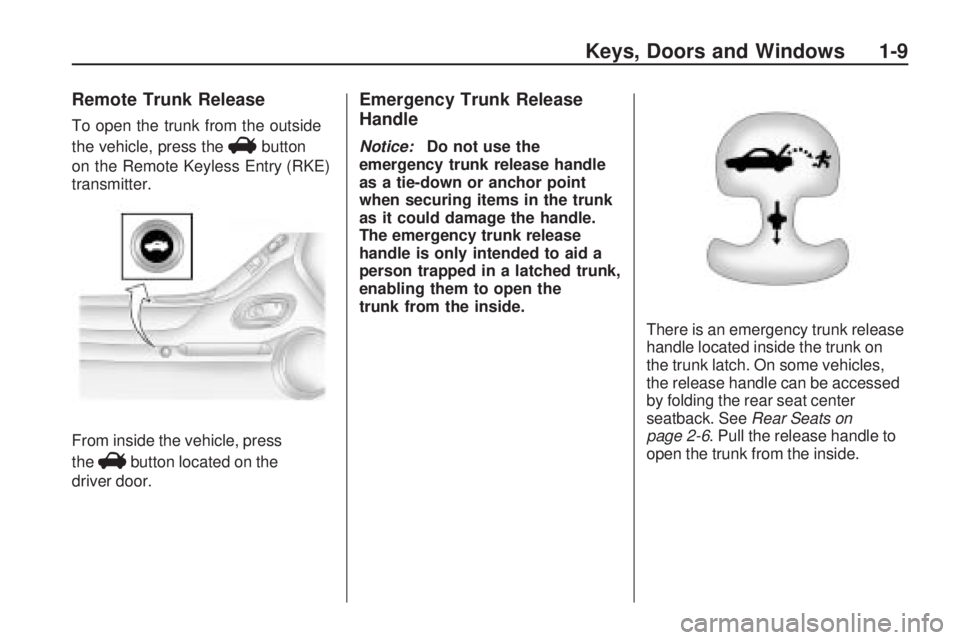
To open the trunk from the outside
the vehicle, press the
Vbutton
on the Remote Keyless Entry (RKE)
transmitter.
From inside the vehicle, press
the
Vbutton located on the
driver door.
Emergency Trunk Release
Handle
Notice:Do not use the
emergency trunk release handle
as a tie-down or anchor point
when securing items in the trunk
as it could damage the handle.
The emergency trunk release
handle is only intended to aid a
person trapped in a latched trunk,
enabling them to open the
trunk from the inside.
There is an emergency trunk release
handle located inside the trunk on
the trunk latch. On some vehicles,
the release handle can be accessed
by folding the rear seat center
seatback. SeeRear Seats on
page 2-6. Pull the release handle to
open the trunk from the inside.
Keys, Doors and Windows 1-9
Page 18 of 372

Exterior Mirrors
Convex Mirrors
{WARNING
A convex mirror can make things,
like other vehicles, look farther
away than they really are. If you
cut too sharply into the right lane,
you could hit a vehicle on the
right. Check the inside mirror or
glance over your shoulder before
changing lanes.
The passenger side mirror is convex
shaped. A convex mirror’s surface
is curved so more can be seen from
the driver seat.
Power Mirrors
Vehicles with outside power mirrors
have controls located on the
driver door armrest.
To adjust each mirror:
1. Press the switch to select the
driver or passenger side
mirror.
2. Press one of the four sides on
the
i(control pad) to adjust
the mirror.3. Adjust each outside mirror so
that a little of the vehicle and
the area behind it can be seen.
Heated Mirrors
For vehicles with heated mirrors:
<(Rear Window Defogger):
Press to heat the mirrors.
See “Rear Window Defogger”
underClimate Control Systems
on page 7-1for more information.
Automatic Dimming
Mirror
Vehicles with automatic dimming
outside mirrors will adjust for
the glare of headlamps behind you.
1-12 Keys, Doors and Windows
Page 20 of 372
Windows
{WARNING
Leaving children, helpless adults,
or pets in a vehicle with the
windows closed is dangerous.
They can be overcome by the
extreme heat and suffer
permanent injuries or even death
from heat stroke. Never leave a
child, a helpless adult, or a pet
alone in a vehicle, especially with
the windows closed in warm or
hot weather.
Power Windows
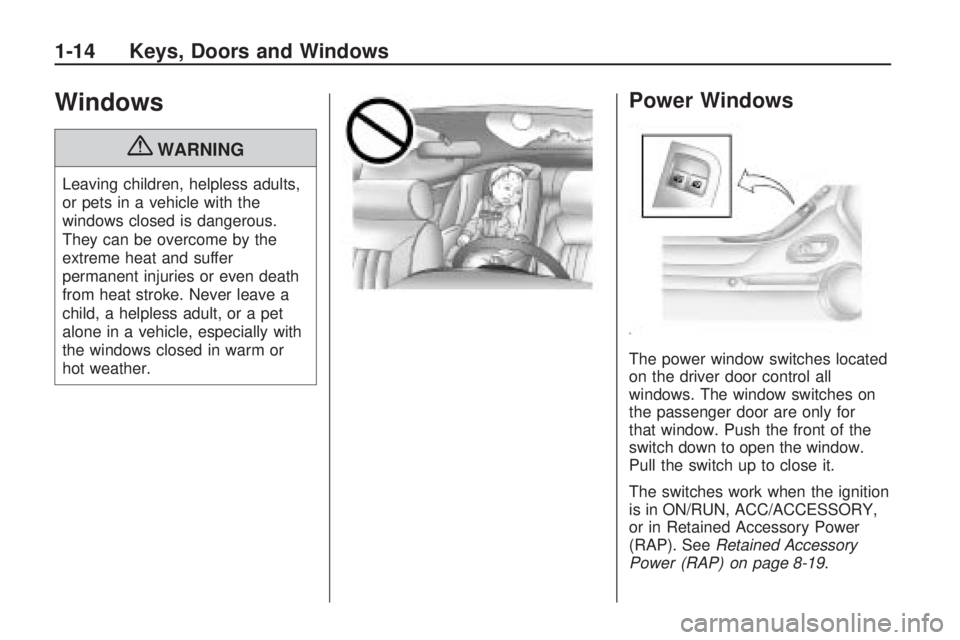
The power window switches located
on the driver door control all
windows. The window switches on
the passenger door are only for
that window. Push the front of the
switch down to open the window.
Pull the switch up to close it.
The switches work when the ignition
is in ON/RUN, ACC/ACCESSORY,
or in Retained Accessory Power
(RAP). SeeRetained Accessory
Power (RAP) on page 8-19.
1-14 Keys, Doors and Windows
Page 21 of 372

Window Indexing
This automatically lowers the
window a small amount when the
door is opened. When the door
is closed, the window will raise fully.
If the vehicle loses power or the
window freezes, this feature may not
work. From outside the vehicle,
close the door and push the window
inward so that the glass goes
under the molding.
If the “Open, Then Close Driver
Window” or “Open, Then Close
Passenger Window” messages are
displayed on the Driver Information
Center (DIC), follow the procedure
for Programming the Power
Windows later in this section.
See alsoDriver Information
Center (DIC) on page 4-27.
Express Window Operation
The front window switches have an
express-up or down feature that
lowers or raises the window without
holding the switch. Pull the switch
up or press it down all the way and
release it. Stop the window by
pressing or pulling the switch.
Express Window Anti-Pinch
Feature
When express-up is active, the
window will auto-reverse if there is
an obstruction or severe icing.
The window returns to normal
operation after the obstruction or
condition is removed.
{WARNING
If express override is activated,
the window will not reverse
automatically. You or others could
be injured and the window could
be damaged. Before you use
express override, make sure that
all people and obstructions are
clear of the window path.
Express Window Anti-Pinch
Override
The anti-pinch feature can be
overridden by holding the window
switch all the way down. The
window will lower for as long as the
switch is held. Once the switch is
released, the express mode is
re-activated. In this mode, the
window can still close on an object
in its path. Use care when using
the override mode.
Keys, Doors and Windows 1-15
Page 27 of 372
Front Seats
Seat Adjustment
{WARNING
You can lose control of the
vehicle if you try to adjust a
manual driver’s seat while the
vehicle is moving. The sudden
movement could startle and
confuse you, or make you push
a pedal when you do not want to.
Adjust the driver’s seat only when
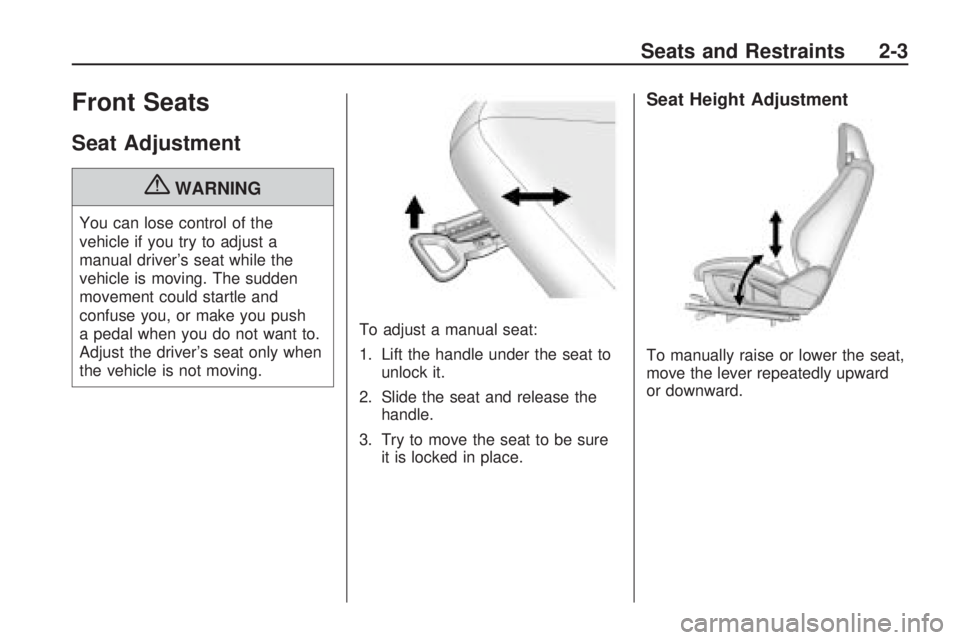
the vehicle is not moving.To adjust a manual seat:
1. Lift the handle under the seat to
unlock it.
2. Slide the seat and release the
handle.
3. Try to move the seat to be sure
it is locked in place.
Seat Height Adjustment
To manually raise or lower the seat,
move the lever repeatedly upward
or downward.
Seats and Restraints 2-3
Page 28 of 372
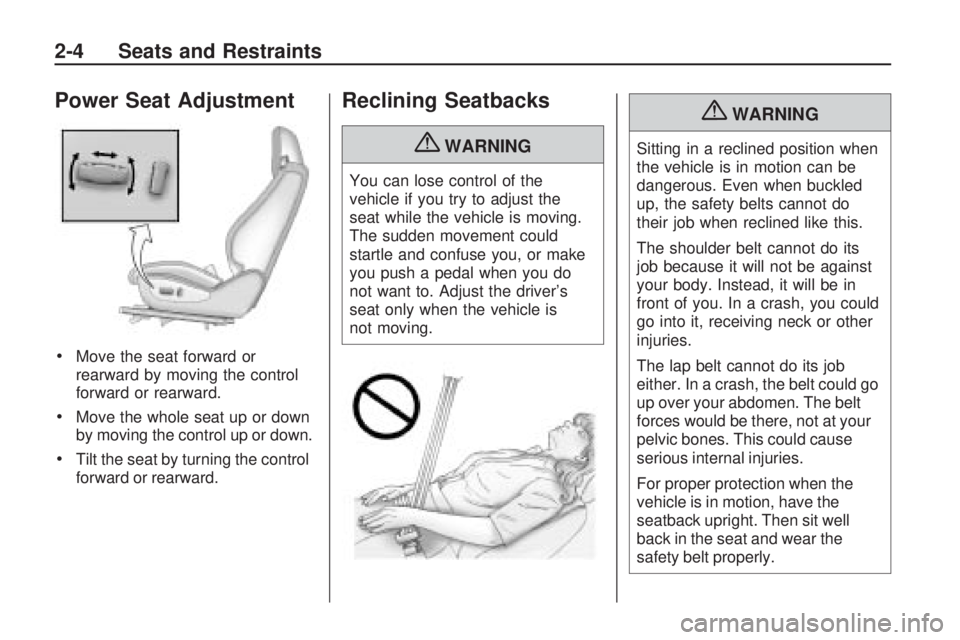
Power Seat Adjustment
•Move the seat forward or
rearward by moving the control
forward or rearward.
•Move the whole seat up or down
by moving the control up or down.
•Tilt the seat by turning the control
forward or rearward.
Reclining Seatbacks
{WARNING
You can lose control of the
vehicle if you try to adjust the
seat while the vehicle is moving.
The sudden movement could
startle and confuse you, or make
you push a pedal when you do
not want to. Adjust the driver’s
seat only when the vehicle is
not moving.
{WARNING
Sitting in a reclined position when
the vehicle is in motion can be
dangerous. Even when buckled
up, the safety belts cannot do
their job when reclined like this.
The shoulder belt cannot do its
job because it will not be against
your body. Instead, it will be in
front of you. In a crash, you could
go into it, receiving neck or other
injuries.
The lap belt cannot do its job
either. In a crash, the belt could go
up over your abdomen. The belt
forces would be there, not at your
pelvic bones. This could cause
serious internal injuries.
For proper protection when the
vehicle is in motion, have the
seatback upright. Then sit well
back in the seat and wear the
safety belt properly.
2-4 Seats and Restraints
Page 29 of 372

Power Reclining Seatbacks
On vehicles with power reclining
seatbacks the control is located
on the outboard side of the seat.
•To recline the seatback,
move the control toward
the rear of the vehicle.
•To raise the seatback, move the
control toward the front of the
vehicle.
Seatback Latches
To access the rear seats pull up on
the latch, located on the rear of the
driver or front passenger seatback.
Fold the seatback forward.
{WARNING
If either seatback is not locked, it
could move forward in a sudden
stop or crash. That could cause
injury to the person sitting there.
Always push and pull on the
seatbacks to be sure they are
locked.
Lift the seatback to return it to the
upright position. Push and pull on the
seatback to make sure it is locked.
Seats and Restraints 2-5
Page 34 of 372
Q:If I am a good driver, and I
never drive far from home,
why should I wear safety
belts?
A:You may be an excellent driver,
but if you are in a crash — even
one that is not your fault — you
and your passenger(s) can be
hurt. Being a good driver does not
protect you from things beyond
your control, such as bad drivers.
Most accidents occur within
25 miles (40 km) of home.
And the greatest number of
serious injuries and deaths
occur at speeds of less than
40 mph (65 km/h).
Safety belts are for everyone.
How to Wear Safety Belts
Properly
This section is only for people of
adult size.
Be aware that there are special
things to know about safety belts
and children. And there are different
rules for smaller children and infants.
If a child will be riding in the vehicle,
seeOlder Children on page 2-35
orInfants and Young Children on
page 2-37. Follow those rules for
everyone’s protection.
It is very important for all occupants
to buckle up. Statistics show that
unbelted people are hurt more
often in crashes than those who
are wearing safety belts.
Occupants who are not buckled up
can be thrown out of the vehicle
in a crash. And they can strike
others in the vehicle who are
wearing safety belts.First, before you or your
passenger(s) wear a safety belt,
there is important information
you should know.
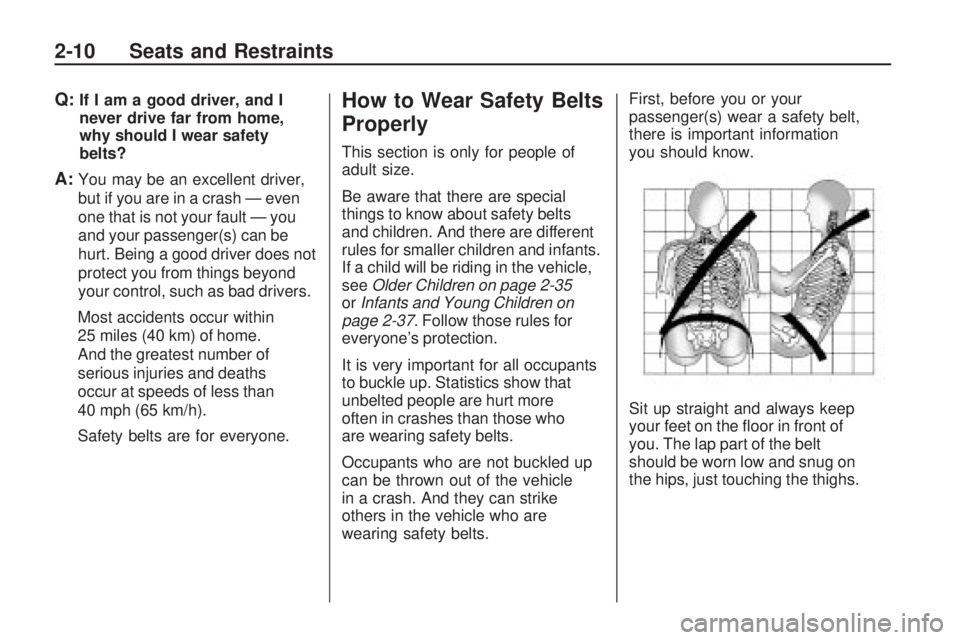
Sit up straight and always keep
your feet on the floor in front of
you. The lap part of the belt
should be worn low and snug on
the hips, just touching the thighs.
2-10 Seats and Restraints