driver CHEVROLET CAMARO SS 2010 Service Manual
[x] Cancel search | Manufacturer: CHEVROLET, Model Year: 2010, Model line: CAMARO SS, Model: CHEVROLET CAMARO SS 2010Pages: 372, PDF Size: 1.91 MB
Page 179 of 372

Drunk Driving
{WARNING
Drinking and then driving is
very dangerous. Your reflexes,
perceptions, attentiveness, and
judgment can be affected by
even a small amount of alcohol.
You can have a serious — or even
fatal — collision if you drive after
drinking. Do not drink and drive or
ride with a driver who has been
drinking. Ride home in a cab; or if
you are with a group, designate a
driver who will not drink.
Death and injury associated with
drinking and driving is a global
tragedy.
Alcohol affects four things that
anyone needs to drive a vehicle:
judgment, muscular coordination,
vision, and attentiveness.Police records show that
almost 40 percent of all motor
vehicle-related deaths involve
alcohol. In most cases, these deaths
are the result of someone who was
drinking and driving. In recent years,
more than 17,000 annual motor
vehicle-related deaths have been
associated with the use of alcohol,
with about 250,000 people injured.
For persons under 21, it is against
the law in every U.S. state to drink
alcohol. There are good medical,
psychological, and developmental
reasons for these laws.
The obvious way to eliminate the
leading highway safety problem
is for people never to drink alcohol
and then drive.
Medical research shows that alcohol
in a person’s system can make crash
injuries worse, especially injuries
to the brain, spinal cord, or heart.This means that when anyone
who has been drinking — driver
or passenger — is in a crash, that
person’s chance of being killed or
permanently disabled is higher than
if the person had not been drinking.
Control of a Vehicle
The following three systems
help to control the vehicle while
driving — brakes, steering, and
accelerator. At times, as when
driving on snow or ice, it is easy to
ask more of those control systems
than the tires and road can provide.
Meaning, you can lose control of the
vehicle. SeeStabiliTrak System on
page 8-36.
Adding non-dealer/non-retailer
accessories can affect vehicle
performance. SeeAccessories
and Modications on page 9-3.
Driving and Operating 8-3
Page 180 of 372

Braking
SeeBrake System Warning Light on
page 4-22.
Braking action involves perception
time and reaction time. Deciding
to push the brake pedal is
perception time. Actually doing
it is reaction time.
Average reaction time is about
three-fourths of a second. But that
is only an average. It might be less
with one driver and as long as two or
three seconds or more with another.
Age, physical condition, alertness,
coordination, and eyesight all play
a part. So do alcohol, drugs,
and frustration. But even in
three-fourths of a second, a vehicle
moving at 100 km/h (60 mph) travels
20 m (66 ft). That could be a lot of
distance in an emergency, so
keeping enough space between
the vehicle and others is important.And, of course, actual stopping
distances vary greatly with the
surface of the road, whether it is
pavement or gravel; the condition of
the road, whether it is wet, dry, or icy;
tire tread; the condition of the brakes;
the weight of the vehicle; and the
amount of brake force applied.
Avoid needless heavy
braking. Some people drive
in spurts — heavy acceleration
followed by heavy braking — rather
than keeping pace with traffic. This
is a mistake. The brakes might not
have time to cool between hard
stops. The brakes will wear out much
faster with a lot of heavy braking.
Keeping pace with the traffic and
allowing realistic following distances
eliminates a lot of unnecessary
braking. That means better braking
and longer brake life.If the engine ever stops while
the vehicle is being driven, brake
normally but do not pump the brakes.
If the brakes are pumped, the pedal
could get harder to push down. If the
engine stops, there will still be some
power brake assist but it will be used
when the brake is applied. Once the
power assist is used up, it can take
longer to stop and the brake pedal
will be harder to push.
Adding non-dealer/non-retailer
accessories can affect vehicle
performance. SeeAccessories
and Modications on page 9-3.
8-4 Driving and Operating
Page 182 of 372

Off-Road Recovery
The vehicle’s right wheels can drop
off the edge of a road onto the
shoulder while driving.
If the level of the shoulder is
only slightly below the pavement,
recovery should be fairly easy.
Ease off the accelerator and then,if there is nothing in the way, steer
so that the vehicle straddles the edge
of the pavement. Turn the steering
wheel 8 to 13 cm, 3 to 5 inches,
(about one-eighth turn) until the right
front tire contacts the pavement
edge. Then turn the steering wheel
to go straight down the roadway.
Loss of Control
Let us review what driving experts
say about what happens when the
three control systems — brakes,
steering, and acceleration — do not
have enough friction where the tires
meet the road to do what the driver
has asked.
In any emergency, do not give up.
Keep trying to steer and constantly
seek an escape route or area of
less danger.
Skidding
In a skid, a driver can lose control of
the vehicle. Defensive drivers avoid
most skids by taking reasonable care
suited to existing conditions, and by
not overdriving those conditions.
But skids are always possible.
The three types of skids correspond
to the vehicle’s three control
systems. In the braking skid, the
wheels are not rolling. In the steering
or cornering skid, too much speed or
steering in a curve causes tires to
slip and lose cornering force. And
in the acceleration skid, too much
throttle causes the driving wheels
to spin.
If the vehicle starts to slide, ease
your foot off the accelerator pedal
and quickly steer the way you want
the vehicle to go. If you start steering
quickly enough, the vehicle may
straighten out. Always be ready
for a second skid if it occurs.
8-6 Driving and Operating
Page 189 of 372

Tire and Loading Information
Label
A vehicle specific Tire and
Loading Information label is
attached to the vehicle’s center
pillar (B-pillar). With the driver’s
door open, you will find the label
attached near the door lock post.The Tire and Loading Information
label shows the number of
occupant seating positions (A),
and the maximum vehicle
capacity weight (B) in kilograms
and pounds.
The Tire and Loading
Information label also shows the
tire size of the original equipment
tires (C) and the recommended
cold tire inflation pressures (D).
For more information on tires and
inflation seeTires on page 9-48
andTire Pressure on page 9-54.
There is also important loading
information on the Certification
label. It tells you the Gross
Vehicle Weight Rating (GVWR)
and the Gross Axle Weight
Rating (GAWR) for the front
and rear axle. See “Certification
Label” later in this section.Steps for Determining Correct
Load Limit
1.Locate the statement
“The combined weight of
occupants and cargo should
never exceed XXX kg or
XXX lbs” on your vehicle
placard.
2.Determine the combined
weight of the driver and
passengers that will be
riding in your vehicle.
3.Subtract the combined weight
of the driver and passengers
from XXX kg or XXX lbs.
4.The resulting figure equals the
available amount of cargo and
luggage load capacity. For
example, if the “XXX” amount
equals 1400 lbs and there will
be five 150 lb passengers in
your vehicle, the amount of
available cargo and luggage
load capacity is 650 lbs
(1400−750 (5 x 150) = 650 lbs).
Label Example
Driving and Operating 8-13
Page 191 of 372
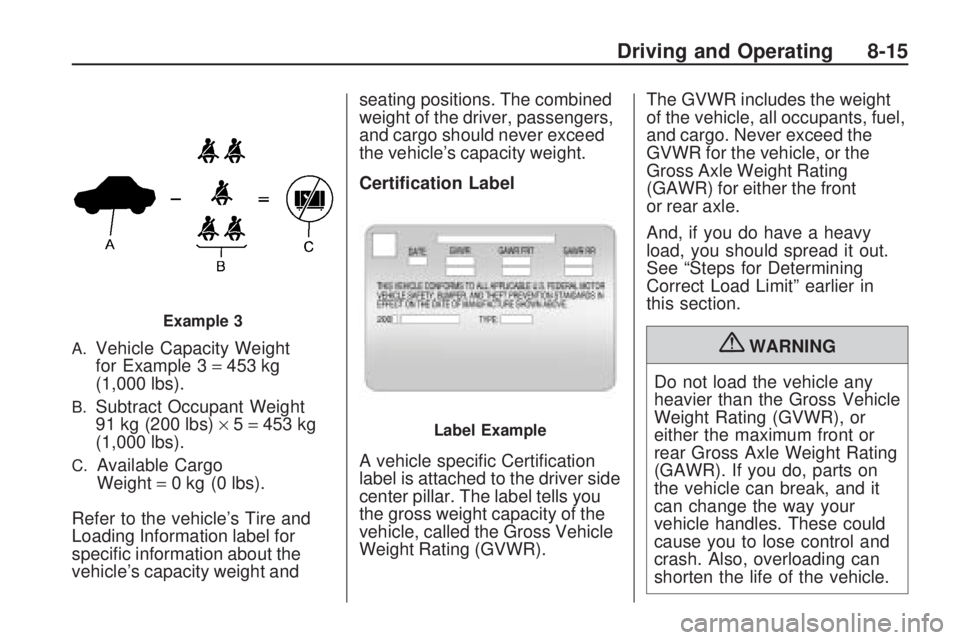
A.Vehicle Capacity Weight
for Example 3=453 kg
(1,000 lbs).
B.Subtract Occupant Weight
91 kg (200 lbs)×5=453 kg
(1,000 lbs).
C.Available Cargo
Weight=0 kg (0 lbs).
Refer to the vehicle’s Tire and
Loading Information label for
specific information about the
vehicle’s capacity weight andseating positions. The combined
weight of the driver, passengers,
and cargo should never exceed
the vehicle’s capacity weight.
Certication Label
A vehicle specific Certification
label is attached to the driver side
center pillar. The label tells you
the gross weight capacity of the
vehicle, called the Gross Vehicle
Weight Rating (GVWR).The GVWR includes the weight
of the vehicle, all occupants, fuel,
and cargo. Never exceed the
GVWR for the vehicle, or the
Gross Axle Weight Rating
(GAWR) for either the front
or rear axle.
And, if you do have a heavy
load, you should spread it out.
See “Steps for Determining
Correct Load Limit” earlier in
this section.
{WARNING
Do not load the vehicle any
heavier than the Gross Vehicle
Weight Rating (GVWR), or
either the maximum front or
rear Gross Axle Weight Rating
(GAWR). If you do, parts on
the vehicle can break, and it
can change the way your
vehicle handles. These could
cause you to lose control and
crash. Also, overloading can
shorten the life of the vehicle.
Example 3
Label Example
Driving and Operating 8-15
Page 194 of 372
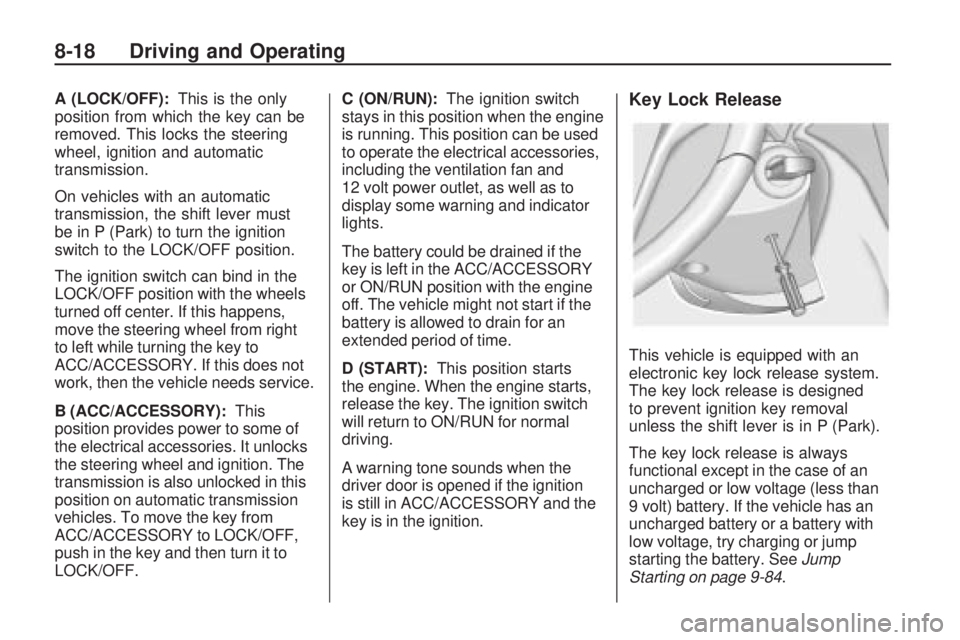
A (LOCK/OFF):This is the only
position from which the key can be
removed. This locks the steering
wheel, ignition and automatic
transmission.
On vehicles with an automatic
transmission, the shift lever must
be in P (Park) to turn the ignition
switch to the LOCK/OFF position.
The ignition switch can bind in the
LOCK/OFF position with the wheels
turned off center. If this happens,
move the steering wheel from right
to left while turning the key to
ACC/ACCESSORY. If this does not
work, then the vehicle needs service.
B (ACC/ACCESSORY):This
position provides power to some of
the electrical accessories. It unlocks
the steering wheel and ignition. The
transmission is also unlocked in this
position on automatic transmission
vehicles. To move the key from
ACC/ACCESSORY to LOCK/OFF,
push in the key and then turn it to
LOCK/OFF.C (ON/RUN):The ignition switch
stays in this position when the engine
is running. This position can be used
to operate the electrical accessories,
including the ventilation fan and
12 volt power outlet, as well as to
display some warning and indicator
lights.
The battery could be drained if the
key is left in the ACC/ACCESSORY
or ON/RUN position with the engine
off. The vehicle might not start if the
battery is allowed to drain for an
extended period of time.
D (START):This position starts
the engine. When the engine starts,
release the key. The ignition switch
will return to ON/RUN for normal
driving.
A warning tone sounds when the
driver door is opened if the ignition
is still in ACC/ACCESSORY and the
key is in the ignition.Key Lock Release
This vehicle is equipped with an
electronic key lock release system.
The key lock release is designed
to prevent ignition key removal
unless the shift lever is in P (Park).
The key lock release is always
functional except in the case of an
uncharged or low voltage (less than
9 volt) battery. If the vehicle has an
uncharged battery or a battery with
low voltage, try charging or jump
starting the battery. SeeJump
Starting on page 9-84.
8-18 Driving and Operating
Page 195 of 372
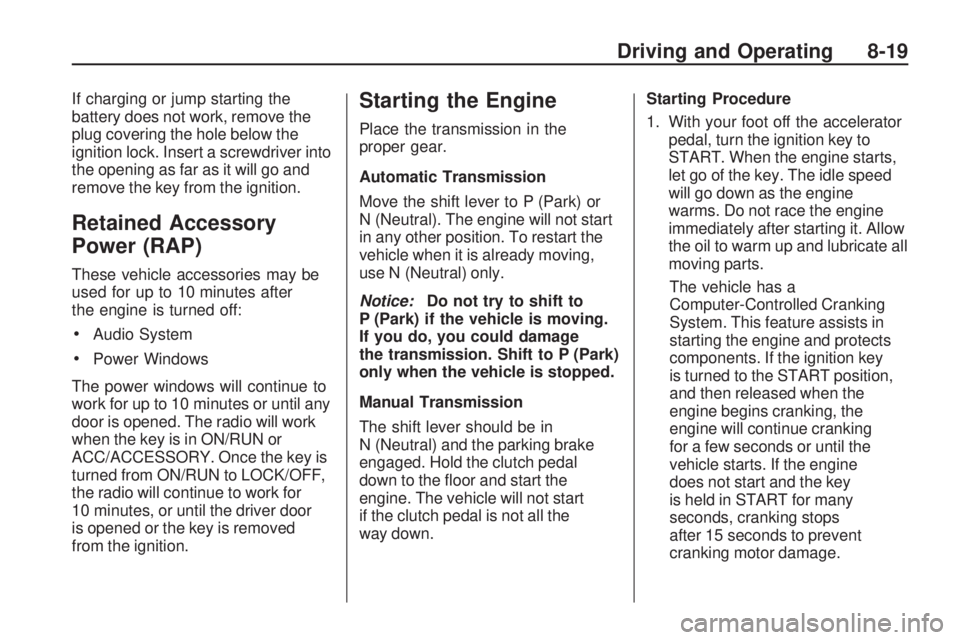
If charging or jump starting the
battery does not work, remove the
plug covering the hole below the
ignition lock. Insert a screwdriver into
the opening as far as it will go and
remove the key from the ignition.
Retained Accessory
Power (RAP)
These vehicle accessories may be
used for up to 10 minutes after
the engine is turned off:
•Audio System
•Power Windows
The power windows will continue to
work for up to 10 minutes or until any
door is opened. The radio will work
when the key is in ON/RUN or
ACC/ACCESSORY. Once the key is
turned from ON/RUN to LOCK/OFF,
the radio will continue to work for
10 minutes, or until the driver door
is opened or the key is removed
from the ignition.
Starting the Engine
Place the transmission in the
proper gear.
Automatic Transmission
Move the shift lever to P (Park) or
N (Neutral). The engine will not start
in any other position. To restart the
vehicle when it is already moving,
use N (Neutral) only.
Notice:Do not try to shift to
P (Park) if the vehicle is moving.
If you do, you could damage
the transmission. Shift to P (Park)
only when the vehicle is stopped.
Manual Transmission
The shift lever should be in
N (Neutral) and the parking brake
engaged. Hold the clutch pedal
down to the floor and start the
engine. The vehicle will not start
if the clutch pedal is not all the
way down.Starting Procedure
1. With your foot off the accelerator
pedal, turn the ignition key to
START. When the engine starts,
let go of the key. The idle speed
will go down as the engine
warms. Do not race the engine
immediately after starting it. Allow
the oil to warm up and lubricate all
moving parts.
The vehicle has a
Computer-Controlled Cranking
System. This feature assists in
starting the engine and protects
components. If the ignition key
is turned to the START position,
and then released when the
engine begins cranking, the
engine will continue cranking
for a few seconds or until the
vehicle starts. If the engine
does not start and the key
is held in START for many
seconds, cranking stops
after 15 seconds to prevent
cranking motor damage.
Driving and Operating 8-19
Page 204 of 372

D (Drive):This position is for
normal driving. It provides the
best fuel economy. If more power
is needed for passing, and the
vehicle is:
•Going less than 35 mph
(56 km/h), push the accelerator
pedal about halfway down.
•Going about 35 mph (56 km/h) or
more, push the accelerator all the
way down.
Powertrain Braking
(V8 and V6 Engines)
When driving on steep descents
in D (Drive) or M (Manual Mode)
where frequent braking is required,
the transmission will shift down a
gear to help hold vehicle speed and
reduce brake wear. If the driver
continues to press the brake, the
transmission will downshift until
3 (Third) gear is reached.
If the brake is released for some
time, the transmission will upshift a
gear. If the road levels out and theaccelerator pedal is pressed, the
transmission will upshift until the
appropriate gear is reached.
4 (Fourth) Gear Hold (V6 Engine)
If, during highway driving, you
wish to pass another vehicle, but
then change your mind (quickly
pushing the accelerator pedal
all the way to the floor and then
immediately releasing the pedal),
the transmission will shift to a lower
gear and then upshift to 4 (Fourth).
This leaves the transmission
prepared with increased
responsiveness for additional driver
input. The passing maneuver can
then be resumed from 4 (Fourth)
gear, or 4 (Fourth) gear hold can
be canceled by lightly pressing
on the accelerator pedal.
Notice:If the vehicle seems
to accelerate slowly or not shift
gears when you go faster, and you
continue to drive the vehicle that
way, you could damage the
transmission. Have the vehicle
serviced right away.M (Manual Mode):This position
engages Sport Mode and allows
the driver to select the range
of gears appropriate for current
driving conditions.
In M (Manual Mode) the
transmission will shift as an
automatic until the Tap Shift
controls are used. Tap Shift
activates driver manual gear
selection.
While driving in M (Manual Mode),
if Tap Shift has not been activated,
the transmission determines when
the vehicle is being driven in a
competitive manner and will select
and hold the transmission in lower
gears and have more noticeable
upshifts for sportier vehicle
performance.
SeeManual Mode on page 8-29
for more information.
8-28 Driving and Operating
Page 205 of 372

Manual Mode
Tap Shift
Tap Shift allows the driver to
manually control the automatic
transmission. To use Tap Shift, the
shift lever must be in M (Manual
Mode). Vehicles with this feature
have flags on the top of the steering
wheel to indicate to the driver the
location of the switches on the back
of the steering wheel. Tap the leftswitch to downshift, and the right
switch to upshift. A display in the
Driver Information Center will show
which gear the vehicle is in.
SeeDriver Information Center (DIC)
on page 4-27for more information.
While using the Tap Shift feature,
the vehicle will have firmer, quicker
shifting for increased performance.
You can use this for sport driving or
when climbing or descending hills, to
stay in gear longer, or to down shift
for more power or engine braking.
The transmission will only allow
you to shift into gears appropriate
for the vehicle speed and engine
Revolutions Per Minute (RPM).
The transmission will not
automatically shift to the next higher
gear if the engine RPM is too high.
If shifting is prevented for any
reason, the message Shift Denied
will appear in the DIC, indicating
that the transmission has notshifted gears. While in the Tap
Shift mode, the transmission will
not automatically downshift on
hard acceleration.
When coasting to a stop, the
V6 transmission will automatically
downshift to 1 (First) gear, and the
V8 transmission will automatically
downshift to 2 (Second) gear.
A 1 (first) gear start can be selected
using the Tap Shift controls on
V8 models When accelerating from
a stop the transmissions will hold
these gears until the driver manually
selects higher gears using the Tap
Shift controls.
When accelerating the vehicle from
a stop in snowy and icy conditions,
you may want to shift into second
gear. A higher gear ratio allows you
to gain more traction on slippery
surfaces.
Driving and Operating 8-29
Page 207 of 372
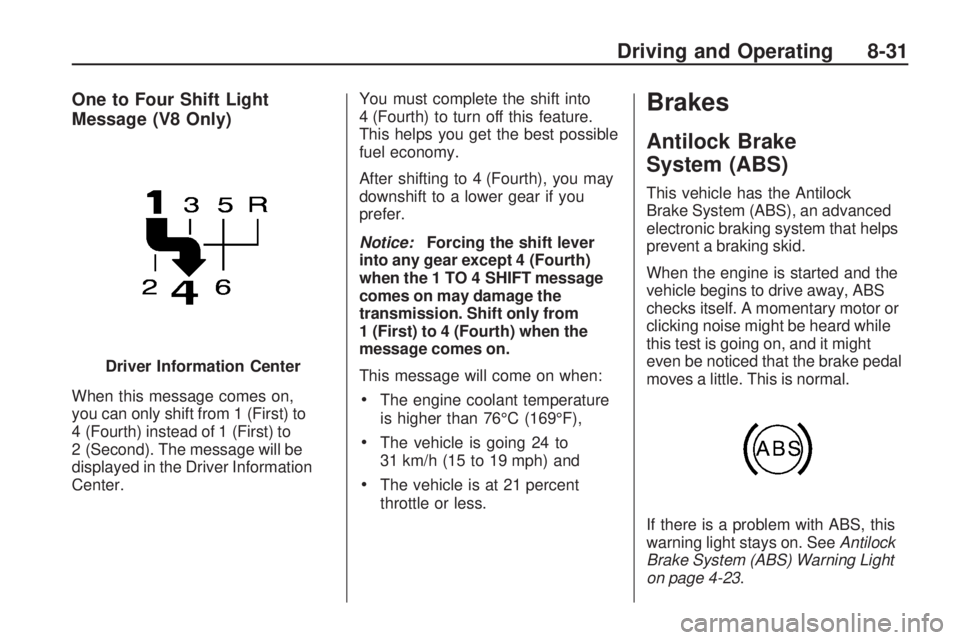
One to Four Shift Light
Message (V8 Only)
When this message comes on,
you can only shift from 1 (First) to
4 (Fourth) instead of 1 (First) to
2 (Second). The message will be
displayed in the Driver Information
Center.You must complete the shift into
4 (Fourth) to turn off this feature.
This helps you get the best possible
fuel economy.
After shifting to 4 (Fourth), you may
downshift to a lower gear if you
prefer.
Notice:Forcing the shift lever
into any gear except 4 (Fourth)
when the 1 TO 4 SHIFT message
comes on may damage the
transmission. Shift only from
1 (First) to 4 (Fourth) when the
message comes on.
This message will come on when:•The engine coolant temperature
is higher than 76°C (169°F),
•The vehicle is going 24 to
31 km/h (15 to 19 mph) and
•The vehicle is at 21 percent
throttle or less.
Brakes
Antilock Brake
System (ABS)
This vehicle has the Antilock
Brake System (ABS), an advanced
electronic braking system that helps
prevent a braking skid.
When the engine is started and the
vehicle begins to drive away, ABS
checks itself. A momentary motor or
clicking noise might be heard while
this test is going on, and it might
even be noticed that the brake pedal
moves a little. This is normal.
If there is a problem with ABS, this
warning light stays on. SeeAntilock
Brake System (ABS) Warning Light
on page 4-23. Driver Information Center
Driving and Operating 8-31