driver CHEVROLET CAMARO SS 2010 User Guide
[x] Cancel search | Manufacturer: CHEVROLET, Model Year: 2010, Model line: CAMARO SS, Model: CHEVROLET CAMARO SS 2010Pages: 372, PDF Size: 1.91 MB
Page 45 of 372

Replacing Safety Belt
System Parts After
a Crash
{WARNING
A crash can damage the
safety belt system in the vehicle.
A damaged safety belt system may
not properly protect the person
using it, resulting in serious injury
or even death in a crash. To help
make sure the safety belt systems
are working properly after a crash,
have them inspected and any
necessary replacements made as
soon as possible.After a minor crash, replacement of
safety belts may not be necessary.
But the safety belt assemblies
that were used during any crash
may have been stressed or
damaged. See your dealer/retailer
to have the safety belt assemblies
inspected or replaced.
New parts and repairs may be
necessary even if the safety belt
system was not being used at
the time of the crash.
Have the safety belt pretensioners
checked if the vehicle has been in a
crash, or if the airbag readiness light
stays on after you start the vehicle or
while you are driving. SeeAirbag
Readiness Light on page 4-17.
Airbag System
The vehicle has the following
airbags:
•A frontal airbag for the driver.
•A frontal airbag for the right front
passenger.
•A seat-mounted side impact
airbag for the driver.
•A seat-mounted side impact
airbag for the right front
passenger.
The vehicle may also have the
following airbags:
•A roof-rail airbag for the driver
and the passenger seated
directly behind the driver.
•A roof-rail airbag for the
right front passenger and the
passenger seated directly behind
the right front passenger.
Seats and Restraints 2-21
Page 46 of 372
All of the airbags in your vehicle will
have the word AIRBAG embossed in
the trim or on an attached label near
the deployment opening.
For frontal airbags, the word
AIRBAG will appear on the middle
part of the steering wheel for
the driver and on the instrument
panel for the right front passenger.
With seat-mounted side impact
airbags, the word AIRBAG
will appear on the side of the
seatback closest to the door.
With roof-rail airbags, the word
AIRBAG will appear along the
headliner or trim.
Airbags are designed to supplement
the protection provided by safety
belts. Even though today’s airbags
are also designed to help reduce
the risk of injury from the force of
an inflating bag, all airbags must
inflate very quickly to do their job.Here are the most important things
to know about the airbag system:
{WARNING
You can be severely injured or
killed in a crash if you are not
wearing your safety belt — even
if you have airbags. Airbags are
designed to work with safety belts,
but do not replace them. Also,
airbags are not designed to deploy
in every crash. In some crashes
safety belts are your only restraint.
SeeWhen Should an Airbag
Inate? on page 2-25.
Wearing your safety belt during a
crash helps reduce your chance of
hitting things inside the vehicle or
being ejected from it. Airbags are
“supplemental restraints” to the
safety belts. Everyone in your
vehicle should wear a safety belt
properly — whether or not there
is an airbag for that person.
{WARNING
Airbags inflate with great force,
faster than the blink of an eye.
Anyone who is up against, or very
close to, any airbag when it inflates
can be seriously injured or killed.
Do not sit unnecessarily close to
the airbag, as you would be if you
were sitting on the edge of your
seat or leaning forward. Safety
belts help keep you in position
before and during a crash. Always
wear your safety belt, even with
airbags. The driver should sit as
far back as possible while still
maintaining control of the vehicle.
Occupants should not lean on or
sleep against the door or side
windows in seating positions with
seat-mounted side impact airbags
and/or roof-rail airbags.
2-22 Seats and Restraints
Page 47 of 372
{WARNING
Children who are up against, or
very close to, any airbag when it
inflates can be seriously injured or
killed. Airbags plus lap-shoulder
belts offer protection for adults and
older children, but not for young
children and infants. Neither the
vehicle’s safety belt system nor its
airbag system is designed for
them. Young children and infants
need the protection that a child
restraint system can provide.
Always secure children properly
in your vehicle. To read how, see
Older Children on page 2-35or
Infants and Young Children on
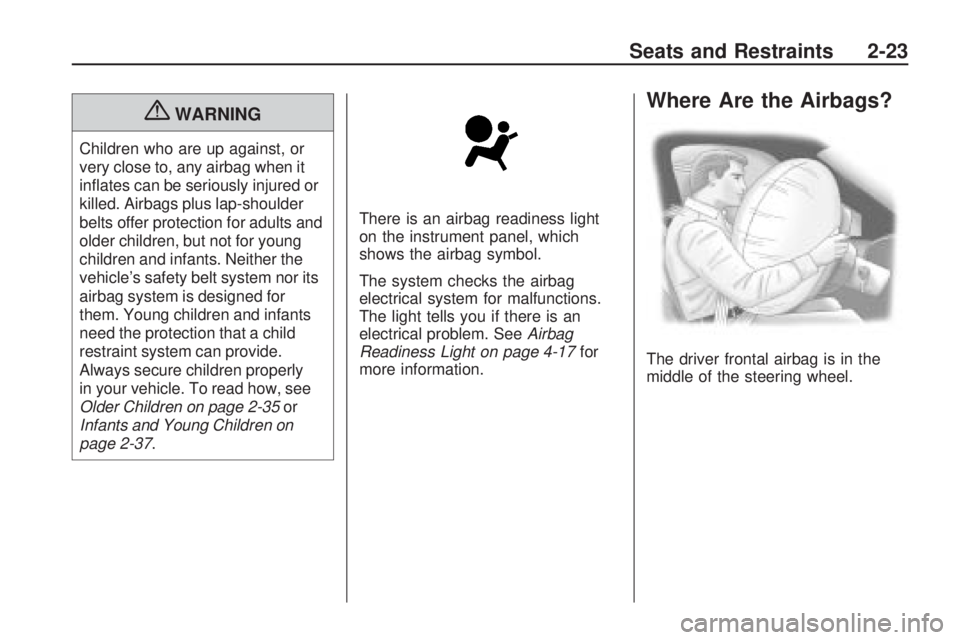
page 2-37.There is an airbag readiness light
on the instrument panel, which
shows the airbag symbol.
The system checks the airbag
electrical system for malfunctions.
The light tells you if there is an
electrical problem. SeeAirbag
Readiness Light on page 4-17for
more information.
Where Are the Airbags?
The driver frontal airbag is in the
middle of the steering wheel.
Seats and Restraints 2-23
Page 48 of 372

The right front passenger frontal
airbag is in the instrument panel on
the passenger side.
The seat-mounted side impact
airbags for the driver and right front
passenger are in the side of the
seatbacks closest to the door.If the vehicle has roof-rail airbags for
the driver, right front passenger, and
second row outboard passengers,
they are in the ceiling above the side
windows.Driver Side shown,
Passenger Side similarDriver Side shown,
Passenger Side similar
2-24 Seats and Restraints
Page 49 of 372
{WARNING
If something is between an
occupant and an airbag, the airbag
might not inflate properly or it might
force the object into that person
causing severe injury or even
death. The path of an inflating
airbag must be kept clear. Do not
put anything between an occupant
and an airbag, and do not attach or
put anything on the steering wheel
hub or on or near any other airbag
covering.
Do not use seat accessories
that block the inflation path of a
seat-mounted side impact airbag.
Never secure anything to the roof
of a vehicle with roof-rail airbags
by routing a rope or tie down
through any door or window
opening. If you do, the path of
an inflating roof-rail airbag will
be blocked.
When Should an Airbag
Inate?
Frontal airbags are designed to
inflate in moderate to severe frontal
or near-frontal crashes to help
reduce the potential for severe
injuries mainly to the driver’s or right
front passenger’s head and chest.
However, they are only designed
to inflate if the impact exceeds
a predetermined deployment
threshold. Deployment thresholds
are used to predict how severe a
crash is likely to be in time for the
airbags to inflate and help restrain
the occupants.
Whether the frontal airbags will
or should deploy is not based on
how fast your vehicle is traveling.
It depends largely on what you hit,
the direction of the impact, and how
quickly your vehicle slows down.Frontal airbags may inflate at
different crash speeds. For example:•If the vehicle hits a stationary
object, the airbags could inflate at
a different crash speed than if the
vehicle hits a moving object.
•If the vehicle hits an object that
deforms, the airbags could inflate
at a different crash speed than if
the vehicle hits an object that
does not deform.
•If the vehicle hits a narrow object
(like a pole), the airbags could
inflate at a different crash speed
than if the vehicle hits a wide
object (like a wall).
•If the vehicle goes into an object
at an angle, the airbags could
inflate at a different crash speed
than if the vehicle goes straight
into the object.
Thresholds can also vary with
specific vehicle design.
Frontal airbags are not intended to
inflate during vehicle rollovers, rear
impacts, or in many side impacts.
Seats and Restraints 2-25
Page 51 of 372
How Does an Airbag
Restrain?
In moderate to severe frontal or
near frontal collisions, even belted
occupants can contact the steering
wheel or the instrument panel. In
moderate to severe side collisions,
even belted occupants can contact
the inside of the vehicle.
Airbags supplement the protection
provided by safety belts. Frontal
airbags distribute the force of the
impact more evenly over the
occupant’s upper body, stopping
the occupant more gradually.
Seat-mounted side impact and
roof-rail airbags distribute the force
of the impact more evenly over the
occupant’s upper body.
But airbags would not help in many
types of collisions, primarily because
the occupant’s motion is not toward
those airbags. SeeWhen Should
an Airbag Inate? on page 2-25
for more information.
Airbags should never be regarded
as anything more than a supplement
to safety belts.
What Will You See After
an Airbag Inates?
After the frontal airbags and
seat-mounted side impact airbags
inflate, they quickly deflate, so
quickly that some people may not
even realize an airbag inflated.
Roof-rail airbags may still be at least
partially inflated for some time after
they deploy. Some components of
the airbag module may be hot for
several minutes. For location of the
airbag modules, seeWhat Makes
an Airbag Inate? on page 2-26.
The parts of the airbag that come
into contact with you may be warm,
but not too hot to touch. There may
be some smoke and dust coming
from the vents in the deflated
airbags. Airbag inflation does not
prevent the driver from seeing out
of the windshield or being able to
steer the vehicle, nor does it prevent
people from leaving the vehicle.
{WARNING
When an airbag inflates, there
may be dust in the air. This dust
could cause breathing problems
for people with a history of asthma
or other breathing trouble.
To avoid this, everyone in the
vehicle should get out as soon
as it is safe to do so. If you have
breathing problems but cannot get
out of the vehicle after an airbag
inflates, then get fresh air by
opening a window or a door. If you
experience breathing problems
following an airbag deployment,
you should seek medical attention.
The vehicle has a feature that may
automatically unlock the doors, turn
the interior lamps on, and turn the
hazard warning flashers on when
the airbags inflate. You can lock the
doors, turn the interior lamps off,
and turn the hazard warning flashers
off by using the controls for those
features.
Seats and Restraints 2-27
Page 52 of 372

In many crashes severe enough
to inflate the airbag, windshields
are broken by vehicle deformation.
Additional windshield breakage
may also occur from the right
front passenger airbag.
•Airbags are designed to inflate
only once. After an airbag inflates,
you will need some new parts for
the airbag system. If you do not
get them, the airbag system will
not be there to help protect you
in another crash. A new system
will include airbag modules and
possibly other parts. The service
manual for your vehicle covers
the need to replace other parts.
•The vehicle has a crash sensing
and diagnostic module which
records information after a crash.
SeeVehicle Data Recording and
Privacy on page 12-14andEvent
Data Recorders on page 12-14.
•Let only qualified technicians work
on the airbag systems. Improper
service can mean that an airbag
system will not work properly.
See your dealer/retailer for
service.
Passenger Sensing
System
The vehicle has a passenger
sensing system for the right front
passenger position. The passenger
airbag status indicator will be
visible on the overhead console
when the vehicle is started.
The words ON and OFF, or the
symbol for on and off, will be
visible during the system check.If you are using remote start to
start the vehicle from a distance,
if equipped, you may not see the
system check. When the system
check is complete, either the word
ON or OFF, or the symbol for on or
off, will be visible. SeePassenger
Airbag Status Indicator on
page 4-18.
The passenger sensing system
will turn off the right front passenger
frontal airbag under certain
conditions. The driver airbags and
roof-rail airbags (if equipped) are not
affected by the passenger sensing
system.
The passenger sensing system
works with sensors that are part
of the right front passenger seat.
The sensors are designed to detect
the presence of a properly-seated
occupant and determine if the right
front passenger frontal airbag should
be enabled (may inflate) or not. United States
Canada
2-28 Seats and Restraints
Page 81 of 372
Instruments and
Controls
Instrument Panel OverviewInstrument Panel Overview......4-4
ControlsSteering Wheel Adjustment.....4-6
Steering Wheel Controls.........4-6
Horn....................................4-7
Windshield Wiper/Washer.......4-7
Compass.............................4-8
Clock...................................4-8
Power Outlets.......................4-9
Warning Lights, Gages,
and Indicators
Warning Lights, Gages,
and Indicators.....................4-9
Instrument Cluster...............4-10
Speedometer......................4-11
Odometer...........................4-11
Trip Odometer.....................4-11
Tachometer........................4-11
Fuel Gage..........................4-11
Engine Oil Pressure Gage......4-12Engine Oil
Temperature Gage.............4-13
Engine Coolant
Temperature Gage.............4-14
Transmission
Temperature Gage.............4-14
Voltmeter Gage...................4-15
Safety Belt Reminders..........4-16
Airbag Readiness Light.........4-17
Passenger Airbag Status
Indicator...........................4-18
Charging System Light.........4-19
Malfunction
Indicator Lamp..................4-19
Brake System Warning
Light................................4-22
Antilock Brake System
(ABS) Warning Light...........4-23
Traction Off Light.................4-23
Traction Control System
(TCS)/StabiliTrak
®Light.......4-24
Traction Control System
(TCS) OFF/StabiliTrak
®OFF
Light................................4-24
Tire Pressure Light..............4-24
Engine Oil Pressure Light.....4-25
Immobilizer Light.................4-26
Fog Lamp Light...................4-26
Taillamp Indicator Light.........4-26
Cruise Control Light.............4-26
Information DisplaysDriver Information
Center (DIC).....................4-27
Vehicle MessagesBattery Voltage and
Charging Messages............4-30
Brake System Messages......4-31
Compass Messages.............4-31
Cruise Control Messages......4-31
Door Ajar Messages............4-31
Engine Cooling System
Messages.........................4-32
Engine Oil Messages...........4-32
Engine Power Messages......4-33
Fuel System Messages........4-33
Key and Lock Messages......4-33
Lamp Messages..................4-33
Object Detection System
Messages.........................4-34
Ride Control System
Messages.........................4-34
Airbag System Messages......4-35
Safety Belt Messages...........4-35
Anti-Theft Alarm System
Messages.........................4-35
Service Vehicle Messages.....4-35
Tire Messages....................4-36
Transmission Messages........4-36
Vehicle Reminder
Messages.........................4-37
Instruments and Controls 4-1
Page 85 of 372
A.Air Vents on page 7-3.
B. Driver Shift Controls
(If Equipped). SeeAutomatic
Transmission on page 8-26.
C.Instrument Cluster on page 4-10.
D.Windshield Wiper/Washer on
page 4-7.
E.AM-FM Radio on page 6-8.
F.Turn and Lane-Change Signals
on page 5-4.Headlamp
High/Low-Beam Changer on
page 5-2.Flash-to-Pass
on page 5-3.Driver Information
Center (DIC) on page 4-27
(If Equipped).G.Cruise Control on page 8-38.
H.Exterior Lamp Controls on
page 5-1.Front Fog Lamps
on page 5-5(If Equipped).
Instrument Panel Illumination
Control on page 5-5.
I.Steering Wheel Adjustment on
page 4-6.
J.Horn on page 4-7.
K.Steering Wheel Controls on
page 4-6.
L.Climate Control Systems on
page 7-1.M.Transmission Temperature
Gage on page 4-14.Voltmeter
Gage on page 4-15.Engine
Oil Temperature Gage on
page 4-13.Engine Oil Pressure
Gage on page 4-12.
N. Shift Lever. SeeShifting Into
Park on page 8-21.
O.Power Outlets on page 4-9.
P.Hazard Warning Flashers on
page 5-4.Power Door Locks
on page 1-7.
Q.Glove Box on page 3-1.
Instruments and Controls 4-5
Page 88 of 372
Compass
The vehicle may have a compass
display on the Driver Information
Center (DIC). The compass is
an OnStar compass and receives its
heading and other information
from OnStar. SeeOnStar
®System
on page 4-42for more information
about the OnStar system.
Clock
The infotainment system controls
are used to access the time
and date settings through the
menu system. SeeOperation on
page 6-4for information about
how to use the menu system.
Setting the Time and Date
1. Press the CONFIG button.
2. Select Time and Date Settings.
3. Select Set Time or Set Date.
4. Turn the MENU/SELECT knob to
adjust the highlighted value.
5. Press the MENU/SELECT knob
to select the next value.
6. To save the time or date and
return to the Time and Date
Settings menu, press the
0BACK button at any time or
press MENU/SELECT knob after
adjusting the minutes or year.
Setting the 12/24 Hour Format
1. Press the CONFIG button.
2. Select Time and Date Settings.
3. Highlight 12/24 Hour Format.
4. Press the MENU/SELECT knob
to select the 12 hour or 24 hour
display format.
Setting the Month & Day
Format
1. Press the CONFIG button.
2. Select Time and Date Settings.
3. Highlight Month & Day Format.
4. Press the MENU/SELECT knob
to select MM/DD (month/day) or
DD/MM (day/month).
Setting the Auto Time Adjust
1. Press the CONFIG button.
2. Select Time and Date Settings.
3. Highlight Auto Time Adjust.
4. Press the MENU/SELECT knob
to turn Auto Time Adjust on or off.
4-8 Instruments and Controls