center console CHEVROLET CAPTIVA SPORT 2013 Owners Manual
[x] Cancel search | Manufacturer: CHEVROLET, Model Year: 2013, Model line: CAPTIVA SPORT, Model: CHEVROLET CAPTIVA SPORT 2013Pages: 374, PDF Size: 6.66 MB
Page 21 of 374
Black plate (17,1)Chevrolet Captiva Sport Owner Manual - 2013 - crc - 11/12/12
In Brief 1-17
Portable Audio Devices The vehicle may have a 3.5 mm
(1/8 in) auxiliary input jack on the
audio faceplate and a USB port in
the center console. Some portable
audio devices such as iPods ®
, MP3
players, and USB storage devices
can be connected to the vehicle
using a 3.5 mm (1/8 in) cable or a
USB cable.
See Auxiliary Devices on page 7 ‑ 19 .
Bluetooth ®
For vehicles with a Bluetooth
system, it allows users with a
Bluetooth-enabled cell phone to
make and receive hands-free calls
using the vehicle ’ s audio system
and controls.
The Bluetooth-enabled cell phone
must be paired with the Bluetooth
system before it can be used in the
vehicle. Not all phones will support
all functions. For more information,
see www.gm.com/bluetooth and
Bluetooth on page 7 ‑ 23 . Steering Wheel Controls
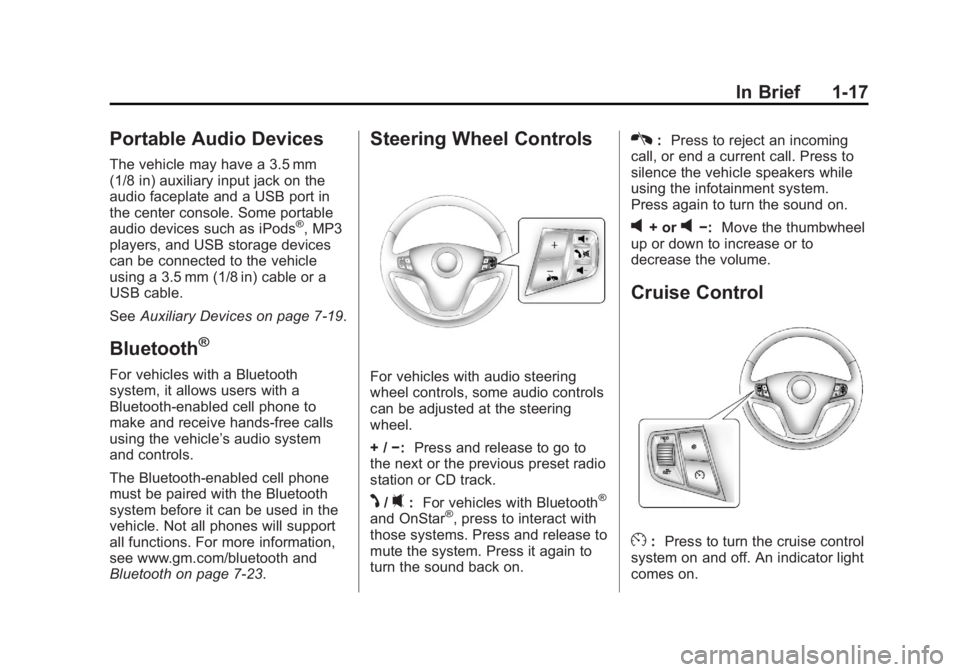
For vehicles with audio steering
wheel controls, some audio controls
can be adjusted at the steering
wheel.
+ / − : Press and release to go to
the next or the previous preset radio
station or CD track.
J /
0 : For vehicles with Bluetooth ®
and OnStar ®
, press to interact with
those systems. Press and release to
mute the system. Press it again to
turn the sound back on. K : Press to reject an incoming
call, or end a current call. Press to
silence the vehicle speakers while
using the infotainment system.
Press again to turn the sound on.
v + or
v − : Move the thumbwheel
up or down to increase or to
decrease the volume.
Cruise Control
E : Press to turn the cruise control
system on and off. An indicator light
comes on.
Page 23 of 374
Black plate (19,1)Chevrolet Captiva Sport Owner Manual - 2013 - crc - 11/12/12
In Brief 1-19Keep the sensors on the vehicle's
rear bumper clean to ensure proper
operation.
See Ultrasonic Parking Assist on
page 9 ‑ 31 .
Power Outlets The accessory power outlets can be
used to plug in electrical equipment,
such as a cell phone or MP3 player.
The power outlets are located inside
the center floor console, on the rear
of the center floor console, and in
the rear cargo compartment.
Remove the cover to access and
replace when not in use.
See Power Outlets on page 5 ‑ 7 .Universal Remote System
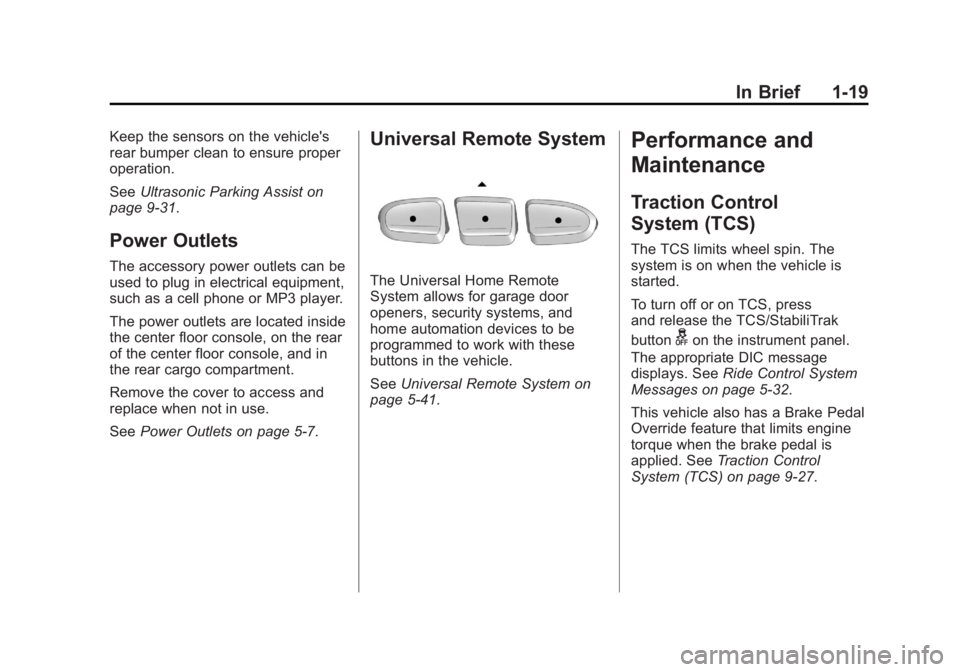
The Universal Home Remote
System allows for garage door
openers, security systems, and
home automation devices to be
programmed to work with these
buttons in the vehicle.
See Universal Remote System on
page 5 ‑ 41 .Performance and
Maintenance Traction Control
System (TCS) The TCS limits wheel spin. The
system is on when the vehicle is
started.
To turn off or on TCS, press
and release the TCS/StabiliTrak
button
g on the instrument panel.
The appropriate DIC message
displays. See Ride Control System
Messages on page 5 ‑ 32 .
This vehicle also has a Brake Pedal
Override feature that limits engine
torque when the brake pedal is
applied. See Traction Control
System (TCS) on page 9 ‑ 27 .
Page 93 of 374
Black plate (1,1)Chevrolet Captiva Sport Owner Manual - 2013 - crc - 11/12/12
Storage 4-1
Storage Storage Compartments Instrument Panel Storage . . . . . 4-1
Glove Box . . . . . . . . . . . . . . . . . . . . 4-1
Cupholders . . . . . . . . . . . . . . . . . . . 4-1
Front Storage . . . . . . . . . . . . . . . . . 4-1
Sunglasses Storage . . . . . . . . . . 4-1
Center Console Storage . . . . . . 4-2
Additional Storage Features Cargo Cover . . . . . . . . . . . . . . . . . . 4-2
Cargo Tie-Downs . . . . . . . . . . . . . 4-2
Cargo Management
System . . . . . . . . . . . . . . . . . . . . . . 4-2
Convenience Net . . . . . . . . . . . . . 4-3
Roof Rack System Roof Rack System . . . . . . . . . . . . 4-3 Storage
Compartments Instrument Panel Storage The vehicle has a storage area to
the left of the steering wheel. Pull
down on the handle to access.
Glove Box To open the glove box, lift up on the
lever. If the glove box has a lock,
use the key to lock and unlock it.
Cupholders There are cupholders in the center
console and in the second row seat
armrest.
Pull down the armrest to access the
cupholders. Front Storage
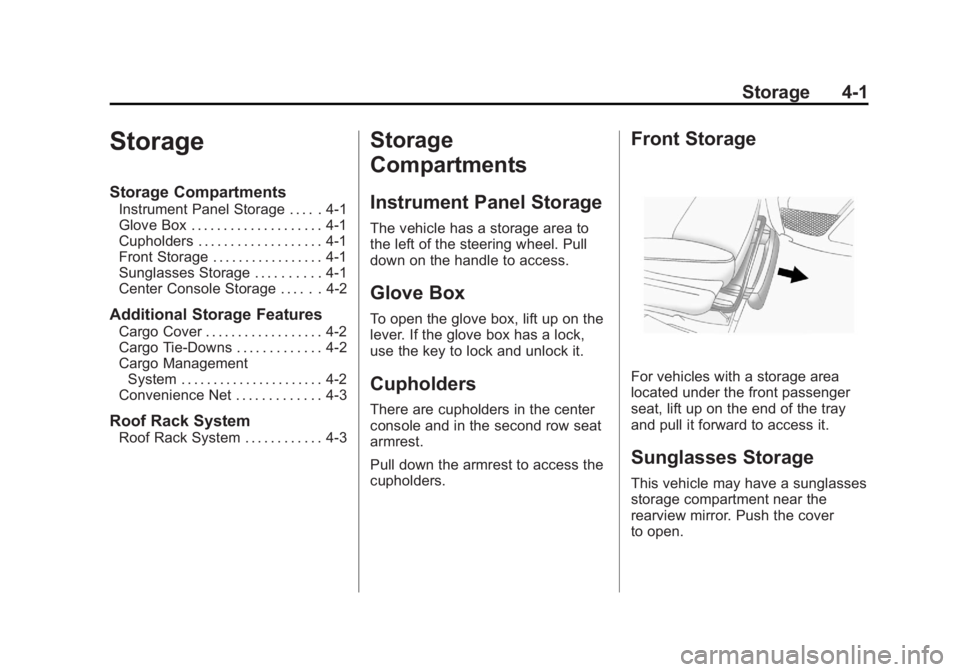
For vehicles with a storage area
located under the front passenger
seat, lift up on the end of the tray
and pull it forward to access it.
Sunglasses Storage This vehicle may have a sunglasses
storage compartment near the
rearview mirror. Push the cover
to open.
Page 94 of 374
Black plate (2,1)Chevrolet Captiva Sport Owner Manual - 2013 - crc - 11/12/12
4-2 Storage
Center Console Storage
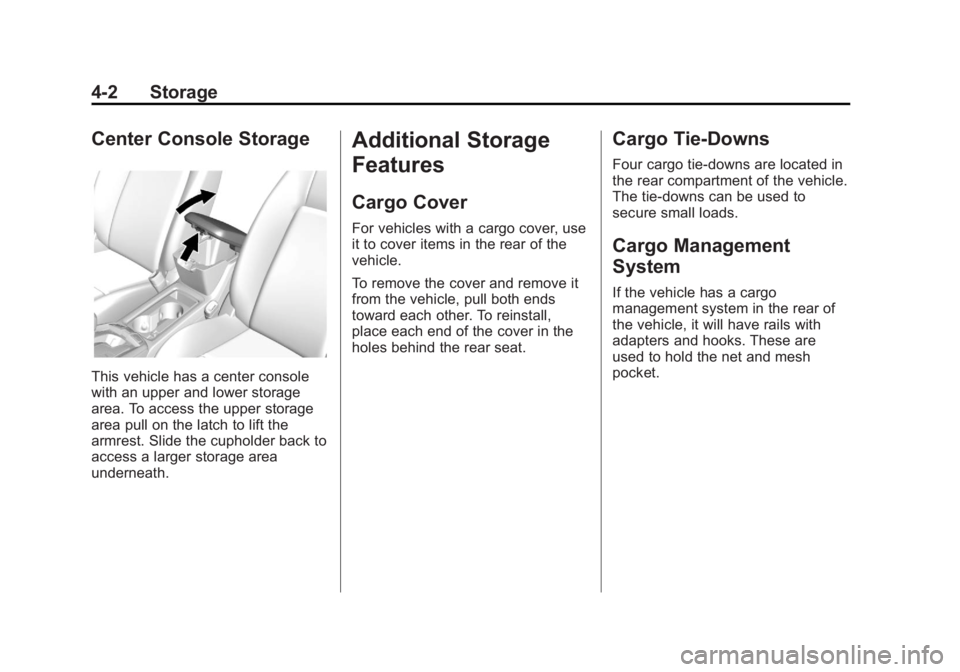
This vehicle has a center console
with an upper and lower storage
area. To access the upper storage
area pull on the latch to lift the
armrest. Slide the cupholder back to
access a larger storage area
underneath. Additional Storage
Features Cargo Cover For vehicles with a cargo cover, use
it to cover items in the rear of the
vehicle.
To remove the cover and remove it
from the vehicle, pull both ends
toward each other. To reinstall,
place each end of the cover in the
holes behind the rear seat. Cargo Tie-Downs Four cargo tie ‐ downs are located in
the rear compartment of the vehicle.
The tie-downs can be used to
secure small loads.
Cargo Management
System If the vehicle has a cargo
management system in the rear of
the vehicle, it will have rails with
adapters and hooks. These are
used to hold the net and mesh
pocket.
Page 103 of 374
Black plate (7,1)Chevrolet Captiva Sport Owner Manual - 2013 - crc - 11/12/12
Instruments and Controls 5-75. To decrease the time or date do
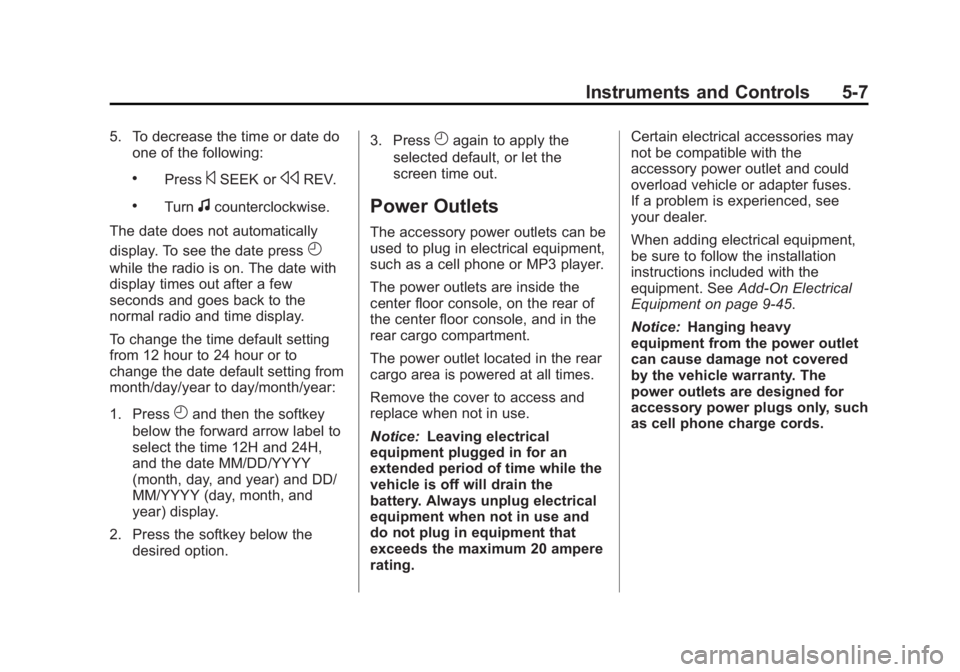
one of the following: .
Press
© SEEK or
s REV..
Turn
f counterclockwise.
The date does not automatically
display. To see the date press
Hwhile the radio is on. The date with
display times out after a few
seconds and goes back to the
normal radio and time display.
To change the time default setting
from 12 hour to 24 hour or to
change the date default setting from
month/day/year to day/month/year:
1. Press
H and then the softkey
below the forward arrow label to
select the time 12H and 24H,
and the date MM/DD/YYYY
(month, day, and year) and DD/
MM/YYYY (day, month, and
year) display.
2. Press the softkey below the
desired option. 3. Press
H again to apply the
selected default, or let the
screen time out.
Power Outlets The accessory power outlets can be
used to plug in electrical equipment,
such as a cell phone or MP3 player.
The power outlets are inside the
center floor console, on the rear of
the center floor console, and in the
rear cargo compartment.
The power outlet located in the rear
cargo area is powered at all times.
Remove the cover to access and
replace when not in use.
Notice: Leaving electrical
equipment plugged in for an
extended period of time while the
vehicle is off will drain the
battery. Always unplug electrical
equipment when not in use and
do not plug in equipment that
exceeds the maximum 20 ampere
rating. Certain electrical accessories may
not be compatible with the
accessory power outlet and could
overload vehicle or adapter fuses.
If a problem is experienced, see
your dealer.
When adding electrical equipment,
be sure to follow the installation
instructions included with the
equipment. See Add-On Electrical
Equipment on page 9 ‑ 45 .
Notice: Hanging heavy
equipment from the power outlet
can cause damage not covered
by the vehicle warranty. The
power outlets are designed for
accessory power plugs only, such
as cell phone charge cords.
Page 116 of 374
Black plate (20,1)Chevrolet Captiva Sport Owner Manual - 2013 - crc - 11/12/12
5-20 Instruments and Controls
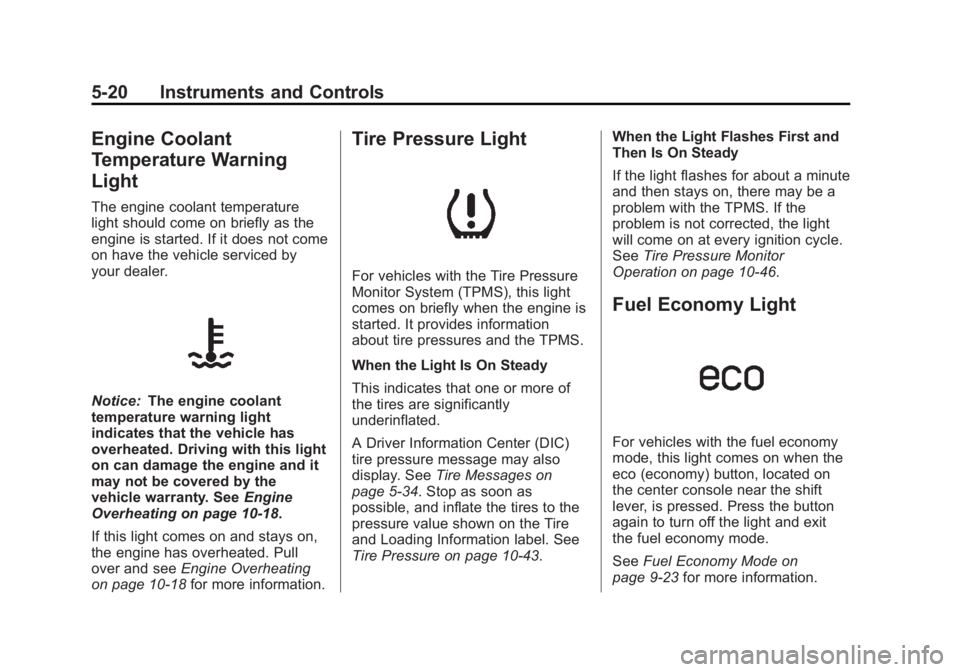
Engine Coolant
Temperature Warning
Light The engine coolant temperature
light should come on briefly as the
engine is started. If it does not come
on have the vehicle serviced by
your dealer.
Notice: The engine coolant
temperature warning light
indicates that the vehicle has
overheated. Driving with this light
on can damage the engine and it
may not be covered by the
vehicle warranty. See Engine
Overheating on page 10 ‑ 18 .
If this light comes on and stays on,
the engine has overheated. Pull
over and see Engine Overheating
on page 10 ‑ 18 for more information. Tire Pressure Light
For vehicles with the Tire Pressure
Monitor System (TPMS), this light
comes on briefly when the engine is
started. It provides information
about tire pressures and the TPMS.
When the Light Is On Steady
This indicates that one or more of
the tires are significantly
underinflated.
A Driver Information Center (DIC)
tire pressure message may also
display. See Tire Messages on
page 5 ‑ 34 . Stop as soon as
possible, and inflate the tires to the
pressure value shown on the Tire
and Loading Information label. See
Tire Pressure on page 10 ‑ 43 . When the Light Flashes First and
Then Is On Steady
If the light flashes for about a minute
and then stays on, there may be a
problem with the TPMS. If the
problem is not corrected, the light
will come on at every ignition cycle.
See Tire Pressure Monitor
Operation on page 10 ‑ 46 .
Fuel Economy Light
For vehicles with the fuel economy
mode, this light comes on when the
eco (economy) button, located on
the center console near the shift
lever, is pressed. Press the button
again to turn off the light and exit
the fuel economy mode.
See Fuel Economy Mode on
page 9 ‑ 23 for more information.
Page 167 of 374
Black plate (19,1)Chevrolet Captiva Sport Owner Manual - 2013 - crc - 11/12/12
Infotainment System 7-19
Auxiliary Devices Using the Auxiliary Input Jack Radios with an auxiliary input jack
on the lower right side of the
faceplate can connect to an external
audio device such as an iPod ®
,
MP3 player, or CD player, for use as
another source for audio listening.
This input jack is not an audio
output; do not plug headphones into
the front auxiliary input jack.
To use a portable audio player,
connect a 3.5 mm (1/8 in) cable to
the radio's front auxiliary input jack.
When a device is connected, press
the radio CD/AUX button to begin
playing audio from the device over
the vehicle speakers.
For optimal sound quality, increase
the portable audio device's volume
to the loudest level.
It is always best to power the
portable audio device through its
own battery while playing. O (Power/Volume): Turn clockwise
or counterclockwise to increase or
decrease the volume of the portable
player. Additional volume
adjustments might have to be made
from the portable device if the
volume is not loud or soft enough.
BAND: Press to listen to the radio
when a portable audio device is
playing. The portable audio device
continues playing.
CD/AUX (CD/Auxiliary): Press to
play a CD when a portable audio
device is playing. Press again and
the system begins playing audio
from the connected portable audio
player. If a portable audio player is
not connected, No Input Device
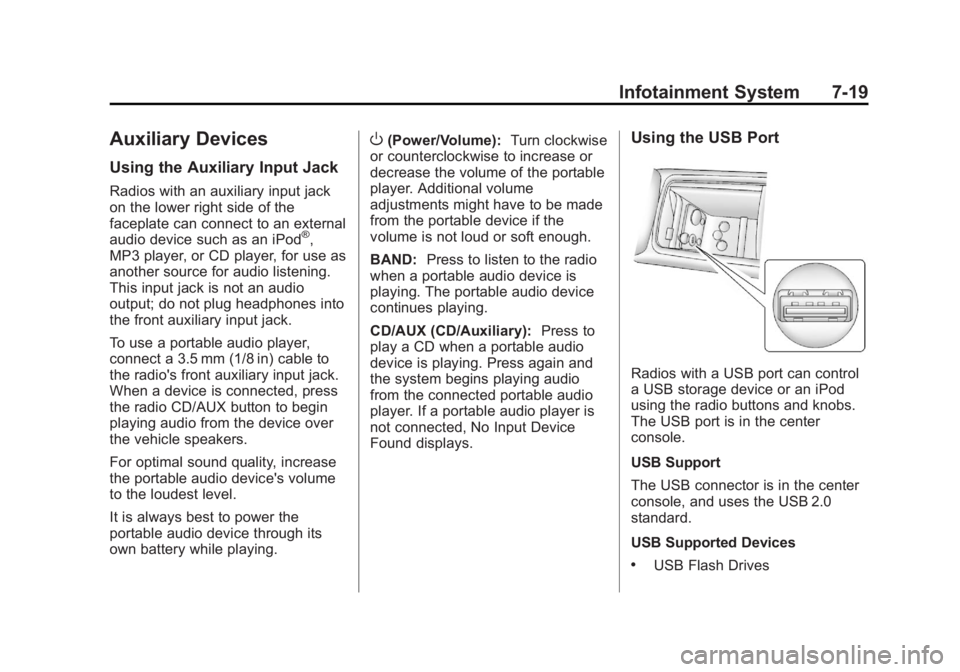
Found displays. Using the USB Port
Radios with a USB port can control
a USB storage device or an iPod
using the radio buttons and knobs.
The USB port is in the center
console.
USB Support
The USB connector is in the center
console, and uses the USB 2.0
standard.
USB Supported Devices .
USB Flash Drives
Page 168 of 374
Black plate (20,1)Chevrolet Captiva Sport Owner Manual - 2013 - crc - 11/12/12
7-20 Infotainment System .
Portable USB Hard Drives .
Fifth generation or later iPod .
iPod nano ®
.
iPod touch ®
.
iPod classic ®
Not all iPods and USB drives are
compatible with the USB port.
Make sure the iPod has the latest
firmware from Apple ®
for proper
operation. iPod firmware can be
updated using the latest iTunes ®
application. See www.apple.com/
itunes.
For help with identifying your iPod,
go to www.apple.com/support.
Radios that have a USB port can
play .mp3 and .wma files stored on a
USB storage device as well as AAC
files stored on an iPod.
USB Supported File and Folder
Structure
The radio supports: .
Up to 700 folders. .
Up to eight folders in depth. .
Up to 65,535 files. .
Folder and file names up to
64 bytes. .
Files with an .mp3 or .wma file
extension. .
AAC files stored on an iPod. .
FAT16. .
FAT32.
Connecting a USB Storage
Device or iPod The USB port can be used to
control an iPod or a USB storage
device.
To connect a USB storage device,
connect the device to the USB port
in the center console or on the
instrument panel.
To connect an iPod, connect one
end of the USB cable that came
with the iPod to the iPod ’ s dock
connector and connect the other
end to the USB port in the center
console. If the vehicle is on and the
USB connection works, OK to
disconnect and a GM logo may appear on the iPod and iPod
appears on the radio display. The
iPod music appears on the radio ’ s
display and begins playing.
The iPod charges while it is
connected to the vehicle if the
vehicle is in the ACC/ACCESSORY
or ON/RUN position. When the
vehicle is turned off, the iPod
automatically powers off and will not
charge or draw power from the
vehicle's battery.
If you have an older iPod model that
is not supported, it can still be used
by connecting it to the auxiliary
input jack using a standard 3.5 mm
(1/8 in) stereo cable. See “ Using the
Auxiliary Input Jack ” earlier for more
information.
Using the Radio to Control a
USB Storage Device or iPod
The radio can control a USB
storage device or an iPod using the
radio buttons and knobs, and
display song information on the
radio ’ s display.
Page 213 of 374
Black plate (25,1)Chevrolet Captiva Sport Owner Manual - 2013 - crc - 11/12/12
Driving and Operating 9-25Remember: ABS does not change
the time needed to get a foot up to
the brake pedal or always decrease
stopping distance. If you get too
close to the vehicle in front of you,
there will not be enough time to
apply the brakes if that vehicle
suddenly slows or stops. Always
leave enough room up ahead to
stop, even with ABS.
Using ABS Do not pump the brakes. Just hold
the brake pedal down firmly and let
ABS work. You might hear the ABS
pump or motor operating and feel
the brake pedal pulsate, but this is
normal.
Braking in Emergencies
ABS allows you to steer and brake
at the same time. In many
emergencies, steering can help
more than even the very best
braking. Parking Brake
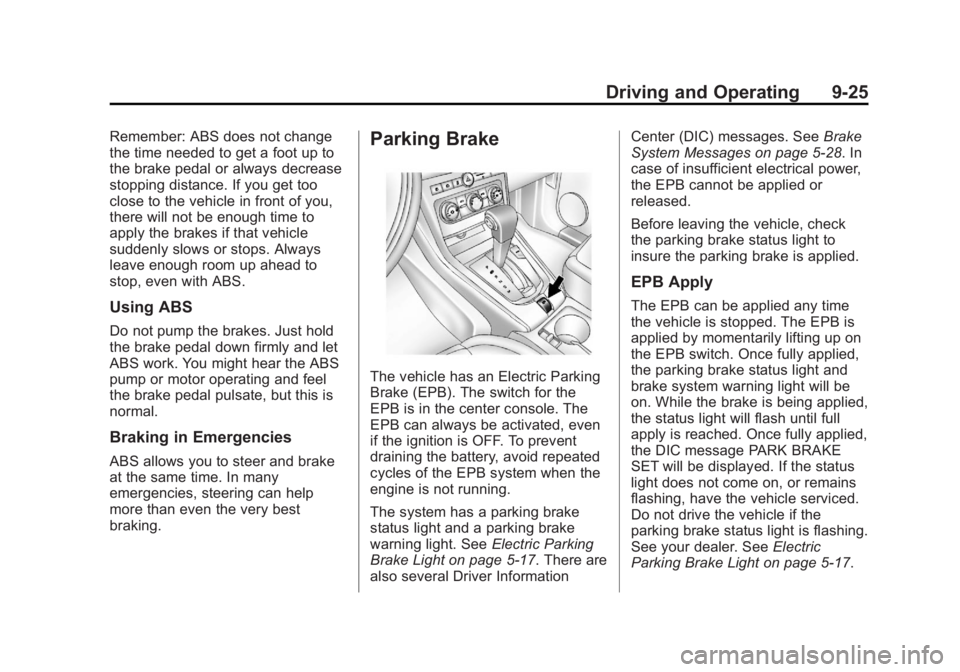
The vehicle has an Electric Parking
Brake (EPB). The switch for the
EPB is in the center console. The
EPB can always be activated, even
if the ignition is OFF. To prevent
draining the battery, avoid repeated
cycles of the EPB system when the
engine is not running.
The system has a parking brake
status light and a parking brake
warning light. See Electric Parking
Brake Light on page 5 ‑ 17 . There are
also several Driver Information Center (DIC) messages. See Brake
System Messages on page 5 ‑ 28 . In
case of insufficient electrical power,
the EPB cannot be applied or
released.
Before leaving the vehicle, check
the parking brake status light to
insure the parking brake is applied.
EPB Apply The EPB can be applied any time
the vehicle is stopped. The EPB is
applied by momentarily lifting up on
the EPB switch. Once fully applied,
the parking brake status light and
brake system warning light will be
on. While the brake is being applied,
the status light will flash until full
apply is reached. Once fully applied,
the DIC message PARK BRAKE
SET will be displayed. If the status
light does not come on, or remains
flashing, have the vehicle serviced.
Do not drive the vehicle if the
parking brake status light is flashing.
See your dealer. See Electric
Parking Brake Light on page 5 ‑ 17 .
Page 364 of 374
Black plate (2,1)Chevrolet Captiva Sport Owner Manual - 2013 - crc - 11/12/12
i-2 INDEX
BBattery . . . . . . . . . . . . . . . . . . . . . . . 10-23
Jump Starting . . . . . . . . . . . . . . . 10-65
Load Management . . . . . . . . . . . . . 6-6
Power Protection . . . . . . . . . . . . . . 6-6
Blade Replacement, Wiper . . . 10-25
Bluetooth . . . . . . . . . . . . . . . . . . . . . . 7-23
Brake
System Warning Light . . . . . . . . 5-16
Brakes . . . . . . . . . . . . . . . . . . . . . . . . 10-20
Antilock . . . . . . . . . . . . . . . . . . . . . . . 9-24
Fluid . . . . . . . . . . . . . . . . . . . . . . . . 10-21
Parking . . . . . . . . . . . . . . . . . . . . . . . 9-25
System Messages . . . . . . . . . . . . 5-28
Braking . . . . . . . . . . . . . . . . . . . . . . . . . 9-4
Break-In, New Vehicle . . . . . . . . . 9-14
Bulb Replacement . . . . . . . . . . . . 10-29
Fog Lamps . . . . . . . . . . . . . 10-27, 6-4
Front Turn Signal and
Parking Lamps . . . . . . . . . . . . 10-27
Halogen Bulbs . . . . . . . . . . . . . . 10-26
Headlamp Aiming . . . . . . . . . . . 10-26 Bulb Replacement (cont'd)
Headlamps . . . . . . . . . . . . . . . . . 10-26
License Plate Lamps . . . . . . . 10-29
Taillamps, Turn Signal,
Stoplamps, and
Back-up Lamps . . . . . . . . . . . 10-28
Buying New Tires . . . . . . . . . . . . . 10-51
C Calibration . . . . . . . . . . . . . . . . . . . . . . 5-4
Camera, Rear Vision . . . . . . . . . . 9-33
Capacities and
Specifications . . . . . . . . . . . . . . . . 12-2
Carbon Monoxide
Engine Exhaust . . . . . . . . . . . . . . . 9-19
Liftgate . . . . . . . . . . . . . . . . . . . . . . . . 2-8
Winter Driving . . . . . . . . . . . . . . . . . 9-8
Cargo
Cover . . . . . . . . . . . . . . . . . . . . . . . . . . 4-2
Management System . . . . . . . . . . 4-2
Tie-Downs . . . . . . . . . . . . . . . . . . . . . 4-2
Cautions, Danger, and
Warnings . . . . . . . . . . . . . . . . . . . . . . . . iii
CD Player . . . . . . . . . . . . . . . . . . . . . 7-10 Center Console Storage . . . . . . . . 4-2
Chains, Tire . . . . . . . . . . . . . . . . . . 10-55
Charging System Light . . . . . . . . 5-13
Check
Engine Light . . . . . . . . . . . . . . . . . . 5-14
Ignition
Transmission Lock . . . . . . . . 10-24
Child Restraints
Infants and Young
Children . . . . . . . . . . . . . . . . . . . . . 3-34
Lower Anchors and
Tethers for Children . . . . . . . . . 3-39
Older Children . . . . . . . . . . . . . . . . 3-32
Securing . . . . . . . . . . . . . . . . 3-44, 3-46
Systems . . . . . . . . . . . . . . . . . . . . . . 3-36
Circuit Breakers . . . . . . . . . . . . . . 10-30
Cleaning
Exterior Care . . . . . . . . . . . . . . . 10-72
Interior Care . . . . . . . . . . . . . . . . 10-75
Climate Control Systems . . . . . . . 8-1
Air Conditioning . . . . . . . . . . . . . . . 8-1
Automatic . . . . . . . . . . . . . . . . . . . . . . 8-4
Heating . . . . . . . . . . . . . . . . . . . . . . . . 8-1
Clock . . . . . . . . . . . . . . . . . . . . . . . . . . . 5-6
Cluster, Instrument . . . . . . . . . . . . . 5-9
Collision Damage Repair . . . . . 13-14