wheel size CHEVROLET CAVALIER 1984 1.G Owners Manual
[x] Cancel search | Manufacturer: CHEVROLET, Model Year: 1984, Model line: CAVALIER, Model: CHEVROLET CAVALIER 1984 1.GPages: 105, PDF Size: 24.23 MB
Page 19 of 105
Downloaded from www.Manualslib.com manuals search engine Now and then, check that all trailer hitch bolts and nuts are tight. Also see the
Maintenance
Schedule folder, and thelndax in this manual , for important facts
on
belts , cooling system care and brake ~tment.
Break-In Schedule
See the new vehicle break-in information in this manual. Also, we recommend
you drive your new vehicle for 500 miles (800 kilometers) before trailer towing.
At the end of this 500 mile (800 kilometer) break-in period, avoid speeds over
50 mph (80 km/h) and full throttle starts during the first 500 miles (800 kilometers) of trailer towing .
CAUTION:
BRAKES-To help avoid personal injury due to poor braking action :
•
Trailer brakes of adequate size are required on trailers more than 450
kilograms (1,000 pounds) loaded weight.
• If you use trailer brakes with this vehicle, follow the instailation and balance instructions of the trailer brake manufacturer.
• Do not tap into the vehicle's brake system iUhe trailer brake system uses
more than 0.3 cubic centimeter (0.02 cubic inches) 01 fluid from the
vehicle 's
mast.". cyllnd<1r .. , In this case, the vehicle's brake fluid capacity will not be enough to operate both thevehicte and trailer brakes under all kinds
of use.
• All brake fluid parts must be able to stand 20 650 kPa (3,000 psi) . The
brake fluid tap must be made at the upper rear master cylinder port.
Copper tubing is subject to fatigue failure and must not be used.
HITCHES-To help avoid personal injury due to sway caused by such things as
crosswinds, large trucks passing or road roughness , or due to separation of
the trailer :
• A properly installed and adjusted (1) frame mounted, weight-dstribut ing hitch and (2) sway control witheoough capacity are required for trailers
more than 900 kilograms (2,000 pounds) loaded weight.
• Keep the trailer tongue load at 10 percent of the loaded trailer weight for
dead-weight hitches and 12 percent for weight-distributing hitches. Tongue
loads can be adjusted by proper distribution of the load in the trailer. This
can
be checked by weighing separately the loaded trailer and then the
tongue .
• Do not use axle-mounted Mches. They can damage the axle housing , wheel bearings , wheels or tires.
• Do not allow steel hitch parts to be in direct contact with aluminum bumper
parts, if so equipped. When steel and aluminum are in contact, a galvanic
reaction (a form of corrosion) can occur which will progressively lessen the
strength of the contacting metals to the point
of failure. An organic
compound or paint should
be used as a barrier on the contacting surfaces
and on the attaching fasteners.
• When you remove a trailer hitch, be sure to seal any mounting holes in the body. This will help prevent entry 01 exhaust fumes,
"Starting and Operating ," Section 2 ollhis manual.)
2-3
Page 63 of 105
Downloaded from www.Manualslib.com manuals search engine JACKING INSTRUCTIONS
JACl LOCATIONS TO RQCI(ER FLANGE NOTCH
~
OCKER FlANGE N
JACI(HEAD , GROOve
~
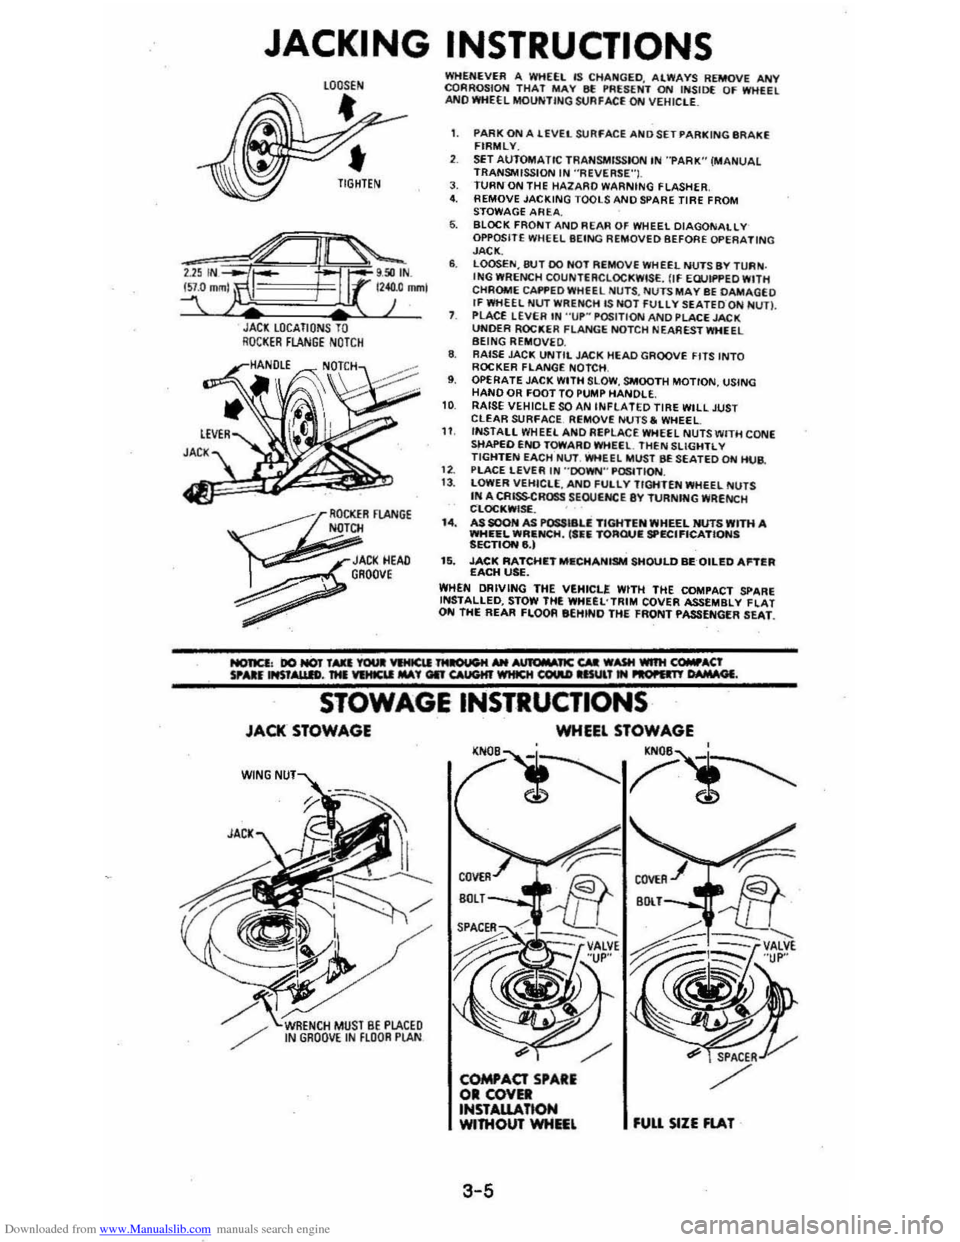
WHENEVER A WHEEL IS CHA~GED. ALWAYS REMOVE ANY CQRROSIOH THAT MAY 8f !'RUENT ON INSID( OF WHEEL ANO WHEEL MOUNTING StJAFACE ON VEHIClE_
1. PARK ON A lEVEL SURFACE AND SET PARKING IIR AKE FIRMLY.
SET AUTOMATIC TRANSMISSION IN "PARK" (MANUAL TRANSMISSION IN ·'ReVERSE"I. J. TURN ON THE HAlARO WARNING FLASHER 4. REMOVE JACKING TOOLS AND SPARE TIRE FROM
STOWAGE AREA. 6. BLOCK FRONT AND REAR OF WHEEL DIAGONALLY OPPOSITE WHEEL BEING REMOVED BEFORE OPERATING JACK. 6. LOOSEN,8tH DO HOT REMOVE WHEEL NUTS BY TURN . ING WRENCH COUNTERCLOCKWISE. flf EWIf'PED WITH
CHROME CAI'f'EDWHfEL NU TS , NUTS MAY BE DAMAGEO If WHEEL NUT WRENCH lS NOT FUllY SEATEDQN NUn. PLACE LEVER IN "UP~ POSITION AND PLACE JACK UNOER ROCKER FLANGE NOTCH NEA REST WHEEL BEING REMOVE D. 8. RAISE JAC!!; UNTIL JACK HEAD GROOVE FITS INTO ROCKER FLANGE NOTCH , 9. OPERATE JACK WITH SLOW , SMOOTH MOTION, USING HAND OR FOOT TO PUMP HANDLE. 10 RAISE VEHICLE SOAN INfLATED TIRE WILL JUST CLEAR SURfACE. Ri;MOVE NUTS. WHEEL 11 INSTALL WHEEL ANO Ai;PLACE WHEEL NUTS WITH CONE sttAPEO END TOWARO WHEEl. THEN SLiGHTL V TIGHTEN EACH Nl.IT. WHEEL MUST BE SEATED ON HUB.
1 2. PlACE LEVER IN "'DOWN'" P~TION. 13 . lOWER VEHICLE, ANO fULlY TIGHTEN WHEEL NUTS IN A CRISSCROSS SEOUtNCE 8Y TURNfNG WRENCH CLOC!!;WISf. . I.. AS SOON AS POSSI8U TIGHTEN WHEEL NUTS WITH A WHEEL WRIlNCH, ('fiIi TORQUIE SPECIFICATIONS SECTIONe,) 15. JACK RATCHIETMIlCHANISM SHOULD BEQILED Antill EACH USE. WHEN DRIVING THE VEHICLE WITH THE COMPACT SPARE INSTALLED, STOW THE WHUL'TRIM COVER ASSEMBLY flAT ON THE REAR FLOOR eEHINO THE FRONT PASSENGER SEAT.
STOWAGE INSTRUCTIONS
JACK STOWAGE
W(NG
WHEEL STOWAGE
'N
3-5
fUU SIZE FlAT
Page 65 of 105
Downloaded from www.Manualslib.com manuals search engine 3. Install wheel and tire assembly and install hub cap by pushing or hitting
into place (the wheel can be mounted with hub cap in place). The hub cap
must be oriented by engaging the bump on the side of the hub cap
retention tab with the cutout on the side of the wheel pilot hole.
Compact Spare
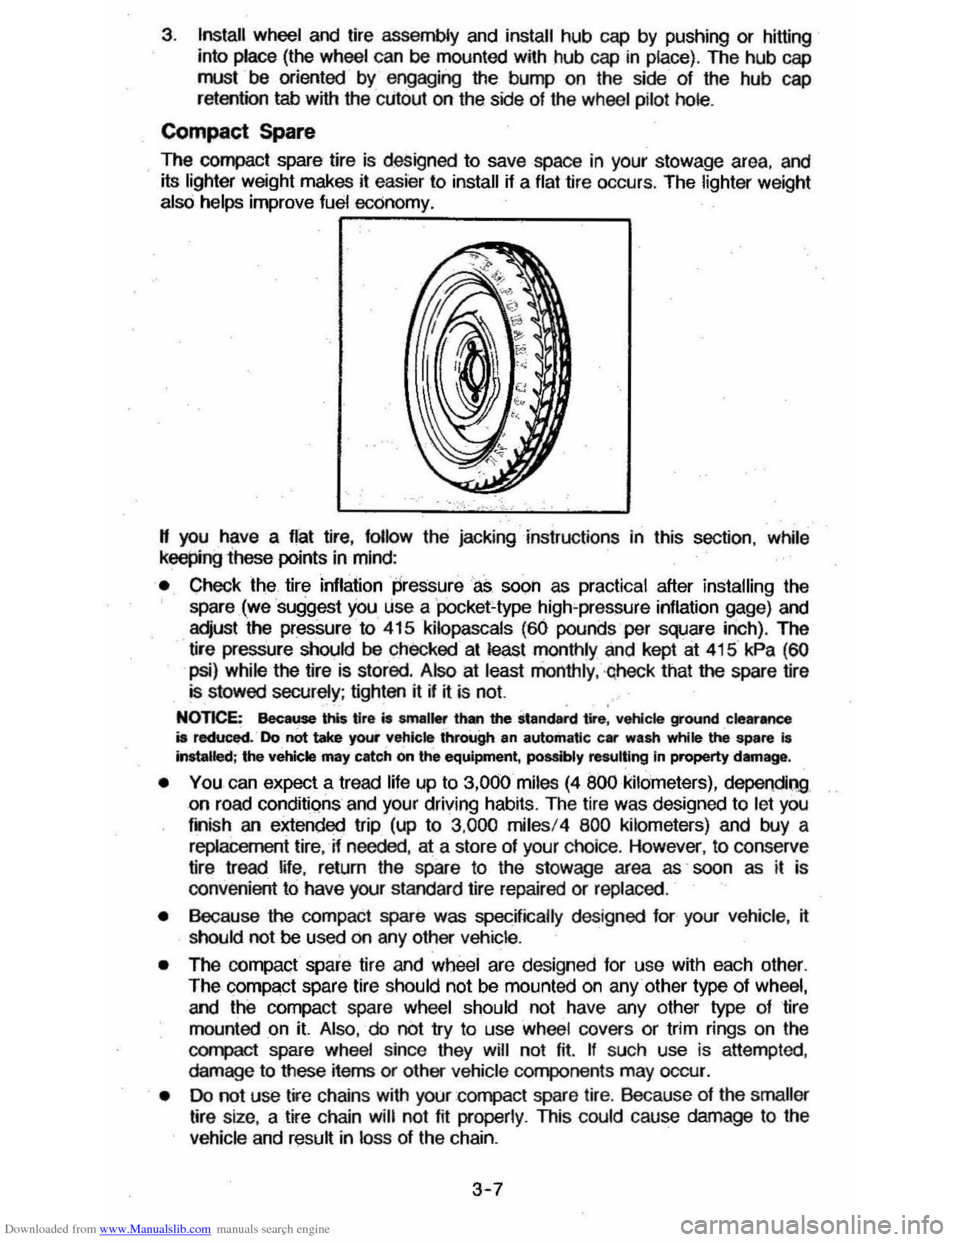
The compact spare tire is designed to save space in your stowage area, and
its lighter weight makes it easier to install if a flat tire occurs. The lighter weight also helps improve fuel economy. ~--~------~~
" you have a flat tire, follow the jacking Instructions in this section, while keepingihese points in mind:
• Check the tire inflaiionpressureas soon as practical after installing the
spare (we suggest you use a 'pocket-type high'pressure inflation gage) and
adjust the pressure to 415
kilopascals (60 pounds per square inch). The
tire pressure should be checked at least monthly and kept at 415 kPa (60
psi) while the tire is stored . Also at least monthly , ·qheck that the spare lire is stowed securely ; tighten it if ~ is not.
NOTICE: Bee ... this tire is smaller than the standard tire, vehicle ground clearance is reduced. Do not take your vehicle through an automatic car wash while ~ spare I. Installed; the vehicle may catch on the equipment, possibly resulting In property damag_.
• YOU can expect a tread life up to 3,000 miles (4 800 kilometers), dependiQg on road conditions and your driving habits. The tire was designed to let you
finish an extended trip (up to 3,000 miles/4 800 kilometers) and buy a replacement tire, -if needed, at a store of your choice. However, to conserve
tire tread ~fe, return the spare to the stowage area as' soon as it is
convenient to have your standard tire repaired or replaced.
• Because the compact spare was specnically designed for your vehicle , ~ should not be used on any other vehicle.
• The compact spare tire and wheel are designed for use with each other.
The compact spare tire should not be mounted on any other type of wheel, and the compact spare wheel should not have any other type of tire
mounted on it. Also, do not try to use wheel covers or trim rings on the
CQr1l>aCt spare whe el since they will not fit. If such use is attempted,
damage to tIlese items or other vehicle components may occur.
• Do not use tire chains with your :compact spare tire. Because of the smaller tire size, a tire chain will not fit properly. This could cause damage to the
vehicle and result in loss of the chain.
3-7
Page 88 of 105
Downloaded from www.Manualslib.com manuals search engine CAUTION; Whenever a wheel is changed, always remove any corrOsion that may be present on inside of wheeland wheel mounting surface on vehicle. Installing wheels
without good metal·to--metalcontact at the mounting surfaces can cause wheel nuts to
loosen, which can later allow a wheel to come off while the vehicle -is moving, possibly
causing loss of control.
Alignment and Balance
Proper wheel alignment improves tire tread life. Your vehicle's suspension
parts should be inspected often and
aligned when needed. (See the
Maintenance
Schedule Folder for more information.) Ball joints have built-in
wear indicators and some movement in the joints is normal.
Improper alignment • will not-cause the vehicle to vibrate. However, improper
alignment can cause:
• the tires to roll at an angle, which will result in faster tire wear;
• your tires _ to wear unevenly;
•
your vehicle to "pull" to the left or right.
Proper tire balancing provides the
best riding comfort and helps reduce tire
tread wear. Out-of-balance tires can cause annoying vibration and uneVen tire
wear such as cupping and flat spots.
Traction
Driving, cornering, and braking traction are reduced -w~ater. snovv' ic:e., gravel, or other material is on the road. Adjust driving practices and vehiCia
speed to road conditions.
When driving on wet
or sluShy roads, a wedge of water can build up between
the tire and road. This is known as hydroplaning, and may cause partial or
complete loss of traction, vehicle control, and stopping ability.
To red\ICe the chance of traclion loss, follow these tips:
1. Slow down during rainstorms or when roads are slushy.
2. StoW down if the road has standing water or puddles.
3. Replace the tires when the tread wear indicators are showing.
4. Keep the tires properly inflated.
H your vehicle has Tpc radial tires (see "Tire Replacement" in this section),
yoU, .lifes were designed to provide better snow traction. In fact, these tires
shOuld be adequate for driving in mO$ wiAter conditions. Howeve" ij you do feel you do need to buyconvenlional snow tires, be sure they are the same
size, load range, and .construction type (bias, bias· belled, Or radial) as your
other tires.
Tire Chain$ or Similar Traction Devices
If you buy tire chains for your car, make sure they are'designated as SAE
Class "S" type chaios. Use of other types of chains may cause damage to
your vehicle.
Use
of chains may adversely affect your vehicle's handling. -When using
chains: (1) adjust speed to road conditions, (2) avoid sharp turns, and (3) when
possible, avoid
locked-wheel braking.
In addition, to help prevent chain damage to your vehicle:
5-15
Page 90 of 105
Downloaded from www.Manualslib.com manuals search engine ,
Temperature -A, B, C
The temperature grades are A (the highest), B, and C, representing the tire's
resistance 10 the generation of heat and its ability 10 dissipate heat when tested
under controlled conditions on a specified indoor laboratory test wheel.
Sustained high temperature can cause the material of the tire to degenerate
and reduce tire life, and excessive temperature can lead to sudden tire failure .
The grade
C corresponds 10 a level of performance which all passenger car
tires must meet under the Federal Motor
Vehicle Safety Standard No. 109. Grades B and A represent higher levels of performance on the laboratory lest
wheel than the ",nimum required by law.
Warning : The temperature grade forlhis tire is established for a tire that is properly inflated and not overloaded . . Excessive speed, underinflation, or
excessive loading, either separately or in combination , can cause heal buildup and possible tire failure .
These grades are molded on the sidewalls 01 passenger car tires.
While
the tires available as 'standard or optional equipment .on General
Motors vehicles may vary with respect to these grades, all such tires meet General Motors performance s!andards and have been approved for
use on General Motors vehicles. All passenger car tires must conform to Federal safety requirements in addition to these grades.
You
should replace your tires when:
1 . The tires are worn to a point where 1.6
milHmeters (2/ 32 inch) or less t.read remains, or the cord or fabric is showing. '.
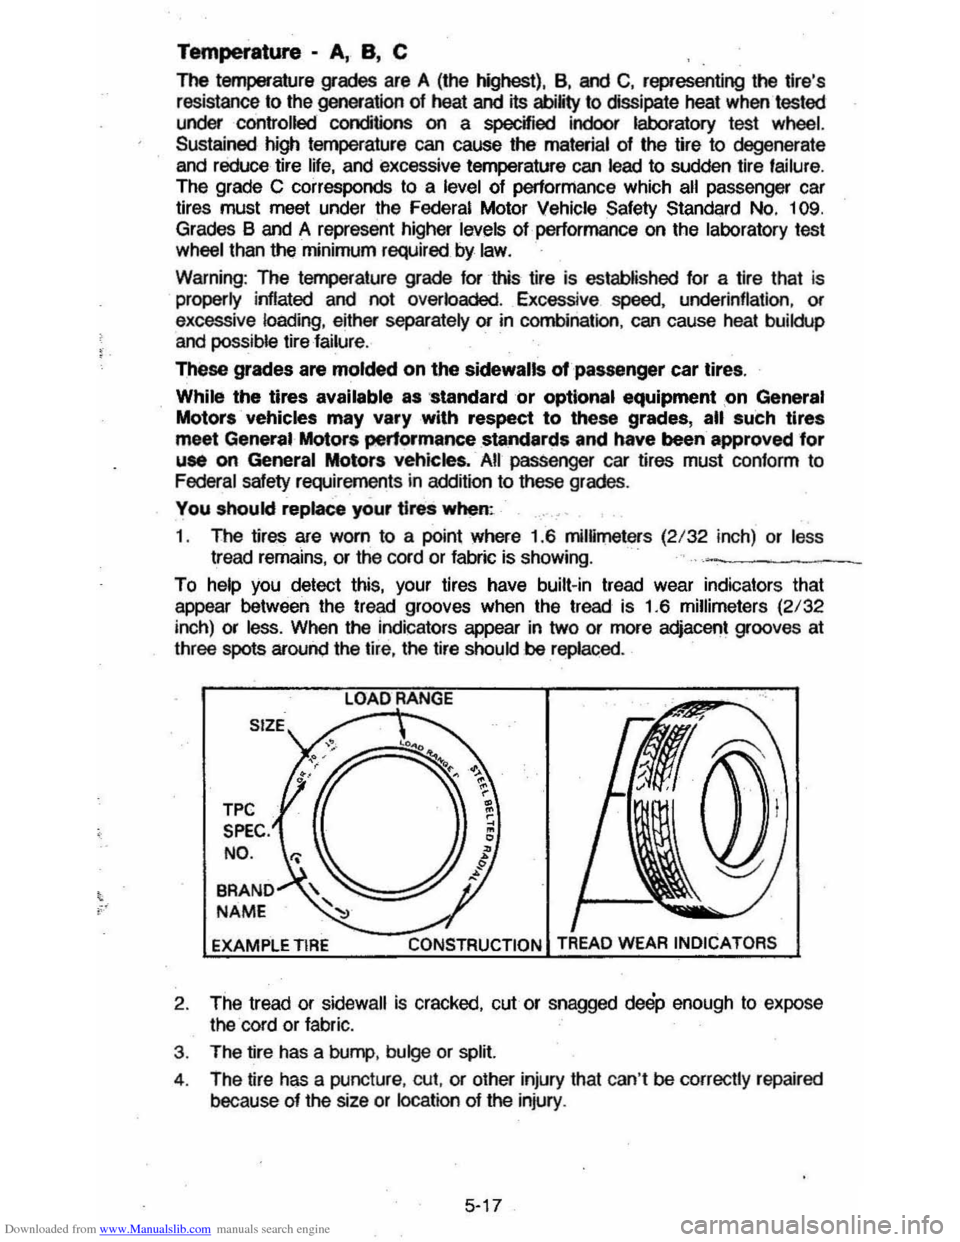
To help you detect this, your tires have built-in tread wear indicators that
appear between the tread grooves when the tread is 1.6 millimeters
(2/32
inch) or less. When the indicators appear in two or more adjacent grooves at
three spots around the tire, the tire should be replaced.
TPC
SPEC. NO .
BRAND
NAME
EXAMPLE TIRE LOAD
RANGE
CONSTRUCTION
2
. The tread or sidewall is cracked, cut or snagged deep enough to expose
the cord or fabric.
3. The tire has a bump , bulge or split.
4 . The tire has a puncture , cut, or other injury thai can 't
be correctly repaired
because of the size or
location of the injury .
5-17
Page 91 of 105
Downloaded from www.Manualslib.com manuals search engine Wheel Replacement
Damaged wheels must be replaced. For example, replace wheels if they are
bent,
cracked,or heavily rusted, or if wheel nuts often become loose. Also
replace wheels which leak air (except some aluminum wheels which can be repaired-- see your authorized dealer). See the Caution under "Inspection and
Rotation"
in this section regarding the importance of obtaining good metal-tometal contact when replacing or changing wheels.
Do not use bent wheels which have been straightened, and do not use inner
tubes in leaking wheels designed for tubeless tires. Such wheels may have
structural damage and could fail without warning. When replacing wheels for
any reason, the new wheels should be equal in load limit. diameter, width,
offset, and mounting configurations to those originally installed on your vehicle.
A wheel of the wrong size or type may adversely affect such things
as wheel
and bearing life, brake cooling, speedometer I odometer calibration, stopping
ability, headlight
aim, bumper height, vehicle ground clearance, and tire or tire
chain clearance to the body and chassis. Replacement with used wheels is not advised; they may have been treated harshly or have very high mileage, and
could fail without warning.
You can get wheels from your dealer.
Warranty
Tires are warranted by the tire manufa9turers. Warranty information is included
in the manufacturer's Warranty folder furnished With your vehicle.
5-18