CHEVROLET CITATION 1980 1.G Workshop Manual
Manufacturer: CHEVROLET, Model Year: 1980, Model line: CITATION, Model: CHEVROLET CITATION 1980 1.GPages: 95, PDF Size: 21.48 MB
Page 51 of 95
Downloaded from www.Manualslib.com manuals search engine • pull over-to a 'safe p'late and stop (he car:-=Set the parking brake and shift to "P"(Park) (with a manual transaxle. shift to Neutral first, then set the parking
brake).
• DON'T TURN OFF THE ENGINE AND DON'T INCREASE THE ENGINE SPEED~ Let the engin e run at normal idle speed for two or three
minutes.
If the
''TEMP'' light still doesn't go off (or the gage needle doesn't start to drop) , NOW TURN OFF THE ENGINE and proceed as follows.
CAUTION: Keep henda, tools end clothing awey from'the engine COOling fen to help prevent personal Injury. This fen ia electric end can come on whether or not the eR8ine is runnirl'jJ. The fan Cen etert eutomatically in reapon .. to a heet ~, wrth the ignitkNl in ~Run."
• Lift the engine hood. Look at the coolant level.in the "see through " coolant
recovery tank. The coolant level should be at or above the "Fun Hot" mark
o n the tank.
If it looks like the coolant is boiling, wait until it stops before
proceeding You should :not need to remove the radiator cap to check the
coolant level and it can be dangerous if the coolant is still hot. See the
following Caution.
CAUTION: To help avoid the dange, of being burned:
• cia not remove the coolent recov.ry tank cap while the coolant is boiling.. and
• cia not remove the .rad~:_c.p white the engine end radiator are atill hot.
Scelding fluid and ateam can be blow, Qut under presau,.. If either cap ia taken off too soon.
• If the coolant level is low:
• look for leak s at the radiator hoses and connectio ns, heater hoses and
connections. radiator, and water pump.
See that the water pump belts
are not
brok~ or otT the pulleys and that the fan runs when the engine is running and theUTEMP" light ison (or the gage needle is in the
warning zone).
• add coolant to the recovery tank.
If the level in the recovery tank is at the correct level and the "TEMP" light (gage) still comes on, air may be-trappedin the, cooling system . This may prevent coolant
from returning to the radiator.
In this case. you may have to add coolant directly
to th e radiator.
See "Coolant Replacement" in "Service and Maintenance," Section 5 of this manual. Follow steps I and 10 for the correct way to remove
the radiator cap and add coolant to the radiator.
After the "TEMP" light is out (or the gage needle is out of the warning zone).
resume driving
at a reduced speed. Return to normal driving after about ten
minutes if the light does not come back on (or the gage needle does not go back
into the warning
~one).
J.4
Page 52 of 95
Downloaded from www.Manualslib.com manuals search engine I COMPACT SPAul
*( ~
Y' v.
~
I ~-C( -"""-c I NO SPARE I • G@1J;"~j ((?)lie, __ ,". ::..-_~.c_
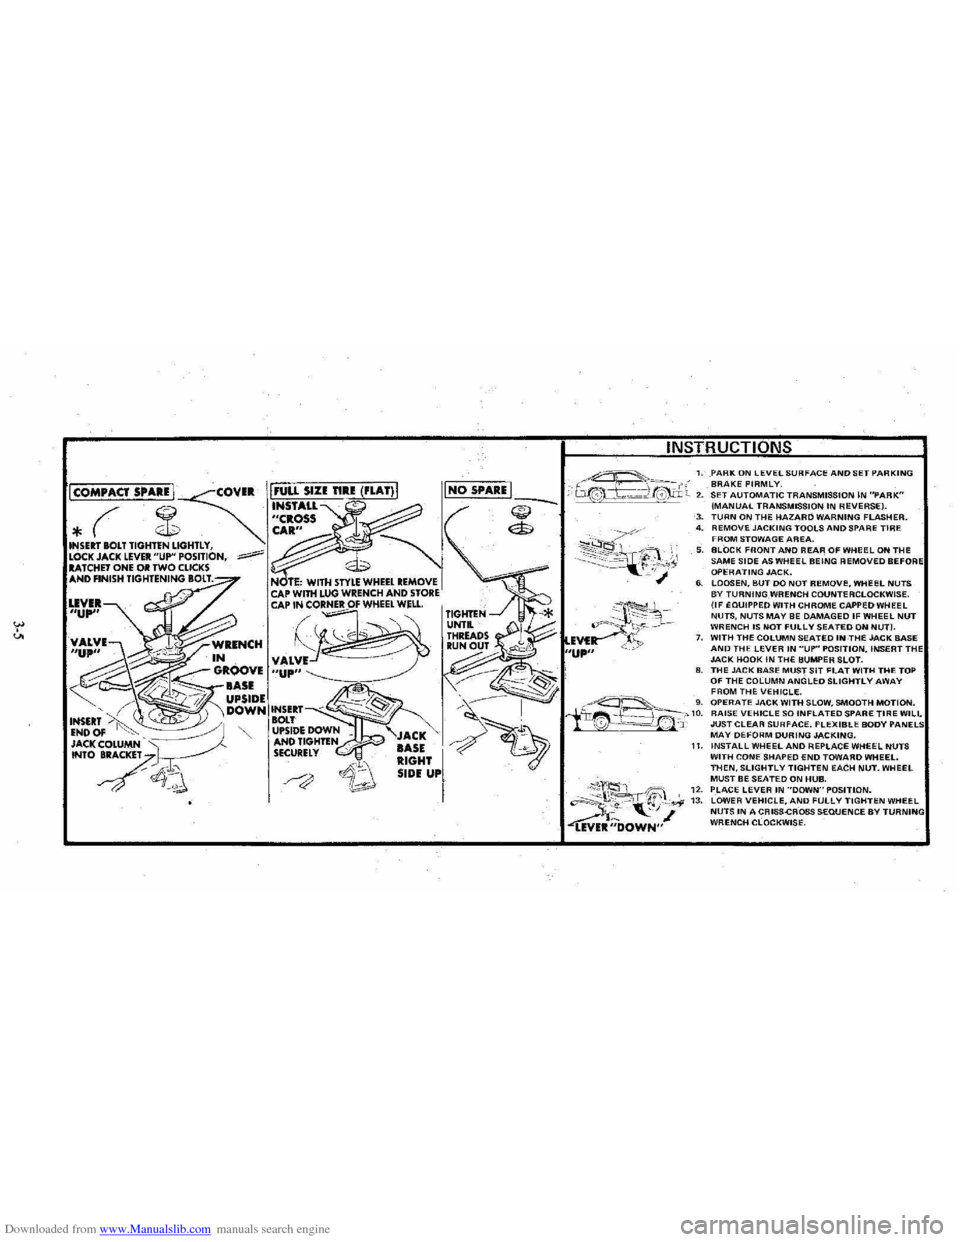
1. PARK ON lEVEL SURFACE AND SET PARKING BRAKE FIRMLY. 2. SET AUTOMATIC TRANSMISSION IN "PARK" (MANUAL TRANSMISSION IN REVERSE). ~ ($
~~~~?~;y,
3. TURN ON THE HAZARD WARNING FLASHER. 4. REMOVE JACKING TOOLS AND SPARE TIRE FROM STOWAGE AREA. 5. BLOCK FRONT AND REAR OF WHeEL ON THE SAME SIDE AS WHEEL BEING REMOVED BEFO OPERATING JACK. 6. LOOSEN, BUT DO NOT REMOVI:, WHEEL NUTS BY TURNING WRENCH COUNTERCLOCKWISE. (IF EQUIPPED WITH CHROME CAPPED WHEEL NUTS, NUTS MAY BE DAMAGED IF WHEEL NUT WRENCH IS NOT FULLY SEATED ON NUT). 7. WITH THE COLUMN SEATED INTHE JACK BASE AND THE LEVER IN "UP" POSITION, INSERT TH JACK HOOK IN THE BUMPER SLOT. 8. THE JACK BASE MUST SIT FLAT WITH THE TOP OF THE COLUMN ANGLED SLIGHTLY AWAY
I
FROM THE VEHICLE. ~---'-_ 'g. OPERATE JACK WITH SLOW, SMOOTH MOTION. iir~f~~_-'-'10. RAISE VEHICLE SO INFLATED SPARE TIRE WILL '0 --=-==!.~' 'J: JUST CLEAR SURFACE. FLEXIBLE BODY MAY DEFORM DURING JACKING.
;\;'2, 'ift;" "~~t. "-', ~ ~R;;'OWN"
11. INSTALL WHEEL AND REPLACE WHEEL NUTS WITH CONE SHAPED END TOWARD WHEEL. THEN. SLIGHTLY TIGHTEN EACH NUT. WHEEL MUST BE SEATED ON HUB. 12. PLACE LEVER IN ··DOWN"POSITlON. 13. LOWER VEHICLE. AND FULLY TIGHTEN WHEEL NUTS IN A CRISS-CROSS SEQUENCE BY WRENCH CLOCKWISE.
Page 53 of 95
Downloaded from www.Manualslib.com manuals search engine JACKING
CAUTION
To help avoid personal injury:
• Follow all jackin g and stowag e instructions.
• Use jack only fo r liftin g this venicle du -rin g wheel c h a ng e.
• Nev er ge t ben eath th e vehiCle, start or run en g in e while vehicle is supported b y jac k.
• Always securely res tow spare tire (o r flat tire ) an d all jackin g equipment.
Wheel Nut Torque
CAUTION: As soon as possible after Installing 8 wheel-and at the intervals shown on the chart-in the Maintenance Schedule foldet-han 8 m.chanic tighten whe&l nuta with II torque wrench to the specifications shown in "SpeCifications ," Section 7 of this manual. Wheel nuts should be tightened alternately and evenly to the correct torque. Never us. oil or grease on studs or nuts. Improperly tightened wheel nuts could eventually allow the wheel to come off while the vehicle is moving, possibty causing loss of control.IAlso see the Caution in "Service and Maintenance," Seetion 5 of this manual regarding the danger of mixing metric and customary fasteners.)
Stowage of Tire and Jack
CAUTION:·AlwaYs MOurely restow the spare tire assembty (or flat tire). all jacking equipment. and the cover, using the means provided. When driving the car with the compact spare installed and the reer seat folded down, stow the wheel cover flat on the rear floor behind the-right front seat. When the rear seat is up (or If It does not fold), stow the wheel cover in the trunk area. This will help keep such things from being thrown about and injuring peopla In the car in an accident.
Compact Spare
The compa ct sp are is des ig ned to save space in yo ur trunk, and its lighler weig ht
m ak es
it easi er to in stall if a flat tire occurs. The light~r weig ht als o helps improve fuel eco no my.
If you have a flat tire, follow the jack ing in struction s in this manual while keeping
t h ese point s in min d:
• Chec k inflati on press ure as soo n as practical after in sta llin g the s pa re ( use of a pocke t type: high pressure inflatio n gage is adv ised) and adjust to 415
k Pa (60 psi). The tire pressur e sh o uld be checked at least monthl y and kept at 415 kPa (60 ps i) while the tire is s tored.
• Co ntinuou s use at spe eds over 50 mph (80 km/h) is not re c omme nded .
NOTICE: Because this tire is amaUer than the standar d tire, vehicle ground clearance is reduced, Avoid driving over obstacles, and do not take your car U,rough an automatic car wash whila the spare is installed. The car may get caught possibly resulting in property damage.
• A trea d life of up to 3,000 mil es (4 800 kilomet ers) ca n b e expe cted, depe nding
on roa d condi tions and you r
driv ing habits . T o co nserve tire t read life. return the spar e to the sto rage area as soo n as the sta nd ard tir e ca n be repa ir ed -or
r
epl ac ed .
• Beca use the co mpac t spare was spec ifica lly designe d for your car, it s hould
no t be used on any other vehicle.
3-6
Page 54 of 95
Downloaded from www.Manualslib.com manuals search engine • The compact spare .tire and wheel are design ed for use with each
other. The compact spare tire should not be mounted on any other
type of wheel, and the compact spare wheel should not have any
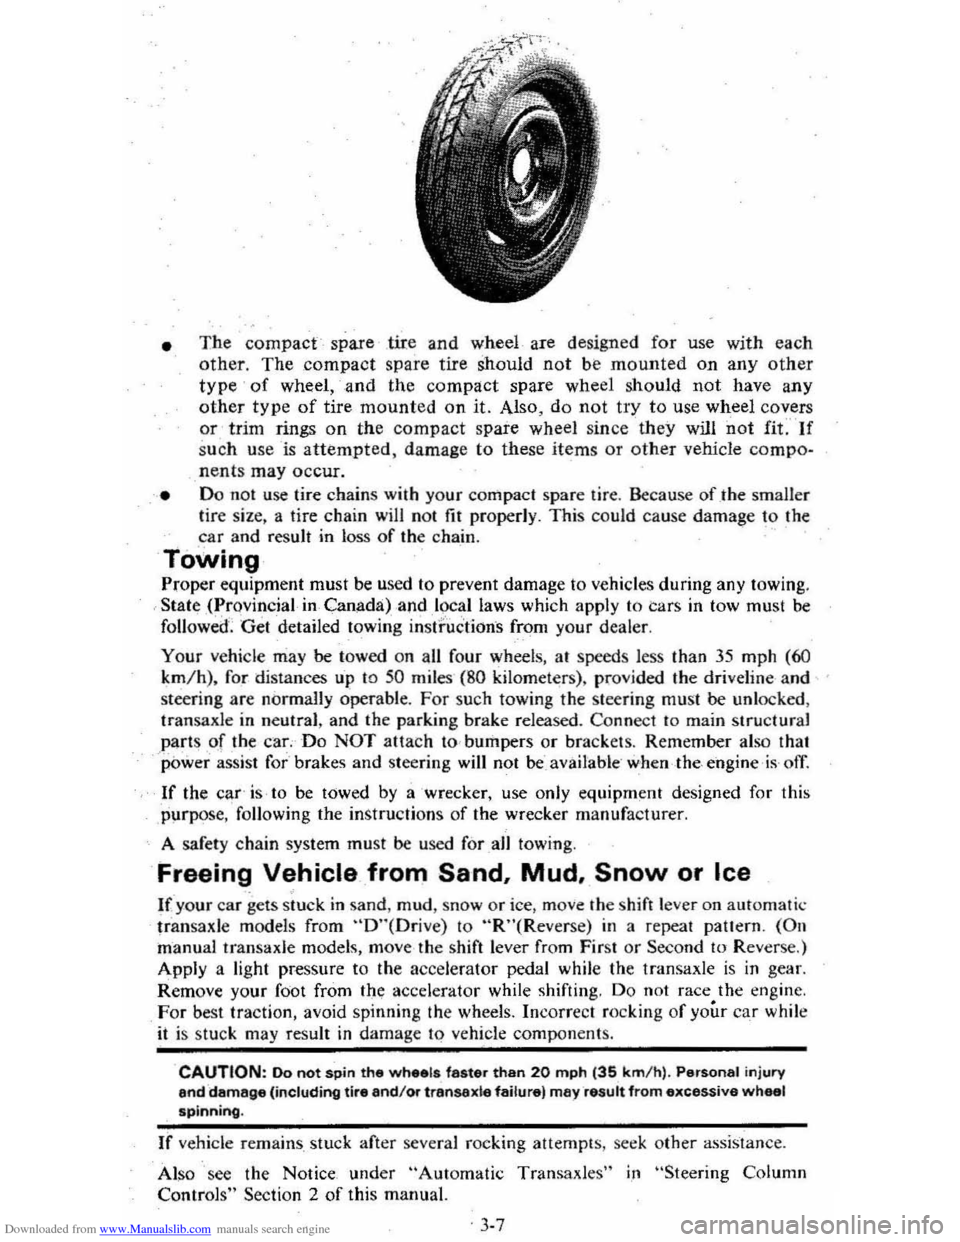
other type of tire mounted on it. Also, do not try to use wheel covers or trim rings on the compact spare wheel since they will not fif" If
s u ch u se is attempted, damage to these items or other vehicle compo~
nent s may occur.
• Do 1I0t use tire chains with your compact spar e tir e. Because of .the smaller lire size, a tire chain will no t fit properly . This could cause damage to the car and result in loss of the cha,in.
Towing
Prop er equipment must be used 10 prevent damage to ve hicle s during any towing .
State ,(.,rovincial in Canada) ,and l~~l laws which apply to Cars in tow must be
followed '. Get detailed towing instructions from your deale r.
Your
vehicle may be towed on all fo ur wheels, at speeds less than 35 mph (60
km /h) , for distances u'p 1O 50 miles ( 8 0 kilometer s). pro vided the driveline and
steering are normally operabl
e. For such towing the steering must be unlocked ,
tran saxle in neutral , and the parking brake released . Co
nnec t to main structural
part s of th~ car; Do NOT attach to , bumpers or brackets . Remember also that power assist for brakes and steering will not beavailable ' when the, engine is ofl
If the car' is to be towed by a 'wrecker, use only equipm~nt designed for this
purpos
e, following the instru ction s of the wrecker manufacturer.
A safety chain system must
be used forall towing .
Freeing Vehicle from Sand. Mud. Snow or Ice
If your car gets stuck in sa nd , mud , snow or ice , move the s hift lever on aut om atic
tr ans ax le models from "D"(Orive) to "R"(Reverse) in a repeat pattern. (On
manual transaxle models, move the shift lever from First or Second to Rever se.)
Apply a
light pressure to the acce lerator pedal while the transaxle is in gear.
Remove your
foot from the;: accelerator while shifting . Do not race the engine.
For best traction, avoid spinnin g the wheels. Incorrect rocking of your car while it is stuc k may result in damage to vehicle components.
CAUTION: 00 not spin the wh •• ls faster than 20 mph (35 km/ h) . Personal injury end damage (including tire and/Of transexle failure) rna)' result from excessive wheal spinning.
If vehide re mains stuck after several roc king attempt s, s eek other assistan ce.
Also 'see the Notice under
"Automatic Transaxles" i,n "Steering Column
Contro ls" Section 2 of this manu al.
. 3-7
Page 55 of 95
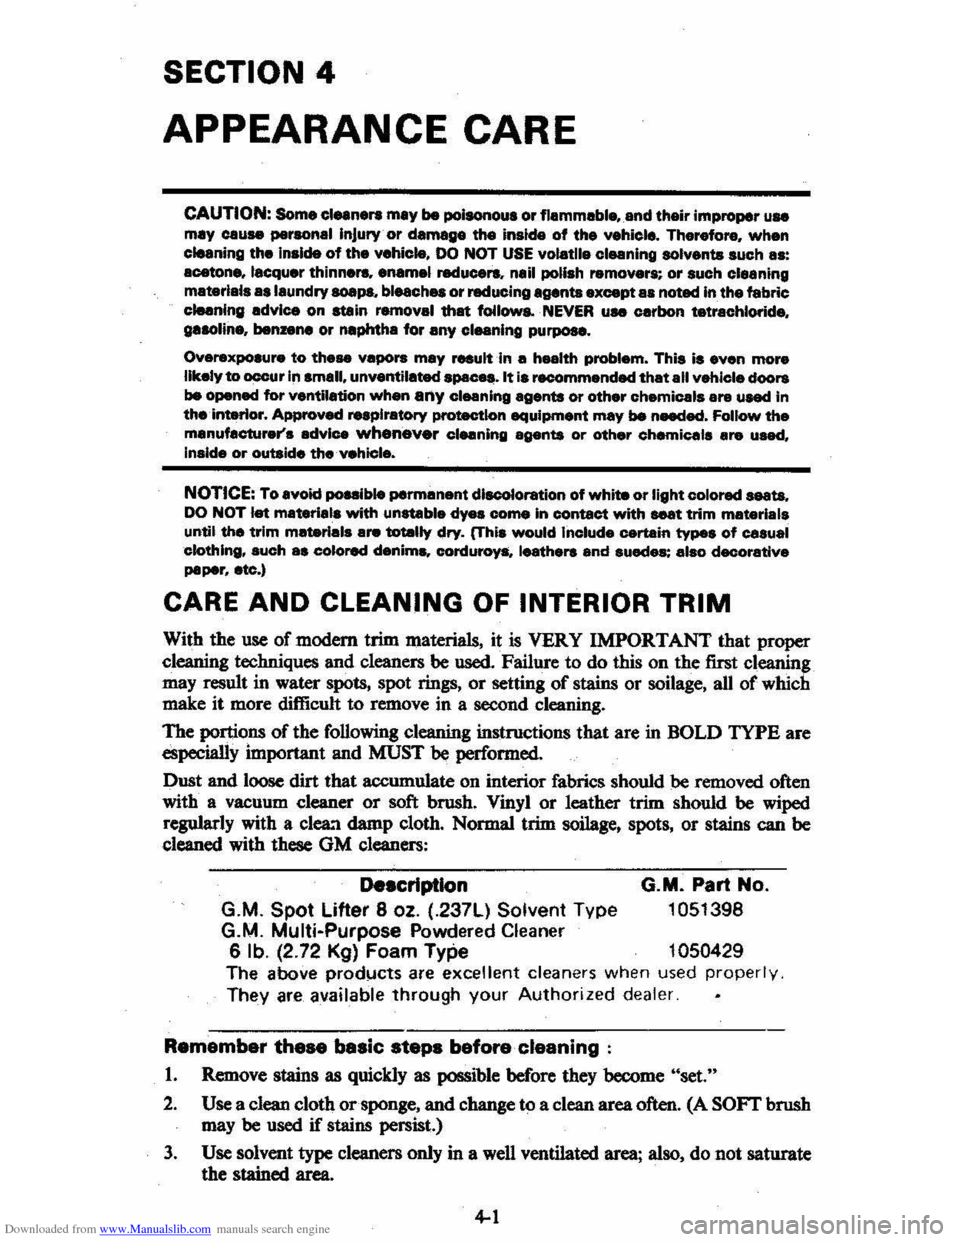
Downloaded from www.Manualslib.com manuals search engine SECTION 4
APPEARANCE CARE
CAUTION: Some cl .. n .... may be poi8Of10ua or flammable, and their improper UH may cau .. per.,nal Injury or damage the inside of the vehicle. Therefore, when cleaning the inside of the vehicle. 00 NOT USE volatile cleaning solvents such as:
acetone. lacquer thinnere. enamel reducers. nail polish removers; or such cl •• ning
materials •• 'aundry soaps. bleach .. or reducing agents except as noted In the fabric cteenlng advice on stein removal that ~Iowa. . NEVER UH carbon tetrachloride, paolin., benzene or naphtha for any cleaning purpose.
Overexposure to the .. vapors may .... ult!n II health problem. This is even more likely to occur In small. unventilated .~. It is recommended that all vehicle doors
be opened for ventilation when any cleaning agents or other chemicals are uNCI in the interior. Approved respiratory protection equipment may be nMded. Follow the manufacturer's advice whenever cleaning agents or other chemicals are used,
Inside or outside the vehicle.
NOTICE: To avoid pouible permanent discoloration of white or light colored nata. DO NOT let materlala with unstabl. dyes come In contact with seat trim materials until the trim meterlals are totally dry. (This would Include certain types of casual
clothing. such a8 colored denims. corduroys. leathers and suedes: also decorative paper, etc.)
CARE AND CLEANING OF INTERIOR TRIM
With the use of modern trim materials, it is VERY IMPORTANT that proper
cleaning techniques
and cleaners be used. Failure to do this on the first cleaning
may result
in water spots, spot rings, or setting of stains or soilage, all of which
make it more difficult to remove in a second cleaning.
The portions of the following cleaning instructions that are in BOLD TYPE are especia11y important and MUST be performed.
Dust and loose dirt that accumulate on interior fabrics should be removed often
with a vacuum cleaner or soft brush. Vinyl or leather trim should be wiped
regularly with a clea:1 damp cloth. Normal trim soilage, spots, or stains can be cleaned with these GM cleaners:
Description
G.M. Spot Lifter 8 oz. (.237L) Solvent Type
G.M. Multi-Purpose Powdered Cleaner
G.M. Part No.
1051398
6
lb. (2.72 Kg) Foam Type 1050429 The above products are excellent cleaners when used property.
They are available through your Authorized dealer.
Remember these basic staps before claaning :
1. Remove stains as quickly as possible before they become "set."
2. Use a clean cloth or sponge, and change to a clean area often. (A SOFT brush
may
be used if stains persist.)
3.
Use solvent type cleaners only in a well ventilated area; also, do not saturate
the stained area.
4-1
Page 56 of 95
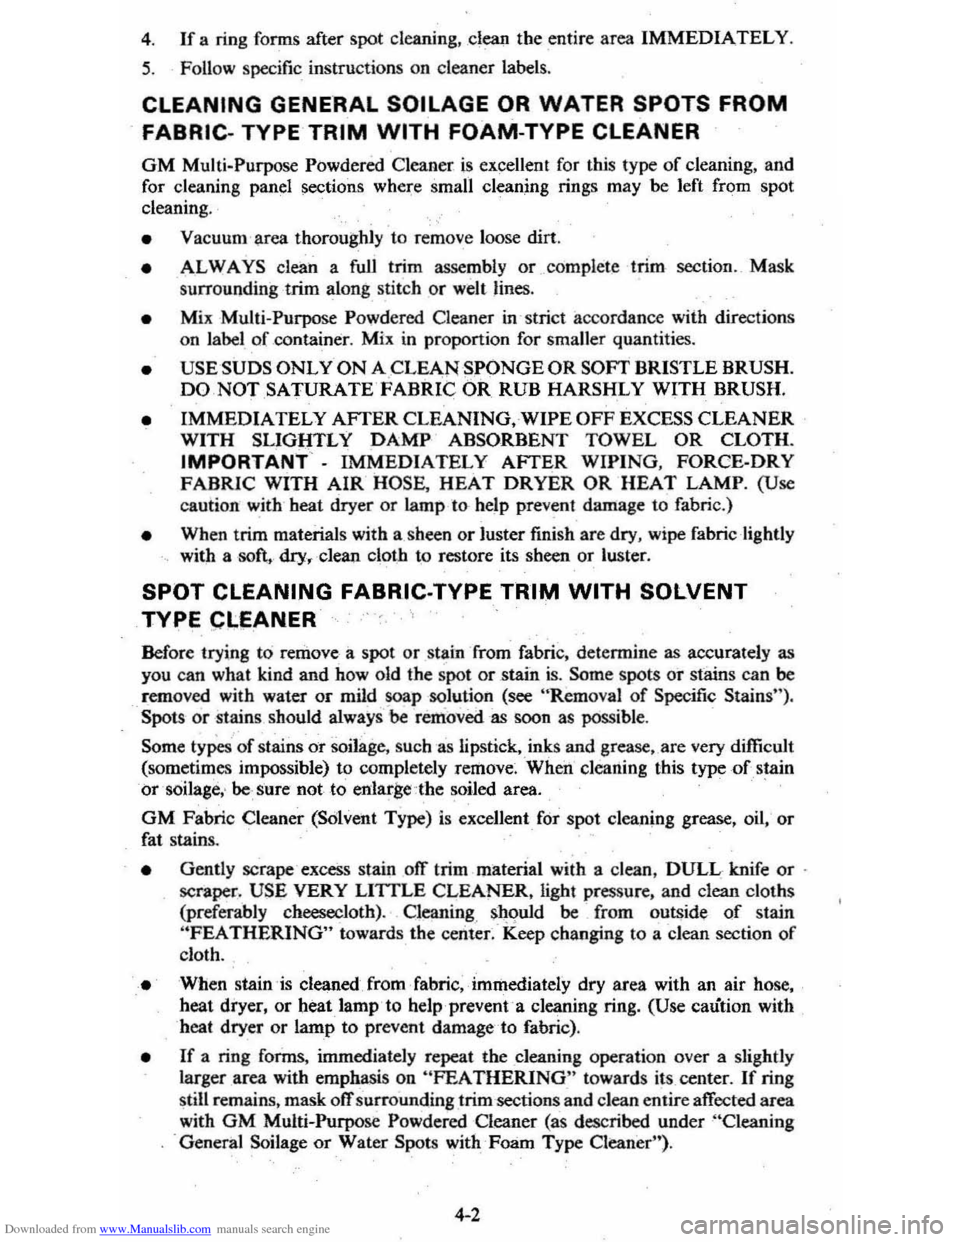
Downloaded from www.Manualslib.com manuals search engine 4. If a ring forms after spot cleaning, dean the entire area IMMEDIATELY.
5. Follow specific instructions on cleaner labels.
CLEANING GENERAL SOILAGE OR WATER SPOTS FROM
FABRIC-TYPE TRIM WITH FOAM-TYPE CLEANER
GM Multi~Purpose Powdered Cleaner is excellent for this type of cleaning, and
for cleaning panel sections where
small cleaning rings may be left from spot
cleaning .
• Vacuum'~rea thoroughly to remove loose dirt.
• AL WAYS clean a fuJI trim assembly or complete trim section. Mask
surrounding trim along stitch
or well Hnes.
• Mi x Multi-Purpose Powdered Cleaner in -strict accordance with direction s
on label of container. Mix in proportion for smaller quantities.
• USE SUDS ONLY ON A CLEAN SPONGE OR SOFT BRISTLE BRUSH. DO NOT SATURATE FABRIC OR RUB HARSHLY WITH BRUSH.
•
IMMEDIATELY AFTER CLEANING, WIPE OFF EXCESS CLEANER WITH SLIGHTLY DAMP ABSORBENT TOWEL OR CLOTH.
IMPORTANT' -IMMEDIATELY AFTER WIPING, FORCE-DRY
FABRIC WITH AIR HOSE, HEAT DRYER OR HEAT LAMP. (Use
ca ution with-beat dryer
or lamp to, help prev~nt damage to fabri c.)
• When trim materials with a sheen or luster finish are dry, wipe fabric lightly with a soft. dry,c1ean cloth to restore its sheen or luster.
SPOT CLEANING FABRIC-TYPE TRIM WITH SOLVENT
TYPE CLEANER
Before trying to remove -a spot or stain from fabric , detennine as accurately as
y o u ca n wha t kind and how old the spot
or stain is. Some spots or stains can be removed with water or mild ~p solution (see "Removal of Specific Stains ").
Spots or stains should always be removed as soon as possi ble.
Some tyPes of stains or soilage, such as lipstick, . ink s and gre ase"are very difficult
(sometimes impossible) to completely reIilove~ When cleaning this type ·of stain or soilage ,' be,: sure not to en)arg e,:the soiled area. .
GM Fabric Cleaner (Solvent Type) is exceHent for spot c1ea,ning grease, oil, or
fat stains .
• Gently scrape -exceSs stain otT trim material with a clean . DULL knife or .
sc raper .
USE VERY LITTLE CLEANER, light pressure, and clean cloths
(preferably c heesecloth) . Cleaning , shquld be from outside of stain "FEATHERING" towards the center;-Keep changing to a clean section of
cloth .
• Wben stain is cleaned from ,fabric,immediately dry area with an air hose.
heat dryer, or heat lamp 'to help ,prevent a cleaning ring. (Use caution with
heat dryer or lamp to prevent damage to fabric) .
• If a ring forms . immediately repeat the deaning operation over a slightly
larger area with emphasi s on "FEA THERINO" toward s its center. If ring
still remains, mask ofT surrounding trim-sections and clean entire affected area
with
GM MUlti-Purpose Powdered Cleaner (as described under -"Cleaning
' General Soilage or Water Spots with -Foam Type Cleaner").
4-2
Page 57 of 95
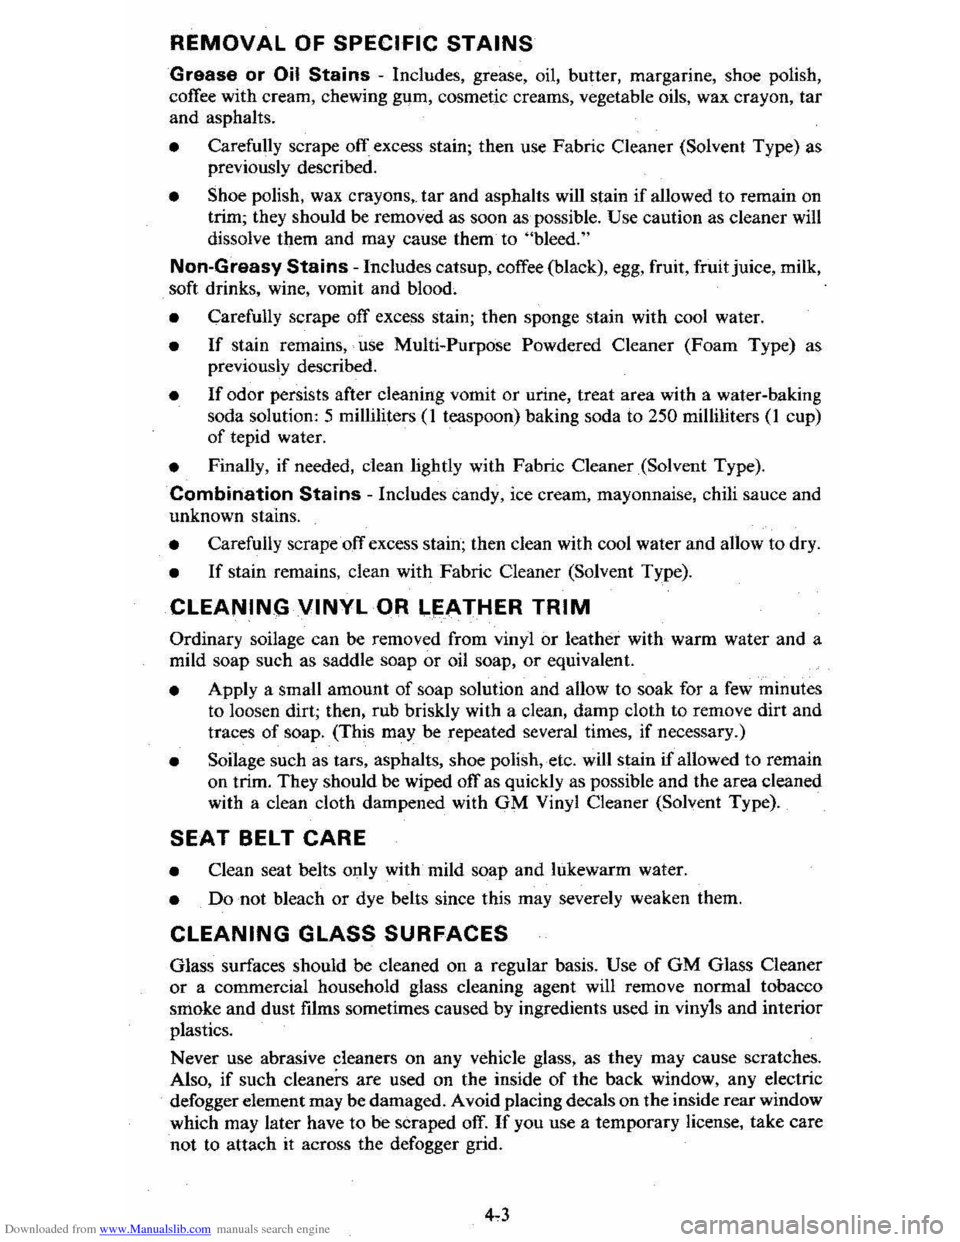
Downloaded from www.Manualslib.com manuals search engine REMOVAL OF SPECIFIC STAINS
Grease or Oil Stains -Includes, grease, oil, butter, margarine, shoe polish,
coffee with cream, chewing gum, cosmetic creams, vegetable oils, wax crayon, tar
and asphalts.
• Carefully scrape of I excess stain; then use Fabric Cleaner (Solvent Type) as
previously described.
• Shoe polish, wax crayons,. tar and asphalts will stain if allowed to remain on
trim; they should be removed as soon as possible. Use caution as cleaner will
dissolve them and may cause them to "bleed."
Non-Greasy Stains -Includes catsup, coffee (black), egg, fruit, fruit juice, milk,
soft drinks, wine, vomit and blood;
•
Carefully scrape off excess stain; then sponge stain with cool water.
• If stain remains,"· use Multi-Purpose Powdered Cleaner (Foam Type) as
previously described.
• If odor persists after cleaning vomit or urine, treat area with a water-baking
soda solution: 5 milliliters (1 teaspoon) baking soda to 250 milliliters (1 cup)
of tepid water.
• Finally, if needed, clean lightly with Fabric Cleaner (Solvent Type).
Combination
Stains - Includes candy, ice cream, mayonnaise , chili sauce and
unknown stains.
• Carefully scrape off excess stain; then clean with cool water and allow to dry.
• If stain remains, clean with Fabric Cleaner (Solvent Type).
CLEANING VINYL OR LEATHER TRIM
Ordinary soilage can be removed from vinyl or leather with warm water and a
mild soap such as saddle soap or oil soap, or equivalent.
• Apply a small amount of soap solution and allow to soak for a few minutes
to loosen dirt; then, rub briskly with a clean, damp cloth to remove dirt and
traces of soap. (This may be repeated several times,
if necessary.)
• Soilage such as tars, asphalts, shoe polish,etc. will stain if allowed to remain
on trim. They should be wiped ofT as quickly as possible and the area cleaned
with a clean cloth dampened with GM Vinyl Cleaner (Solvent Type).
SEAT BELT CARE
• Clean seat belts only with mild soap and lukewarm water.
• Do not bleach or dye belts since this may severely weaken them.
CLEANING GLASS SURFACES
Glass surfaces should be cleaned on a regular basis. Use of GM Glass Cleaner or a commercial household glass cleaning agent will remove normal tobacco
smoke and dust films sometimes caused by ingredients used in vinyls and interior
plastics.
Never use abrasive cleaners on any vehicle glass, as they may cause scratches.
Also,
if such cleaners are used on the inside of the back window, any electric
defogger element may be damaged. A void placing decals on the inside rear window
which may later have to be scraped
ofT. If you use a temporary license, take care
not to attach it across the defogger grid.
Page 58 of 95
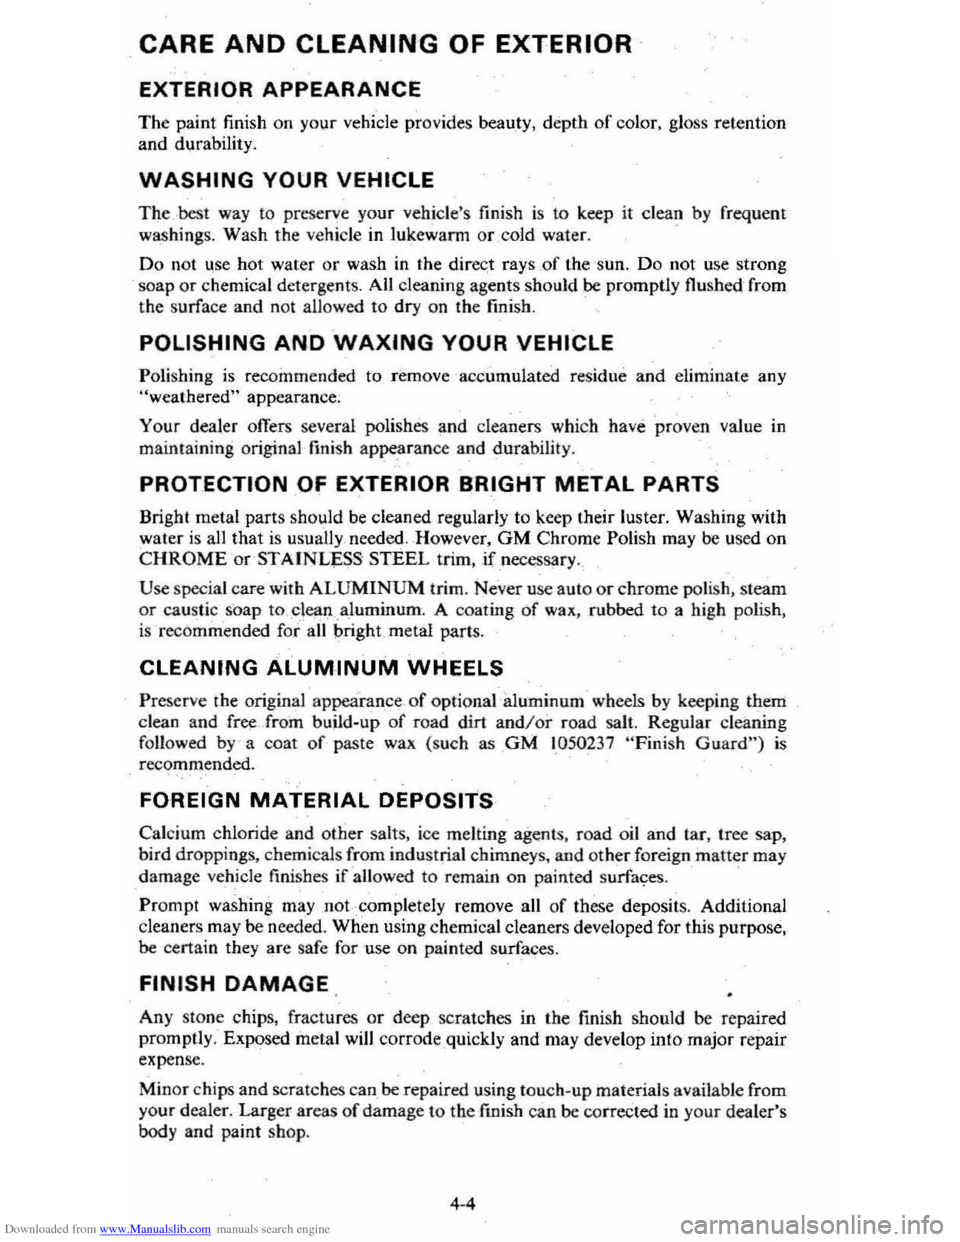
Downloaded from www.Manualslib.com manuals search engine CARE AND CLEANING OF EXTERIOR
EXTERIOR APPEARANCE
The paint finish on yo~r vehicle provides beauty, depth of color, gloss retention
and durability.
WASHING YOUR VEHICLE
The best way to preserve your vehicle's finish is to keep it clean by frequent
wa sh ings. Wash the vehicle in lukewarm or cold wate r. .
Do n o t lise hot water or wash in the direct rays of the 's un. Do not use stro ng
soap or chemical deterge nts. All cleaning agents should be promptly flushed from the surface and not allowed to dry on the fini sh .
POLISHING AND WAXING YOUR VEHICLE
Poli shin g is recomme nded to rem ove accu mulat ed residue and elim inate any "weathered" appearance;
Y ou r dealer offers several
polishes and cleaners which have proven value in
m aint
ainin g original finish appe .a rance and durability .
PROTECTION OF EXTERIOR ~RIGHT METAL PARTS
Bright metal parts should be clean ed regu larly to keep their luster. Washing with
wat er i s all that
is usu ally, needed. How ever, GM Chrome Polish may be used on CHROME or STAINLESS STEEL trim. if neces sary .
Use spec ial care with ALUMINU M trim . N eve r use aul a o r chrome polish, s team
or caustic soap to clean .aluminum. A coat ing of wax, rubbed to a high polish,
is recom mended for all bright metal parts.
CLEANING ALUMINUM WHEELS
Prese rve the original appearance of opti onal ·aluminum wheels by keep ing them clean and free ·Jrorn build-up of road dirt andlor road salt. Regular cleaning
followed
by · a coat of paste wax (such as GM 1.050237 " Fini sh Guard") is reco mm ended.
FOREIGN MATERIAL DEPOSITS
Calcium chloride and other salts, ice melt ing ag~nts, road oil and tar, tree sap ,
bird drop pings , chem icals from industria l c himn eys, and other foreign matter may
dam age
vehicle finishe s if allowed to remai n on painted surfa~es.
Promp t washing may ,not complet ely remove all of these deposits. Additional
clean ers may be needed . When using chem ical clean ers developed for this purpose,
be certain they are safe for use on painted s
urfaces.
FINISH DAMAGE.
Any sto ne chips, fractures or deep scratches in the finish should be repaired
promptly. Exposed
meta l will corrode ,quick ly and may develo p into majo r repair
exp ense.
Min or chips and scratches c
an be repaired using touc h-up materials available from
your dealer. Larger areas of dama ge to the finish can be co rreeted in your dealer's
body and paint sho p.
4 -4
Page 59 of 95
Downloaded from www.Manualslib.com manuals search engine CLEANING WHITE SIDEWALL TIRES
UseGM White Sidewall Tire Cleaner or a tire cleaner which will not harm wheel
aluminum trim. A stitT brush may
be used with the cleaner.
CORROSION PROTECTION
Generally, your vehicle has been designed and built to resist corrosion. Special
materials and protective finishes were applied to most parts of your vehicle when it was built to belp maintain good looks, strength and reliable operation. However,
some parts which are normally not visible (such as certain parts
under the vehicle and under the hood) are strong enough so that surface rust will not affect their
reliability.
So corrosion protection is not needed or used on these parts. By
omitting unneeded fust protection on such parts and applying extra protection where it is needed most, best value is assured for the vehicle buyer.
SHEET METAL DAMAGE
If your vehicle is damaged and requires sheet metal repair or replacement. make
sure·
the body repair shop applies anti-corrosion material to the parts repaired or replaced so that corrosion protection is restored. (Also see "Finish Damage" in
this section.)
UNDERBODY MAINTENANCE
Corrosive materials used for ice and· snow removal and dust control can collect
on the underbody. If these materials are-not removed. accelerated corrosion (rust)
can
occur on underbody parts such as fuel lines. frame, floor pan. and exhaust
system even though they have been provided with corrosion protection.
At least every spring. flush these materials from the underbooy with plain water.
Take care to clean well any areas where mud and other debris can collect.
Sediment packed in closed areas
of the frame should . be loosened before being
flushed.
If desired. your authorized dealer can perform this service for you.
4-5
Page 60 of 95
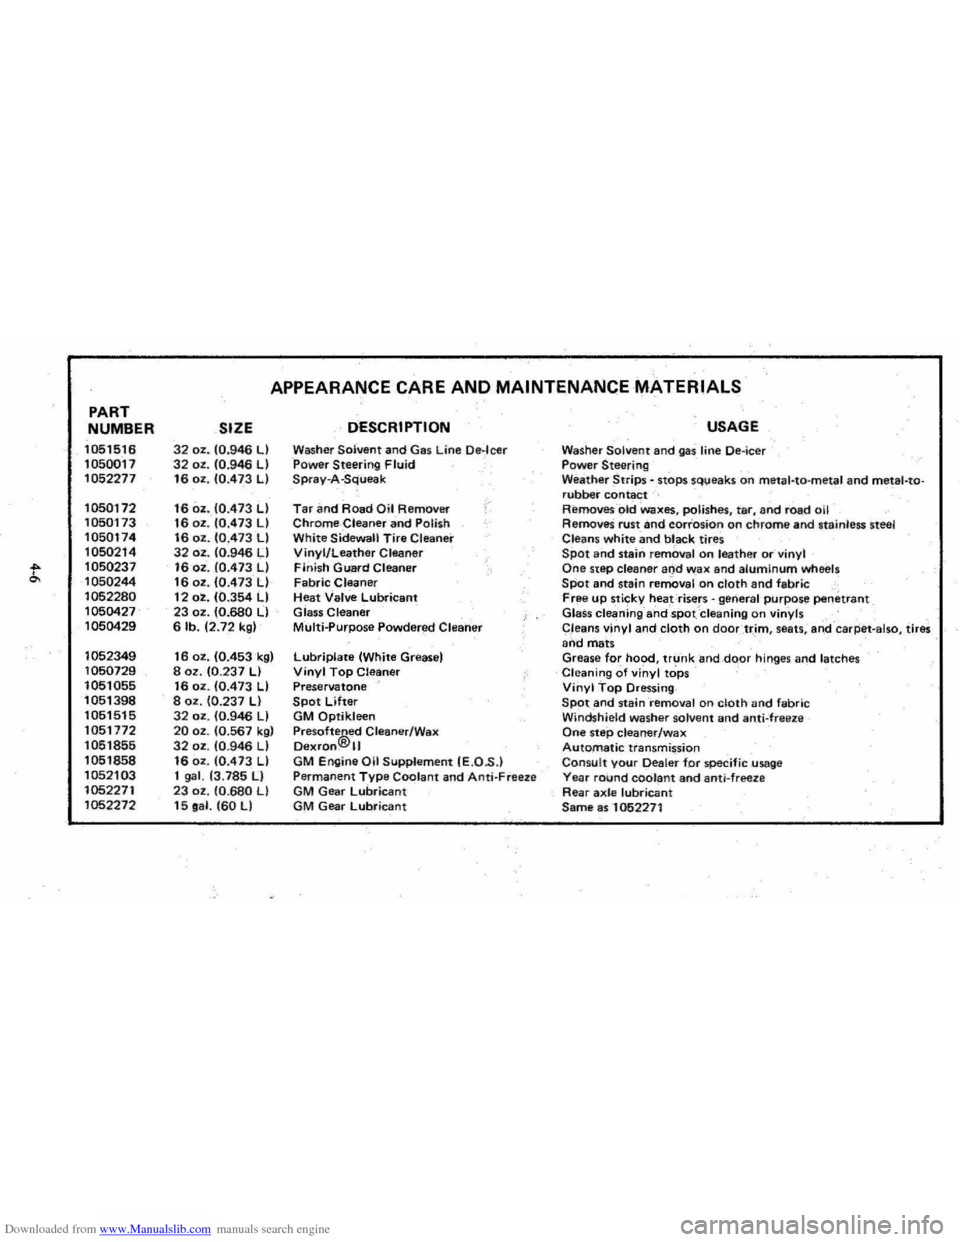
Downloaded from www.Manualslib.com manuals search engine PART
NUMBER
1051516
1050017
1052277
1050172 1050173
1050174
1050214
t 1050237
1050244
1052280
1050427 1050429
1052349
1050729
1051055 1051398 1051515
1051772 1051855
1051858
1052103
1052271 1052272
APPEARANCE CARE AND MAINTENANCE MATERIALS
SIZE DESCRIPTION
32 oz. 10.946 LI Washer Solvent and Gas Line De·leer 32 oz. 10.946 LI Power Steering Fluid 16 oz. 10.473 LI Spray-A-Squeak
16 oz. 10.473 LI Tar an d Road Oil Removirr /"
16 oz . 10.473 LI Chrome-Cleaner and Polish 16 oz. 10.473 LI White Sidewall Tire Cleaner 32 oz. 10:946 LI Vinyl/Leather Cleaner 16 oz . 10.473 LI Finish Guard Cleaner 16 oz. 10.473 LI Fabric Cleaner 12 oz. 10.354 LI Heat Valve Lubricant 23 oz. (0.680 LI Glass Cleaner 6 lb. 12.72 kgl Multi..purpose Powdered Clearier
16 oz. 10.453k91 Lubriplate (White Greasel 8 oz. 10.237 LI Vinyl Top Cleaner 16 oz. 10.473 LI Preservatone 8 oz. 10.237 LI Spot Lifter 32 oz. 10.946 LI GM Qptikleen 20 oz. 10.567 kgl Pre softe®ed Cleaner/Wax 32 oz. 10.946 LI Dexfon. II 16 oz. 10.473 LI GM Engine Oil Supplement IE.O .S .) 1 gal. 13.785 II Permanent Type Coolant and Anti- Freeze 23 oz . 10.680 LI GM Gear lubricant 15 oa l. 160 LI GM Gear Lubricant
USAGE
Washer Solvent and gas line Oe-ieer Power Steering Weather Strips - .stops sq\;leaks on meta l-ta-metal and metal-torubber contact Removes- -old Waxes, polishes, tar, and road oil RemoveS rust and corrosion on chrome and stainless steel
Cleans white and bl _ack tires Spot and stalrl removal o n leather or vinyl One step cleaner and wax and alumInum wh eels SPot and stain removal on cloth and fabric , Free up sticky heat risers -general 'purpose penetrant Glass cleaning ahdspot Cleaning on vinyls
C,leans vinyl and cloth on doortr,im , seats , ari,d -caq:iet -also, tires and mats Grease for hood, trunk and,dQor hinges and latches Cleaning of vinyl tops Vinyl Top Dressing SPOt and staini-emoval on cloth and fabric Windshield washer solvent and anti-freeze One step cleaner/wax Automatic transmission Consult your Dealer for specific usage Yea r round coolant and anti-freez e Rear axle lubricant Same as -1052271