check CHEVROLET CORVETTE 2017 7.G Repair Manual
[x] Cancel search | Manufacturer: CHEVROLET, Model Year: 2017, Model line: CORVETTE, Model: CHEVROLET CORVETTE 2017 7.GPages: 360, PDF Size: 6.3 MB
Page 251 of 360
Chevrolet Corvette Owner Manual (GMNA-Localizing-U.S./Canada/Mexico-
9956103) - 2017 - crc - 4/28/16
250 Vehicle Care
Rear Axle
When to Check Lubricant
It is not necessary to regularly
check rear axle fluid unless a leak is
suspected or an unusual noise is
heard. A fluid loss could indicate a
problem. Have it inspected and
repaired.
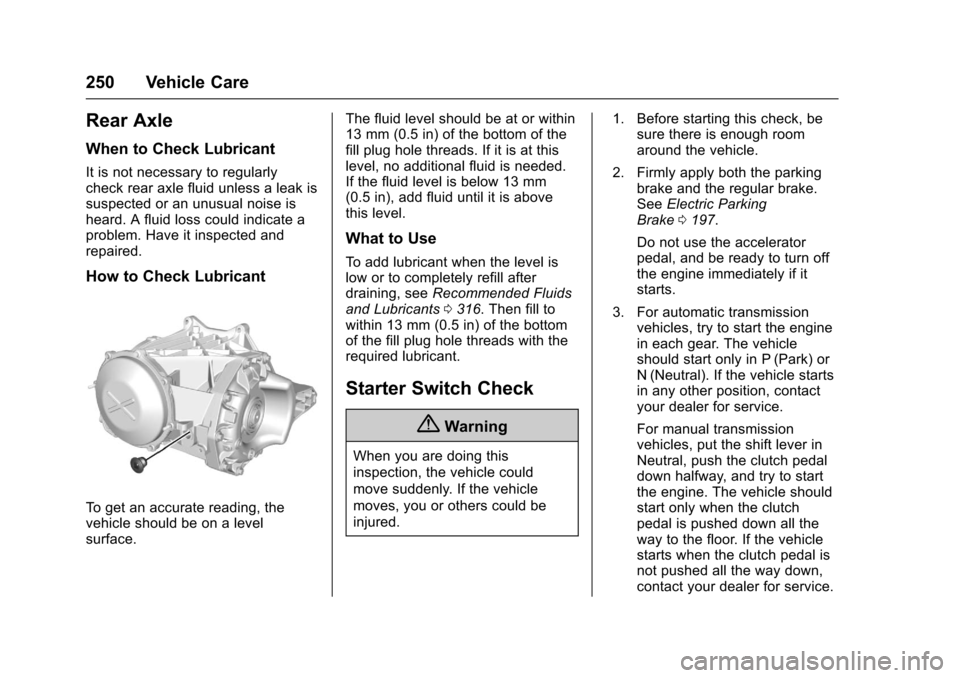
How to Check Lubricant
To get an accurate reading, the
vehicle should be on a level
surface.The fluid level should be at or within
13 mm (0.5 in) of the bottom of the
fill plug hole threads. If it is at this
level, no additional fluid is needed.
If the fluid level is below 13 mm
(0.5 in), add fluid until it is above
this level.
What to Use
To add lubricant when the level is
low or to completely refill after
draining, see
Recommended Fluids
and Lubricants 0316. Then fill to
within 13 mm (0.5 in) of the bottom
of the fill plug hole threads with the
required lubricant.
Starter Switch Check
{Warning
When you are doing this
inspection, the vehicle could
move suddenly. If the vehicle
moves, you or others could be
injured. 1. Before starting this check, be
sure there is enough room
around the vehicle.
2. Firmly apply both the parking brake and the regular brake.
See Electric Parking
Brake 0197.
Do not use the accelerator
pedal, and be ready to turn off
the engine immediately if it
starts.
3. For automatic transmission vehicles, try to start the engine
in each gear. The vehicle
should start only in P (Park) or
N (Neutral). If the vehicle starts
in any other position, contact
your dealer for service.
For manual transmission
vehicles, put the shift lever in
Neutral, push the clutch pedal
down halfway, and try to start
the engine. The vehicle should
start only when the clutch
pedal is pushed down all the
way to the floor. If the vehicle
starts when the clutch pedal is
not pushed all the way down,
contact your dealer for service.
Page 252 of 360
Chevrolet Corvette Owner Manual (GMNA-Localizing-U.S./Canada/Mexico-
9956103) - 2017 - crc - 4/28/16
Vehicle Care 251
Automatic Transmission
Shift Lock Control
Function Check
{Warning
When you are doing this
inspection, the vehicle could
move suddenly. If the vehicle
moves, you or others could be
injured.
1. Before starting this check, be sure there is enough room
around the vehicle. It should be
parked on a level surface.
2. Apply the parking brake. See Electric Parking Brake 0197.
Be ready to apply the regular
brake immediately if the vehicle
begins to move.
3. With the engine off, turn the ignition on, but do not start the
engine. Without applying the
regular brake, try to move the
shift lever out of P (Park) with normal effort. If the shift lever
moves out of P (Park), contact
your dealer for service.
Park Brake and P (Park)
Mechanism Check
{Warning
When you are doing this check,
the vehicle could begin to move.
You or others could be injured
and property could be damaged.
Make sure there is room in front
of the vehicle in case it begins to
roll. Be ready to apply the regular
brake at once should the vehicle
begin to move.
Park on a fairly steep hill, with the
vehicle facing downhill. Keeping
your foot on the regular brake, set
the parking brake.
. To check the parking brake's
holding ability: With the engine
running and the transmission in
N (Neutral), slowly remove foot pressure from the regular brake
pedal. Do this until the vehicle is
held by the parking brake only.
. To check the P (Park)
mechanism's holding ability:
With the engine running, shift to
P (Park). Then release the
parking brake followed by the
regular brake.
Contact your dealer if service is
required.
Wiper Blade Replacement
Windshield wiper blades should be
inspected for wear and cracking.
Replacement blades come in
different types and are removed in
different ways. For proper type and
length, see Maintenance
Replacement Parts 0317.
To replace the windshield wiper
blade: 1. Open the hood.
2. Pull the windshield wiper assembly away from the
windshield.
Page 263 of 360
Chevrolet Corvette Owner Manual (GMNA-Localizing-U.S./Canada/Mexico-
9956103) - 2017 - crc - 4/28/16
262 Vehicle Care
FusesUsage
39 –
40 –
41 –
42 –
43 –
44 –
Relays Usage
R1 –
R2 Rear window defogger
R3 –
R4 Front accessory power outlet
R5 Theft (door lock security)Wheels and Tires
Tires
Every new GM vehicle has
high-quality tires made by a
leading tire manufacturer. See
the warranty manual for
information regarding the tire
warranty and where to get
service. For additional
information refer to the tire
manufacturer.
{Warning
.Poorly maintained and
improperly used tires are
dangerous.
.Overloading the tires can
cause overheating as a
result of too much
flexing. There could be a
blowout and a serious
crash. See Vehicle Load
Limits 0177.
(Continued)
Warning (Continued)
.Underinflated tires pose
the same danger as
overloaded tires. The
resulting crash could
cause serious injury.
Check all tires frequently
to maintain the
recommended pressure.
Tire pressure should be
checked when the tires
are cold.
.Overinflated tires are
more likely to be cut,
punctured, or broken by
a sudden impact —such
as when hitting a pothole.
Keep tires at the
recommended pressure.
.Worn or old tires can
cause a crash. If the
tread is badly worn,
replace them.
(Continued)
Page 265 of 360
Chevrolet Corvette Owner Manual (GMNA-Localizing-U.S./Canada/Mexico-
9956103) - 2017 - crc - 4/28/16
264 Vehicle Care
Warning (Continued)
drive over 80 km/h (50 mph) when
the low tire warning light is
displayed. Drive cautiously and
check the tire pressures as soon
as possible.
Run-flat tires can be driven on with
no air pressure. There is no need to
stop on the side of the road to
change the tire. Continue driving;
however, do not drive too far or too
fast. Driving on the tire may not be
possible if there is permanent
damage. To prevent permanent
damage, the tire can be driven with
no air pressure for up to 80 km
(50 mi) at speeds slower than
80 km/h (50 mph). As soon as
possible, contact the nearest
authorized GM or run-flat servicing
facility for inspection and repair or
replacement.
When driving on a deflated run-flat
tire, avoid potholes and other road
hazards that could damage the tire
and/or wheel beyond repair. When a
tire has been damaged, or if driven any distance while deflated, check
with an authorized run-flat tire
service center to determine whether
the tire can be repaired or should be
replaced. To maintain the run-flat
feature, all replacement tires must
be run-flat tires.
To locate the nearest GM or run-flat
servicing facility, call Customer
Assistance.
The valve stems on run-flat tires
have sensors that are part of the
TPMS. See
Tire Pressure Monitor
System 0273. These sensors
contain batteries that are designed
to last for 10 years under normal
driving conditions. See your dealer
for wheel or sensor replacement.
Caution
Using liquid sealants can damage
the tire valves and tire pressure
monitor sensors in the run-flat
tires. This damage is not covered
by the vehicle warranty. Do not
use liquid sealants in run-flat
tires.
Low-Profile Tires
Low-Profile Performance Tire
The original equipment tires on
this vehicle are classified as
low-profile performance tires.
These tires are designed for
very responsive driving on wet
or dry pavement, however, may
produce more road noise and
tend to wear faster.
Caution
Low-profile tires are more
susceptible to damage from road
hazards or curb impact than
standard profile tires. Tire and/or
wheel assembly damage can
occur when coming into contact
with road hazards like potholes,
or sharp edged objects, or when
sliding into a curb. The warranty
does not cover this type of
damage. Keep tires set to the
correct inflation pressure and (Continued)
Page 272 of 360
Chevrolet Corvette Owner Manual (GMNA-Localizing-U.S./Canada/Mexico-
9956103) - 2017 - crc - 4/28/16
Vehicle Care 271
Caution
Neither tire underinflation nor
overinflation is good.
Underinflated tires, or tires
that do not have enough air,
can result in:
.Tire overloading and
overheating which could
lead to a blowout.
.Premature or
irregular wear.
.Poor handling.
.Reduced fuel economy.
Overinflated tires, or tires that
have too much air, can
result in:
.Unusual wear.
.Poor handling.
.Rough ride.
.Needless damage from
road hazards. The Tire and Loading
Information label on the vehicle
indicates the original equipment
tires and the correct cold tire
inflation pressures. The
recommended pressure is the
minimum air pressure needed to
support the vehicle's maximum
load carrying capacity.
On rare occasions, vehicles with
P245/40ZR18 and P285/35ZR19
size tires may experience a
rough ride at the tire pressure
recommended on the Tire and
Loading Information label. To
improve ride performance,
decrease the tire pressure to no
less than 205 kPa (30 psi) when
the tire is cold. This may reduce
fuel economy and cause the low
tire pressure warning to occur
more often.
Inflate the tires to the
recommended pressure once
rough ride road conditions have
passed. For additional information
regarding how much weight the
vehicle can carry, and an
example of the Tire and Loading
Information label, see
Vehicle
Load Limits 0177. How the
vehicle is loaded affects vehicle
handling and ride comfort. Never
load the vehicle with more
weight than it was designed to
carry.
When to Check
Check the tires once a month
or more.
How to Check
Use a good quality pocket-type
gauge to check the tire
pressure. Proper tire inflation
cannot be determined by looking
at the tire. Check the tire
inflation pressure when the tires
are cold, meaning the vehicle
has not been driven for at least
three hours or no more than
1.6 km (1 mi).
Page 273 of 360

Chevrolet Corvette Owner Manual (GMNA-Localizing-U.S./Canada/Mexico-
9956103) - 2017 - crc - 4/28/16
272 Vehicle Care
Remove the valve cap from the
tire valve stem. Press the tire
gauge firmly onto the valve to
get the pressure measurement.
If the cold tire inflation pressure
matches the recommended
pressure on the Tire and
Loading Information label, no
further adjustment is necessary.
If the inflation pressure is low,
add air until the recommended
pressure is reached. If the
inflation pressure in high, press
on the metal stem in the center
of the tire valve to release air.
Re-check the tire pressure with
the tire gauge.
Put the valve caps back on the
valve stems to keep out dirt and
moisture and prevent leaks. Use
only valve caps designed for the
vehicle by GM. TPMS sensors
could be damaged and would
not be covered by the vehicle
warranty.Tire Pressure for
High-Speed Operation
{Warning
Driving at high speeds, 160 km/h
(100 mph) or higher, puts
additional strain on tires.
Sustained high-speed driving
causes excessive heat buildup
and can cause sudden tire failure.
This could cause a crash, and
you or others could be killed.
Some high-speed rated tires
require inflation pressure
adjustment for high-speed
operation. When speed limits and
road conditions allow the vehicle
to be driven at high speeds, make
sure the tires are rated for
high-speed operation, are in
excellent condition, and are set to
the correct cold tire inflation
pressure for the vehicle load.
The tires require inflation pressure
adjustment when driving the vehicle
at speeds of 160 km/h (100 mph) or higher, where it is legal. Set the cold
inflation pressure to the maximum
inflation pressure shown on the tire
sidewall, or 265 kPa (38 psi),
whichever is lower. See the
example following. Return the tires
to the recommended cold tire
inflation pressure when high-speed
driving has ended. See
Vehicle
Load Limits 0177.
Example:
The maximum load and inflation
pressure molded on the tire
sidewall, in small letters, near the
rim flange. It will read something like
this: Maximum load
690 kg (1521 lbs) 300 kPa (44 psi)
Max. Press.
For this example, set the inflation
pressure for high-speed driving at
265 kPa (38 psi).
Racing or other competitive driving
may affect the warranty coverage of
the vehicle. See the warranty
booklet for more information.
Page 274 of 360
Chevrolet Corvette Owner Manual (GMNA-Localizing-U.S./Canada/Mexico-
9956103) - 2017 - crc - 4/28/16
Vehicle Care 273
Tire Pressure Monitor
System
The Tire Pressure Monitor System
(TPMS) uses radio and sensor
technology to check tire pressure
levels. The TPMS sensors monitor
the air pressure in your tires and
transmit tire pressure readings to a
receiver located in the vehicle.
Each tire, including the spare (if
provided), should be checked
monthly when cold and inflated to
the inflation pressure recommended
by the vehicle manufacturer on the
vehicle placard or tire inflation
pressure label. (If your vehicle has
tires of a different size than the size
indicated on the vehicle placard or
tire inflation pressure label, you
should determine the proper tire
inflation pressure for those tires.)
As an added safety feature, your
vehicle has been equipped with a
tire pressure monitoring system
(TPMS) that illuminates a low tire
pressure telltale when one or more
of your tires is significantly
under-inflated.Accordingly, when the low tire
pressure telltale illuminates, you
should stop and check your tires as
soon as possible, and inflate them
to the proper pressure. Driving on a
significantly under-inflated tire
causes the tire to overheat and can
lead to tire failure. Under-inflation
also reduces fuel efficiency and tire
tread life, and may affect the
vehicle's handling and stopping
ability.
Please note that the TPMS is not a
substitute for proper tire
maintenance, and it is the driver's
responsibility to maintain correct tire
pressure, even if under-inflation has
not reached the level to trigger
illumination of the TPMS low tire
pressure telltale.
Your vehicle has also been
equipped with a TPMS malfunction
indicator to indicate when the
system is not operating properly.
The TPMS malfunction indicator is
combined with the low tire pressure
telltale. When the system detects a
malfunction, the telltale will flash for
approximately one minute and then
remain continuously illuminated.This sequence will continue upon
subsequent vehicle start-ups as
long as the malfunction exists.
When the malfunction indicator is
illuminated, the system may not be
able to detect or signal low tire
pressure as intended. TPMS
malfunctions may occur for a variety
of reasons, including the installation
of replacement or alternate tires or
wheels on the vehicle that prevent
the TPMS from functioning properly.
Always check the TPMS malfunction
telltale after replacing one or more
tires or wheels on your vehicle to
ensure that the replacement or
alternate tires and wheels allow the
TPMS to continue to function
properly.
See
Tire Pressure Monitor
Operation 0274.
See Radio Frequency
Statement 0334.
Page 275 of 360
Chevrolet Corvette Owner Manual (GMNA-Localizing-U.S./Canada/Mexico-
9956103) - 2017 - crc - 4/28/16
274 Vehicle Care
Tire Pressure Monitor
Operation
This vehicle may have a Tire
Pressure Monitor System (TPMS).
The TPMS is designed to warn the
driver when a low tire pressure
condition exists. TPMS sensors are
mounted onto each tire and wheel
assembly on your vehicle. The
TPMS sensors monitor the air
pressure in the tires and transmits
the tire pressure readings to a
receiver located in the vehicle.
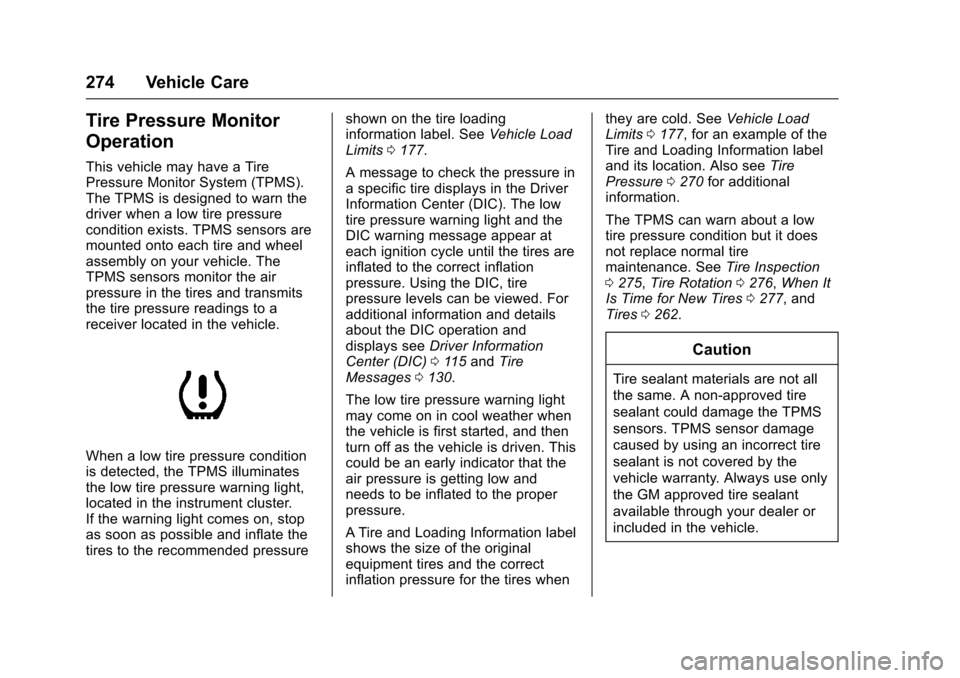
When a low tire pressure condition
is detected, the TPMS illuminates
the low tire pressure warning light,
located in the instrument cluster.
If the warning light comes on, stop
as soon as possible and inflate the
tires to the recommended pressureshown on the tire loading
information label. See
Vehicle Load
Limits 0177.
A message to check the pressure in
a specific tire displays in the Driver
Information Center (DIC). The low
tire pressure warning light and the
DIC warning message appear at
each ignition cycle until the tires are
inflated to the correct inflation
pressure. Using the DIC, tire
pressure levels can be viewed. For
additional information and details
about the DIC operation and
displays see Driver Information
Center (DIC) 0115 and Tire
Messages 0130.
The low tire pressure warning light
may come on in cool weather when
the vehicle is first started, and then
turn off as the vehicle is driven. This
could be an early indicator that the
air pressure is getting low and
needs to be inflated to the proper
pressure.
A Tire and Loading Information label
shows the size of the original
equipment tires and the correct
inflation pressure for the tires when they are cold. See
Vehicle Load
Limits 0177, for an example of the
Tire and Loading Information label
and its location. Also see Tire
Pressure 0270 for additional
information.
The TPMS can warn about a low
tire pressure condition but it does
not replace normal tire
maintenance. See Tire Inspection
0 275, Tire Rotation 0276, When It
Is Time for New Tires 0277, and
Tires 0262.
Caution
Tire sealant materials are not all
the same. A non-approved tire
sealant could damage the TPMS
sensors. TPMS sensor damage
caused by using an incorrect tire
sealant is not covered by the
vehicle warranty. Always use only
the GM approved tire sealant
available through your dealer or
included in the vehicle.
Page 277 of 360
Chevrolet Corvette Owner Manual (GMNA-Localizing-U.S./Canada/Mexico-
9956103) - 2017 - crc - 4/28/16
276 Vehicle Care
Replace the tire if:
.The indicators at three or
more places around the tire
can be seen.
.There is cord or fabric
showing through the tire's
rubber.
.The tread or sidewall is
cracked, cut, or snagged
deep enough to show cord or
fabric.
.The tire has a bump, bulge,
or split.
.The tire has a puncture, cut,
or other damage that cannot
be repaired well because of
the size or location of the
damage.
Tire Rotation
The tires should be rotated
every 12 000 km/7,500 mi. See
Maintenance Schedule0307.
Tires are rotated to achieve
uniform wear for all tires. The
first rotation is the most
important.
Anytime unusual wear is
noticed, rotate the tires as soon
as possible, check for proper tire
inflation pressure, and check for
damaged tires or wheels. If the
unusual wear continues after the
rotation, check the wheel
alignment. See When It Is Time
for New Tires 0277 andWheel
Replacement 0281.
Different tire sizes should not be
rotated front to rear.
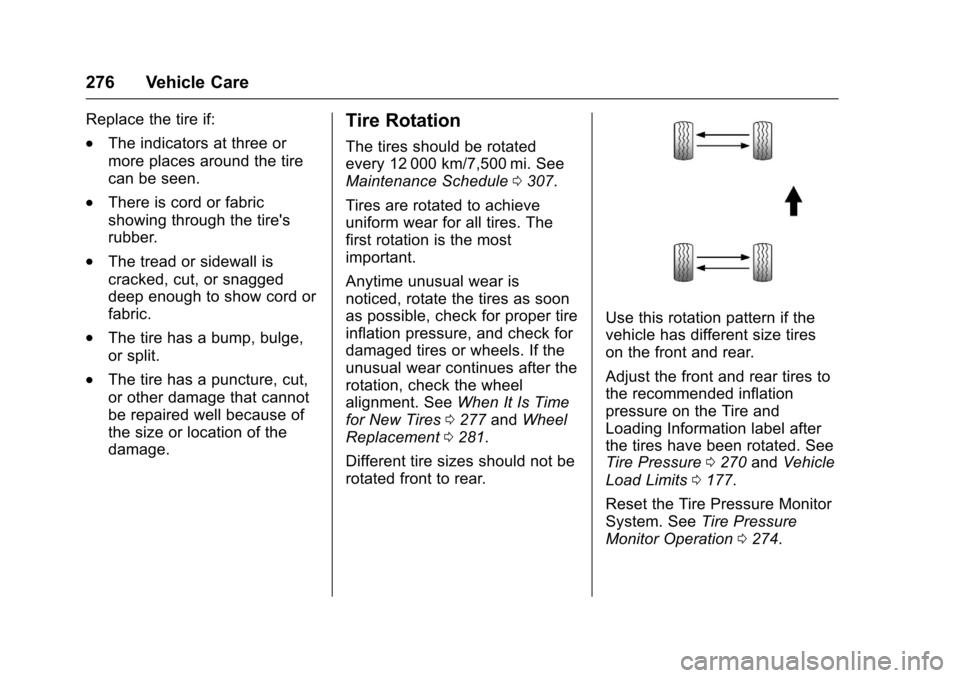
Use this rotation pattern if the
vehicle has different size tires
on the front and rear.
Adjust the front and rear tires to
the recommended inflation
pressure on the Tire and
Loading Information label after
the tires have been rotated. See
Tire Pressure 0270 and Vehicle
Load Limits 0177.
Reset the Tire Pressure Monitor
System. See Tire Pressure
Monitor Operation 0274.
Page 278 of 360
Chevrolet Corvette Owner Manual (GMNA-Localizing-U.S./Canada/Mexico-
9956103) - 2017 - crc - 4/28/16
Vehicle Care 277
Check that all wheel nuts are
properly tightened. See“Wheel
Nut Torque” underCapacities
and Specifications 0321.
{Warning
Rust or dirt on a wheel, or on the
parts to which it is fastened, can
make wheel nuts become loose
after time. The wheel could come
off and cause an accident. When
changing a wheel, remove any
rust or dirt from places where the
wheel attaches to the vehicle. In
an emergency, a cloth or a paper
towel can be used; however, use
a scraper or wire brush later to
remove all rust or dirt.
Lightly coat the center of the
wheel hub with wheel bearing
grease after a wheel change or
tire rotation to prevent corrosion
or rust build-up. Do not get
grease on the flat wheel
mounting surface or on the
wheel nuts or bolts.
When It Is Time for New
Tires
Factors such as maintenance,
temperatures, driving speeds,
vehicle loading, and road conditions
affect the wear rate of the tires.
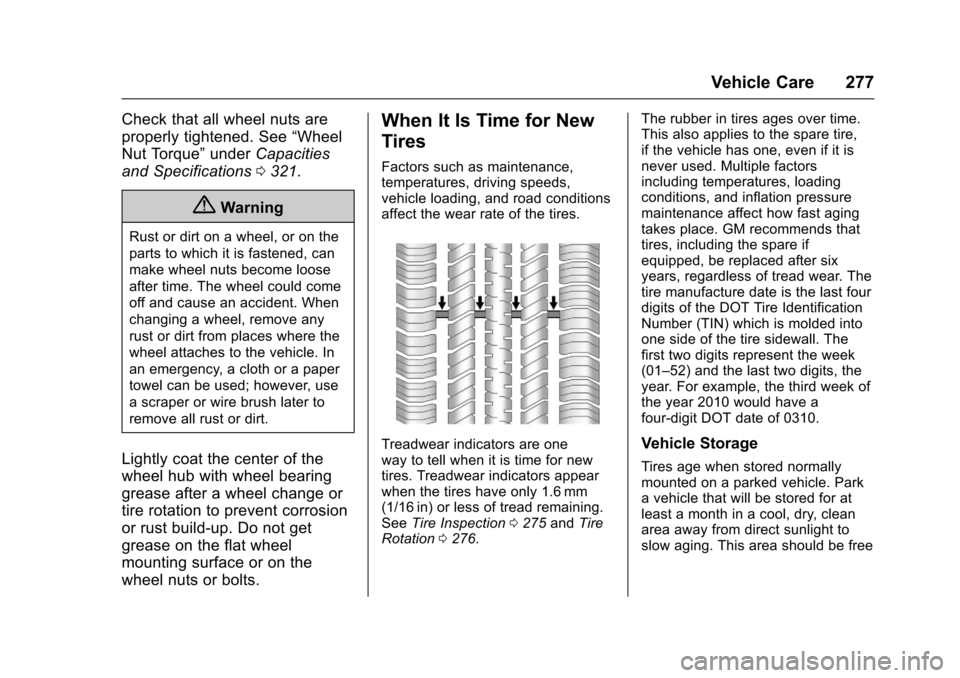
Treadwear indicators are one
way to tell when it is time for new
tires. Treadwear indicators appear
when the tires have only 1.6 mm
(1/16 in) or less of tread remaining.
See Tire Inspection 0275 andTire
Rotation 0276. The rubber in tires ages over time.
This also applies to the spare tire,
if the vehicle has one, even if it is
never used. Multiple factors
including temperatures, loading
conditions, and inflation pressure
maintenance affect how fast aging
takes place. GM recommends that
tires, including the spare if
equipped, be replaced after six
years, regardless of tread wear. The
tire manufacture date is the last four
digits of the DOT Tire Identification
Number (TIN) which is molded into
one side of the tire sidewall. The
first two digits represent the week
(01–52) and the last two digits, the
year. For example, the third week of
the year 2010 would have a
four-digit DOT date of 0310.Vehicle Storage
Tires age when stored normally
mounted on a parked vehicle. Park
a vehicle that will be stored for at
least a month in a cool, dry, clean
area away from direct sunlight to
slow aging. This area should be free