light CHEVROLET EXPRESS 2020 Get To Know Guide
[x] Cancel search | Manufacturer: CHEVROLET, Model Year: 2020, Model line: EXPRESS, Model: CHEVROLET EXPRESS 2020Pages: 356, PDF Size: 5.7 MB
Page 113 of 356
Chevrolet Express Owner Manual (GMNA-Localizing-U.S./Canada/Mexico-
13882570) - 2020 - CRC - 11/1/19
112 Lighting
Daytime Running
Lamps (DRL)
DRL can make it easier for others to
see the front of the vehicle during
the day. Fully functional DRL are
required on all vehicles first sold in
Canada.
The DRL system comes on in
daylight when the following
conditions are met:
.The ignition is on.
. The exterior lamp control is in
the AUTO position.
. The shift lever is not in P (Park).
. The light sensor determines it is
daytime.
When the DRL are on, the taillamps,
sidemarker, instrument panel lights,
and other lamps will not be on.
The automatic headlamp system
automatically switches from DRL to
the headlamps depending on the
darkness of the surroundings. To turn off the DRL, turn the exterior
lamp control to
Oand then release
it. For vehicles first sold in Canada,
the DRL can only be turned off
when the vehicle is parked.
Automatic Headlamp
System
When it is dark enough outside and
the headlamp switch is in AUTO,
the automatic headlamp system
turns on the headlamps, along with
the taillamps, sidemarker lamps,
parking lamps, and the instrument
panel lights. The radio lights will
also be dim.
To turn off the automatic headlamp
system, turn the exterior lamp
control to the off position and then
release. For vehicles first sold in
Canada, the transmission must be
in the P (Park) position, before the
automatic headlamp system can be
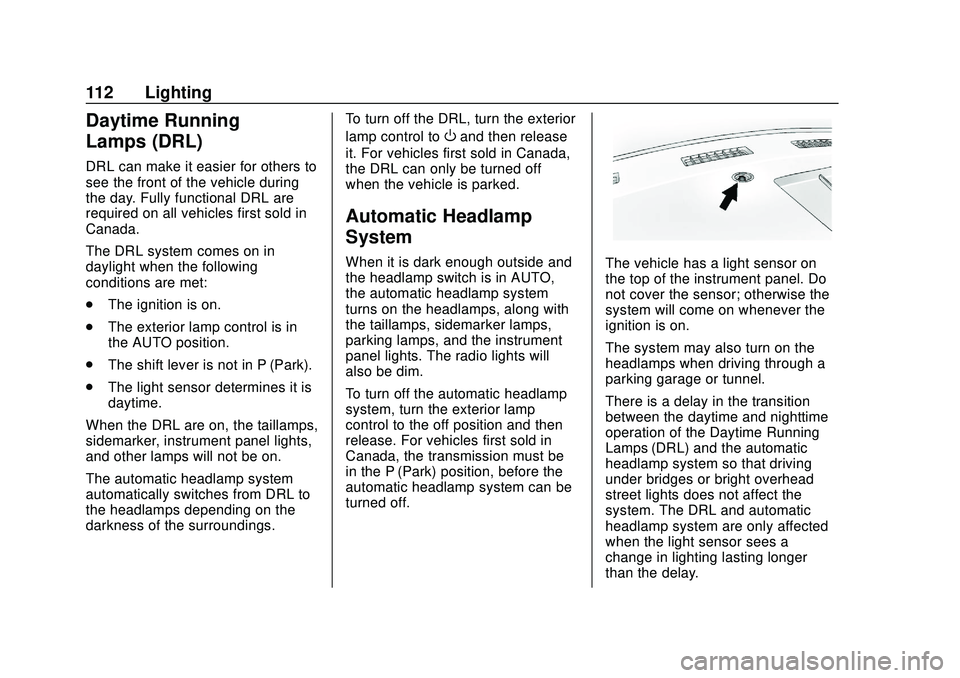
turned off.The vehicle has a light sensor on
the top of the instrument panel. Do
not cover the sensor; otherwise the
system will come on whenever the
ignition is on.
The system may also turn on the
headlamps when driving through a
parking garage or tunnel.
There is a delay in the transition
between the daytime and nighttime
operation of the Daytime Running
Lamps (DRL) and the automatic
headlamp system so that driving
under bridges or bright overhead
street lights does not affect the
system. The DRL and automatic
headlamp system are only affected
when the light sensor sees a
change in lighting lasting longer
than the delay.
Page 114 of 356
Chevrolet Express Owner Manual (GMNA-Localizing-U.S./Canada/Mexico-
13882570) - 2020 - CRC - 11/1/19
Lighting 113
If the vehicle is started in a dark
garage, the automatic headlamp
system comes on immediately.
Once the vehicle leaves the garage,
it takes approximately 30 seconds
for the automatic headlamp system
to change to DRL if it is light
outside. During that delay, the
instrument cluster may not be as
bright as usual. Make sure the
instrument panel brightness control
is in the full bright position. See
Instrument Panel Illumination
Control0114.
To idle the vehicle with the
automatic headlamp system off, turn
the control off.
The headlamps will also stay on
after exiting the vehicle. This feature
may be programmable. See Vehicle
Personalization 0105.
If the feature is not programmable,
exit lighting is automatic. When it is
dark enough outside, the exterior
lamps remain on for 30 seconds
after the ignition is turned off.Lights On with Wipers
If the windshield wipers are
activated in daylight with the engine
on, and the exterior lamp control is
in AUTO, the headlamps, parking
lamps, and other exterior lamps
come on. The transition time for the
lamps coming on varies based on
wiper speed. When the wipers are
not operating, these lamps turn off.
Move the exterior lamp control to
P
or;to disable this feature.
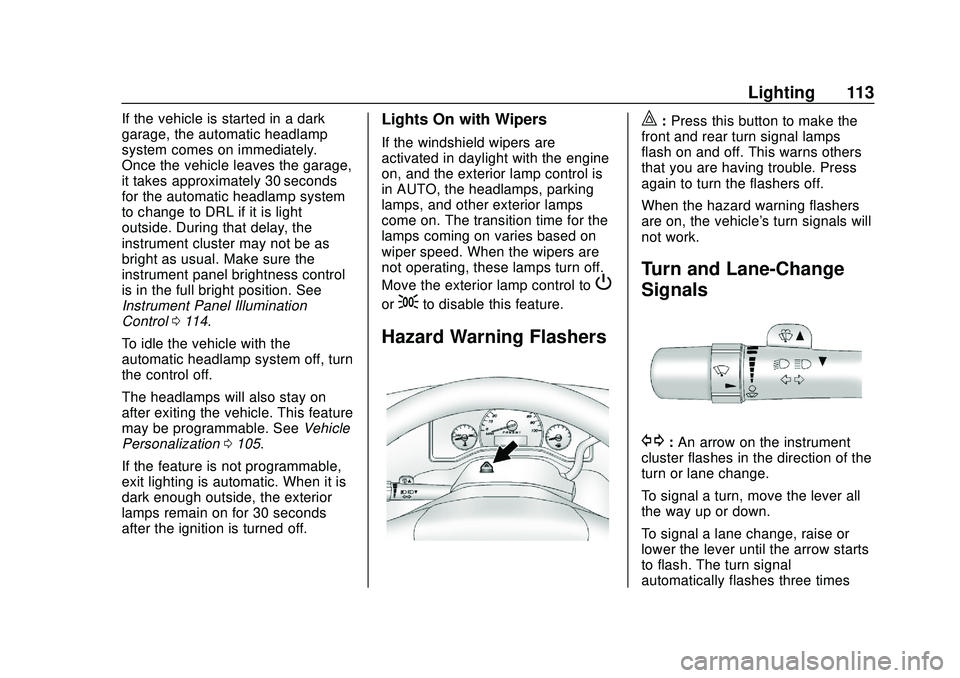
Hazard Warning Flashers
|: Press this button to make the
front and rear turn signal lamps
flash on and off. This warns others
that you are having trouble. Press
again to turn the flashers off.
When the hazard warning flashers
are on, the vehicle's turn signals will
not work.
Turn and Lane-Change
Signals
G: An arrow on the instrument
cluster flashes in the direction of the
turn or lane change.
To signal a turn, move the lever all
the way up or down.
To signal a lane change, raise or
lower the lever until the arrow starts
to flash. The turn signal
automatically flashes three times
Page 115 of 356
Chevrolet Express Owner Manual (GMNA-Localizing-U.S./Canada/Mexico-
13882570) - 2020 - CRC - 11/1/19
114 Lighting
and if the Tow/Haul Mode is active it
flashes six times. Holding the turn
signal lever for more than
one second causes the turn signals
to flash continually until the lever is
released.
The lever returns to its starting
position when released.
If after signaling a turn or lane
change the arrow flashes rapidly or
does not come on, a signal bulb
may be burned out.
Have any burned out bulbs
replaced. If a bulb is not burned out,
check the fuse. SeeFuses and
Circuit Breakers 0249.
Turn Signal On Chime
If the turn signal is left on for more
than 1.2 km (0.75 mi), a chime
sounds at each flash of the turn
signal and the message TURN
SIGNAL ON also appears in the
Driver Information Center (DIC). To
turn off the chime and message,
move the turn signal lever to the off
position.
Interior Lighting
Instrument Panel
Illumination Control
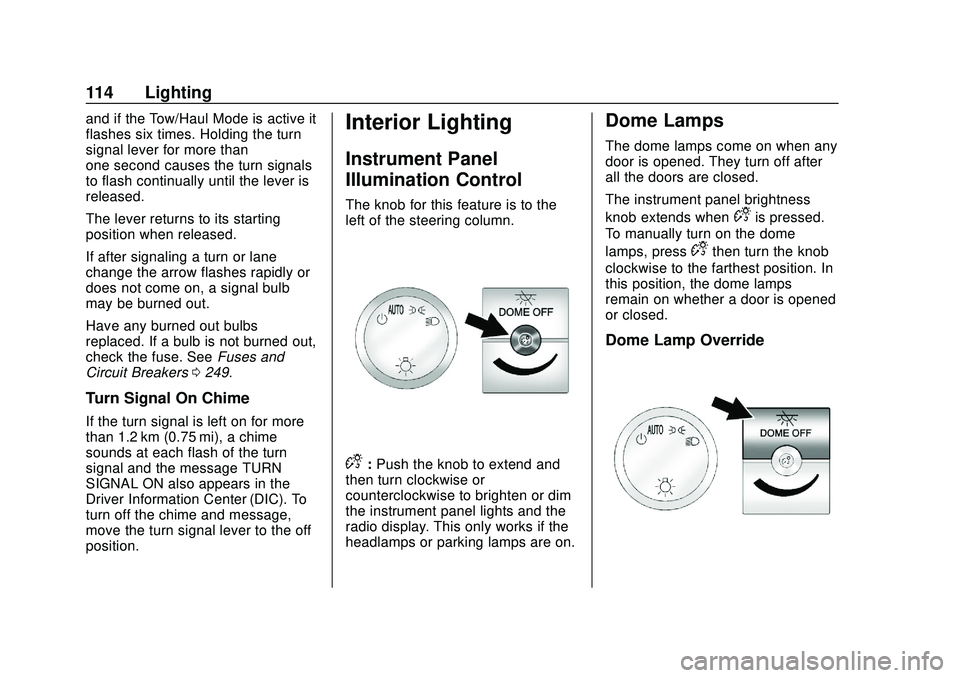
The knob for this feature is to the
left of the steering column.
D:Push the knob to extend and
then turn clockwise or
counterclockwise to brighten or dim
the instrument panel lights and the
radio display. This only works if the
headlamps or parking lamps are on.
Dome Lamps
The dome lamps come on when any
door is opened. They turn off after
all the doors are closed.
The instrument panel brightness
knob extends when
Dis pressed.
To manually turn on the dome
lamps, press
Dthen turn the knob
clockwise to the farthest position. In
this position, the dome lamps
remain on whether a door is opened
or closed.
Dome Lamp Override
Page 116 of 356

Chevrolet Express Owner Manual (GMNA-Localizing-U.S./Canada/Mexico-
13882570) - 2020 - CRC - 11/1/19
Lighting 115
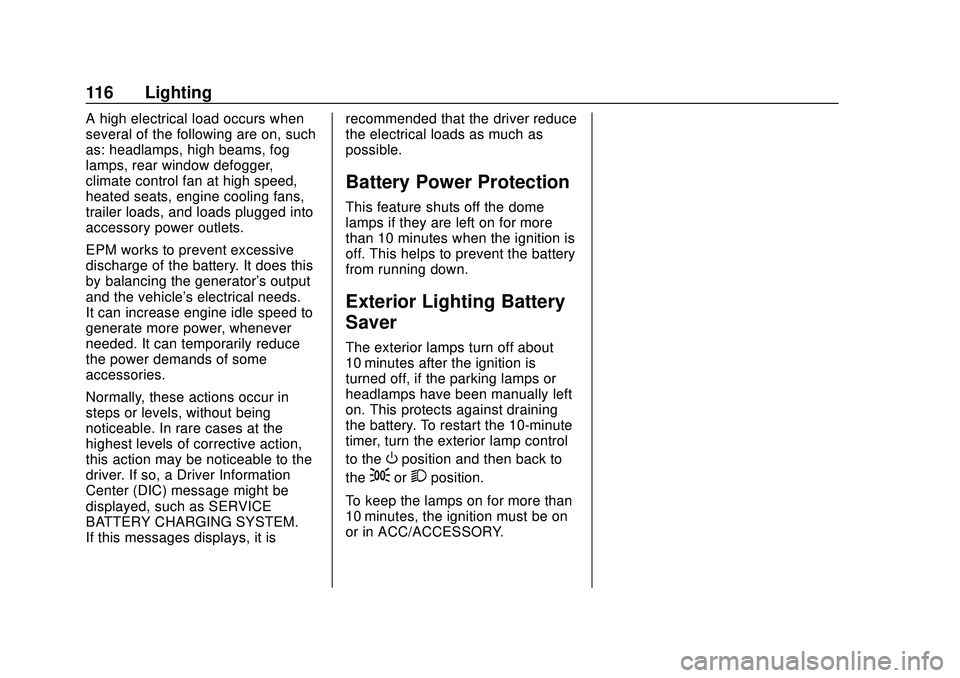
The dome lamp override sets the
dome lamps to remain off or come
on automatically when a door is
opened.
EDOME OFF :Press this button in
and the dome lamps remain off
when a door is opened. Press the
button again to return it to the
extended position so that the dome
lamps come on when a door is
opened.
Reading Lamps
If equipped with reading lamps,
press the button next to each lamp
to turn it on or off.
The vehicle may also have reading
lamps in other locations. The lamps
cannot be adjusted.
Lighting Features
Entry Lighting
If it is dark enough outside, the
exterior lamps will turn on briefly
when unlocking the vehicle with the
RKE transmitter.
Entry/Exit Lighting
The vehicle has an illuminated
entry/exit feature.
The dome lamps come on if the
E
DOME OFF button is in the
extended position, when a door is
opened, or the key is removed from
the ignition.
Exit Lighting
If it is dark enough outside, the
exterior lamps will turn on when the
ignition is turned off. This feature
may be programmable. See Vehicle
Personalization 0105.
Battery Load
Management
The vehicle may have Electric
Power Management (EPM) that
estimates the battery's temperature
and state of charge. It then adjusts
the voltage for best performance
and extended life of the battery.
When the battery's state of charge
is low, the voltage is raised slightly
to quickly bring the charge back up.
When the state of charge is high,
the voltage is lowered slightly to
prevent overcharging. If the vehicle
has a voltmeter gauge or a voltage
display on the Driver Information
Center (DIC), you may see the
voltage move up or down. This is
normal. If there is a problem, an
alert will be displayed.
The battery can be discharged at
idle if the electrical loads are very
high. This is true for all vehicles.
This is because the generator
(alternator) may not be spinning fast
enough at idle to produce all the
power that is needed for very high
electrical loads.
Page 117 of 356
Chevrolet Express Owner Manual (GMNA-Localizing-U.S./Canada/Mexico-
13882570) - 2020 - CRC - 11/1/19
116 Lighting
A high electrical load occurs when
several of the following are on, such
as: headlamps, high beams, fog
lamps, rear window defogger,
climate control fan at high speed,
heated seats, engine cooling fans,
trailer loads, and loads plugged into
accessory power outlets.
EPM works to prevent excessive
discharge of the battery. It does this
by balancing the generator's output
and the vehicle's electrical needs.
It can increase engine idle speed to
generate more power, whenever
needed. It can temporarily reduce
the power demands of some
accessories.
Normally, these actions occur in
steps or levels, without being
noticeable. In rare cases at the
highest levels of corrective action,
this action may be noticeable to the
driver. If so, a Driver Information
Center (DIC) message might be
displayed, such as SERVICE
BATTERY CHARGING SYSTEM.
If this messages displays, it isrecommended that the driver reduce
the electrical loads as much as
possible.
Battery Power Protection
This feature shuts off the dome
lamps if they are left on for more
than 10 minutes when the ignition is
off. This helps to prevent the battery
from running down.
Exterior Lighting Battery
Saver
The exterior lamps turn off about
10 minutes after the ignition is
turned off, if the parking lamps or
headlamps have been manually left
on. This protects against draining
the battery. To restart the 10-minute
timer, turn the exterior lamp control
to the
Oposition and then back to
the
;or2position.
To keep the lamps on for more than
10 minutes, the ignition must be on
or in ACC/ACCESSORY.
Page 122 of 356
Chevrolet Express Owner Manual (GMNA-Localizing-U.S./Canada/Mexico-
13882570) - 2020 - CRC - 11/1/19
Infotainment System 121
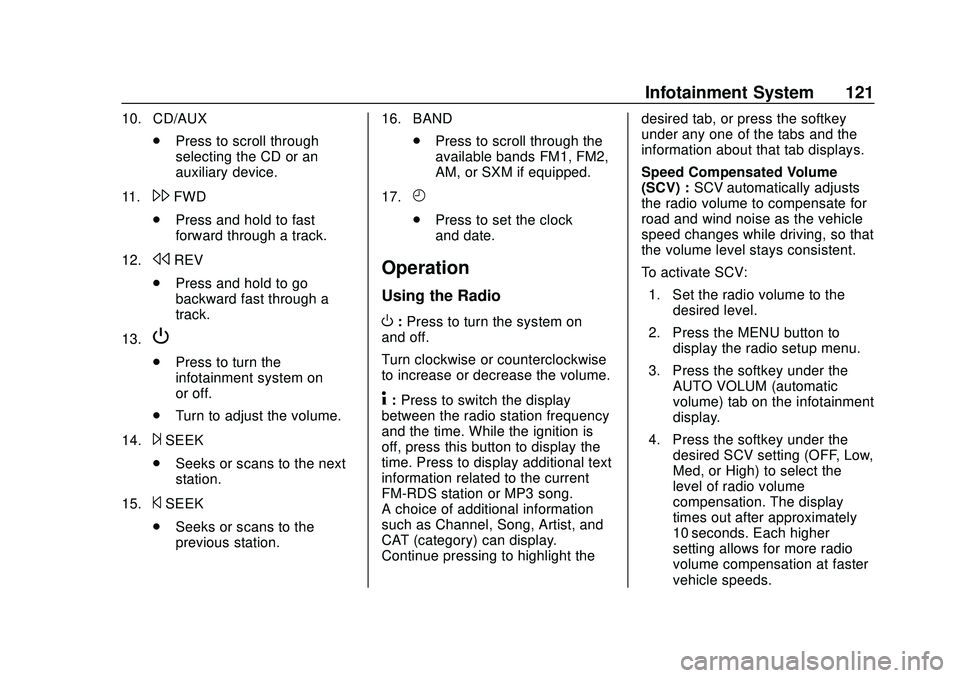
10. CD/AUX.Press to scroll through
selecting the CD or an
auxiliary device.
11.
\FWD
. Press and hold to fast
forward through a track.
12.
sREV
. Press and hold to go
backward fast through a
track.
13.
P
. Press to turn the
infotainment system on
or off.
. Turn to adjust the volume.
14.
¨SEEK
. Seeks or scans to the next
station.
15.
©SEEK
. Seeks or scans to the
previous station. 16. BAND
.Press to scroll through the
available bands FM1, FM2,
AM, or SXM if equipped.
17.
H
. Press to set the clock
and date.
Operation
Using the Radio
O:Press to turn the system on
and off.
Turn clockwise or counterclockwise
to increase or decrease the volume.
4: Press to switch the display
between the radio station frequency
and the time. While the ignition is
off, press this button to display the
time. Press to display additional text
information related to the current
FM-RDS station or MP3 song.
A choice of additional information
such as Channel, Song, Artist, and
CAT (category) can display.
Continue pressing to highlight the desired tab, or press the softkey
under any one of the tabs and the
information about that tab displays.
Speed Compensated Volume
(SCV) :
SCV automatically adjusts
the radio volume to compensate for
road and wind noise as the vehicle
speed changes while driving, so that
the volume level stays consistent.
To activate SCV:
1. Set the radio volume to the desired level.
2. Press the MENU button to display the radio setup menu.
3. Press the softkey under the AUTO VOLUM (automatic
volume) tab on the infotainment
display.
4. Press the softkey under the desired SCV setting (OFF, Low,
Med, or High) to select the
level of radio volume
compensation. The display
times out after approximately
10 seconds. Each higher
setting allows for more radio
volume compensation at faster
vehicle speeds.
Page 123 of 356
Chevrolet Express Owner Manual (GMNA-Localizing-U.S./Canada/Mexico-
13882570) - 2020 - CRC - 11/1/19
122 Infotainment System
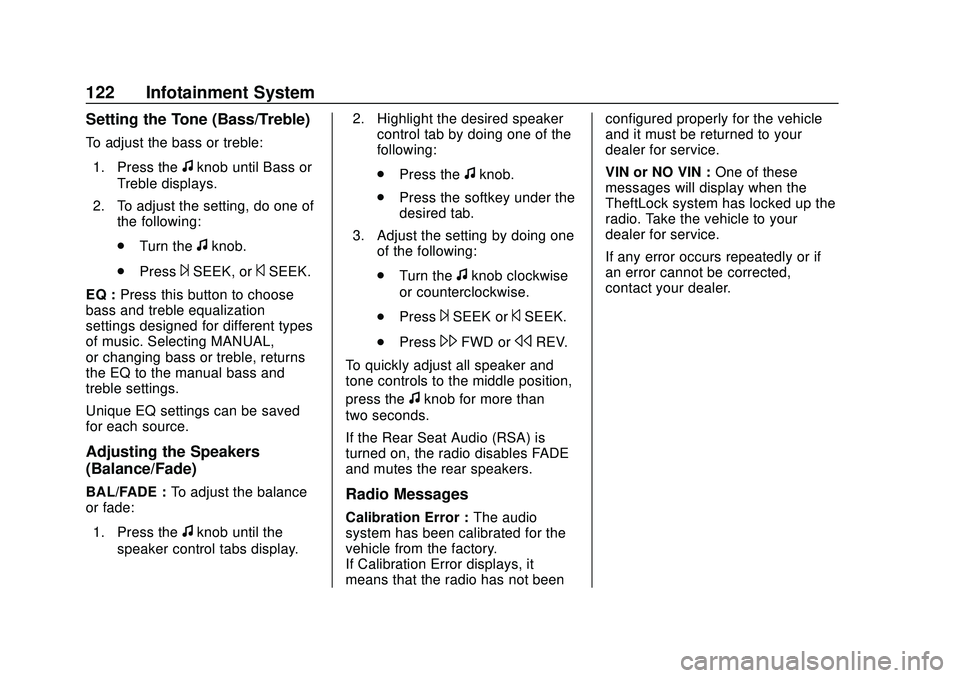
Setting the Tone (Bass/Treble)
To adjust the bass or treble:1. Press the
fknob until Bass or
Treble displays.
2. To adjust the setting, do one of the following:
.Turn the
fknob.
. Press
¨SEEK, or©SEEK.
EQ : Press this button to choose
bass and treble equalization
settings designed for different types
of music. Selecting MANUAL,
or changing bass or treble, returns
the EQ to the manual bass and
treble settings.
Unique EQ settings can be saved
for each source.
Adjusting the Speakers
(Balance/Fade)
BAL/FADE : To adjust the balance
or fade:
1. Press the
fknob until the
speaker control tabs display. 2. Highlight the desired speaker
control tab by doing one of the
following:
.Press the
fknob.
. Press the softkey under the
desired tab.
3. Adjust the setting by doing one of the following:
.Turn the
fknob clockwise
or counterclockwise.
. Press
¨SEEK or©SEEK.
. Press
\FWD orsREV.
To quickly adjust all speaker and
tone controls to the middle position,
press the
fknob for more than
two seconds.
If the Rear Seat Audio (RSA) is
turned on, the radio disables FADE
and mutes the rear speakers.
Radio Messages
Calibration Error : The audio
system has been calibrated for the
vehicle from the factory.
If Calibration Error displays, it
means that the radio has not been configured properly for the vehicle
and it must be returned to your
dealer for service.
VIN or NO VIN :
One of these
messages will display when the
TheftLock system has locked up the
radio. Take the vehicle to your
dealer for service.
If any error occurs repeatedly or if
an error cannot be corrected,
contact your dealer.
Page 128 of 356
Chevrolet Express Owner Manual (GMNA-Localizing-U.S./Canada/Mexico-
13882570) - 2020 - CRC - 11/1/19
Infotainment System 127
Caution
If a label is added to a CD, more
than one CD is inserted into the
slot at a time, or an attempt is
made to play scratched or
damaged CDs, the CD player
could be damaged. While using
the CD player, use only CDs in
good condition without any label,
load one CD at a time, and keep
the CD player and the loading slot
free of foreign materials, liquids,
and debris.
If an error displays, see “CD Player
Messages” later in this section.
Care of CDs
If playing a CD-R, the sound quality
can be reduced due to CD-R or
CD-RW quality, the method of
recording, the quality of the music
that has been recorded, and the
way the CD-R or CD-RW has been
handled. Handle them carefully.
Store CD-Rs or CD-RWs in their
original cases or other protective cases and away from direct sunlight
and dust. The CD player scans the
bottom surface of the disc. If the
surface of a CD is damaged, such
as cracked, broken, or scratched,
the CD does not play properly or not
at all. Do not touch the bottom side
of a CD while handling it; this could
damage the surface. Pick up CDs
by the outer edges or the edge of
the hole and the outer edge.
If the surface of a CD is soiled,
clean it with a soft, lint-free cloth or
dampen a clean, soft cloth in a mild,
neutral detergent solution mixed
with water. Make sure the wiping
process starts from the center to
the edge.
Inserting a CD
Insert a CD partway into the slot,
label side up. The player pulls it in
and the CD should begin playing.
Ejecting a CD
ZEJECT :
Press and release to
eject the disc. Remove the CD
when Remove Disc displays. If the disc is not removed, after several
seconds the disc is automatically
pulled back into the player.
Playing a CD
If the ignition or radio is turned off
with a CD in the player, it stays in
the player. When the ignition or
radio is turned on, the CD starts
playing where it stopped, if it was
the last selected audio source.
When a CD is inserted, the CD
symbol displays on the left side of
the radio display. As each new track
starts to play, the track number
displays.
The CD player can play the smaller
8 cm (3 in) single CDs with an
adapter ring. Full-size CDs and the
smaller CDs are loaded in the same
manner.
CD/AUX :
Press to cycle between
CD or Auxiliary when listening to the
radio. The CD icon and a message
showing the disc and/or track
number will display when a CD is in
the player. Press again and the
system automatically searches for
Page 146 of 356
Chevrolet Express Owner Manual (GMNA-Localizing-U.S./Canada/Mexico-
13882570) - 2020 - CRC - 11/1/19
Climate Controls 145
):Air is divided between the
instrument panel and floor outlets,
with some air directed toward the
windshield.
6: Air is directed to the floor
outlets with some air directed to the
windshield and side windows.
-: This mode clears the windows
of fog or moisture. Outside air is
directed to the floor and defroster
outlets. Adjust the temperature knob
for warmer or cooler air. The air
conditioning compressor might turn
on in this setting to dehumidify
the air.
1: This mode clears the
windshield of fog or frost more
quickly. Air is directed to the
windshield, with some to the floor
outlets and front side windows. The
air conditioning compressor might
turn on in this setting to dehumidify
the air.
Do not drive the vehicle until all the
windows are clear.
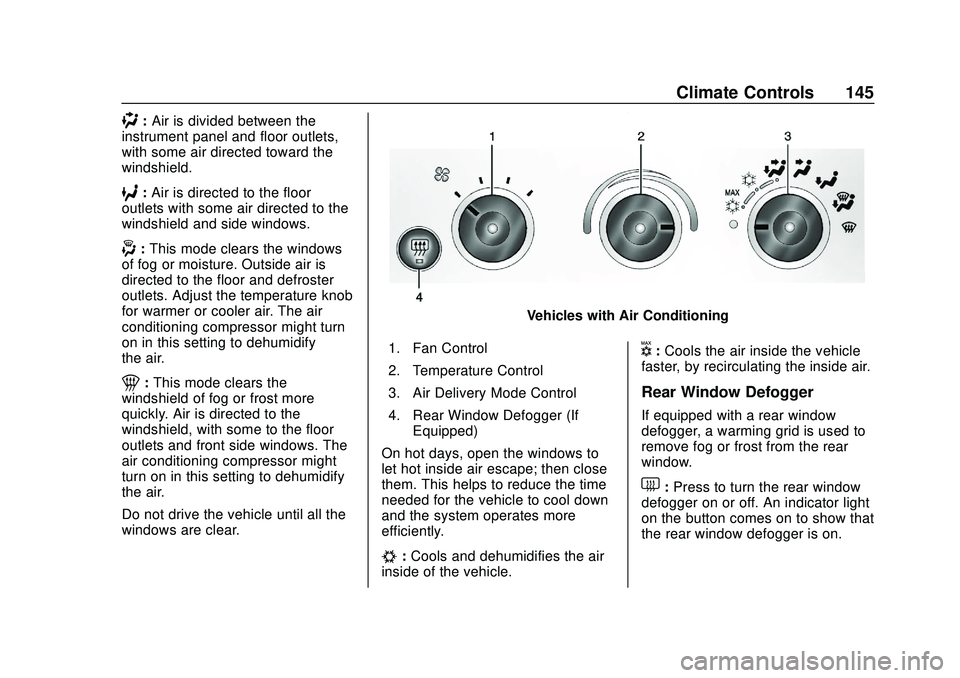
Vehicles with Air Conditioning
1. Fan Control
2. Temperature Control
3. Air Delivery Mode Control
4. Rear Window Defogger (If Equipped)
On hot days, open the windows to
let hot inside air escape; then close
them. This helps to reduce the time
needed for the vehicle to cool down
and the system operates more
efficiently.
#: Cools and dehumidifies the air
inside of the vehicle.
V: Cools the air inside the vehicle
faster, by recirculating the inside air.
Rear Window Defogger
If equipped with a rear window
defogger, a warming grid is used to
remove fog or frost from the rear
window.
1: Press to turn the rear window
defogger on or off. An indicator light
on the button comes on to show that
the rear window defogger is on.
Page 156 of 356

Chevrolet Express Owner Manual (GMNA-Localizing-U.S./Canada/Mexico-
13882570) - 2020 - CRC - 11/1/19
Driving and Operating 155
Defensive drivers avoid most skids
by taking reasonable care suited to
existing conditions, and by not
overdriving those conditions. But
skids are always possible.
If the vehicle starts to slide, follow
these suggestions:
.Ease your foot off the
accelerator pedal and steer the
way you want the vehicle to go.
The vehicle may straighten out.
Be ready for a second skid if it
occurs.
. Slow down and adjust your
driving according to weather
conditions. Stopping distance
can be longer and vehicle
control can be affected when
traction is reduced by water,
snow, ice, gravel, or other
material on the road. Learn to
recognize warning clues —such
as enough water, ice, or packed
snow on the road to make a
mirrored surface —and slow
down when you have any doubt.
. Try to avoid sudden steering,
acceleration, or braking,
including reducing vehicle speed by shifting to a lower gear. Any
sudden changes could cause
the tires to slide.
Remember: Antilock brakes help
avoid only the braking skid.
Driving on Wet Roads
Rain and wet roads can reduce
vehicle traction and affect your
ability to stop and accelerate.
Always drive slower in these types
of driving conditions and avoid
driving through large puddles and
deep-standing or flowing water.
{Warning
Wet brakes can cause crashes.
They might not work as well in a
quick stop and could cause
pulling to one side. You could
lose control of the vehicle. (Continued)
Warning (Continued)
After driving through a large
puddle of water or a car/vehicle
wash, lightly apply the brake
pedal until the brakes work
normally.
Flowing or rushing water creates
strong forces. Driving through
flowing water could cause the
vehicle to be carried away. If this
happens, you and other vehicle
occupants could drown. Do not
ignore police warnings and be
very cautious about trying to drive
through flowing water.
Hydroplaning
Hydroplaning is dangerous. Water
can build up under the vehicle's
tires so they actually ride on the
water. This can happen if the road is
wet enough and you are going fast
enough. When the vehicle is
hydroplaning, it has little or no
contact with the road.