display CHEVROLET HHR 2007 1.G Owners Manual
[x] Cancel search | Manufacturer: CHEVROLET, Model Year: 2007, Model line: HHR, Model: CHEVROLET HHR 2007 1.GPages: 446, PDF Size: 2.43 MB
Page 100 of 446
Battery Replacement
Under normal use, the battery in your remote
keyless entry transmitter should last about
four years.
You can tell the battery is weak if the transmitter
will not work at the normal range in any location.
If you have to get close to your vehicle before
the transmitter works, it is probably time to change
the battery.
The KEY FOB BATT LOW message in the
vehicle’s DIC will display if the remote keyless
entry transmitter battery is low.
Notice:When replacing the battery, use care
not to touch any of the circuitry. Static
from your body transferred to these surfaces
may damage the transmitter.To replace the battery in the remote keyless entry
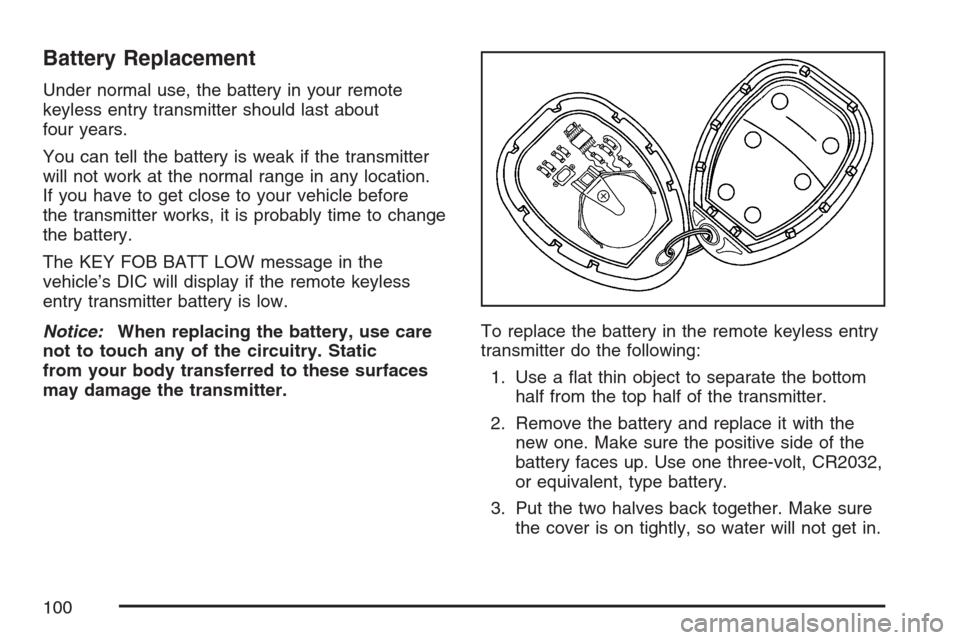
transmitter do the following:
1. Use a �at thin object to separate the bottom
half from the top half of the transmitter.
2. Remove the battery and replace it with the
new one. Make sure the positive side of the
battery faces up. Use one three-volt, CR2032,
or equivalent, type battery.
3. Put the two halves back together. Make sure
the cover is on tightly, so water will not get in.
100
Page 117 of 446
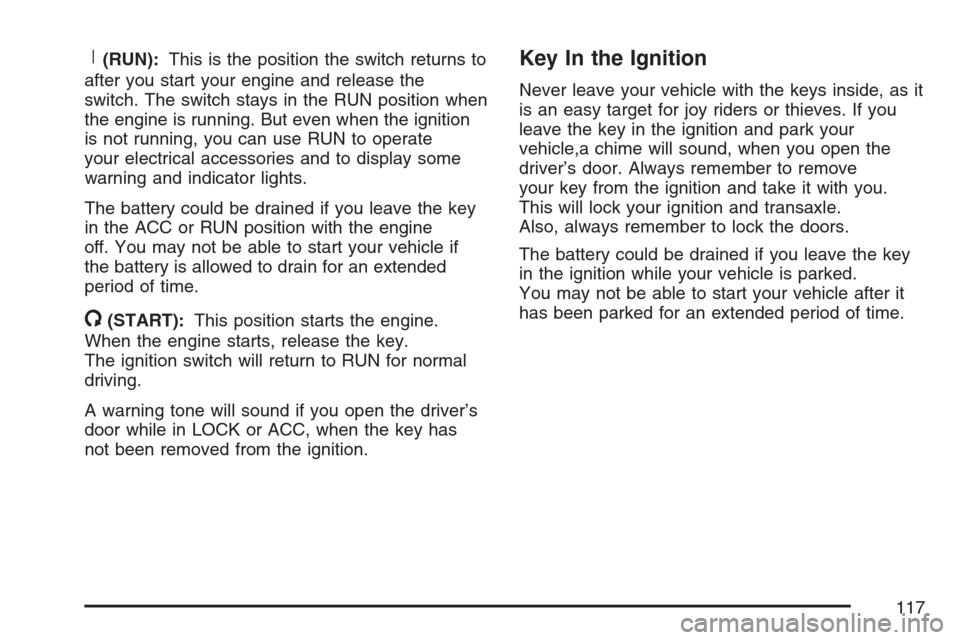
R(RUN):This is the position the switch returns to
after you start your engine and release the
switch. The switch stays in the RUN position when
the engine is running. But even when the ignition
is not running, you can use RUN to operate
your electrical accessories and to display some
warning and indicator lights.
The battery could be drained if you leave the key
in the ACC or RUN position with the engine
off. You may not be able to start your vehicle if
the battery is allowed to drain for an extended
period of time.
/(START):This position starts the engine.
When the engine starts, release the key.
The ignition switch will return to RUN for normal
driving.
A warning tone will sound if you open the driver’s
door while in LOCK or ACC, when the key has
not been removed from the ignition.
Key In the Ignition
Never leave your vehicle with the keys inside, as it
is an easy target for joy riders or thieves. If you
leave the key in the ignition and park your
vehicle,a chime will sound, when you open the
driver’s door. Always remember to remove
your key from the ignition and take it with you.
This will lock your ignition and transaxle.
Also, always remember to lock the doors.
The battery could be drained if you leave the key
in the ignition while your vehicle is parked.
You may not be able to start your vehicle after it
has been parked for an extended period of time.
117
Page 128 of 446
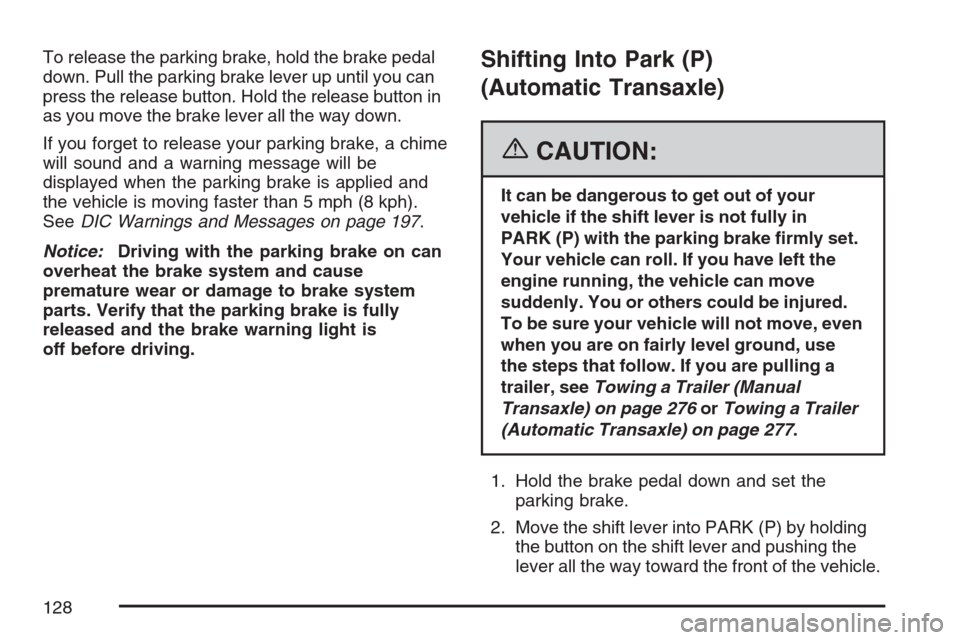
To release the parking brake, hold the brake pedal
down. Pull the parking brake lever up until you can
press the release button. Hold the release button in
as you move the brake lever all the way down.
If you forget to release your parking brake, a chime
will sound and a warning message will be
displayed when the parking brake is applied and
the vehicle is moving faster than 5 mph (8 kph).
SeeDIC Warnings and Messages on page 197.
Notice:Driving with the parking brake on can
overheat the brake system and cause
premature wear or damage to brake system
parts. Verify that the parking brake is fully
released and the brake warning light is
off before driving.Shifting Into Park (P)
(Automatic Transaxle)
{CAUTION:
It can be dangerous to get out of your
vehicle if the shift lever is not fully in
PARK (P) with the parking brake �rmly set.
Your vehicle can roll. If you have left the
engine running, the vehicle can move
suddenly. You or others could be injured.
To be sure your vehicle will not move, even
when you are on fairly level ground, use
the steps that follow. If you are pulling a
trailer, seeTowing a Trailer (Manual
Transaxle) on page 276orTowing a Trailer
(Automatic Transaxle) on page 277.
1. Hold the brake pedal down and set the
parking brake.
2. Move the shift lever into PARK (P) by holding
the button on the shift lever and pushing the
lever all the way toward the front of the vehicle.
128
Page 134 of 446
Mirrors
Manual Rearview Mirror
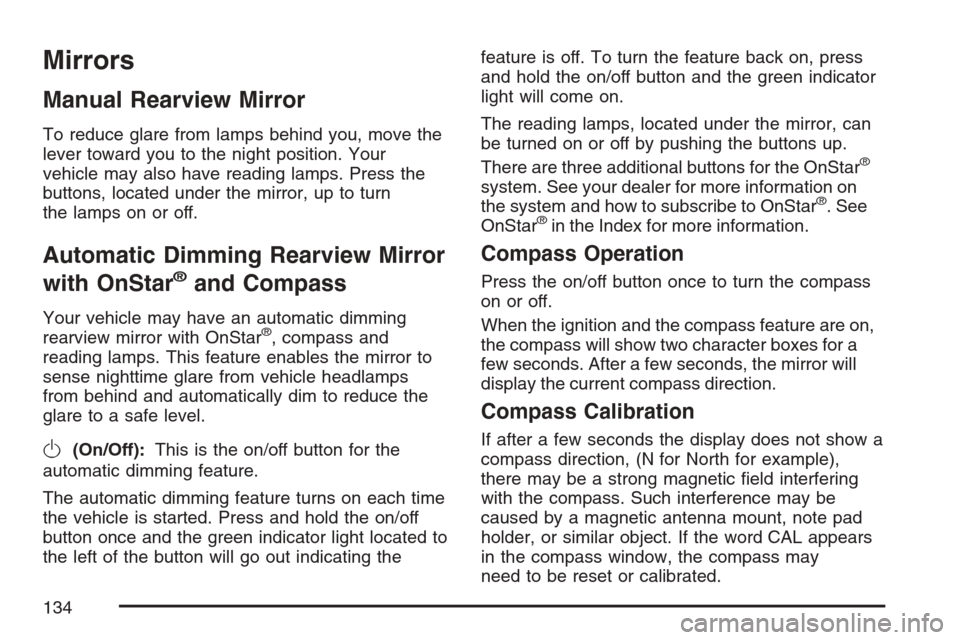
To reduce glare from lamps behind you, move the
lever toward you to the night position. Your
vehicle may also have reading lamps. Press the
buttons, located under the mirror, up to turn
the lamps on or off.
Automatic Dimming Rearview Mirror
with OnStar
®and Compass
Your vehicle may have an automatic dimming
rearview mirror with OnStar®, compass and
reading lamps. This feature enables the mirror to
sense nighttime glare from vehicle headlamps
from behind and automatically dim to reduce the
glare to a safe level.
O(On/Off):This is the on/off button for the
automatic dimming feature.
The automatic dimming feature turns on each time
the vehicle is started. Press and hold the on/off
button once and the green indicator light located to
the left of the button will go out indicating thefeature is off. To turn the feature back on, press
and hold the on/off button and the green indicator
light will come on.
The reading lamps, located under the mirror, can
be turned on or off by pushing the buttons up.
There are three additional buttons for the OnStar
®
system. See your dealer for more information on
the system and how to subscribe to OnStar®. See
OnStar®in the Index for more information.
Compass Operation
Press the on/off button once to turn the compass
on or off.
When the ignition and the compass feature are on,
the compass will show two character boxes for a
few seconds. After a few seconds, the mirror will
display the current compass direction.
Compass Calibration
If after a few seconds the display does not show a
compass direction, (N for North for example),
there may be a strong magnetic �eld interfering
with the compass. Such interference may be
caused by a magnetic antenna mount, note pad
holder, or similar object. If the word CAL appears
in the compass window, the compass may
need to be reset or calibrated.
134
Page 135 of 446
To calibrate the compass, do the following:
1. Make sure CAL is displayed. If CAL is not
displayed, press and hold the on/off button
until CAL is displayed.
2. While CAL is displayed, drive the vehicle in
circles at 5 mph (8 km/h) or less until the
display reads a direction.
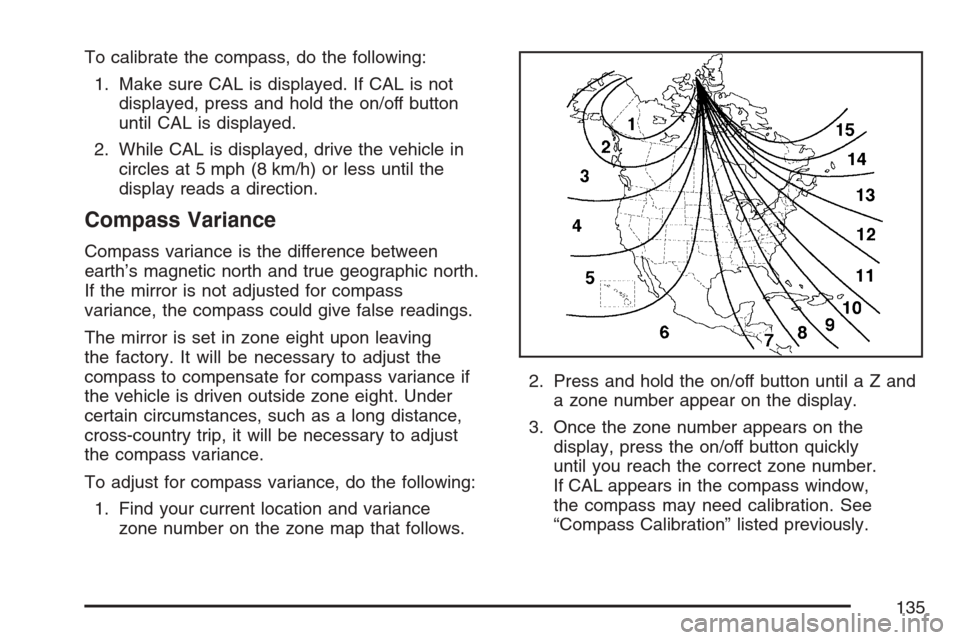
Compass Variance
Compass variance is the difference between
earth’s magnetic north and true geographic north.
If the mirror is not adjusted for compass
variance, the compass could give false readings.
The mirror is set in zone eight upon leaving
the factory. It will be necessary to adjust the
compass to compensate for compass variance if
the vehicle is driven outside zone eight. Under
certain circumstances, such as a long distance,
cross-country trip, it will be necessary to adjust
the compass variance.
To adjust for compass variance, do the following:
1. Find your current location and variance
zone number on the zone map that follows.2. Press and hold the on/off button untilaZand
a zone number appear on the display.
3. Once the zone number appears on the
display, press the on/off button quickly
until you reach the correct zone number.
If CAL appears in the compass window,
the compass may need calibration. See
“Compass Calibration” listed previously.
135
Page 136 of 446
Cleaning the Mirror
When cleaning the mirror, use a paper towel or
similar material dampened with glass cleaner. Do
not spray glass cleaner directly on the mirror
as that may cause the liquid cleaner to enter the
mirror housing.
Automatic Dimming Rearview Mirror
with Compass
Your vehicle may have an automatic dimming
rearview mirror with a compass and reading lamps.
This feature enables the mirror to sense nighttime
glare from vehicle headlamps from behind and
automatically dim to reduce the glare to a
safe level.
O(On/Off):This is the on/off button for the
automatic dimming feature.
The automatic dimming feature turns on each time
the vehicle is started. Press the on/off button
once and the green indicator light located to the
left of the button will go out indicating the feature is
off. To turn the feature back on, press and
release the on/off button and the green indicator
light will come on.The reading lamps, located under the mirror, can
be turned on or off by pushing the buttons up.
Compass Operation
Y
:This is the on/off button for the
compass feature.
Press the compass button once to turn the
compass on or off.
When the ignition and the compass feature are
on, the compass will show two character boxes for
a few seconds. After a few seconds, the mirror
will display the current compass direction.
Compass Calibration
If after a few seconds the display does not show a
compass direction, (N for North for example),
there may be a strong magnetic �eld interfering
with the compass. Such interference may be
caused by a magnetic antenna mount, note pad
holder, or similar object. If the word CAL appears
in the compass window, the compass may
need to be reset or calibrated.
136
Page 137 of 446
To calibrate the compass, do the following:
1. Make sure CAL is displayed. If CAL is not
displayed, press and hold the on/off button
until CAL is displayed.
2. While CAL is displayed drive the vehicle in
circles at 5 mph (8 km/h) or less until the
display reads a direction.
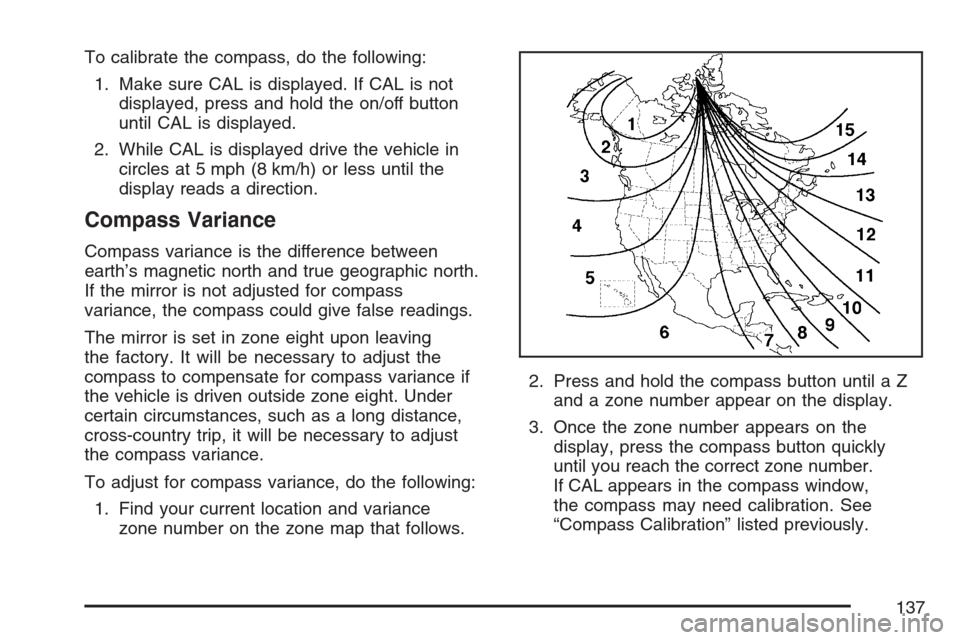
Compass Variance
Compass variance is the difference between
earth’s magnetic north and true geographic north.
If the mirror is not adjusted for compass
variance, the compass could give false readings.
The mirror is set in zone eight upon leaving
the factory. It will be necessary to adjust the
compass to compensate for compass variance if
the vehicle is driven outside zone eight. Under
certain circumstances, such as a long distance,
cross-country trip, it will be necessary to adjust
the compass variance.
To adjust for compass variance, do the following:
1. Find your current location and variance
zone number on the zone map that follows.2. Press and hold the compass button until a Z
and a zone number appear on the display.
3. Once the zone number appears on the
display, press the compass button quickly
until you reach the correct zone number.
If CAL appears in the compass window,
the compass may need calibration. See
“Compass Calibration” listed previously.
137
Page 150 of 446
Brake System Warning Light..................... 185
Anti-Lock Brake System Warning Light........ 186
Enhanced Traction System Warning Light.... 187
Engine Coolant Temperature
Warning Light........................................ 187
Engine Coolant Temperature Gage............ 188
Malfunction Indicator Lamp........................ 188
Oil Pressure Light..................................... 192
Security Light............................................ 193
Fog Lamp Light......................................... 193
Highbeam On Light................................... 193
Fuel Gage................................................. 193
Driver Information Center (DIC).................. 194
DIC Operation and Displays...................... 195
DIC Warnings and Messages.................... 197
DIC Vehicle Personalization....................... 200Audio System(s)......................................... 206
Setting the Time (Without Date Display).... 207
Setting the Time (With Date Display)......... 208
Radio with CD (Base)............................... 210
Radio with CD (MP3)................................ 215
Using an MP3........................................... 226
XM Radio Messages................................. 232
Theft-Deterrent Feature............................. 233
Audio Steering Wheel Controls.................. 234
Radio Reception........................................ 234
Care of Your CDs..................................... 235
Care of the CD Player.............................. 235
Fixed Mast Antenna.................................. 236
XM™ Satellite Radio Antenna System....... 236
Section 3 Instrument Panel
150
Page 163 of 446
Erasing Speed Memory
When you turn off the cruise control or the ignition,
your cruise control set speed memory is erased.
Headlamps
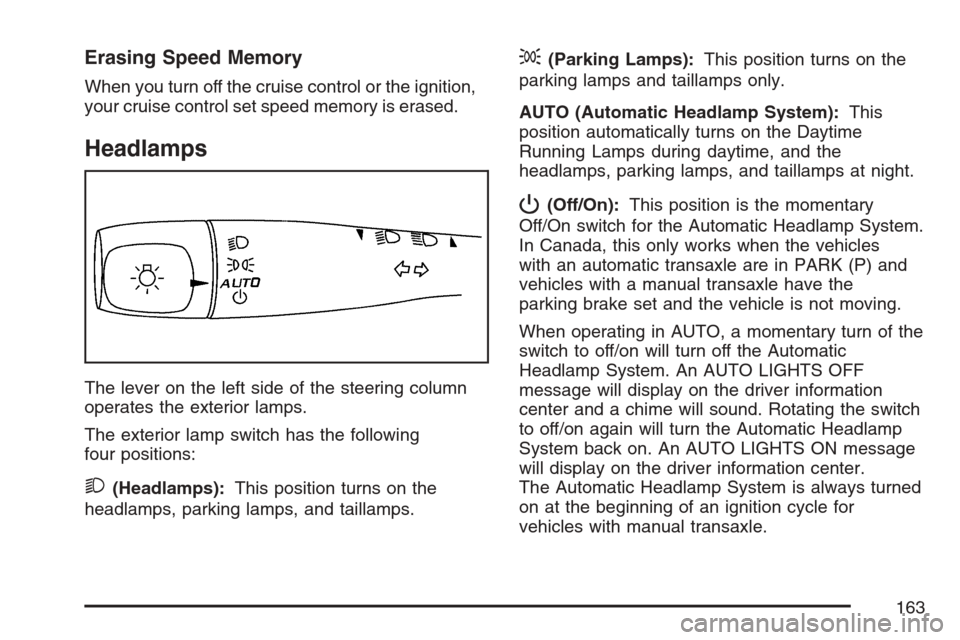
The lever on the left side of the steering column
operates the exterior lamps.
The exterior lamp switch has the following
four positions:
2(Headlamps):This position turns on the
headlamps, parking lamps, and taillamps.
;(Parking Lamps):This position turns on the
parking lamps and taillamps only.
AUTO (Automatic Headlamp System):This
position automatically turns on the Daytime
Running Lamps during daytime, and the
headlamps, parking lamps, and taillamps at night.
P(Off/On):This position is the momentary
Off/On switch for the Automatic Headlamp System.
In Canada, this only works when the vehicles
with an automatic transaxle are in PARK (P) and
vehicles with a manual transaxle have the
parking brake set and the vehicle is not moving.
When operating in AUTO, a momentary turn of the
switch to off/on will turn off the Automatic
Headlamp System. An AUTO LIGHTS OFF
message will display on the driver information
center and a chime will sound. Rotating the switch
to off/on again will turn the Automatic Headlamp
System back on. An AUTO LIGHTS ON message
will display on the driver information center.
The Automatic Headlamp System is always turned
on at the beginning of an ignition cycle for
vehicles with manual transaxle.
163
Page 168 of 446
Mirror Reading Lamps
Your vehicle may have reading lamps on the
rearview mirror. Push the button to turn the reading
lamps on and off. The reading lamps will
automatically come on when a door is open.
Rear Reading Lamps
Push the lens to turn the reading lamps on
and off.
Electric Power Management
The vehicle has Electric Power Management
(EPM) that estimates the battery’s temperature and
state of charge. It then adjusts the voltage for
best performance and extended life of the battery.
When the battery’s state of charge is low, the
voltage is raised slightly to quickly put the charge
back in. When the state of charge is high, the
voltage is lowered slightly to prevent overcharging.
If the vehicle has a voltmeter gage or voltage
display on the Driver Information Center (DIC), you
may see the voltage move up or down. This is
normal. If there is a problem, an alert will be
displayed.The battery can be discharged at idle if the
electrical loads are very high. This is true for all
vehicles. This is because the generator (alternator)
may not be spinning fast enough at idle to
produce all the power that is needed for very high
electrical loads.
A high electrical load occurs when several of the
following loads are on: headlamps, high beams,
fog lamps, rear window defogger, climate
control fan at high speed, heated seats, engine
cooling fans, trailer loads, and loads plugged into
accessory power outlets.
EPM works to prevent excessive discharge of the
battery. It does this by balancing the generator’s
output and the vehicle’s electrical needs.
It can increase engine idle speed to generate
more power, whenever needed.
Battery Run-Down Protection
Your vehicle has a battery saver feature designed
to protect your vehicle’s battery.
When any interior lamp is left on and the ignition
is turned off, the battery rundown protection
system will automatically turn the lamp off after
20 minutes. This will avoid draining the battery.
168