CHEVROLET KODIAK 2005 Owners Manual
Manufacturer: CHEVROLET, Model Year: 2005, Model line: KODIAK, Model: CHEVROLET KODIAK 2005Pages: 374, PDF Size: 5.46 MB
Page 271 of 374
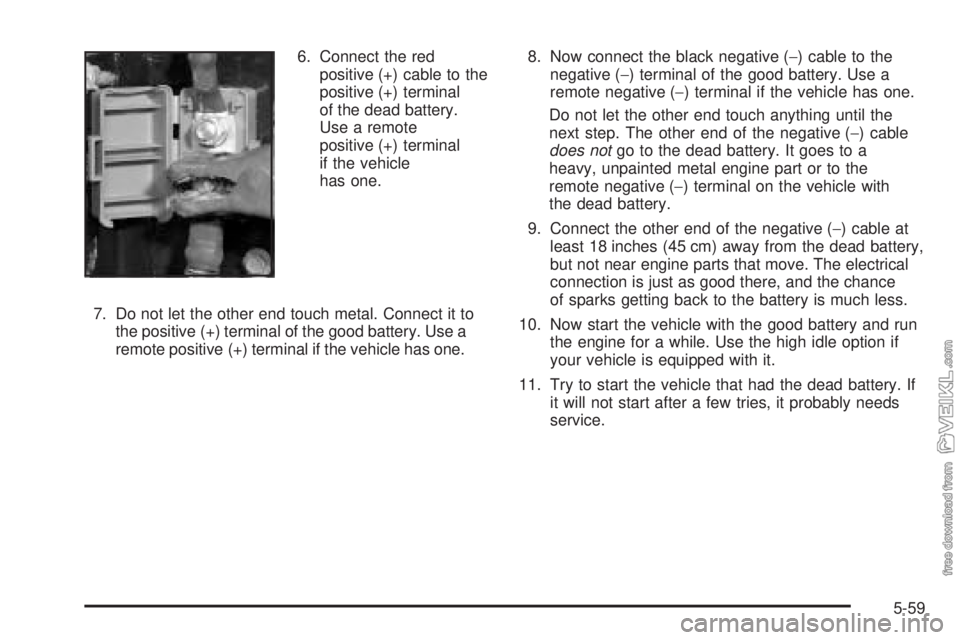
6. Connect the red
positive (+) cable to the
positive (+) terminal
of the dead battery.
Use a remote
positive (+) terminal
if the vehicle
has one.
7. Do not let the other end touch metal. Connect it to
the positive (+) terminal of the good battery. Use a
remote positive (+) terminal if the vehicle has one.8. Now connect the black negative (−) cable to the
negative (−) terminal of the good battery. Use a
remote negative (−) terminal if the vehicle has one.
Do not let the other end touch anything until the
next step. The other end of the negative (−) cable
does notgo to the dead battery. It goes to a
heavy, unpainted metal engine part or to the
remote negative (−) terminal on the vehicle with
the dead battery.
9. Connect the other end of the negative (−) cable at
least 18 inches (45 cm) away from the dead battery,
but not near engine parts that move. The electrical
connection is just as good there, and the chance
of sparks getting back to the battery is much less.
10. Now start the vehicle with the good battery and run
the engine for a while. Use the high idle option if
your vehicle is equipped with it.
11. Try to start the vehicle that had the dead battery. If
it will not start after a few tries, it probably needs
service.
5-59
Page 272 of 374
Notice:If the jumper cables are connected or
removed in the wrong order, electrical shorting may
occur and damage the vehicle. The repairs would
not be covered by your warranty. Always connect
and remove the jumper cables in the correct
order, making sure that the cables do not touch
each other or other metal.
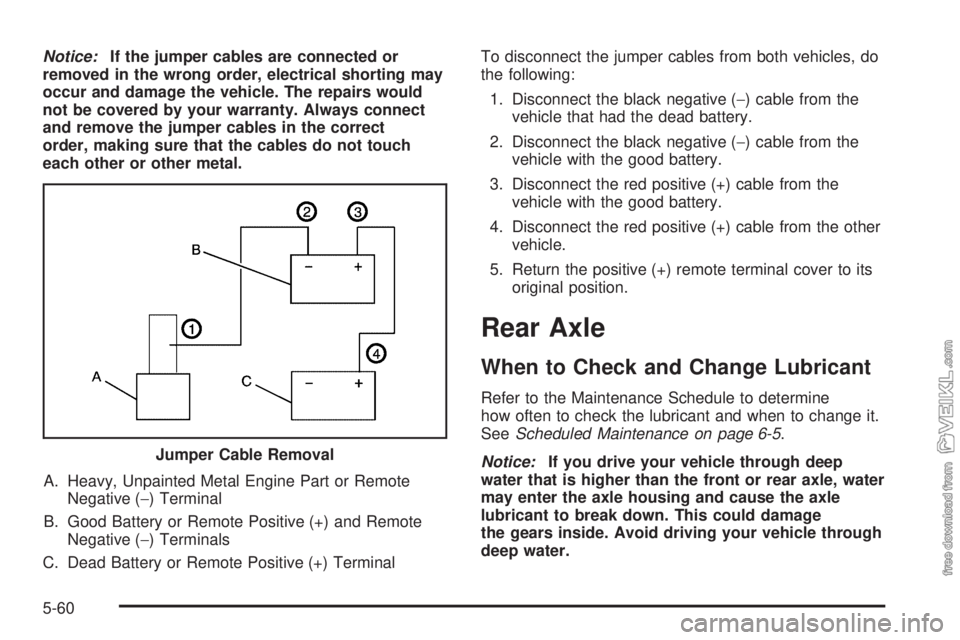
A. Heavy, Unpainted Metal Engine Part or Remote
Negative (−) Terminal
B. Good Battery or Remote Positive (+) and Remote
Negative (−) Terminals
C. Dead Battery or Remote Positive (+) TerminalTo disconnect the jumper cables from both vehicles, do
the following:
1. Disconnect the black negative (−) cable from the
vehicle that had the dead battery.
2. Disconnect the black negative (−) cable from the
vehicle with the good battery.
3. Disconnect the red positive (+) cable from the
vehicle with the good battery.
4. Disconnect the red positive (+) cable from the other
vehicle.
5. Return the positive (+) remote terminal cover to its
original position.
Rear Axle
When to Check and Change Lubricant
Refer to the Maintenance Schedule to determine
how often to check the lubricant and when to change it.
SeeScheduled Maintenance on page 6-5.
Notice:If you drive your vehicle through deep
water that is higher than the front or rear axle, water
may enter the axle housing and cause the axle
lubricant to break down. This could damage
the gears inside. Avoid driving your vehicle through
deep water. Jumper Cable Removal
5-60
Page 273 of 374
You should avoid driving your vehicle through deep
puddles or standing water. If you must drive through
water that is higher than the front or rear axle, see your
dealer immediately afterward to have the condition of
the axle lubricant checked.
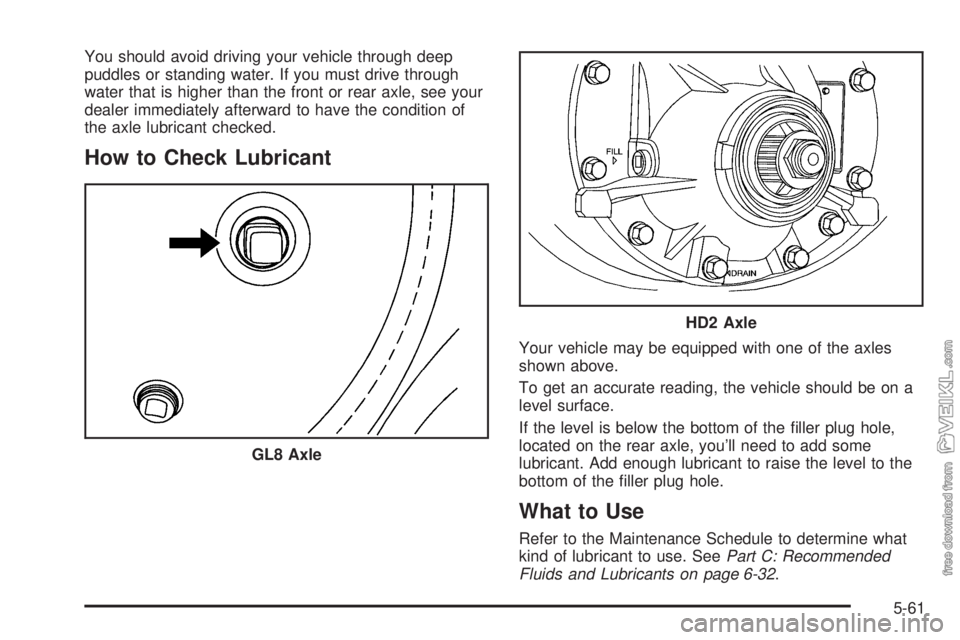
How to Check Lubricant
Your vehicle may be equipped with one of the axles
shown above.
To get an accurate reading, the vehicle should be on a
level surface.
If the level is below the bottom of the filler plug hole,
located on the rear axle, you’ll need to add some
lubricant. Add enough lubricant to raise the level to the
bottom of the filler plug hole.
What to Use
Refer to the Maintenance Schedule to determine what
kind of lubricant to use. SeePart C: Recommended
Fluids and Lubricants on page 6-32. GL8 Axle
HD2 Axle
5-61
Page 274 of 374
Rear Axle Shift Motor
When to Check and Change Fluid
If you have an optional air-shift two-speed, controlled
traction, or locking differential type rear axle, a good time
to check the fluid level in the axle shift motor is when
the rear axle lubricant is checked. Use refrigerant
oil (shift motor only).
How to Check Fluid
Remove the plug on the front plate of the axle shift
motor, add enough fluid to raise the level to the bottom
of the filler plug hole, then replace the plug.
What to Use
Refer to your Maintenance Schedule to determine what
kind of lubricant to use. SeePart C: Recommended
Fluids and Lubricants on page 6-32.
Four-Wheel Drive
Transfer Case
When to Check Lubricant
It is not necessary to regularly check transfer case fluid
unless you suspect there is a leak or you hear an
unusual noise. A fluid loss could indicate a problem.
Have it inspected and repaired.
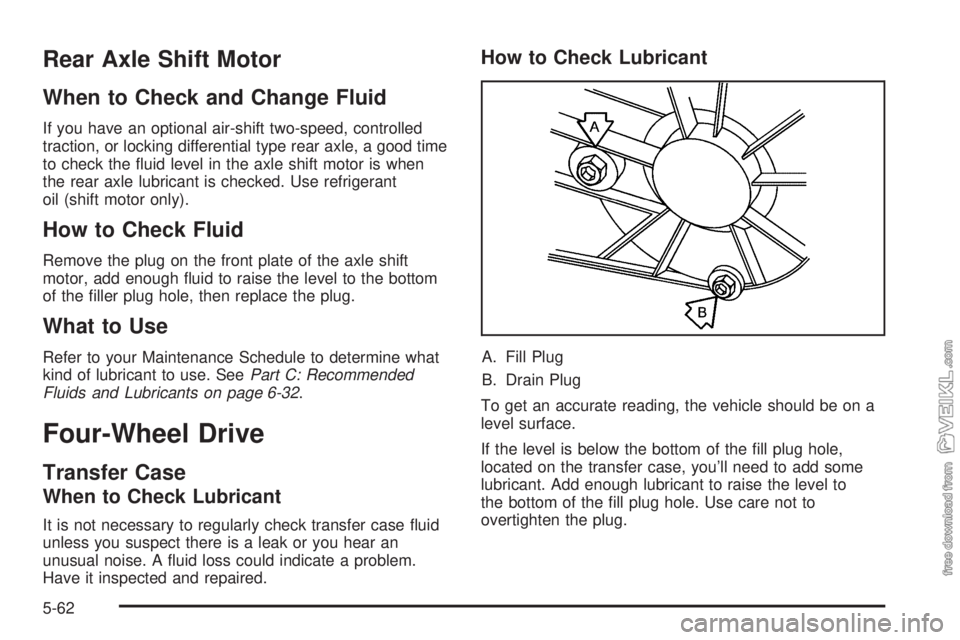
How to Check Lubricant
A. Fill Plug
B. Drain Plug
To get an accurate reading, the vehicle should be on a
level surface.
If the level is below the bottom of the fill plug hole,
located on the transfer case, you’ll need to add some
lubricant. Add enough lubricant to raise the level to
the bottom of the fill plug hole. Use care not to
overtighten the plug.
5-62
Page 275 of 374
When to Change Lubricant
Refer to the Maintenance Schedule to determine how
often to change the lubricant. SeeScheduled
Maintenance on page 6-5.
What to Use
Refer to the Maintenance Schedule to determine what
kind of lubricant to use. SeePart C: Recommended
Fluids and Lubricants on page 6-32.
Front Axle
When to Check Lubricant
It is not necessary to regularly check front axle fluid
unless you suspect there is a leak or you hear an
unusual noise. A fluid loss could indicate a problem.
Have it inspected and repaired.
Notice:If you drive your vehicle through deep
water that is higher than the front or rear axle, water
may enter the axle housing and cause the axle
lubricant to break down. This could damage the
gears inside. Avoid driving your vehicle through
deep water.
You should avoid driving your vehicle through deep
puddles or standing water. If you must drive through
water that is higher than the front or rear axle, see your
dealer immediately afterward to have the condition of
the axle lubricant checked.
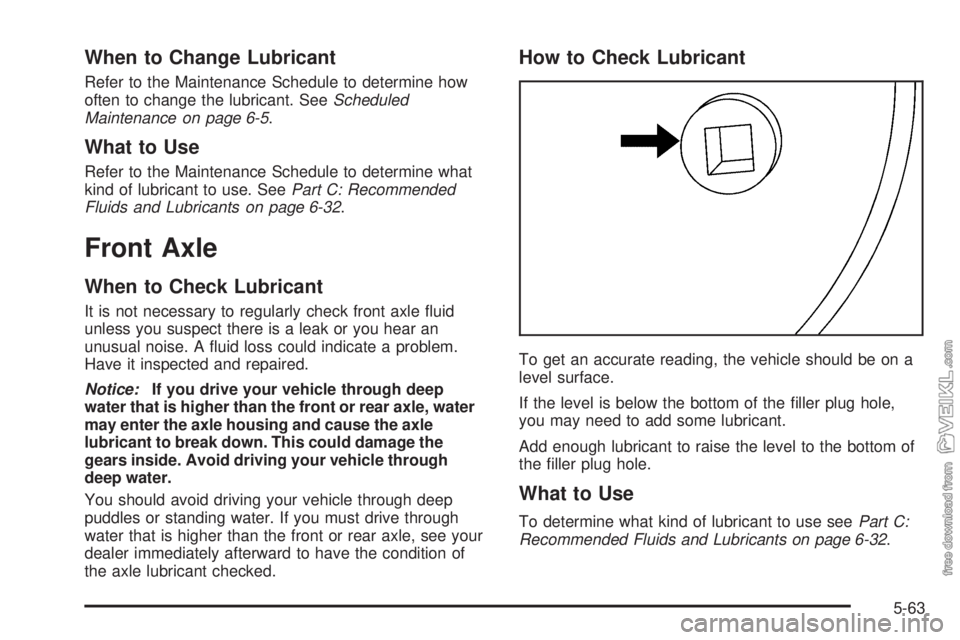
How to Check Lubricant
To get an accurate reading, the vehicle should be on a
level surface.
If the level is below the bottom of the filler plug hole,
you may need to add some lubricant.
Add enough lubricant to raise the level to the bottom of
the filler plug hole.
What to Use
To determine what kind of lubricant to use seePart C:
Recommended Fluids and Lubricants on page 6-32.
5-63
Page 276 of 374
Noise Control System
Tampering with Noise Control
System Prohibited
The following information relates to compliance with
federal noise emission standards for vehicles with a
Gross Vehicle Weight Rating (GVWR) of more than
10,000 lbs (4 536 kg). The Maintenance Schedule
provides information on maintaining the noise control
system to minimize degradation of the noise emission
control system during the life of your vehicle. The noise
control system warranty is given in your warranty booklet.
These standards apply only to vehicles sold in the
United States.
Federal law prohibits the following acts or the
causing thereof:
1. The removal or rendering inoperative by any person,
other than for purposes of maintenance, repair or
replacement, of any device or element of design
incorporated into any new vehicle for the purpose of
noise control, prior to its sale or delivery to the
ultimate purchaser or while it is in use; or
2. The use of the vehicle after such device or element
of design has been removed or rendered inoperative
by any person.Among those acts presumed to constitute tampering are
the acts listed below.
Insulation:
•
Removal of the noise shields or any underhood
insulation.
Engine:
•
Removal or rendering engine speed governor (if
equipped) inoperative so as to allow engine
speed to exceed manufacturer specifications.
Fan and Drive:
•
Removal of fan clutch (if equipped) or rendering
clutch inoperative.
•Removal of the fan shroud (if equipped).
Air Intake:
•
Removal of the air cleaner silencer.
•Modification of the air cleaner.
Exhaust:
•
Removal of the muffler and/or resonator.
•Removal of the exhaust pipes and exhaust
pipe clamps.
5-64
Page 277 of 374
Bulb Replacement
It is recommended that all bulbs be replaced by your
dealer.
Windshield Wiper Blade
Replacement
Windshield wiper blades should be inspected at least
twice a year for wear or cracking. SeeWiper Blade
CheckunderAt Least Twice a Year on page 6-28for
more information.
Replacement blades come in different types and are
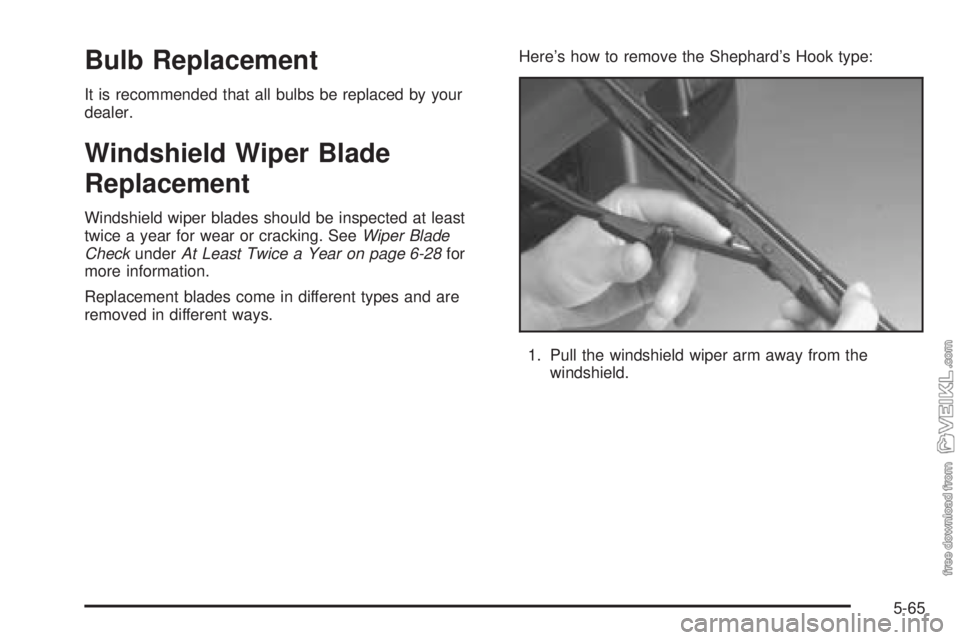
removed in different ways.Here’s how to remove the Shephard’s Hook type:
1. Pull the windshield wiper arm away from the
windshield.
5-65
Page 278 of 374
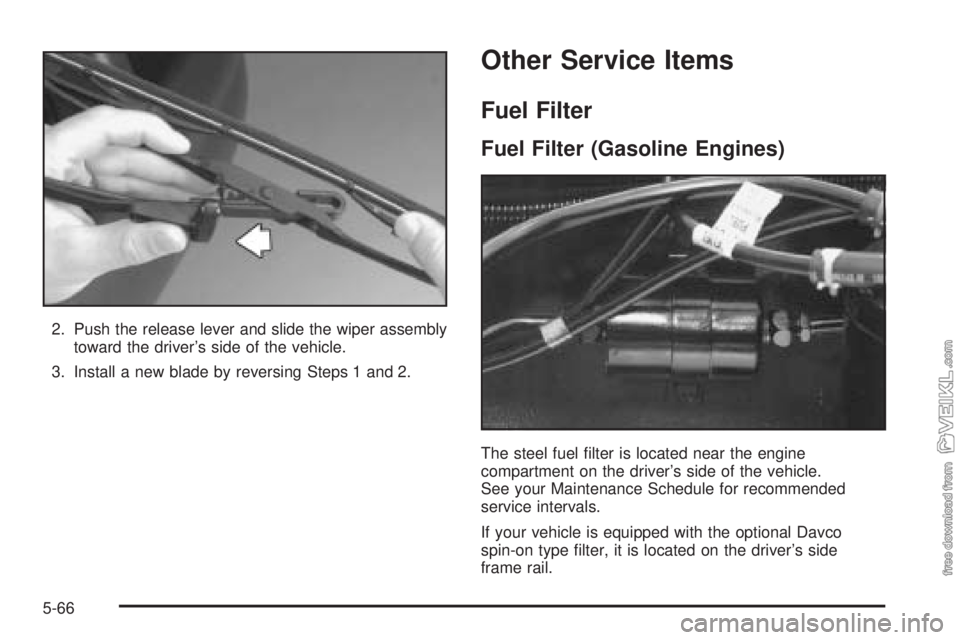
2. Push the release lever and slide the wiper assembly
toward the driver’s side of the vehicle.
3. Install a new blade by reversing Steps 1 and 2.
Other Service Items
Fuel Filter
Fuel Filter (Gasoline Engines)
The steel fuel filter is located near the engine
compartment on the driver’s side of the vehicle.
See your Maintenance Schedule for recommended
service intervals.
If your vehicle is equipped with the optional Davco
spin-on type filter, it is located on the driver’s side
frame rail.
5-66
Page 279 of 374
Fuel Filter (Diesel Engines)
If you have a diesel engine, your fuel filter is located in
the engine compartment on the driver’s side of the
vehicle, or along the driver’s side frame rail. SeeFuel
Filter Replacementearlier in this section for further
information.
Also seeScheduled Maintenance on page 6-5for
recommended service intervals.
Primary Fuel Filter and Water
Separator
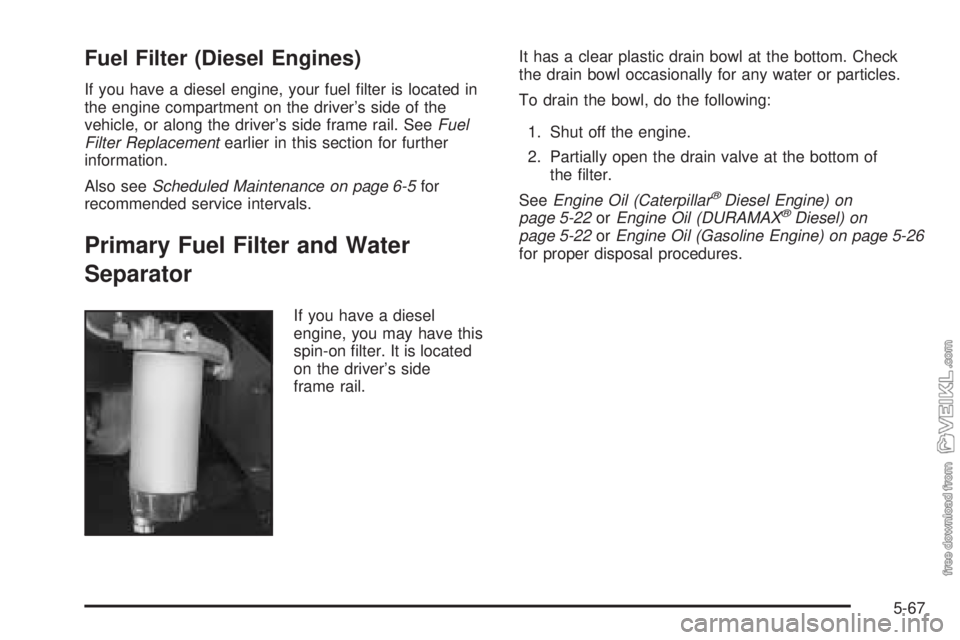
If you have a diesel
engine, you may have this
spin-on filter. It is located
on the driver’s side
frame rail.It has a clear plastic drain bowl at the bottom. Check
the drain bowl occasionally for any water or particles.
To drain the bowl, do the following:
1. Shut off the engine.
2. Partially open the drain valve at the bottom of
the filter.
SeeEngine Oil (Caterpillar
®Diesel Engine) on
page 5-22orEngine Oil (DURAMAX®Diesel) on
page 5-22orEngine Oil (Gasoline Engine) on page 5-26
for proper disposal procedures.
5-67
Page 280 of 374
Secondary Fuel Filter and Water
Separator/Heater
(Caterpillar
®Diesel)
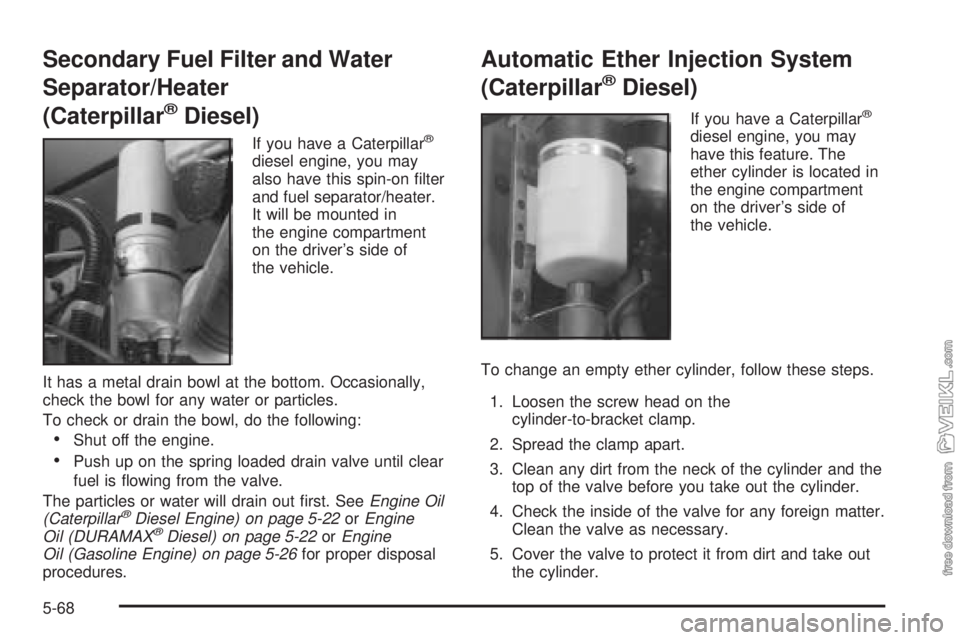
If you have a Caterpillar®
diesel engine, you may
also have this spin-on filter
and fuel separator/heater.
It will be mounted in
the engine compartment
on the driver’s side of
the vehicle.
It has a metal drain bowl at the bottom. Occasionally,
check the bowl for any water or particles.
To check or drain the bowl, do the following:
•Shut off the engine.
•Push up on the spring loaded drain valve until clear
fuel is flowing from the valve.
The particles or water will drain out first. SeeEngine Oil
(Caterpillar
®Diesel Engine) on page 5-22orEngine
Oil (DURAMAX®Diesel) on page 5-22orEngine
Oil (Gasoline Engine) on page 5-26for proper disposal
procedures.
Automatic Ether Injection System
(Caterpillar
®Diesel)
If you have a Caterpillar®
diesel engine, you may
have this feature. The
ether cylinder is located in
the engine compartment
on the driver’s side of
the vehicle.
To change an empty ether cylinder, follow these steps.
1. Loosen the screw head on the
cylinder-to-bracket clamp.
2. Spread the clamp apart.
3. Clean any dirt from the neck of the cylinder and the
top of the valve before you take out the cylinder.
4. Check the inside of the valve for any foreign matter.
Clean the valve as necessary.
5. Cover the valve to protect it from dirt and take out
the cylinder.
5-68