washer CHEVROLET KODIAK 2007 Owners Manual
[x] Cancel search | Manufacturer: CHEVROLET, Model Year: 2007, Model line: KODIAK, Model: CHEVROLET KODIAK 2007Pages: 430, PDF Size: 6.06 MB
Page 137 of 430
Instrument Panel Overview........................ 140
Hazard Warning Flashers.......................... 142
Other Warning Devices............................. 142
Horn.......................................................... 142
Tilt Wheel.................................................. 142
Turn Signal/Multifunction Lever.................. 143
Turn and Lane-Change Signals................. 144
Headlamp High/Low-Beam Changer.......... 144
Windshield Wipers..................................... 145
Windshield Washer.................................... 146
Cruise Control........................................... 146
Exterior Lamps.......................................... 150
Headlamps on Reminder........................... 150
Daytime Running Lamps (DRL)................. 151
Marker Lamps........................................... 152
Instrument Panel Brightness...................... 152
Dome Lamps............................................. 153
Entry Lighting............................................ 154
Reading Lamps......................................... 154
Instrument Panel Switchbank..................... 154
Accessory Power Outlet(s)........................ 156
Ashtray(s) and Cigarette Lighter................ 157Climate Controls......................................... 157
Climate Control System............................. 157
Outlet Adjustment...................................... 160
Rear Heating System................................ 161
Warning Lights, Gages, and Indicators..... 161
Instrument Panel Cluster........................... 162
Speedometer and Odometer...................... 163
Trip Odometer........................................... 163
Tachometer............................................... 163
Engine Speed Limiter................................ 164
Safety Belt Reminder Light........................ 164
Safety Belt Reminder Tone....................... 164
Airbag Readiness Light............................. 165
Airbag Off Light......................................... 166
Charging System Light.............................. 167
Voltmeter Gage......................................... 168
Service Transmission Warning Light.......... 168
Range Inhibit Warning Indicator................. 169
Brake System Warning Light..................... 169
Anti-Lock Brake System Warning Light...... 172
Trailer Anti-Lock Brake System
Warning Light........................................ 172
Section 3 Instrument Panel
137
Page 138 of 430
Engine Coolant Temperature Gage............ 173
Low Coolant Warning Light....................... 173
Wait to Start Indicator............................... 174
Malfunction Indicator Lamp........................ 174
Oil Pressure Gage..................................... 175
Low Oil Level Light................................... 176
Change Engine Oil Light........................... 176
Engine Overspeed Warning Light.............. 177
Engine Shutdown Warning Light................ 177
Transmission Temperature Gage............... 178
Exhaust Brake Indicator Light.................... 178
Differential Lock Indicator Light.................. 178
Reduced Engine Power Light.................... 179
Highbeam On Light................................... 179
Daytime Running Lamps (DRL)
Indicator Light........................................ 179
Low Washer Fluid Warning Light............... 180
Check Gages Warning Light...................... 180
Fuel Gage................................................. 181Water in Fuel Warning Light...................... 182
Air Filter Restriction Indicator..................... 182
Air Pressure Gage..................................... 183
Hourmeter Gage........................................ 183
Audio System(s)......................................... 184
Setting the Time........................................ 185
AM-FM Radio............................................ 186
Radio with Cassette.................................. 189
Radio with CD........................................... 195
Theft-Deterrent Feature
(Non-RDS Radios)................................. 201
Radio Reception........................................ 201
Care of the Cassette Tape Player............. 202
Care of Your CDs..................................... 203
Care of the CD Player.............................. 204
Fixed Mast Antenna.................................. 204
Chime Level Adjustment............................ 204
Section 3 Instrument Panel
138
Page 143 of 430
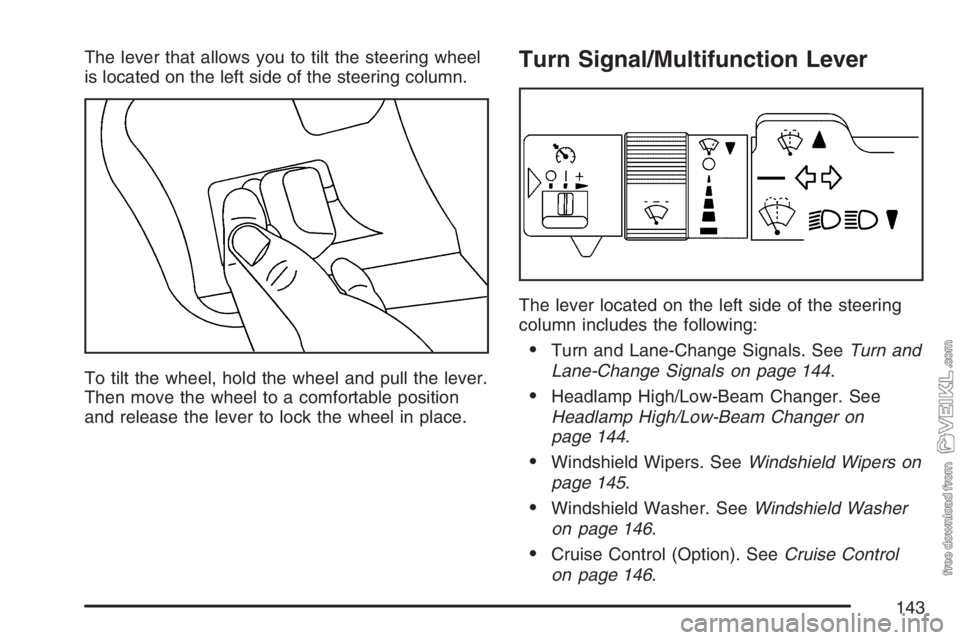
The lever that allows you to tilt the steering wheel
is located on the left side of the steering column.
To tilt the wheel, hold the wheel and pull the lever.
Then move the wheel to a comfortable position
and release the lever to lock the wheel in place.Turn Signal/Multifunction Lever
The lever located on the left side of the steering
column includes the following:
•Turn and Lane-Change Signals. SeeTurn and
Lane-Change Signals on page 144.
•Headlamp High/Low-Beam Changer. See
Headlamp High/Low-Beam Changer on
page 144.
•Windshield Wipers. SeeWindshield Wipers on
page 145.
•Windshield Washer. SeeWindshield Washer
on page 146.
•Cruise Control (Option). SeeCruise Control
on page 146.
143
Page 146 of 430
Windshield Washer
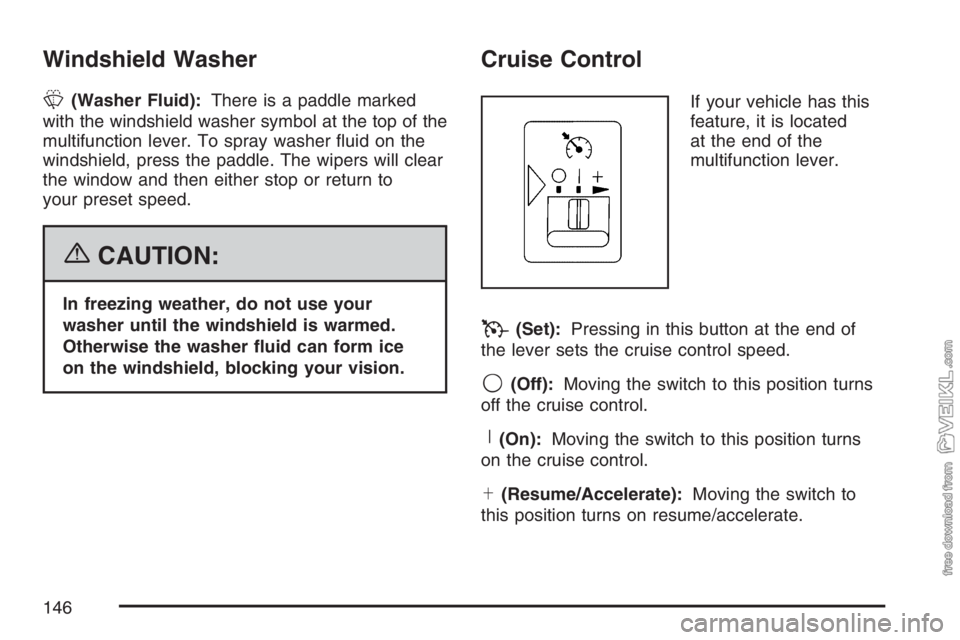
L(Washer Fluid):There is a paddle marked
with the windshield washer symbol at the top of the
multifunction lever. To spray washer fluid on the
windshield, press the paddle. The wipers will clear
the window and then either stop or return to
your preset speed.
{CAUTION:
In freezing weather, do not use your
washer until the windshield is warmed.
Otherwise the washer uid can form ice
on the windshield, blocking your vision.
Cruise Control
If your vehicle has this
feature, it is located
at the end of the
multifunction lever.
T(Set):Pressing in this button at the end of
the lever sets the cruise control speed.
9(Off):Moving the switch to this position turns
off the cruise control.
R(On):Moving the switch to this position turns
on the cruise control.
S(Resume/Accelerate):Moving the switch to
this position turns on resume/accelerate.
146
Page 180 of 430
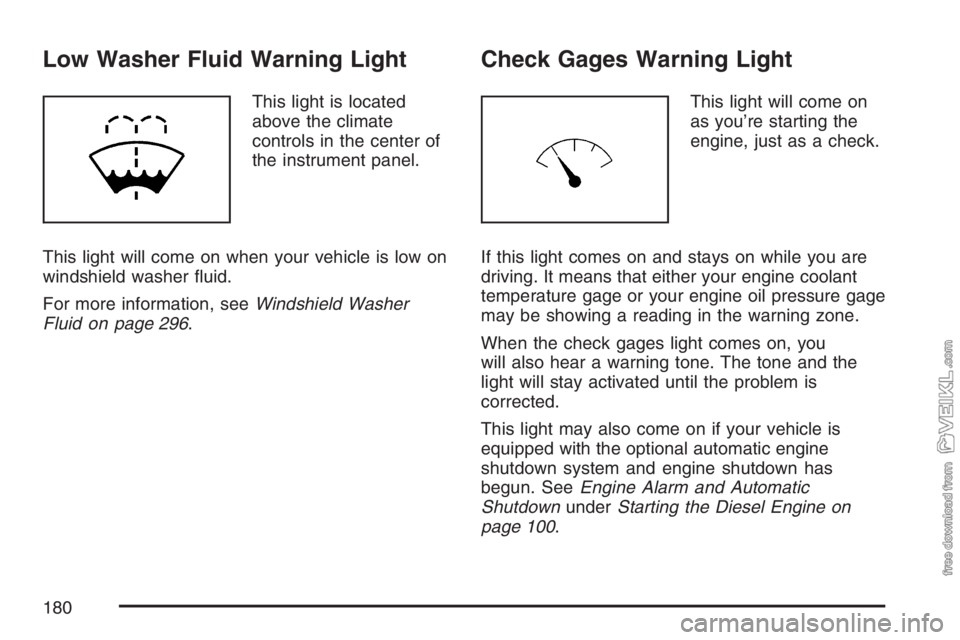
Low Washer Fluid Warning Light
This light is located
above the climate
controls in the center of
the instrument panel.
This light will come on when your vehicle is low on
windshield washer fluid.
For more information, seeWindshield Washer
Fluid on page 296.
Check Gages Warning Light
This light will come on
as you’re starting the
engine, just as a check.
If this light comes on and stays on while you are
driving. It means that either your engine coolant
temperature gage or your engine oil pressure gage
may be showing a reading in the warning zone.
When the check gages light comes on, you
will also hear a warning tone. The tone and the
light will stay activated until the problem is
corrected.
This light may also come on if your vehicle is
equipped with the optional automatic engine
shutdown system and engine shutdown has
begun. SeeEngine Alarm and Automatic
ShutdownunderStarting the Diesel Engine on
page 100.
180
Page 225 of 430
The heavier the rain, the harder it is to see.
Even if your windshield wiper blades are in good
shape, a heavy rain can make it harder to see
road signs and traffic signals, pavement markings,
the edge of the road, and even people walking.
It is wise to keep your wiping equipment in
good shape and keep your windshield washer fluid
reservoir filled with washer fluid. Replace your
windshield wiper inserts when they show signs
of streaking or missing areas on the windshield,
or when strips of rubber start to separate from
the inserts.
{CAUTION:
Wet brakes can cause accidents. They
may not work as well in a quick stop and
may cause pulling to one side. You could
lose control of the vehicle.
After driving through a large puddle of
water or a vehicle wash, apply your brake
pedal lightly until your brakes work
normally.Driving too fast through large water puddles
or even going through some vehicle washes can
cause problems, too. The water may affect
your brakes. Try to avoid puddles. But if you
cannot, try to slow down before you hit them.
Hydroplaning
Hydroplaning is dangerous. So much water can
build up under your tires that they can actually ride
on the water. This can happen if the road is wet
enough and you are going fast enough. When your
vehicle is hydroplaning, it has little or no contact
with the road.
Hydroplaning does not happen often. But it can
if your tires do not have much tread or if the
pressure in one or more is low. It can happen if
a lot of water is standing on the road. If you
can see reflections from trees, telephone poles,
or other vehicles, and raindrops dimple the
water’s surface, there could be hydroplaning.
Hydroplaning usually happens at higher speeds.
There just is not a hard and fast rule about
hydroplaning. The best advice is to slow down
when it is raining.
225
Page 232 of 430
Include an ice scraper, a small brush or broom, a
supply of windshield washer fluid, a rag, some
winter outer clothing, a small shovel, a flashlight,
a red cloth, and reflective warning triangles.
And, if you will be driving under severe conditions,
include a small bag of sand, a piece of old
carpet, or a couple of burlap bags to help provide
traction. Be sure you properly secure these
items in your vehicle.
Driving on Snow or Ice
Most of the time, those places where the tires
meet the road probably have good traction.
However, if there is snow or ice between the tires
and the road, you can have a very slippery
situation. You will have a lot less traction, or grip,
and will need to be very careful.What is the worst time for this? Wet ice. Very cold
snow or ice can be slick and hard to drive on.
But wet ice can be even more trouble because it
may offer the least traction of all. You can get
wet ice when it is about freezing, 32°F (0°C), and
freezing rain begins to fall. Try to avoid driving
on wet ice until salt and sand crews can get there.
Whatever the condition — smooth ice, packed,
blowing, or loose snow — drive with caution.
232
Page 242 of 430
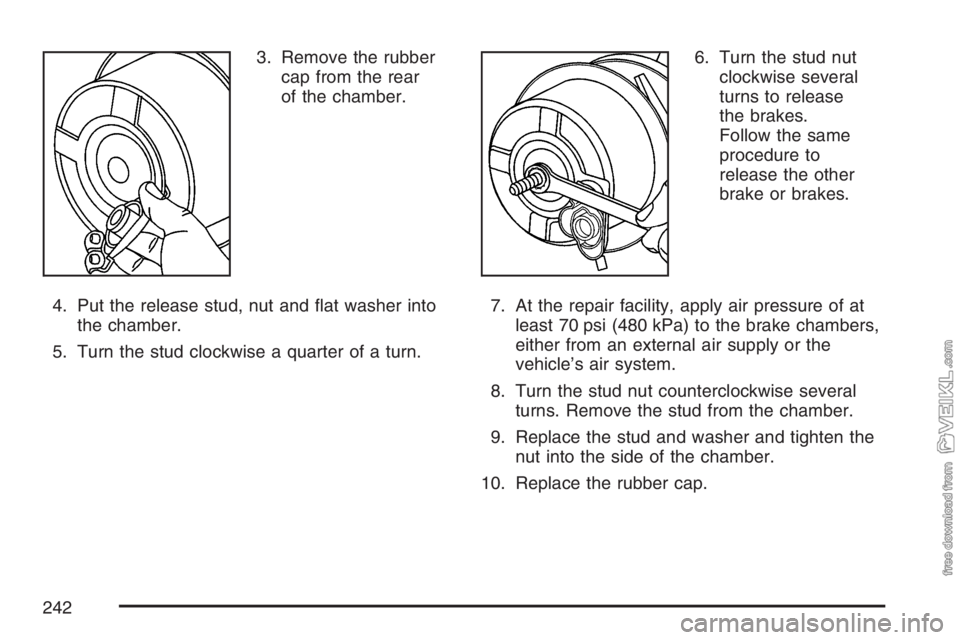
3. Remove the rubber
cap from the rear
of the chamber.
4. Put the release stud, nut and flat washer into
the chamber.
5. Turn the stud clockwise a quarter of a turn.6. Turn the stud nut
clockwise several
turns to release
the brakes.
Follow the same
procedure to
release the other
brake or brakes.
7. At the repair facility, apply air pressure of at
least 70 psi (480 kPa) to the brake chambers,
either from an external air supply or the
vehicle’s air system.
8. Turn the stud nut counterclockwise several
turns. Remove the stud from the chamber.
9. Replace the stud and washer and tighten the
nut into the side of the chamber.
10. Replace the rubber cap.
242
Page 246 of 430
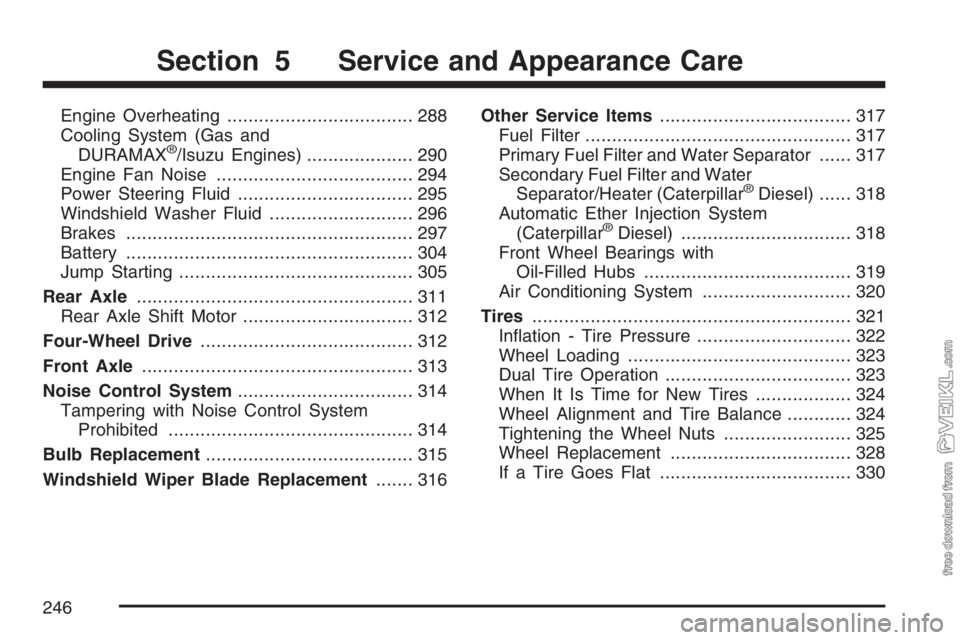
Engine Overheating................................... 288
Cooling System (Gas and
DURAMAX
®/Isuzu Engines).................... 290
Engine Fan Noise..................................... 294
Power Steering Fluid................................. 295
Windshield Washer Fluid........................... 296
Brakes...................................................... 297
Battery...................................................... 304
Jump Starting............................................ 305
Rear Axle.................................................... 311
Rear Axle Shift Motor................................ 312
Four-Wheel Drive........................................ 312
Front Axle................................................... 313
Noise Control System................................. 314
Tampering with Noise Control System
Prohibited.............................................. 314
Bulb Replacement....................................... 315
Windshield Wiper Blade Replacement....... 316Other Service Items.................................... 317
Fuel Filter.................................................. 317
Primary Fuel Filter and Water Separator...... 317
Secondary Fuel Filter and Water
Separator/Heater (Caterpillar
®Diesel)...... 318
Automatic Ether Injection System
(Caterpillar
®Diesel)................................ 318
Front Wheel Bearings with
Oil-Filled Hubs....................................... 319
Air Conditioning System............................ 320
Tires............................................................ 321
Inflation - Tire Pressure............................. 322
Wheel Loading.......................................... 323
Dual Tire Operation................................... 323
When It Is Time for New Tires.................. 324
Wheel Alignment and Tire Balance............ 324
Tightening the Wheel Nuts........................ 325
Wheel Replacement.................................. 328
If a Tire Goes Flat.................................... 330
Section 5 Service and Appearance Care
246
Page 266 of 430

Filling a Portable Fuel Container
{CAUTION:
Never ll a portable fuel container while it
is in your vehicle. Static electricity
discharge from the container can ignite the
gasoline vapor. You can be badly burned
and your vehicle damaged if this occurs.
To help avoid injury to you and others:
Dispense gasoline only into approved
containers.
Do not ll a container while it is inside a
vehicle, in a vehicle’s trunk, pickup
bed, or on any surface other than the
ground.
Bring the ll nozzle in contact with the
inside of the ll opening before
operating the nozzle. Contact should
be maintained until the lling is
complete.
Do not smoke while pumping gasoline.
Checking Things Under
the Hood
{CAUTION:
Things that burn can get on hot engine
parts and start a re. These include
liquids like fuel, oil, coolant, brake uid,
windshield washer and other uids, and
plastic or rubber. You or others could be
burned. Be careful not to drop or spill
things that will burn onto a hot engine.
266