CHEVROLET KODIAK 2009 Owners Manual
Manufacturer: CHEVROLET, Model Year: 2009, Model line: KODIAK, Model: CHEVROLET KODIAK 2009Pages: 376, PDF Size: 5.39 MB
Page 91 of 376
Automatic Transmission Operation
If the vehicle has an Allison®five-speed or six-speed
automatic transmission, you will also find an Allison®
Transmission Operator’s Manual in the vehicle which
goes into more detail. On the headliner, in front of and
above the driver, or in some other place near the driver,
you will see a label that describes important operating
facts about the automatic transmission in the vehicle.
Make sure you follow the instructions on this label.
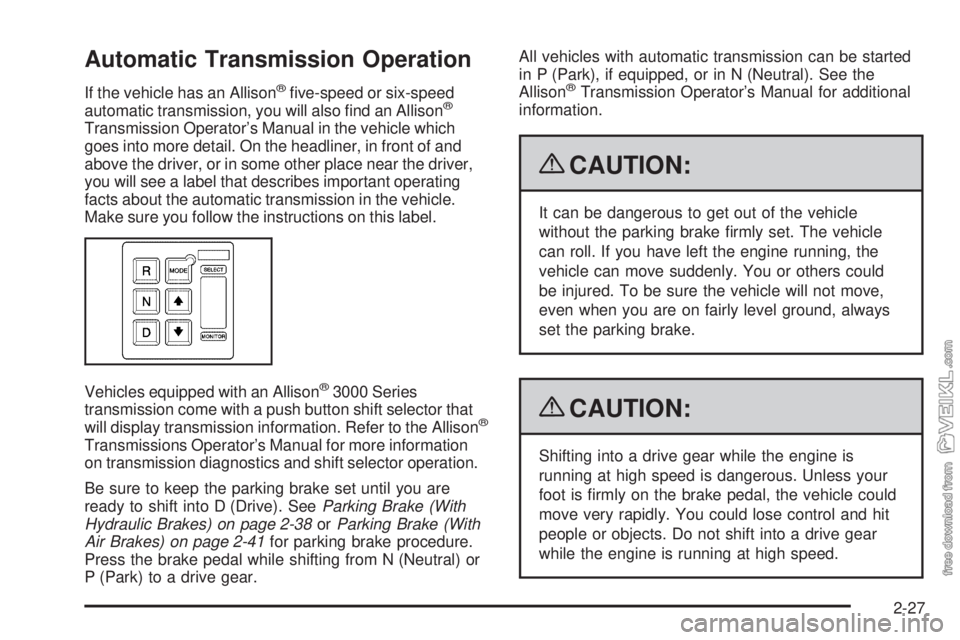
Vehicles equipped with an Allison
®3000 Series
transmission come with a push button shift selector that
will display transmission information. Refer to the Allison
®
Transmissions Operator’s Manual for more information
on transmission diagnostics and shift selector operation.
Be sure to keep the parking brake set until you are
ready to shift into D (Drive). SeeParking Brake (With
Hydraulic Brakes) on page 2-38orParking Brake (With
Air Brakes) on page 2-41for parking brake procedure.
Press the brake pedal while shifting from N (Neutral) or
P (Park) to a drive gear.All vehicles with automatic transmission can be started
in P (Park), if equipped, or in N (Neutral). See the
Allison
®Transmission Operator’s Manual for additional
information.
{CAUTION:
It can be dangerous to get out of the vehicle
without the parking brake firmly set. The vehicle
can roll. If you have left the engine running, the
vehicle can move suddenly. You or others could
be injured. To be sure the vehicle will not move,
even when you are on fairly level ground, always
set the parking brake.
{CAUTION:
Shifting into a drive gear while the engine is
running at high speed is dangerous. Unless your
foot is firmly on the brake pedal, the vehicle could
move very rapidly. You could lose control and hit
people or objects. Do not shift into a drive gear
while the engine is running at high speed.
2-27
Page 92 of 376
Overdrive Defeat
If your vehicle has this feature, you can select not to
shift up to fifth gear. This is useful when towing or under
a heavy load.
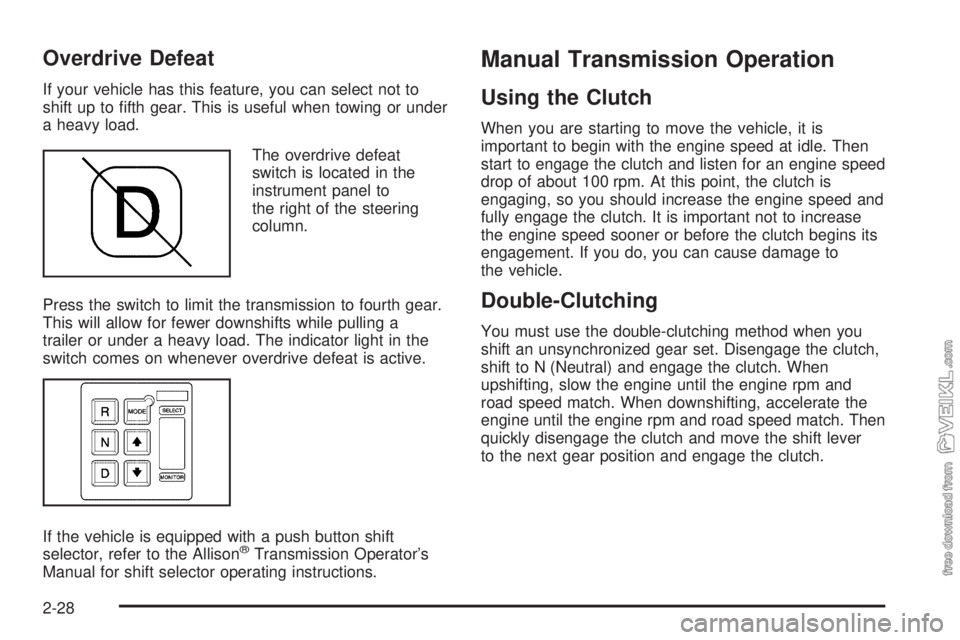
The overdrive defeat
switch is located in the
instrument panel to
the right of the steering
column.
Press the switch to limit the transmission to fourth gear.
This will allow for fewer downshifts while pulling a
trailer or under a heavy load. The indicator light in the
switch comes on whenever overdrive defeat is active.
If the vehicle is equipped with a push button shift
selector, refer to the Allison
®Transmission Operator’s
Manual for shift selector operating instructions.
Manual Transmission Operation
Using the Clutch
When you are starting to move the vehicle, it is
important to begin with the engine speed at idle. Then
start to engage the clutch and listen for an engine speed
drop of about 100 rpm. At this point, the clutch is
engaging, so you should increase the engine speed and
fully engage the clutch. It is important not to increase
the engine speed sooner or before the clutch begins its
engagement. If you do, you can cause damage to
the vehicle.
Double-Clutching
You must use the double-clutching method when you
shift an unsynchronized gear set. Disengage the clutch,
shift to N (Neutral) and engage the clutch. When
upshifting, slow the engine until the engine rpm and
road speed match. When downshifting, accelerate the
engine until the engine rpm and road speed match. Then
quickly disengage the clutch and move the shift lever
to the next gear position and engage the clutch.
2-28
Page 93 of 376
Eaton®Fuller®Five and Six-Speed
Transmissions and TTC Spicer
Seven-Speed Transmissions
These transmissions have gears that automatically
synchronize when you shift up or down (except 1 (First)
gear on the five-speed and seven-speed transmission
which is unsynchronized). Choose the gear that will
maintain the road speed you want while keeping
the engine above two-thirds of the governed speed.
When the engine speed drops below two-thirds of the
governed speed, shift into the next lower gear before
your engine begins to lug. When you shift down, be sure
to double-clutch if required.
Eaton®Fuller®Nine and Ten-Speed
Non-Synchronized Manual
Transmissions
If the vehicle has one of these transmissions the engine
rpm and road speed must match when upshifting and
downshifting. The label above the windshield will tell you
the operating basics you need to know.
The following are driving tips.
•Always choose an initial starting gear suitable for
the load and terrain.
•Always use double-clutching procedures when
shifting.
•Never move the range shift lever to the LO speed
gear position after HI range preselection, or
anytime the transmission is in the HI range.
•Never move the range knob or lever with the shift
lever in N (Neutral) while the vehicle is moving.
•Never make a range shift while moving in
R (Reverse).
Clutch Brake (Vehicles with
Non-Synchronized Transmission)
A clutch brake is used to stop transmission input shaft
rotation so that 1 (First) or R (Reverse) gear selection
can be initiated when the vehicle is at a standstill
and the engine is idling.
Press the clutch pedal all the way down to the floorboard
to apply the clutch brake.
When using the clutch brake, disengage the clutch pedal
and shift the transmission into either the initial starting
gear or R (Reverse). If the tooth-butting occurs between
the clutching teeth, re-engage the clutch while applying
light pressure to the shift lever. This will provide for a
smooth shift into either 1 (First) or R (Reverse) gear.
Notice:Using the clutch brake for shifting into any
gear other than 1 (First) or R (Reverse) may cause
premature wear of the clutch brake and make gear
shift effort more difficult. Do not use the clutch brake
for shifting after engaging 1 (First) or R (Reverse).
2-29
Page 94 of 376
Power Take-Off (PTO)
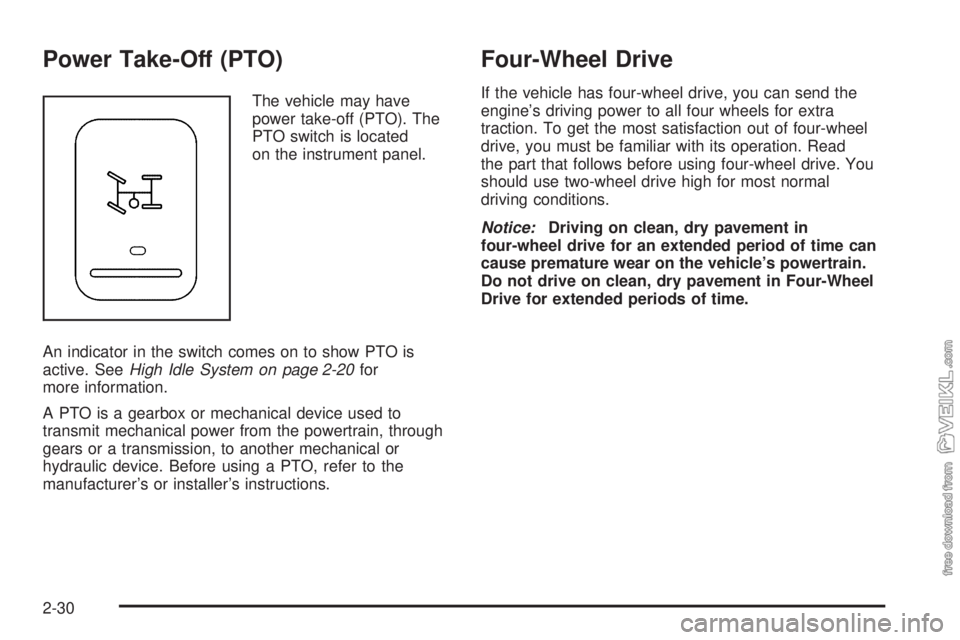
The vehicle may have
power take-off (PTO). The
PTO switch is located
on the instrument panel.
An indicator in the switch comes on to show PTO is
active. SeeHigh Idle System on page 2-20for
more information.
A PTO is a gearbox or mechanical device used to
transmit mechanical power from the powertrain, through
gears or a transmission, to another mechanical or
hydraulic device. Before using a PTO, refer to the
manufacturer’s or installer’s instructions.
Four-Wheel Drive
If the vehicle has four-wheel drive, you can send the
engine’s driving power to all four wheels for extra
traction. To get the most satisfaction out of four-wheel
drive, you must be familiar with its operation. Read
the part that follows before using four-wheel drive. You
should use two-wheel drive high for most normal
driving conditions.
Notice:Driving on clean, dry pavement in
four-wheel drive for an extended period of time can
cause premature wear on the vehicle’s powertrain.
Do not drive on clean, dry pavement in Four-Wheel
Drive for extended periods of time.
2-30
Page 95 of 376
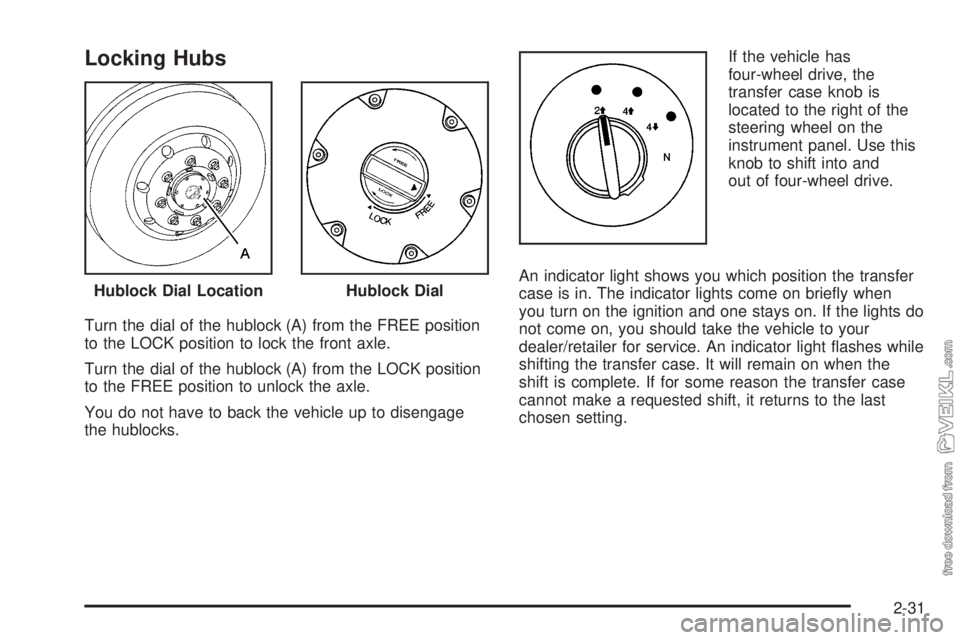
Locking Hubs
Turn the dial of the hublock (A) from the FREE position
to the LOCK position to lock the front axle.
Turn the dial of the hublock (A) from the LOCK position
to the FREE position to unlock the axle.
You do not have to back the vehicle up to disengage
the hublocks.If the vehicle has
four-wheel drive, the
transfer case knob is
located to the right of the
steering wheel on the
instrument panel. Use this
knob to shift into and
out of four-wheel drive.
An indicator light shows you which position the transfer
case is in. The indicator lights come on briefly when
you turn on the ignition and one stays on. If the lights do
not come on, you should take the vehicle to your
dealer/retailer for service. An indicator light flashes while
shifting the transfer case. It will remain on when the
shift is complete. If for some reason the transfer case
cannot make a requested shift, it returns to the last
chosen setting. Hublock Dial Location
Hublock Dial
2-31
Page 96 of 376
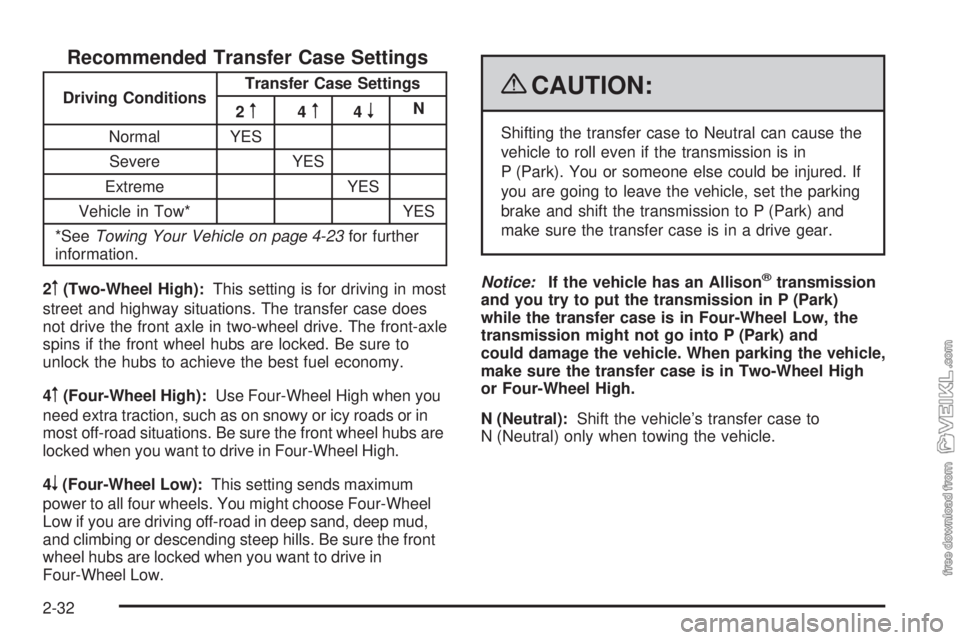
Recommended Transfer Case Settings
Driving ConditionsTransfer Case Settings
2m4m4nN
Normal YES
Severe YES
Extreme YES
Vehicle in Tow* YES
*SeeTowing Your Vehicle on page 4-23for further
information.
2
m(Two-Wheel High):This setting is for driving in most
street and highway situations. The transfer case does
not drive the front axle in two-wheel drive. The front-axle
spins if the front wheel hubs are locked. Be sure to
unlock the hubs to achieve the best fuel economy.
4
m(Four-Wheel High):Use Four-Wheel High when you
need extra traction, such as on snowy or icy roads or in
most off-road situations. Be sure the front wheel hubs are
locked when you want to drive in Four-Wheel High.
4
n(Four-Wheel Low):This setting sends maximum
power to all four wheels. You might choose Four-Wheel
Low if you are driving off-road in deep sand, deep mud,
and climbing or descending steep hills. Be sure the front
wheel hubs are locked when you want to drive in
Four-Wheel Low.
{CAUTION:
Shifting the transfer case to Neutral can cause the
vehicle to roll even if the transmission is in
P (Park). You or someone else could be injured. If
you are going to leave the vehicle, set the parking
brake and shift the transmission to P (Park) and
make sure the transfer case is in a drive gear.
Notice:If the vehicle has an Allison
®transmission
and you try to put the transmission in P (Park)
while the transfer case is in Four-Wheel Low, the
transmission might not go into P (Park) and
could damage the vehicle. When parking the vehicle,
make sure the transfer case is in Two-Wheel High
or Four-Wheel High.
N (Neutral):Shift the vehicle’s transfer case to
N (Neutral) only when towing the vehicle.
2-32
Page 97 of 376
Shifting Into Four-Wheel High
Turn the knob to four-wheel high. This can be done at
3 mph or less. The indicator light flashes while shifting.
It remains on after the shift is complete. Be sure to
lock the front hubs.
Shifting Into Two-Wheel High
Turn the knob to Two-Wheel High. This can be done at
3 mph or less.
Shifting Into Four-Wheel Low
To shift to Four-Wheel Low, the vehicle’s engine must be
running and the vehicle must be stopped or moving less
than 3 mph (5 km/h) with the transmission in N (Neutral).
The preferred method for shifting into Four-Wheel Low is
to have the vehicle moving 1 or 2 mph (1.6 to 3.2 km/h).
Turn the knob to Four-Wheel Low. You must wait for
the Four-Wheel Low indicator light to stop flashing and
remain on before shifting the transmission into gear.
Be sure to lock the front hubs.Notice:Shifting the transmission into gear before
the Four-Wheel Drive Low indicator light has
stopped flashing could damage the transfer case.
To help avoid damaging the vehicle, always wait for
the Four-Wheel Drive Low indicator light to stop
flashing before shifting the transmission into gear.
If you turn the knob to Four-Wheel Low while the
vehicle is in gear and/or moving, the Four-Wheel Low
indicator light flashes for 30 seconds and does not
complete the shift unless the vehicle is moving less than
3 mph (4.8 km/h) and the transmission is in N (Neutral).
After 30 seconds, the transfer case returns to the
setting last chosen. If the vehicle is in gear and moving
less than 3 mph (4.8 km/h), the transfer case shifts
to Four-Wheel High.
2-33
Page 98 of 376
Shifting Out of Four-Wheel Low
To shift from Four-Wheel Low to Four-Wheel High or
Two-Wheel High, the vehicle must be stopped or moving
less than 3 mph (5 km/h) with the transmission in
N (Neutral) with the engine running. The preferred
method for shifting out of Four-Wheel Low is to have
the vehicle moving 1 or 2 mph (1.6 to 3.2 km/h).
Turn the knob to Four-Wheel High or Two-Wheel High.
You must wait for the Four-Wheel High or Two-Wheel
High indicator light to stop flashing and remain on before
shifting the transmission into gear.
Notice:Shifting the transmission into gear before
the Four-Wheel High or Two-Wheel High indicator
light has stopped flashing could damage the transfer
case. To help avoid damaging the vehicle, always
wait for the Four-Wheel High or Two-Wheel High
indicator light to stop flashing before shifting
the transmission into gear.
If the knob is turned to Four-Wheel High or Two-Wheel
High while the vehicle is in gear and/or moving, the
Four-Wheel High or Two-Wheel high indicator light
flashes for 30 seconds. It will not complete the shift
unless the vehicle is moving less than 3 mph (5 km/h)
with the transmission in N (Neutral).
Shifting Into Neutral
Before shifting the transfer case to N (Neutral), first
make sure the vehicle is parked so that it will not roll.
1. Set the parking brake. SeeParking Brake (With
Hydraulic Brakes) on page 2-38orParking Brake
(With Air Brakes) on page 2-41for parking
brake apply procedure.
2. Start the vehicle.
3. Put the transmission in N (Neutral).
4. Shift the transfer case to Two-Wheel High.
5. Turn the transfer case knob all of the way past
Four-Wheel Low and hold it there for a minimum
of 10 seconds. The N (Neutral) indicator light
comes on.
6. Shift the transmission to R (Reverse) for
one second, then shift the transmission to D (Drive)
for one second.
7. Turn the ignition to OFF.
8. Place the transmission shift lever in P (Park).
9. Turn the ignition to LOCK.
2-34
Page 99 of 376
Shifting Out of Neutral
To shift the transfer case out of N (Neutral), do the
following:
1. Set the parking brake. SeeParking Brake (With
Hydraulic Brakes) on page 2-38orParking Brake
(With Air Brakes) on page 2-41for parking
brake apply procedure.
2. Apply the regular brake pedal.
3. Turn the ignition to ON/RUN with the engine off.
4. Put the transmission in N (Neutral).
5. Turn the transfer case knob to the desired shift
position (Two-Wheel High, Four-Wheel High,
Four-Wheel Low).
6. After the transfer case has shifted out of N (Neutral),
the indicator light goes out.
Notice:Driving with the parking brake on can
overheat the brake system and cause premature
wear or damage to brake system parts. Verify that
the parking brake is fully released and the brake
warning light is off before driving.
7. Release the parking brake.
8. Start the engine and shift the transmission lever to
the desired position.Excessively shifting the transfer case into or out of the
different modes can cause the transfer case to enter the
shift protection mode. This protects the transfer case from
possible damage and only allows the transfer case to
respond to one shift per 10 seconds. The transfer case
can stay in this mode for up to three minutes.
Parking
{CAUTION:
If you do not park the vehicle properly, it can roll.
If you have left the engine running, it can move
very quickly. You or others could be injured. To be
sure the vehicle will not move, even when you are
on level ground, follow the steps below.
2-35
Page 100 of 376
Parking a Vehicle With the Two-Speed
Rear Axle
1. With the engine running, shift the two-speed rear
axle into low. To be sure it is in low, you will need
to move the vehicle in gear just a little.
2. Hold the brake pedal down.
3. Apply the parking brake. SeeParking Brake (With
Hydraulic Brakes) on page 2-38orParking Brake
(With Air Brakes) on page 2-41for parking
brake apply procedure.
4. Shift the transmission to N (Neutral) for manual
transmission or P (Park) for automatic transmission.
Two-Speed Rear Axle
The Two-Speed rear axle lets the driver select Low
Range and High Range. Low Range provides good
starting torque and pulling power. When selecting High
Range the axle allows for higher road speed and
fuel economy.For better performance during off-road or under a heavy
load, shift the axle into Low Range and then operate
the transmission normally.
For better performance on the highway, shift the axle to
High Range and operate the transmission normally.
High or Low Range can be used when additional shifts
between transmission gears is needed while driving
on grades and for better fuel economy.
Notice:Driving in Low Range above 50 mph
(80.5 kph) will damage driveline components. Drive
below 50 mph (80.5 kph) in Low Range.
If the vehicle has this feature, there is a label on the
headliner above the windshield or in another place near
the driver that shows how to use it. Be sure to follow
the directions carefully.
2-36