parking brake CHEVROLET KODIAK 2009 Owner's Manual
[x] Cancel search | Manufacturer: CHEVROLET, Model Year: 2009, Model line: KODIAK, Model: CHEVROLET KODIAK 2009Pages: 376, PDF Size: 5.39 MB
Page 133 of 376
Daytime Running Lamps (DRL)
Daytime Running Lamps (DRL) can make it easier for
others to see the front of your vehicle during the
day. Fully functional daytime running lamps are required
on all vehicles first sold in Canada.
The DRL system will make the headlamps come on
at reduced brightness when the following conditions
are met:
•The ignition is on,
•the exterior lamp control is off, and
•the parking brake is released.
When the DRL are on, only the headlamps will be on.
The taillamps, sidemarker, instrument panel lights,
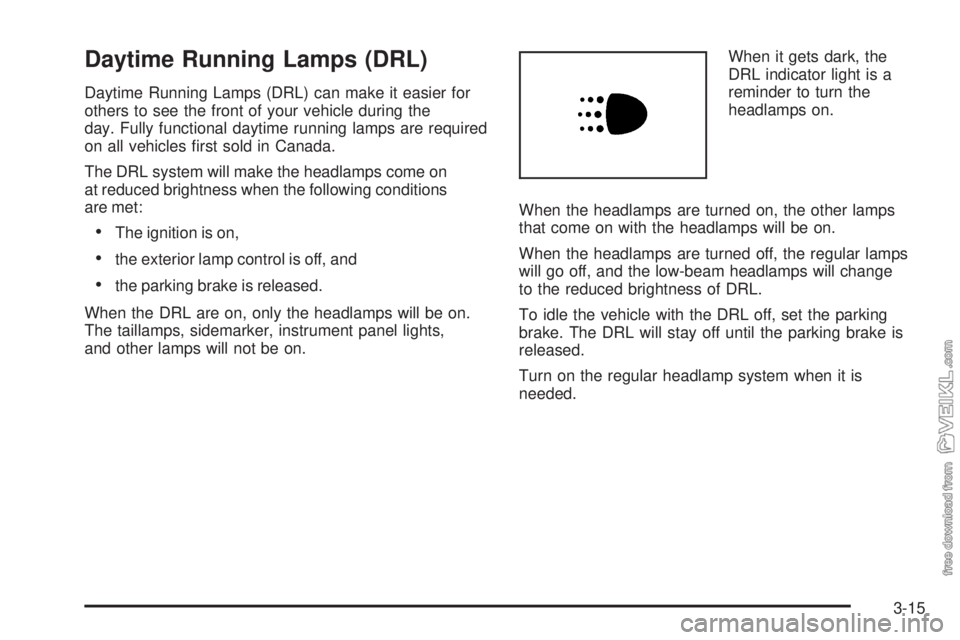
and other lamps will not be on.When it gets dark, the
DRL indicator light is a
reminder to turn the
headlamps on.
When the headlamps are turned on, the other lamps
that come on with the headlamps will be on.
When the headlamps are turned off, the regular lamps
will go off, and the low-beam headlamps will change
to the reduced brightness of DRL.
To idle the vehicle with the DRL off, set the parking
brake. The DRL will stay off until the parking brake is
released.
Turn on the regular headlamp system when it is
needed.
3-15
Page 150 of 376
If the light comes on while driving, pull off the road and
stop carefully. The pedal might be harder to push or
might go the floor. It can take longer to stop. If the light
remains on, have the vehicle towed for service. See
Towing Your Vehicle on page 4-23for more information.
The brake warning light may come on, and the
warning tone may sound, when you are turning and
braking at the same time. This is normal. See “Hydraulic
Brake Systems” underBraking on page 4-4.
Parking Brake Warning Light
Your vehicle has a brake warning light. When the
ignition is on, this light will come on when you set your
parking brake. The light will stay on if your parking
brake does not release fully.
This light should also come on when you turn the
ignition key to START. If it does not come on then, have
it fixed so it will be ready to remind you if the parking
brake is applied or has not released fully.
Air Brake System Warning Light
Vehicles with air brake systems have a brake system
warning light on the instrument panel.
The low air warning light
should come on, as a
check, whenever you start
the engine.
However, it is designed to come on, and stay on, when
brake reservoir pressure has dropped below 60 psi
(410 kPa).
3-32
Page 151 of 376
When the warning light comes on while you are driving,
you should drive only as far as the nearest point of
safety and then stop the vehicle. Here is a very
important thing for you to know:
{CAUTION:
If the air brake system warning light comes on and
the warning tone sounds, the vehicle can stop
suddenly and without further warning. This is
because the parking brake will come on if the
pressure falls below 35 to 45 psi (240 to 310 kPa).
You or others could be injured. If the air brake
system warning light comes on and the warning
tone sounds, stop as soon as you can. You will
not know how quickly the system is losing
pressure, so be aware that the parking brake may
come on suddenly.
Antilock Brake System (ABS)
Warning Light
This light will come on
briefly when you start the
engine, then it will turn
off. This is normal.
If the light stays on, or comes on when you are driving,
your vehicle needs service. If the brake or low air warning
light is not on, you still have brakes, but you do not have
the antilock brake feature. If the brake and/or low air
warning light is on, you do not have antilock brakes and
there is a problem with your regular brakes. SeeBrake
System Warning Light on page 3-31andAntilock Brake
System (ABS) on page 4-5for more information.
3-33
Page 166 of 376
Audio System(s)
If the vehicle came without a radio, the wiring provisions
for a radio and an antenna were installed at the
assembly plant, so that if you want, a radio can be
installed at the dealer/retailer.
Determine which radio the vehicle has and read the
following pages to become familiar with its features.
{CAUTION:
Taking your eyes off the road for extended periods
could cause a crash resulting in injury or death to
you or others. Do not give extended attention to
entertainment tasks while driving.
This system provides access to many audio and non
audio listings.
To minimize taking your eyes off the road while driving,
do the following while the vehicle is parked:
•Become familiar with the operation and controls of
the audio system.
•Set up the tone, speaker adjustments, and preset
radio stations.
For more information, seeDefensive Driving on
page 4-2.Notice:Contact your dealer/retailer before adding
any equipment.
Adding audio or communication equipment could
interfere with the operation of the vehicle’s engine,
radio, or other systems, and could damage them.
Follow federal rules covering mobile radio and
telephone equipment.
Notice:The chime signals related to safety belts,
parking brake, and other functions of your vehicle
operate through the radio/entertainment system.
If that equipment is replaced or additional equipment
is added to your vehicle, the chimes may not
work. Make sure that replacement or additional
equipment is compatible with your vehicle before
installing it. SeeAccessories and Modifications
on page 5-3.
Setting the Clock
Press and hold the HR (down) or MIN (up) arrow for
two seconds. Then press HR until the correct hour
displays. Press and hold MIN until the correct minute
displays. The time can be set with the ignition on or off.
3-48
Page 182 of 376
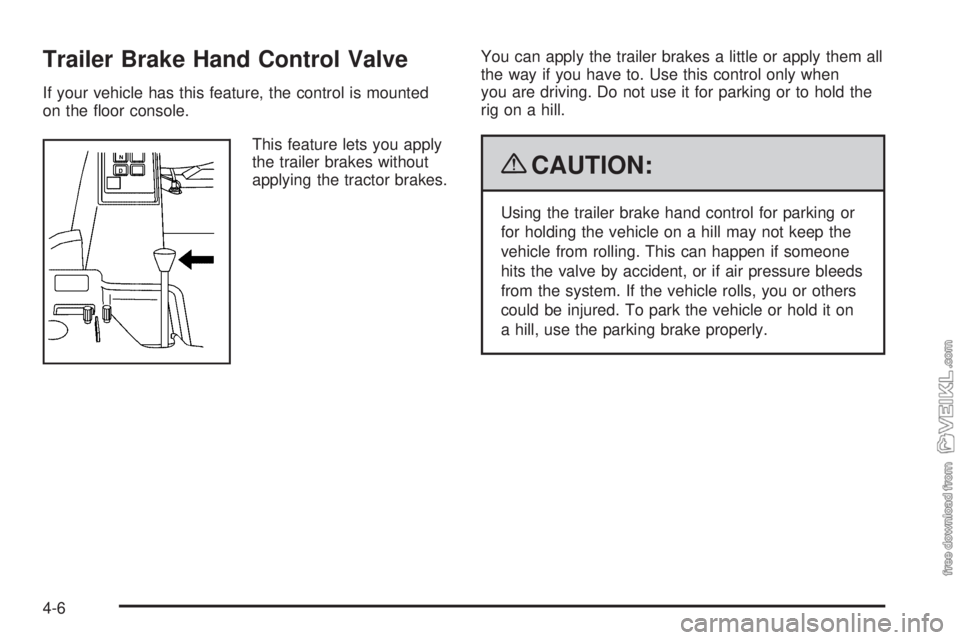
Trailer Brake Hand Control Valve
If your vehicle has this feature, the control is mounted
on the floor console.
This feature lets you apply
the trailer brakes without
applying the tractor brakes.You can apply the trailer brakes a little or apply them all
the way if you have to. Use this control only when
you are driving. Do not use it for parking or to hold the
rig on a hill.
{CAUTION:
Using the trailer brake hand control for parking or
for holding the vehicle on a hill may not keep the
vehicle from rolling. This can happen if someone
hits the valve by accident, or if air pressure bleeds
from the system. If the vehicle rolls, you or others
could be injured. To park the vehicle or hold it on
a hill, use the parking brake properly.
4-6
Page 199 of 376
Towing
Towing Your Vehicle
Consult your dealer/retailer or a professional towing
service to have the vehicle towed. They can provide the
right equipment and know-how to tow it without
damage. SeeRoadside Assistance Program on
page 7-5.
Releasing Air-Operated Parking Brakes
If the vehicle has air brakes, there could be a special
towing problem. If the vehicle has to be towed because
of a complete loss of air pressure from both systems,
the parking brakes will have automatically engaged.The tow operator can release the brakes manually by
using the following steps. Then the vehicle can be towed
with all wheels or only the rear wheels on the ground.
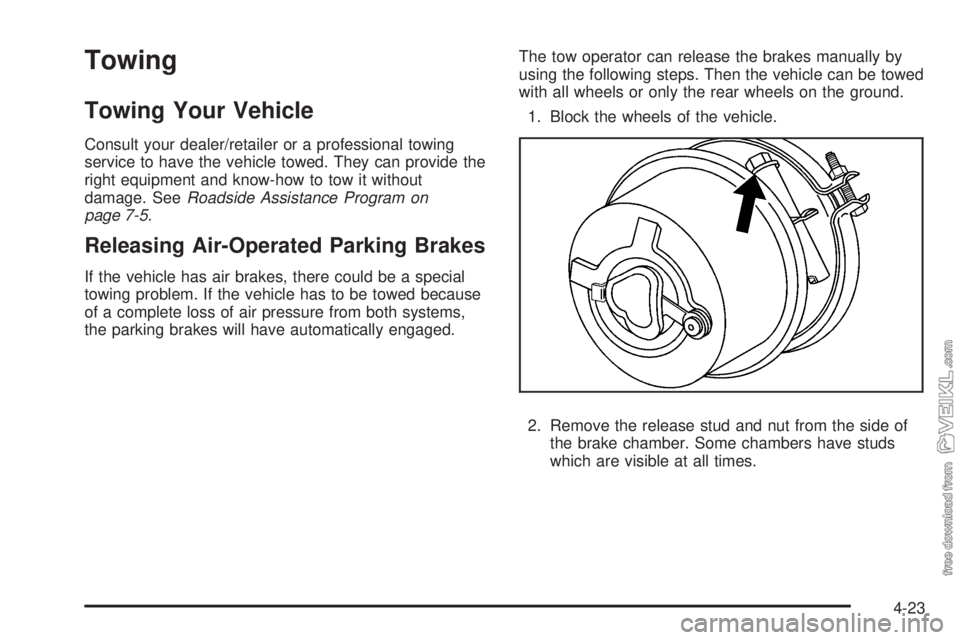
1. Block the wheels of the vehicle.
2. Remove the release stud and nut from the side of
the brake chamber. Some chambers have studs
which are visible at all times.
4-23
Page 214 of 376
Water In Fuel Light
Problem Recommended Action
Light comes on
intermittently.Drain water from the fuel
filter.
Light stays on at
temperatures above
freezing.Drain the fuel filter
immediately. If no water
can be drained and the
light stays on, see your
dealer/retailer for
assistance.
Light stays on at
temperatures below
freezing.Drain the fuel filter
immediately. If no water
can be drained, water
may be frozen in the
water drain system, or in
the fuel lines. Move the
vehicle to a warm location
to thaw out, and then
drain the filter system.
Light stays on
immediately after
refueling, and a large
amount of water was
possibly pumped into the
fuel tank.Fuel tank purging is
required. See your
dealer/retailer for
assistance.Notice:Driving when this warning indicator is on,
can damage the fuel injection system and the engine.
If the indicator comes on right after a refuel, it means
water was pumped into the fuel tank. Turn off the
engine immediately. Then, have the water drained
at once.
To drain water, do the following:
1. Stop and park the vehicle in a safe place. Turn off
the engine and apply the parking brake.
2. Remove the fuel cap.
3. Place a fuel-resistant container under the fuel filter.
The filter drain valve is located on the bottom of the
fuel filter.
If the vehicle has the 6.6L engine, the fuel filter is
located in the engine compartment on the driver side
of the vehicle. If the vehicle has either the 7.2L or
7.8L engine, the fuel filters are located in the engine
compartment on the driver side of the vehicle, and on
the driver side frame rail in front of the fuel tank.
5-12
Page 220 of 376
Fuel Filter Replacement
If you want to change the diesel engine fuel filter
yourself, here is how to do it:
{CAUTION:
Diesel fuel is flammable. It could start a fire if
something ignites it, and you could be burned.
Do not let it get on hot engine parts, and keep
matches or other ignition sources away.
First, drain any water from the filter by following the
water draining procedure earlier in this section.
The vehicle’s engine should be off until the end of this
procedure.If the vehicle has the 6.6L engine, the fuel filter is located
in the engine compartment on the driver side of the
vehicle. If the vehicle has either the 7.2L or 7.8L engine,
the fuel filters are located in the engine compartment
on the driver side of the vehicle, and on the driver side
frame rail in front of the fuel tank.
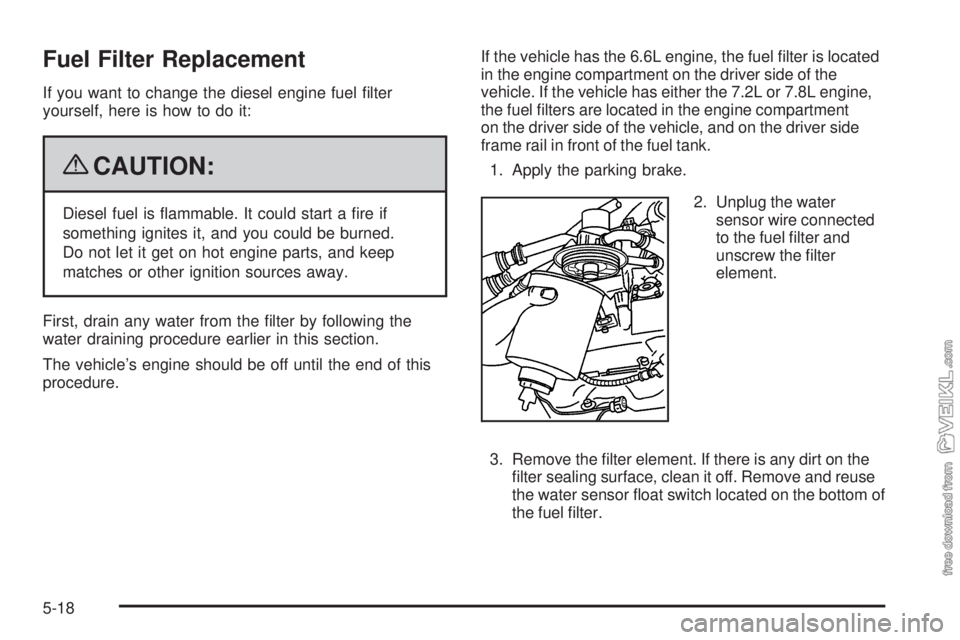
1. Apply the parking brake.
2. Unplug the water
sensor wire connected
to the fuel filter and
unscrew the filter
element.
3. Remove the filter element. If there is any dirt on the
filter sealing surface, clean it off. Remove and reuse
the water sensor float switch located on the bottom of
the fuel filter.
5-18
Page 261 of 376
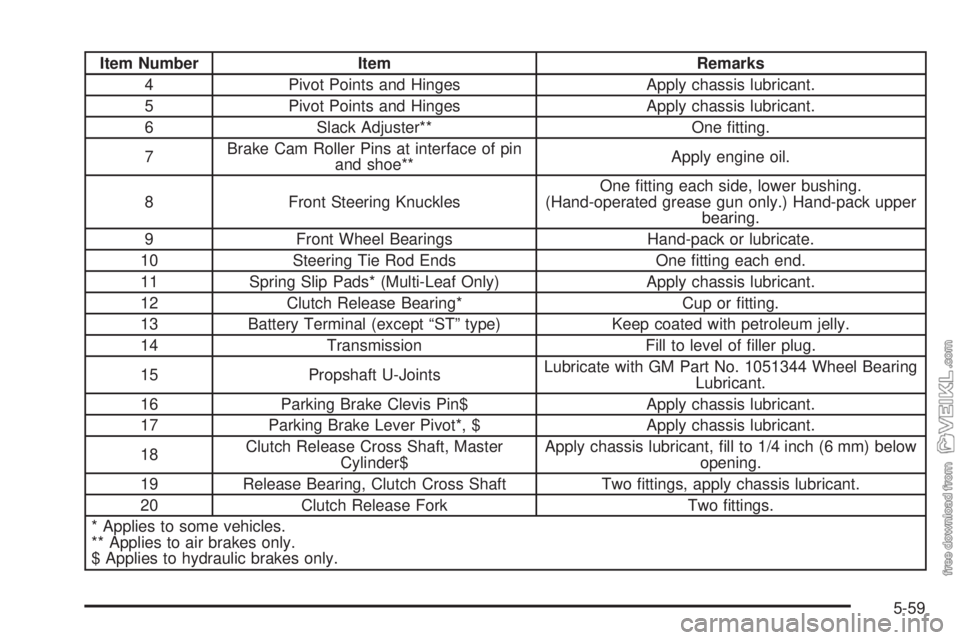
Item Number Item Remarks
4 Pivot Points and Hinges Apply chassis lubricant.
5 Pivot Points and Hinges Apply chassis lubricant.
6 Slack Adjuster** One fitting.
7Brake Cam Roller Pins at interface of pin
and shoe**Apply engine oil.
8 Front Steering KnucklesOne fitting each side, lower bushing.
(Hand-operated grease gun only.) Hand-pack upper
bearing.
9 Front Wheel Bearings Hand-pack or lubricate.
10 Steering Tie Rod Ends One fitting each end.
11 Spring Slip Pads* (Multi-Leaf Only) Apply chassis lubricant.
12 Clutch Release Bearing* Cup or fitting.
13 Battery Terminal (except “ST” type) Keep coated with petroleum jelly.
14 Transmission Fill to level of filler plug.
15 Propshaft U-JointsLubricate with GM Part No. 1051344 Wheel Bearing
Lubricant.
16 Parking Brake Clevis Pin$ Apply chassis lubricant.
17 Parking Brake Lever Pivot*, $ Apply chassis lubricant.
18Clutch Release Cross Shaft, Master
Cylinder$Apply chassis lubricant, fill to 1/4 inch (6 mm) below
opening.
19 Release Bearing, Clutch Cross Shaft Two fittings, apply chassis lubricant.
20 Clutch Release Fork Two fittings.
* Applies to some vehicles.
** Applies to air brakes only.
$ Applies to hydraulic brakes only.
5-59
Page 265 of 376
2. Get the vehicles close enough so the jumper cables
can reach, but be sure the vehicles are not touching
each other. If they are, it could cause a ground
connection you do not want. You would not be able
to start your vehicle, and the bad grounding could
damage the electrical systems.
To avoid the possibility of the vehicles rolling, set the
parking brake firmly on both vehicles involved in the
jump start procedure. Put an automatic transmission
in P (PARK) or a manual transmission in N (Neutral)
before setting the parking brake. If you have a
four-wheel-drive vehicle, be sure the transfer case
is in a drive gear, not in N (Neutral).
Notice:If you leave the radio or other accessories
on during the jump starting procedure, they could be
damaged. The repairs would not be covered by the
warranty. Always turn off the radio and other
accessories when jump starting the vehicle.
3. Turn off the ignition on both vehicles. Unplug
unnecessary accessories plugged into the cigarette
lighter or accessory power outlets. Turn off the
radio and all lamps that are not needed. This will
avoid sparks and help save both batteries, and
it could save the radio!4. Open the hood on the other vehicle and locate the
positive (+) and the negative (−) terminal locations
on that vehicle.
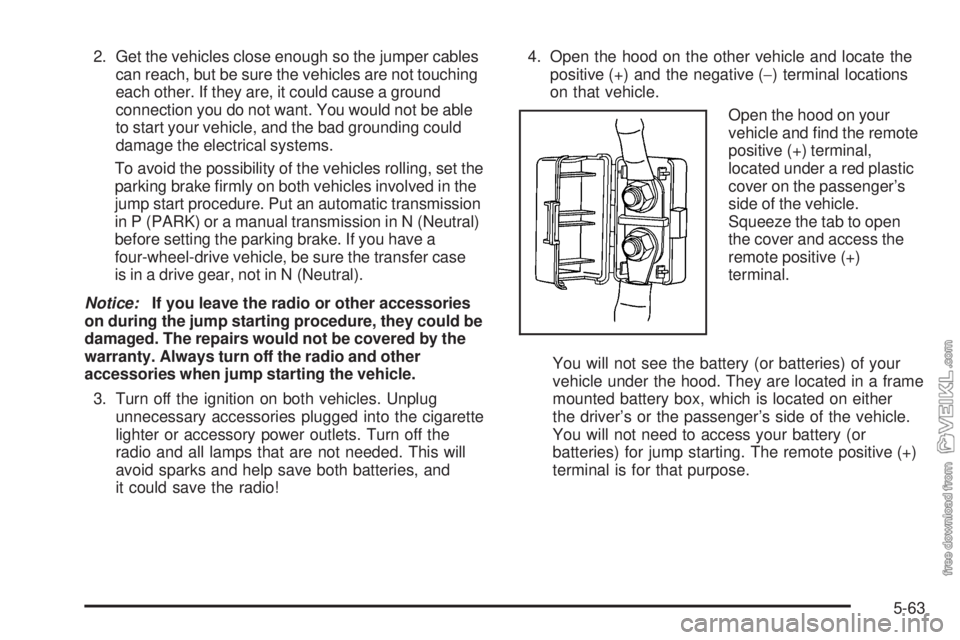
Open the hood on your
vehicle and find the remote
positive (+) terminal,
located under a red plastic
cover on the passenger’s
side of the vehicle.
Squeeze the tab to open
the cover and access the
remote positive (+)
terminal.
You will not see the battery (or batteries) of your
vehicle under the hood. They are located in a frame
mounted battery box, which is located on either
the driver’s or the passenger’s side of the vehicle.
You will not need to access your battery (or
batteries) for jump starting. The remote positive (+)
terminal is for that purpose.
5-63