turn signal CHEVROLET MONTE CARLO 2003 6.G Owners Manual
[x] Cancel search | Manufacturer: CHEVROLET, Model Year: 2003, Model line: MONTE CARLO, Model: CHEVROLET MONTE CARLO 2003 6.GPages: 394, PDF Size: 2.73 MB
Page 68 of 394

At times you may notice a decrease in range. This is
normal for any remote keyless entry system. If the
transmitter does not work or if you have to stand closer
to your vehicle for the transmitter to work, try this:
·Check the distance. You may be too far from your
vehicle. You may need to stand closer during
rainy or snowy weather.
·Check the location. Other vehicles or objects may
be blocking the signal. Take a few steps to the
left or right, hold the transmitter higher, and
try again.
·Check to determine if battery replacement or
resynchronization is necessary. See ªBattery
Replacementº and ªResynchronizationº under
Remote Keyless Entry System Operation on
page 2-4.
·If you are still having trouble, see your dealer
or a quali®ed technician for service.
Remote Keyless Entry System
Operation
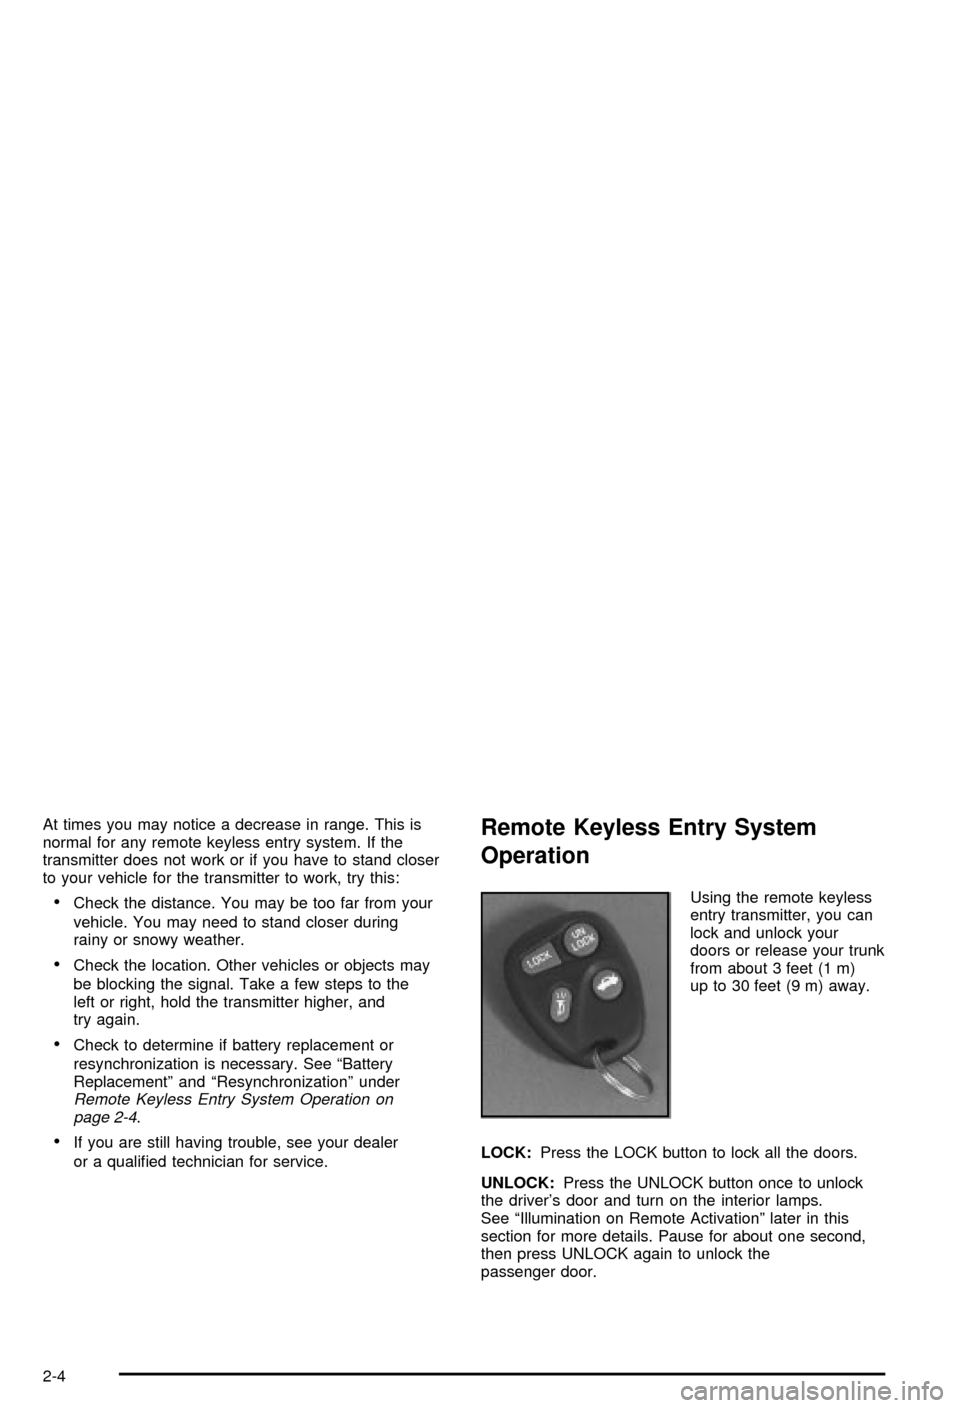
Using the remote keyless
entry transmitter, you can
lock and unlock your
doors or release your trunk
from about 3 feet (1 m)
up to 30 feet (9 m) away.
LOCK:Press the LOCK button to lock all the doors.
UNLOCK:Press the UNLOCK button once to unlock
the driver's door and turn on the interior lamps.
See ªIllumination on Remote Activationº later in this
section for more details. Pause for about one second,
then press UNLOCK again to unlock the
passenger door.
2-4
Page 101 of 394

3. Simultaneously press and hold both the desired
button on HomeLinkžand the hand-held transmitter
button. Do not release the buttons until Step 4
has been completed.
Some entry gates and garage door openers may
require you to substitute Step 3 with the procedure
noted in ªGate Operator and Canadian
Programmingº later in this section.
4. The indicator light will ¯ash slowly at ®rst and then
rapidly after HomeLink
žsuccessfully receives the
frequency signal from the hand-held transmitter.
Release both buttons.
5. Press and hold the newly-trained HomeLink
žbutton
and observe the indicator light.
If the indicator light stays on constantly,
programming is complete and your device should
activate when the HomeLink
žbutton is pressed and
released.
To program the remaining two HomeLink
žbuttons,
begin with Step 2 under ªProgramming HomeLinkž.º
Do not repeat Step 1 as this will erase all of the
programmed channels.If the indicator light blinks rapidly for two seconds
and then turns to a constant light, continue with
Steps 6 through 8 following to complete the
programming of a rolling-code equipped device
(most commonly, a garage door opener).
6. Locate in the garage, the garage door opener
receiver (motor-head unit). Locate the ªLearnº
or ªSmartº button. This can usually be found where
the hanging antenna wire is attached to the
motor-head unit.
7. Firmly press and release the ªLearnº or ªSmartº
button. The name and color of the button may
vary by manufacturer.
You will have 30 seconds to start Step 8.
8. Return to the vehicle. Firmly press and hold the
programmed HomeLink
žbutton for two seconds,
then release. Repeat the press/hold/release
sequence a second time, and depending on the
brand of the garage door opener (or other rolling
code device), repeat this sequence a third time
to complete the programming.
HomeLink
žshould now activate your rolling-code
equipped device.
To program the remaining two HomeLink
žbuttons,
begin with Step 2 of ªProgramming HomeLinkž.º Do not
repeat Step 1.
2-37
Page 115 of 394

Instrument Panel Overview...............................3-4
Hazard Warning Flashers................................3-6
Other Warning Devices...................................3-6
Horn.............................................................3-7
Tilt Wheel.....................................................3-7
Turn Signal/Multifunction Lever.........................3-7
Exterior Lamps.............................................3-15
Interior Lamps..............................................3-17
Accessory Power Outlets...............................3-20
Auxiliary Power Connection (Power Drop).........3-21
Ashtrays and Cigarette Lighter........................3-21
Climate Controls............................................3-22
Dual Climate Control System..........................3-22
Passenger Compartment Air Filter...................3-28
Warning Lights, Gages and Indicators.............3-30
Instrument Panel Cluster................................3-31
Speedometer and Odometer...........................3-33
Tachometer.................................................3-33
Safety Belt Reminder Light.............................3-34
Air Bag Readiness Light................................3-34
Voltmeter Gage............................................3-35
Brake System Warning Light..........................3-36
Anti-Lock Brake System Warning Light.............3-37Traction Control System (TCS)
Warning Light...........................................3-37
Engine Coolant Temperature Gage..................3-38
Malfunction Indicator Lamp.............................3-38
Oil Pressure Indicator Light............................3-42
Cruise Control Light......................................3-43
Fuel Gage...................................................3-43
Message Center.............................................3-44
Service Traction System Warning Message......3-44
Traction Active Message................................3-45
Battery Warning Message..............................3-45
Hot Coolant Temperature Warning Message.....3-46
Low Oil Pressure Message............................3-46
Low Engine Oil Level Message.......................3-47
Change Engine Oil Message..........................3-47
Low Tire Message........................................3-48
Door Ajar Warning Message...........................3-48
Trunk Ajar Warning Message.........................3-49
Security Message.........................................3-49
Low Washer Fluid Warning Message...............3-50
Low Fuel Warning Message...........................3-50
Low Brake Fluid Warning Message.................3-51
Service Vehicle Soon Message.......................3-51
Highbeam Out Warning Message....................3-52
Section 3 Instrument Panel
3-1
Page 119 of 394

The main components of your instrument panel are listed here:
A. Instrument Panel Fuse Block. See ªInstrument Panel
Fuse Blockº under
Fuses and Circuit Breakers on
page 5-91.
B. Turn Signal/Multifunction Lever (behind steering
wheel). See
Turn Signal/Multifunction Lever
on page 3-7.
C. Audio Steering Wheel Controls (If Equipped). See
Audio Steering Wheel Controls on page 3-90.
D. Instrument Panel Cluster. See
Instrument Panel
Cluster on page 3-31.
E. Hazard Warning Flasher Button. See
Hazard
Warning Flashers on page 3-6.
F. Audio System. See
Audio System(s) on page 3-56.
G. Air Outlet. See ªOutlet Adjustmentº under
Dual
Climate Control System on page 3-22.
H. Exterior Lamps Control. See
Exterior Lamps on
page 3-15.I. Remote Trunk Release. See ªRemote Trunk
Releaseº under
Trunk on page 2-10.
J. Tilt Steering Wheel Lever. See
Tilt Wheel on
page 3-7.
K. Hood Release. See
Hood Release on page 5-10.
L. Cruising Steering Wheel Controls (If Equipped). See
ªCruise Controlº under
Turn Signal/Multifunction
Lever on page 3-7.
M. Ignition Switch. See ªIgnition Positionsº under
New
Vehicle Break-In on page 2-16.
N. Automatic Transaxle Shift Lever. See
Automatic
Transaxle Operation on page 2-21.
O. Climate Controls. See
Dual Climate Control System
on page 3-22.
P. Glove Box. See
Glove Box on page 2-39.
3-5
Page 120 of 394

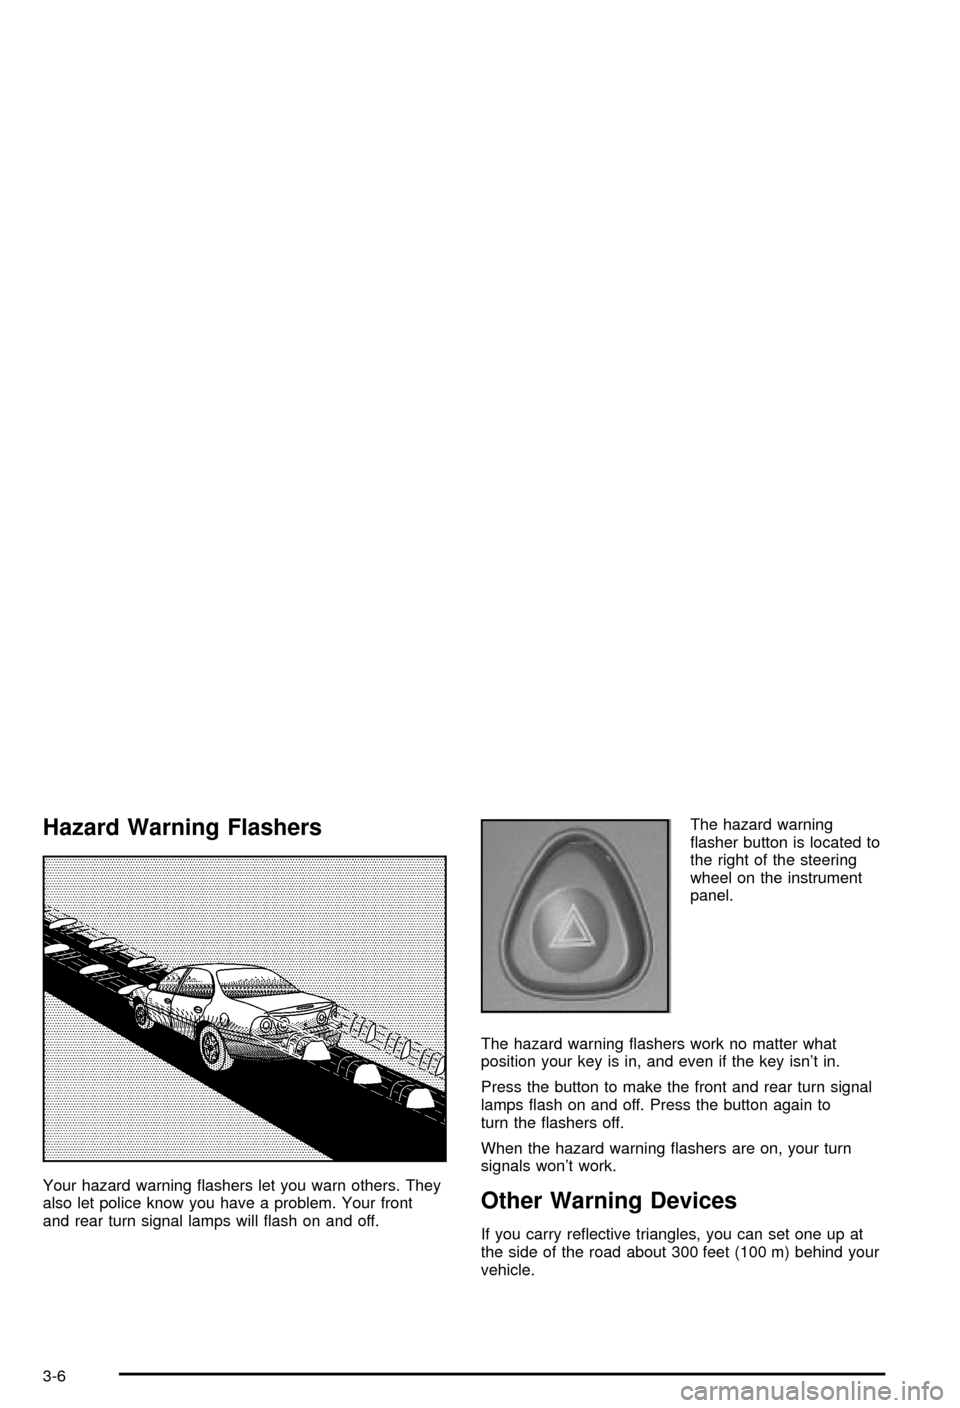
Hazard Warning Flashers
Your hazard warning ¯ashers let you warn others. They
also let police know you have a problem. Your front
and rear turn signal lamps will ¯ash on and off.The hazard warning
¯asher button is located to
the right of the steering
wheel on the instrument
panel.
The hazard warning ¯ashers work no matter what
position your key is in, and even if the key isn't in.
Press the button to make the front and rear turn signal
lamps ¯ash on and off. Press the button again to
turn the ¯ashers off.
When the hazard warning ¯ashers are on, your turn
signals won't work.Other Warning Devices
If you carry re¯ective triangles, you can set one up at
the side of the road about 300 feet (100 m) behind your
vehicle.
3-6
Page 121 of 394

Horn
Press near or on the horn symbols on your steering
wheel pad to sound the horn.
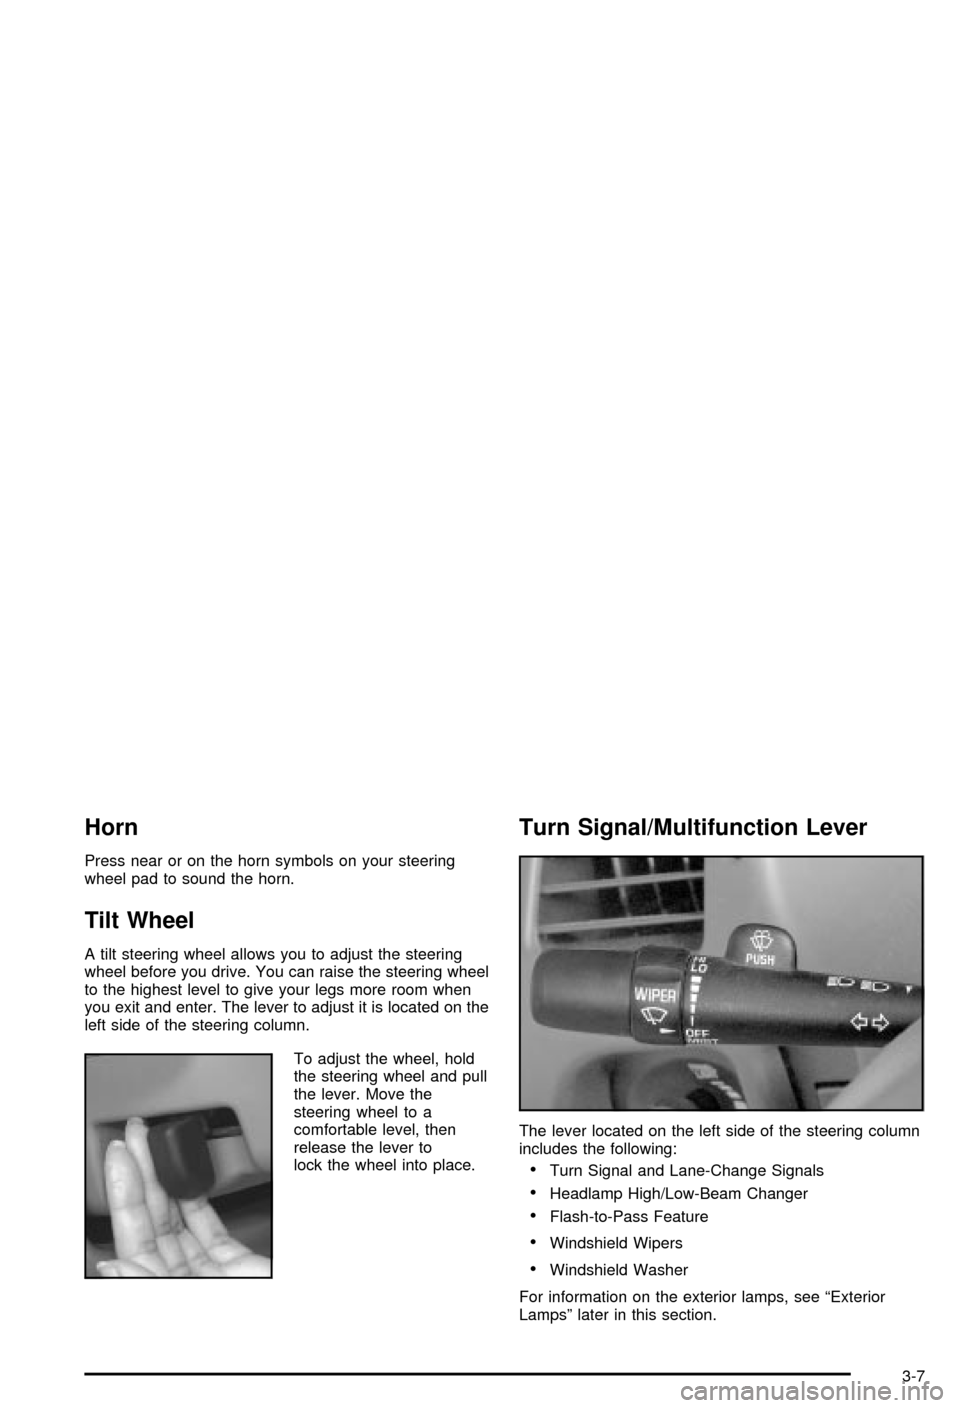
Tilt Wheel
A tilt steering wheel allows you to adjust the steering
wheel before you drive. You can raise the steering wheel
to the highest level to give your legs more room when
you exit and enter. The lever to adjust it is located on the
left side of the steering column.
To adjust the wheel, hold
the steering wheel and pull
the lever. Move the
steering wheel to a
comfortable level, then
release the lever to
lock the wheel into place.
Turn Signal/Multifunction Lever
The lever located on the left side of the steering column
includes the following:
·Turn Signal and Lane-Change Signals
·Headlamp High/Low-Beam Changer
·Flash-to-Pass Feature
·Windshield Wipers
·Windshield Washer
For information on the exterior lamps, see ªExterior
Lampsº later in this section.
3-7
Page 122 of 394

Turn and Lane-Change Signals
The turn signal has two upward (for right) and two
downward (for left) positions. These positions allow you
to signal a turn or a lane change.
To signal a turn, move the lever all the way up or down.
When the turn is ®nished, the lever will return
automatically.
An arrow on the instrument
panel cluster will ¯ash in
the direction of the
turn or lane change.To signal a lane change, raise or lower the lever until
the arrow starts to ¯ash. Hold it there until you complete
your lane change. The lever will return by itself when
you release it.
If the arrow ¯ashes faster than normal as you signal a
turn or a lane change, a signal bulb may be burned
out and other drivers won't see your turn signal.
If a bulb is burned out, replace it to help avoid an
accident. If the arrows don't go on at all when you signal
a turn, check for burned-out bulbs and then check the
fuse. See
Fuses and Circuit Breakers on page 5-91.
Turn Signal On Chime
If you leave either one of your turn signals on and drive
more than 3/4 mile (1.2 km), a chime will sound to
alert you.
3-8
Page 123 of 394

Headlamp High/Low-Beam Changer
To change your headlamps from low beams to
high beams, or from high to low, pull the multifunction
lever all the way toward you. Then release it.
While the high beams are
on, this light will appear on
the instrument panel
cluster.
This light works only while the key is in ON. The fog
lamps (if equipped) are not illuminated when the
high beams are on.
Flash-to-Pass Feature
With the turn signal lever in the low-beam position, pull
the lever toward you momentarily to switch to
high-beam, (to signal you are going to pass).
If the headlamps are on, they will return to low-beam
when the lever is released. This feature operates even if
the headlamps are off.
3-9
Page 157 of 394

Cruise Control Light
Tthe CRUISE light comes
on whenever you set your
cruise control. See
ªCruise Controlº under
Turn Signal/Multifunction
Lever on page 3-7.
Fuel Gage
The fuel gage, when the ignition is on, tells you about
how much fuel you have left in your tank.
The gage will ®rst indicate empty before you are out of
fuel, and you should get more fuel as soon as
possible.
United States-3400 V6
Engine ClusterUnited States-3800 V6
Engine Cluster
Canada-3400 V6 Engine
ClusterCanada-3800 V6 Engine
Cluster
3-43
Page 172 of 394

Playing the Radio
PWR (Power):Press this knob to turn the system on
and off.
VOL (Volume):Turn this knob to increase or to
decrease volume.
AUTO VOL (Automatic Volume):With automatic
volume, your audio system adjusts automatically
to make up for road and wind noise as you drive.
Set the volume at the desired level. Press this button to
select LOW, MEDIUM, or HIGH. AVOL will appear
on the display. Each higher setting will allow for more
volume compensation at faster vehicle speeds. Then as
you drive, automatic volume increases the volume as
necessary to overcome noise at any speed. The volume
level should always sound the same to you as you
drive. NONE will appear on the display if the radio
cannot determine the vehicle speed. If you don't want to
use automatic volume, select OFF.
DISPL (Display):For RDS, press this knob to change
what appears on the display while using RDS. The
display options are station name, RDS station frequency,
PTY and the name of the program (if available).
For XMŸ (USA only, if equipped), press this button
while in XM mode to retrieve four different categories of
information related to the current song or channel:
Artist, Song Title, Category or PTY, Channel
Number/Channel Name.To change the default on the display, press the knob
until you see the display you want, then hold the
knob for two seconds. The radio will produce one beep
and selected display will now be the default.
Finding a Station
BAND:Press this button to switch between FM1, FM2,
AM, or XM1 or XM2 (USA only, if equipped). The
display will show your selection.
TUNE:Turn this knob to choose radio stations.
qSEEKr:Press the right or the left arrow to seek
to the next or to the previous station and stay there.
The radio will seek only to stations that are in the
selected band and only to those with a strong signal.
qPSCAN (Preset Scan)r:Press and hold one of
the arrows for more than two seconds and the radio will
produce one beep. The radio will scan to the ®rst preset
station stored on your pushbuttons, play for a few
seconds, then go on to the next preset station. SCAN will
appear on the display. Press one of the arrows again or
one of the pushbuttons to stop scanning presets.
The radio will scan only to the preset stations that are in
the selected band and only to those with a strong signal.
3-58