fog light CHEVROLET ORLANDO 2012 1.G Owners Manual
[x] Cancel search | Manufacturer: CHEVROLET, Model Year: 2012, Model line: ORLANDO, Model: CHEVROLET ORLANDO 2012 1.GPages: 378, PDF Size: 6.68 MB
Page 5 of 378

Black plate (5,1)Chevrolet Orlando Owner Manual - 2012
Introduction v
Vehicle Symbol Chart
Here are some additional symbols
that may be found on the vehicle
and what they mean. For more
information on the symbol, refer to
the Index.
9:Airbag Readiness Light
#:Air Conditioning
!:Antilock Brake System (ABS)
%:Audio Steering Wheel Controls
or OnStar®
$: Brake System Warning Light
":Charging System
I:Cruise Control
B: Engine Coolant Temperature
O:Exterior Lamps
#:Fog Lamps
.: Fuel Gauge
+:Fuses
3: Headlamp High/Low-Beam
Changer
j: LATCH System Child
Restraints
*: Malfunction Indicator Lamp
::Oil Pressure
}:Power
/:Remote Vehicle Start
>:Safety Belt Reminders
7:Tire Pressure Monitor
d:Traction Control/StabiliTrak®
M:Windshield Washer Fluid
Page 9 of 378

Black plate (3,1)Chevrolet Orlando Owner Manual - 2012
In Brief 1-3
A.Air Vents on page 8‑6.
B. Turn and Lane-Change Lever. See Turn and Lane-Change
Signals on page 6‑4.
Headlamp High/Low-Beam
Changer on page 6‑2.
C. Instrument Cluster on page 5‑9.
D. Windshield Wiper/Washer on
page 5‑3.
Rear Window Wiper/Washer on
page 5‑5.
E. Infotainment on page 7‑1.
F. Infotainment Display.
G. Light Sensor. See Automatic
Headlamp System on page 6‑3.
H. Instrument Panel Storage on
page 4‑1.
USB Port and Auxiliary Input
Jack (Inside Instrument Panel
Storage). See Auxiliary Devices
on page 7‑18. I.
CD Player on page 7‑16.
J. TCS/StabiliTrak Button. See StabiliTrak
®System on
page 9‑31.
K. Exterior Lamp Controls on
page 6‑1.
Instrument Panel Illumination
Control on page 6‑5.
Front Fog Lamps on page 6‑4.
L. Front Storage on page 4‑1.
M. Data Link Connector (DLC) (Out of View). See Malfunction
Indicator Lamp on page 5‑13.
N. Cruise Control on page 9‑32.
O. Steering Wheel Adjustment on
page 5‑2.
P. Horn on page 5‑3.
Q. Steering Wheel Controls on
page 5‑3. R.
Power Door Locks on page 2‑7.
S. Heated Front Seats on page 3‑7
(If Equipped).
T. Climate Control Systems on
page 8‑1.
Automatic Climate Control
System on page 8‑3.
U. Shift Lever. See Automatic
Transmission on page 9‑23 or
Manual Transmission on
page 9‑25.
V. Parking Brake on page 9‑28.
W. Power Outlets on page 5‑6.
X. Hazard Warning Flashers on
page 6‑3.
Y. Passenger Safety Belt Reminder Light. See Safety Belt
Reminders on page 5‑11.
Page 18 of 378
Black plate (12,1)Chevrolet Orlando Owner Manual - 2012
1-12 In Brief
;:Turns on the parking lamps,
taillamps, license plate lamps,
sidemarker lamps, and instrument
panel lights.
5: Turns on the headlamps,
parking lamps, taillamps, license
plate lamps, sidemarker lamps, and
instrument panel lights. A warning
chime sounds if the driver door is
opened when the ignition switch is
off and the headlamps are on.
#: For vehicles with fog lamps,
press to turn the lamps on or off.
For more information, see:
.Exterior Lamp Controls on
page 6‑1.
.Daytime Running Lamps (DRL)
on page 6‑2.
.Front Fog Lamps on page 6‑4.
Windshield Wiper/Washer
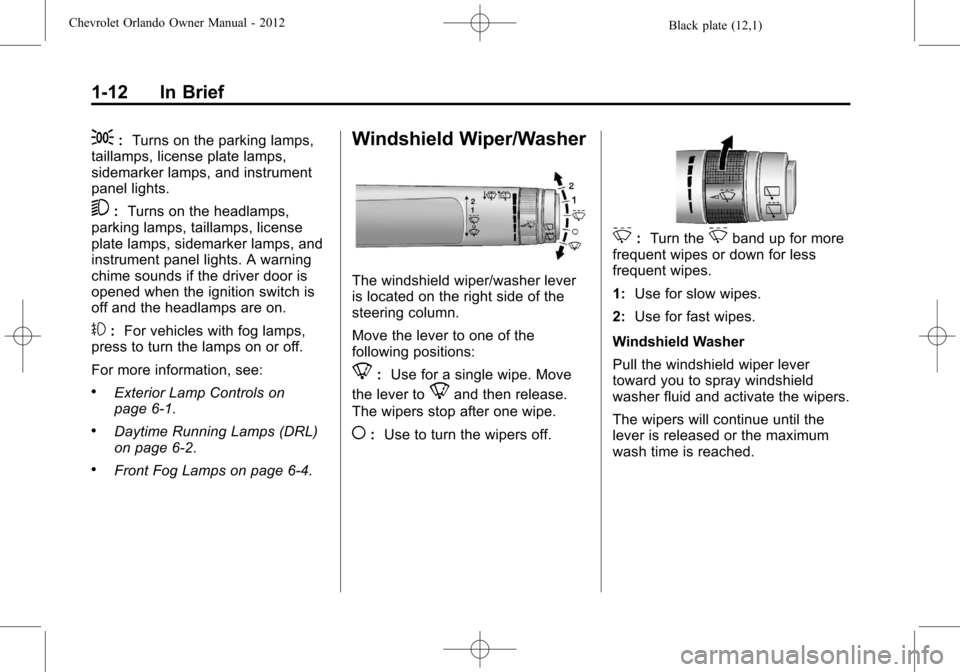
The windshield wiper/washer lever
is located on the right side of the
steering column.
Move the lever to one of the
following positions:
8: Use for a single wipe. Move
the lever to
8and then release.
The wipers stop after one wipe.
(: Use to turn the wipers off.
3:Turn the3band up for more
frequent wipes or down for less
frequent wipes.
1: Use for slow wipes.
2: Use for fast wipes.
Windshield Washer
Pull the windshield wiper lever
toward you to spray windshield
washer fluid and activate the wipers.
The wipers will continue until the
lever is released or the maximum
wash time is reached.
Page 40 of 378
Black plate (12,1)Chevrolet Orlando Owner Manual - 2012
2-12 Keys, Doors, and Windows
Folding Mirrors
Push the mirror toward the vehicle.
Pull the mirror out to return to its
original position.
Heated Mirrors
The vehicle may have heated
mirrors.
=(Rear Window Defogger):
Press to heat the outside rearview
mirrors. See “Rear Window
Defogger” underClimate Control
Systems on page 8‑1 orAutomatic
Climate Control System on page 8‑3
for more information.
Interior Mirrors
Manual Rearview Mirror
Hold the inside rearview mirror in
the center to move it for a clearer
view of behind your vehicle. Adjust
the inside rearview mirror by moving
it up and down or side to side.
Adjust the mirror to avoid glare from
the headlamps behind you. Push
the tab forward for daytime use and
pull it for nighttime use.
Cleaning the Mirror
Do not spray glass cleaner directly
on the mirror. Use a soft towel
dampened with water.
Automatic Dimming
Rearview Mirror
The vehicle may have an automatic
dimming inside rearview mirror.
Automatic dimming reduces the
glare from the headlamps of the
vehicle behind you. The dimming
feature and indicator light come on
each time the vehicle is started.
Vehicles with OnStar have three
control buttons at the bottom of the
mirror. See your dealer for more
information about OnStar and how
to subscribe to it. See OnStar
Overview on page 14‑1.
Cleaning the Mirror
Do not spray glass cleaner directly
on the mirror. Use a soft towel
dampened with water.
Page 105 of 378
Black plate (1,1)Chevrolet Orlando Owner Manual - 2012
Instruments and Controls 5-1
Instruments and
Controls
Controls
Steering Wheel Adjustment . . . 5-2
Steering Wheel Controls . . . . . . 5-3
Horn . . . . . . . . . . . . . . . . . . . . . . . . . . 5-3
Windshield Wiper/Washer . . . . . 5-3
Rear Window Wiper/Washer . . . . . . . . . . . . . . . . . . . . . . 5-5
Compass . . . . . . . . . . . . . . . . . . . . . 5-5
Clock . . . . . . . . . . . . . . . . . . . . . . . . . 5-5
Power Outlets . . . . . . . . . . . . . . . . . 5-6
Cigarette Lighter . . . . . . . . . . . . . . 5-7
Ashtrays . . . . . . . . . . . . . . . . . . . . . . 5-7
Warning Lights, Gauges, and
Indicators
Warning Lights, Gauges, and Indicators . . . . . . . . . . . . . . . . . . . . 5-7
Instrument Cluster . . . . . . . . . . . . 5-9
Speedometer . . . . . . . . . . . . . . . . 5-10
Odometer . . . . . . . . . . . . . . . . . . . . 5-10
Tachometer . . . . . . . . . . . . . . . . . . 5-10 Fuel Gauge . . . . . . . . . . . . . . . . . . 5-10
Engine Coolant Temperature
Gauge . . . . . . . . . . . . . . . . . . . . . . 5-11
Safety Belt Reminders . . . . . . . 5-11
Airbag Readiness Light . . . . . . 5-12
Charging System Light . . . . . . 5-12
Malfunction Indicator Lamp . . . . . . . . . . . . . 5-13
Service Vehicle Soon Light . . . . . . . . . . . . . . . . . . . . . . . 5-15
Brake System Warning Light . . . . . . . . . . . . . . . . . . . . . . . 5-15
Antilock Brake System (ABS) Warning Light . . . . . . . . . . . . . . 5-16
Up-Shift Light . . . . . . . . . . . . . . . . 5-17
Power Steering Warning Light . . . . . . . . . . . . . . . . . . . . . . . 5-17
Traction Off Light . . . . . . . . . . . . 5-17
StabiliTrak
®OFF Light . . . . . . . 5-18
Traction Control System (TCS)/StabiliTrak
®Light . . . . 5-18
Tire Pressure Light . . . . . . . . . . 5-18
Engine Oil Pressure Light . . . . 5-19
Low Fuel Warning Light . . . . . . 5-20
Security Light . . . . . . . . . . . . . . . . 5-20
Reduced Engine Power Light . . . . . . . . . . . . . . . . . . . . . . . 5-20 High-Beam On Light . . . . . . . . . 5-21
Daytime Running Lamps
(DRL) Indicator Light . . . . . . . 5-21
Front Fog Lamp Light . . . . . . . . 5-21
Lamps On Reminder . . . . . . . . . 5-21
Cruise Control Light . . . . . . . . . 5-22
Door Ajar Light . . . . . . . . . . . . . . 5-22
Information Displays
Driver Information Center (DIC) . . . . . . . . . . . . . . . 5-22
Vehicle Messages
Vehicle Messages(Base Level) . . . . . . . . . . . . . . . 5-26
Vehicle Messages (Uplevel) . . . . . . . . . . . . . . . . . . . 5-26
Battery Voltage and Charging Messages . . . . . . . . . . . . . . . . . . 5-26
Brake System Messages . . . . 5-27
Compass Messages . . . . . . . . . 5-27
Cruise Control Messages . . . . 5-27
Door Ajar Messages . . . . . . . . . 5-27
Engine Cooling System Messages . . . . . . . . . . . . . . . . . . 5-27
Engine Oil Messages . . . . . . . . 5-28
Engine Power Messages . . . . 5-28
Page 125 of 378
Black plate (21,1)Chevrolet Orlando Owner Manual - 2012
Instruments and Controls 5-21
The vehicle can be driven at a
reduced speed when the reduced
engine power light is on but
acceleration and speed might be
reduced. The performance could be
reduced until the next time the
vehicle is driven. If this light stays
on, see your dealer as soon as
possible for diagnosis and repair.
High-Beam On Light
The high‐beam on light comes on
when the high-beam headlamps are
in use.
SeeHeadlamp High/Low-Beam
Changer on page 6‑2 for more
information.
Daytime Running Lamps
(DRL) Indicator Light
This light turns on whenever the
Daytime Running Lamps are in use.
See Daytime Running Lamps (DRL)
on page 6‑2 for more information.
Front Fog Lamp Light
For vehicles with front fog lamps,
this light comes on when the front
fog lamps are in use. The light goes out when the front
fog lamps are turned off. See
Front
Fog Lamps on page 6‑4 for more
information.
Lamps On Reminder
The lamps on reminder light comes
on when the lights are in use.
Page 136 of 378
Black plate (32,1)Chevrolet Orlando Owner Manual - 2012
5-32 Instruments and Controls
Vehicle
Personalization
The audio system controls are used
to access the personalization
menus for customizing vehicle
features.
CONFIG (Configuration):Press to
access the Configuration
Settings menu.
MENU: Press the center of this
knob to enter the menus and select
menu items. Turn the knob to scroll
through the menus.
BACK: Press to exit or move
backward in a menu.
Entering the Personalization
Menus
1. Press CONFIG to access the
Configuration Settings menu.
2. Turn the MENU knob to highlight Vehicle Settings. Press the
CONFIG button until Vehicle is
highlighted on vehicles with a
navigation system only. 3. Press the center of the MENU
knob to select the Vehicle
Settings menu. The vehicle must
be in the run position.
The following list of menu items may
be available:
.Climate and Air Quality
.Comfort and Convenience
.Collision/Detection Systems
.Languages
.Lighting
.Power Door Locks
.Remote Locking, Unlocking,
Starting
.Return to Factory Settings
Turn the MENU knob to highlight the
menu. Press the knob to select it.
Each of the menus is detailed in the
following information.
Vehicles with a navigation system
will display a checkmark to indicate
this feature is on.
Climate and Air Quality
If equipped, select the Climate and
Air Quality menu and the following
will be displayed:
.Auto Fan Speed
.Air Quality Sensor
.Remote Start Auto Heat Seats
.Auto Defog
.Auto Rear Defog
Auto Fan Speed
This will allow you to select the
automatic fan speed. This feature
sets the climate control fan speed to
maintain the interior temperature.
Press the MENU knob when Auto
Fan Speed is highlighted to open
the menu. Turn the knob to highlight
High, Medium, or Low. Press the
BACK button to confirm the
selection and move back to the
last menu.
Page 137 of 378
Black plate (33,1)Chevrolet Orlando Owner Manual - 2012
Instruments and Controls 5-33
Air Quality Sensor
This will allow you to select whether
the system will operate at high or
low sensitivity. Only vehicles with
the automatic climate control will
have this option.
Press the MENU knob when Air
Quality Sensor is highlighted to
open the menu. Turn the knob to
highlight High Sensitivity or Low
Sensitivity. Press the BACK button
to confirm the selection and move
back to the last menu.
Remote Start Auto Heat Seats
On vehicles with remote start and
heated seats, the heated seats can
be set to on or off.
Press the MENU knob when
Remote Start Auto Heat Seats is
highlighted to open the menu. Turn
the knob to highlight On or Off.
Press the BACK button to confirm
the selection and move back to the
last menu.Auto Defog
When turned on and high humidity
is detected, the climate control
system may adjust to outside
air supply and turn on the air
conditioner or the heater. The fan
speed may slightly increase to
help prevent fogging. When high
humidity is no longer detected, the
system will return to its prior
operation.
Press the MENU knob when Auto
Defog is highlighted to open the
menu. Turn the knob to highlight On
or Off. Press the BACK button to
confirm the selection and move
back to the last menu.
Auto Rear Defog
When on, this feature turns on the
rear defogger at vehicle start when
the interior temperature is cold and
fog is likely. The Auto Rear Defog
function can be disabled by
pressing
1. When off, the feature
can be turned on by pressing
1. See
“Rear Window Defogger” under
Climate Control Systems on
page 8‑1 for more information.
Press the MENU knob when Auto
Rear Defog is highlighted to open
the menu. Turn the knob to highlight
On or Off. Press the knob to confirm
the selection and move back to the
last menu.
Comfort and Convenience
Select the Comfort and
Convenience menu and Chime
Volume will be displayed.
Chime Volume
This allows selection of the chime
volume level.
Press the MENU knob when Chime
Volume is highlighted. Turn the knob
to select Normal or High. Press the
BACK button to confirm and go
back to the last menu.
Collision/Detection Systems
If equipped, select the Collision/
Detection Systems menu and Park
Assist will be displayed.
Page 141 of 378
Black plate (1,1)Chevrolet Orlando Owner Manual - 2012
Lighting 6-1
Lighting
Exterior Lighting
Exterior Lamp Controls . . . . . . . . 6-1
Headlamp High/Low-BeamChanger . . . . . . . . . . . . . . . . . . . . . 6-2
Flash-to-Pass . . . . . . . . . . . . . . . . . 6-2
Daytime Running Lamps (DRL) . . . . . . . . . . . . . . . . 6-2
Automatic Headlamp System . . . . . . . . . . . . . . . . . . . . . . 6-3
Hazard Warning Flashers . . . . . 6-3
Turn and Lane-Change Signals . . . . . . . . . . . . . . . . . . . . . . 6-4
Front Fog Lamps . . . . . . . . . . . . . . 6-4
Interior Lighting
Instrument Panel Illumination Control . . . . . . . . . . . . . . . . . . . . . . 6-5
Courtesy Lamps . . . . . . . . . . . . . . 6-5
Dome Lamps . . . . . . . . . . . . . . . . . 6-5
Reading Lamps . . . . . . . . . . . . . . . 6-5
Lighting Features
Entry Lighting . . . . . . . . . . . . . . . . . 6-6
Exit Lighting . . . . . . . . . . . . . . . . . . . 6-6
Battery Power Protection . . . . . . 6-6
Exterior Lighting
Exterior Lamp Controls
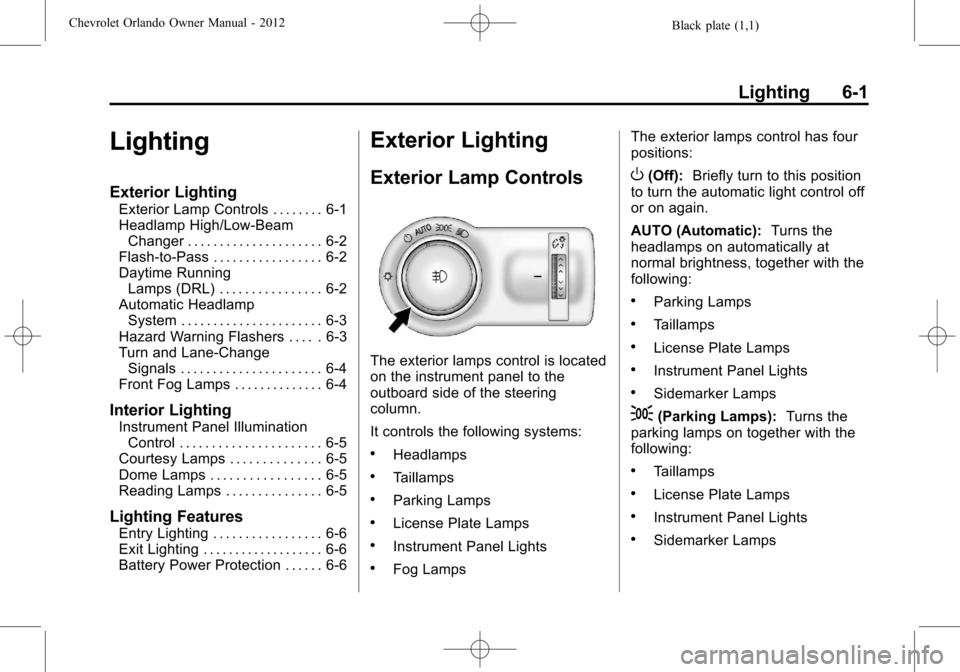
The exterior lamps control is located
on the instrument panel to the
outboard side of the steering
column.
It controls the following systems:
.Headlamps
.Taillamps
.Parking Lamps
.License Plate Lamps
.Instrument Panel Lights
.Fog Lamps The exterior lamps control has four
positions:
O(Off):
Briefly turn to this position
to turn the automatic light control off
or on again.
AUTO (Automatic): Turns the
headlamps on automatically at
normal brightness, together with the
following:
.Parking Lamps
.Taillamps
.License Plate Lamps
.Instrument Panel Lights
.Sidemarker Lamps
;(Parking Lamps): Turns the
parking lamps on together with the
following:
.Taillamps
.License Plate Lamps
.Instrument Panel Lights
.Sidemarker Lamps
Page 142 of 378
Black plate (2,1)Chevrolet Orlando Owner Manual - 2012
6-2 Lighting
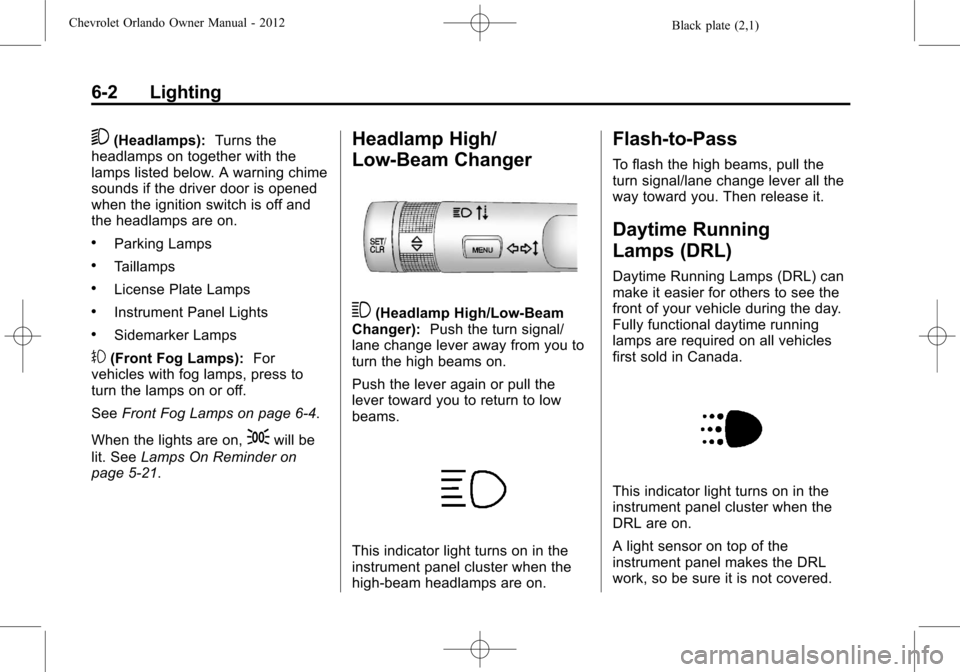
5(Headlamps):Turns the
headlamps on together with the
lamps listed below. A warning chime
sounds if the driver door is opened
when the ignition switch is off and
the headlamps are on.
.Parking Lamps
.Taillamps
.License Plate Lamps
.Instrument Panel Lights
.Sidemarker Lamps
#(Front Fog Lamps): For
vehicles with fog lamps, press to
turn the lamps on or off.
See Front Fog Lamps on page 6‑4.
When the lights are on,
;will be
lit. See Lamps On Reminder on
page 5‑21.
Headlamp High/
Low-Beam Changer
3(Headlamp High/Low‐Beam
Changer): Push the turn signal/
lane change lever away from you to
turn the high beams on.
Push the lever again or pull the
lever toward you to return to low
beams.
This indicator light turns on in the
instrument panel cluster when the
high‐beam headlamps are on.
Flash-to-Pass
To flash the high beams, pull the
turn signal/lane change lever all the
way toward you. Then release it.
Daytime Running
Lamps (DRL)
Daytime Running Lamps (DRL) can
make it easier for others to see the
front of your vehicle during the day.
Fully functional daytime running
lamps are required on all vehicles
first sold in Canada.
This indicator light turns on in the
instrument panel cluster when the
DRL are on.
A light sensor on top of the
instrument panel makes the DRL
work, so be sure it is not covered.