automatic transmission CHEVROLET S10 1995 2.G User Guide
[x] Cancel search | Manufacturer: CHEVROLET, Model Year: 1995, Model line: S10, Model: CHEVROLET S10 1995 2.GPages: 354, PDF Size: 18.92 MB
Page 84 of 354
Downloaded from www.Manualslib.com manuals search engine If you have an automatic transmission and you apply your brakes, the
Cruise Control will shut
off.
If you have a manual transmission and you apply your brakes or push the
clutch pedal, the
Cruise Control will shut off.
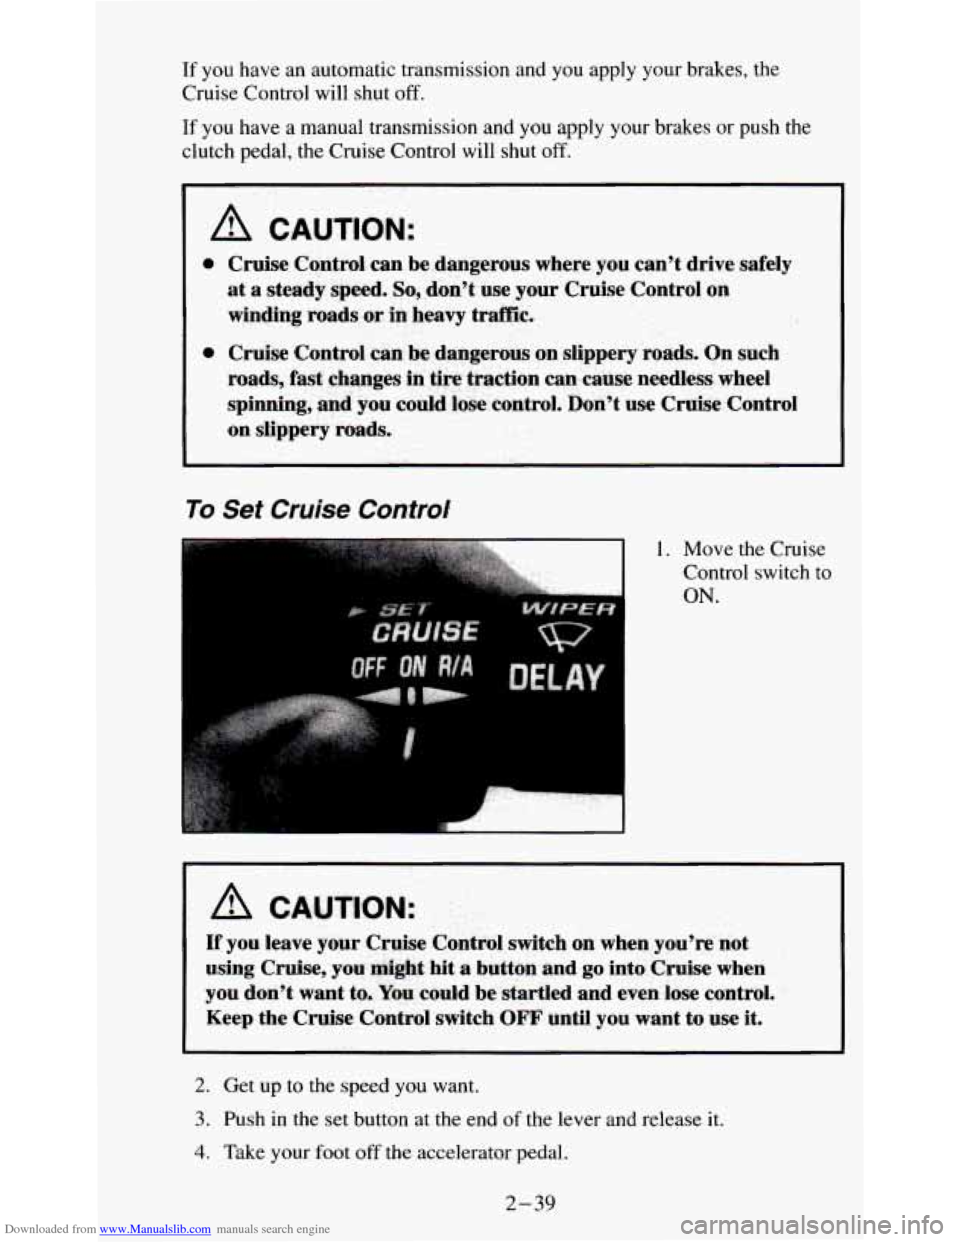
To Set Cruise Control
1. Move the Cruise
Control switch
to
ON.
A CAUTION:
If you leave your Cruise Control switch on when you're not
using Cruise, you
mi&€ hit a button and go into Cruise when
you don't want to- Yaw could be startled and even lose control.
Keep the Cruise Control switch OFF until you want to use it.
2. Get up to the speed you want.
3. Push in the set button at the end of the lever and release it.
4. Take your foot off the accelerator pedal.
2-39
Page 101 of 354
Downloaded from www.Manualslib.com manuals search engine Normal operating range shows your engine speed during normal driving
conditions. For example, when the needle points
to 2, it means the engine is
running at
2,000 revolutions per minute (rpm). The tachometer needle will
vary all the time that the engine is running.
The red warning range tells you that your engine speed is reaching its upper
limits. Don’t drive very long with the tachometer in the red warning range.
If you have a manual transmission, shift to a higher gear as soon as possible.
If you have an automatic transmission, lift your foot off of the accelerator
pedal. If
you drive for very long with the tachometer in the red danger
range, engine damage will result.
I NOTICE:
Do not operate the engine with the tachometer in the red range,
or engine damage
will occur.
The red danger range tells you that your engine speed is at its upper limits.
You should immediately shift to a higher gear, or lift your
foot off of the
accelerator pedal. If you drive for very long with the tachometer in the red
danger range, engine damage will result.
Warning Lights and Indicators
This part describes the warning lights and gages that may be on your
vehicle.
The pictures will help you locate them.
Warning lights and gages can signal that something is wrong before it
becomes serious enough
to cause an expensive repair or replacement.
Paying attention to your warning lights and gages could also save you or
others from injury.
Warning lights come on when there may be or is a problem with one of your
vehicle’s functions.
As you will see in the details on the next few pages,
some warning lights come on briefly when you start the engine just to let
you know they’re working. If
you are familiar with this section, you should
not be alarmed when this happens.
Gages can indicate when there may be or is a problem with one
of your
vehicle’s functions. Often gages and warning lights work together to let you
know when there’s a problem with your vehicle.
When one
of the warning lights comes on and stays on when you are
driving, or when one
of the gages shows there may be a problem, check the
section that
tells you what to do about it. Please follow this manual’s advice.
Waiting to do repairs can be costly
- and even dangerous. So please get to
know your warning lights and gages. They’re a big help.
2-56
Page 168 of 354
Downloaded from www.Manualslib.com manuals search engine Power Winches
If you wish to use a power winch on your vehicle, only use it when your
vehicle
is stationary or anchored.
I NOTICE:
-
Operating a power winch with an automatic transmission in
PARK
(P) or a manual transmission in gear may damage the
transmission. Always put the transmission
in a Neutral position
while operating
a power winch.
Use the regular brakes, set the parking brake or block the wheels to keep
your vehicle from rolling.
If your vehicle is equipped with an airbag, see “Adding Equipment to Your
Air Bag-Equipped Vehicle” in the Index.
Recreational Vehicle Towing (Four- Wheel
Drive Only)
If your vehicle has four-wheel drive, you may tow it behind another vehicle
providing it does not have the optional electronic shift transfer case.
I NOTICE:
Recreational vehicle towing is not recommended for vehicles
with the optional electronic shift transfer case because the
electronic shift has no neutral position.
Before towing, you should:
1. Set the parking brake firmly.
2. Place the automatic transmission in PARK (P) or the manual
transmission in the lowest gear
(FIRST GEAR).
hitch manufacturer’s instructions.
3. Firmly attach the vehicle being towed to the tow vehicle. Refer to the
4. Place the transfer case shift lever in NEUTRAL (N).
NOTICE:
Removal of either propeller shaft is unnecessary.
4-35
Page 177 of 354
Downloaded from www.Manualslib.com manuals search engine Don’t tow a trailer at all during the first 500 miles (800 km) your new
vehicle is driven. Your engine, axle or other parts could be damaged.
Then, during the first 500 miles (800 km) that you tow a trailer, don’t
drive over
50 mph (80 km/h) and don’t make starts at full throttle. This
helps your engine and other parts of your vehicle wear in at the heavier
loads.
If you have an automatic transmission, you should use DRIVE (D) (or,
as you need to, a lower gear) when towing a trailer. Operating your
vehicle
in DRIVE (D) when towing a trailer will minimize heat
build-up and extend the life of your transmission. If you have a manual
transmission and you are towing a trailer, it’s better not to use
FIFTH
(5) gear. Just drive in FOURTH (4) gear (or, as you need to, a lower
gear)-
Three important considerations have to do with weight:
Weight of the Trailer
How heavy can a trailer safely be?
It depends on how you plan to use your rig. For example, speed, altitude,
road grades, outside temperature and how much your vehicle is used to pull
a trailer are all important. And, it can also depend on any special equipment
that you have on your vehicle.
You can ask your dealer for our trailering information
or advice, or you can
write us at the address listed in your Warranty and Owner Assistance
Information Booklet.
In Canada, write to:
General Motors of Canada Limited
Customer Assistance Center
1908 Colonel Sam Drive
Oshawa, Ontario L1H
8P7
Weight of the Trailer Tongue
The tongue load (A) of any trailer is an important weight to measure
because it affects the total or gross weight of your vehicle. The gross vehicle
weight (GVW) includes the curb weight of the vehicle, any cargo you may
carry in it, and the people who will be riding in the vehicle. And if you will
tow a trailer, you must add the tongue load to the GVW because your
vehicle will be carrying that weight, too. See “Loading Your Vehicle” in the
Index for more information about your vehicle’s maximum load capacity.
4-44
Page 181 of 354
Downloaded from www.Manualslib.com manuals search engine Driving On Grades
Reduce speed and shift to a lower gear before you start down a long or steep
downgrade. If you don’t shift down, you might have to use your brakes
so
much that they would get hot and no longer work well.
On a long uphill grade,
shift down and reduce your speed to around 45 mph
(70 km/h) to reduce the possibility of engine and transmission overheating.
When towing at high altitude on steep uphill grades, consider the following:
Engine coolant will boil at a lower temperature than at normal altitudes. If
you
turn your engine off immediately after towing at high altitude on steep
uphill grades, your vehicle may show signs similar to engine overheating.
To avoid this, let the engine run while parked (preferably on level ground)
with the automatic transmission in PARK
(P) (or the manual transmission
out of gear and the parking brake applied) for
a few minutes before turning
the engine
off. If you do get the overheat warning, see “Engine
Overheating” in the Index.
Parking on Hi//s
You really should not park your vehicle, with a trailer attached, on a hill. If
something goes wrong, your rig could start to move. People can be injured,
and both your vehicle and the trailer can be damaged.
But if you ever have to park your rig on a hill, here’s how to do it:
1. Apply your regular brakes, but don’t shift into PARK (P) yet, or into
gear for a manual transmission. When parking uphill,
turn your wheels
away from the curb. When parking downhill,
turn your wheels into the
curb.
2. Have someone place chocks under the trailer wheels.
3. When the wheel chocks are in place, release the regular brakes until the
chocks absorb the load.
4. Reapply the regular brakes. Then apply your parking brake, and then
shift into PARK
(P), or REVERSE (R) for a manual transmission.
5. If you have a four-wheeldrive vehicle with a manual transfer case
shift lever, be sure the transfer case is
in a drive gear - not in
NEUTRAL (N).
6. Release the parking brake.
4-48
Page 182 of 354
Downloaded from www.Manualslib.com manuals search engine When You Are Ready to Leave After Parking on a Hill
1. Apply your regular brakes and hold the pedal down while you:
Start your engine;
Shift into a gear; and
Release the parking brake.
2. Let up on the brake pedal.
3. Drive slowly until the trailer is clear of the chocks.
4. Stop and have someone pick up and store the chocks.
Maintenance When Trailer Towing
Your vehicle will need service more often when you’re pulling a trailer. See
the Maintenance Schedule for more on this. Things that are especially
important in trailer operation are automatic transmission fluid (don’t
overfill), engine oil, axle lubricant, belt, cooling system, and brake
adjustment. Each of these is covered in this manual, and the Index will help
you find them quickly. If you’re trailering, it’s a
good idea to review these
sections before you start your trip.
Check periodically to
see that all hitch nuts and bolts are tight.
Trailer Lighting Systems Wiring
See “Trailer Wiring Harness” in the Index.
4-49
Page 186 of 354
Downloaded from www.Manualslib.com manuals search engine NOTICE:
Ignoring these steps could result in costly damage to your
vehicle that wouldn’t be covered by your warranty.
Trying to start your vehicle by pushing or pulling
it could
damage your vehicle, even if you have a manual transmission.
And if you have an automatic transmission, it won’t
start that
way.
To Jump Start Your Vehicle;
1. Check the other vehicle. It must have a 12-volt battery with a negative
ground system.
NOTICE:
If the other system isn’t a 12-volt system with a negative
ground, both vehicles can be damaged.
2. Get the vehicles close enough so the jumper cables can reach, but be
sure the vehicles aren’t touching each other. If they are, it could cause
a
ground connection you don’t want. You wouldn’t be able to start your
vehicle, and the bad grounding could damage the electrical systems.
You could be injured if the vehicles roll. Set the parking brake firmly
on each vehicle. Put an automatic transmission in
PARK (P) or a
manual transmission in NEUTRAL (N). If you have
a
four-wheel-drive vehicle with a manual transfer case shift lever, be
sure the transfer case is not in NEUTRAL
(N).
3. Turn off the ignition on both vehicles. Turn off all lights that aren’t
needed, and radios. This will avoid sparks and help save both batteries.
And it could save your radio!
NOTICE:
If you leave your radio on, it could be badly damaged. The
repair wouldn’t be covered by your warranty.
4. Open the hoods and locate the batteries. Find the positive (+) and
negative
(-) terminals on each battery.
5-3
Page 190 of 354
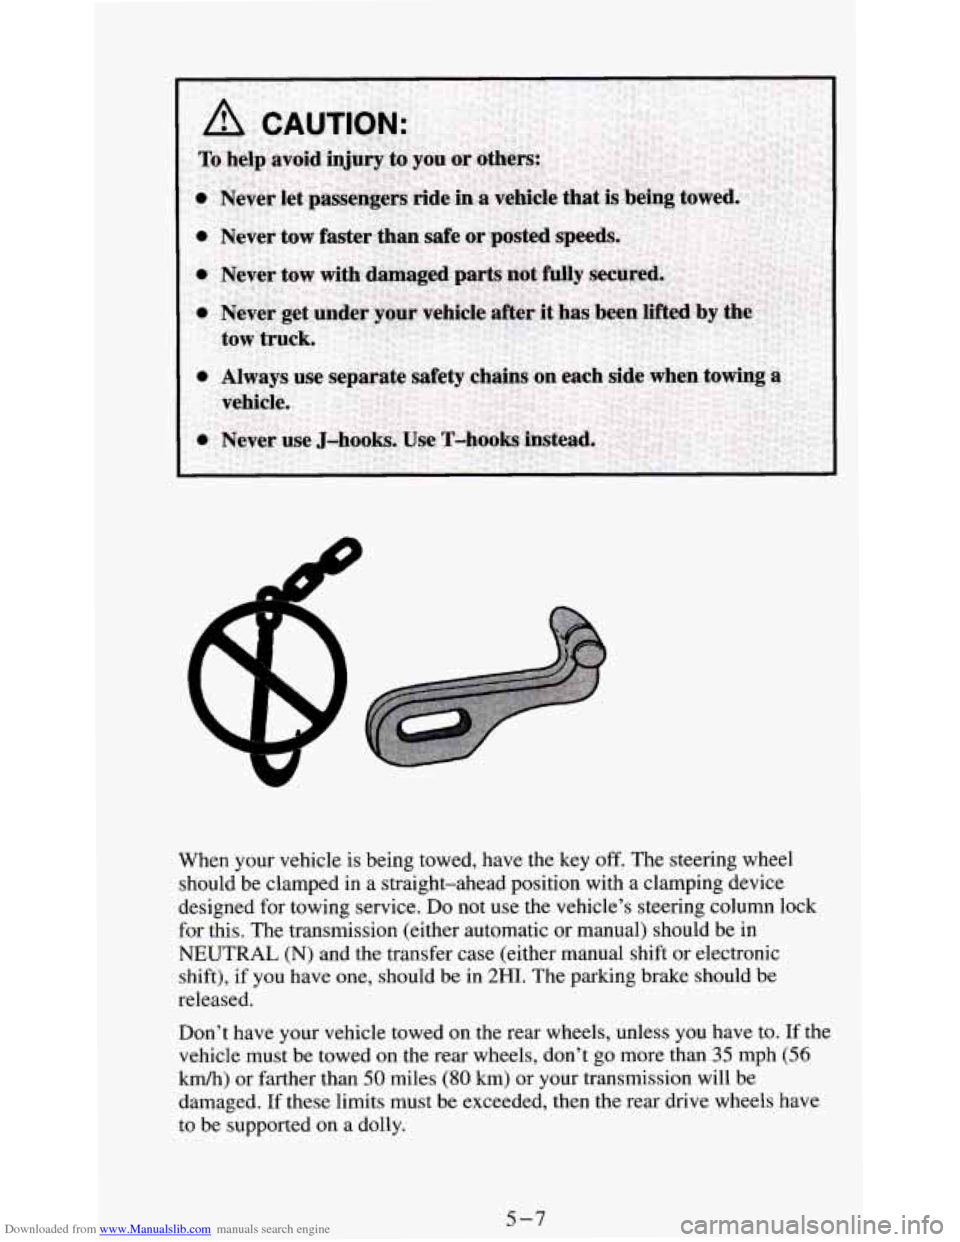
Downloaded from www.Manualslib.com manuals search engine When your vehicle is being towed, have the key off. The steering wheel
should be clamped in a straight-ahead position with
a clamping device
designed for towing service.
Do not use the vehicle’s steering column lock
for this. The transmission (either automatic or manual) should be
in
NEUTRAL (N) and the transfer case (either manual shift or electronic
shift), if you have one, should be in 2HI.
The parking brake should be
released.
Don’t have your vehicle towed
on the rear wheels, unless you have to. If the
vehicle must be towed on the rear wheels, don’t
go more than 35 mph (56
kmk) or farther than 50 miles (80 km) or your transmission will be
damaged.
If these limits must be exceeded, then the rear drive wheels have
to be supported on a dolly.
5-7
Page 194 of 354
Downloaded from www.Manualslib.com manuals search engine If your engine catches fire because you keep driving with no
coolant, your vehicle can be badly damaged. The costly repairs \
would not be covered by your warranty.
If No Steam Is Coming From Your Engine
If you get the overheat warning but see or hear no steam, the problem may
not be too serious. Sometimes the engine can get a little too hot when you:
Climb a long hill on a hot day.
Stop after high speed driving.
Idle for long periods in traffic.
Tow a trailer. See “Driving on Grades’’ in the Index.
If you get the overheat warning with
no sign of steam, try this for a minute
or
so:
1. If you have an air conditioner, turn it off.
2. Turn on your heater to full hot at the highest fan speed and open the
window as necessary.
3. If you’re in a traffic jam, shift to NEUTRAL (N); otherwise, shift to the
highest gear while driving
- AUTOMATIC OVERDRIVE (0) or
DRIVE
(D) for automatic transmissions.
If
you no longer have the overheat warning, you can drive. Just to be safe,
drive slower for about
ten minutes. If the warning doesn’t come back on,
you can drive normally.
If the warning continues, pull over, stop, and park your vehicle right away.
If there’s still no sign of steam, push
the accelerator until the engine speed is
about twice as fast as normal idle speed. Bring the engine speed back to
normal idle speed after two or three minutes. Now see
if the warning stops.
But then, if
you still have the warning, turn ofSthe engine and get everyone
out of the vehicle until it cools down.
You may decide not to lift the hood but to get service help right away.
5-11
Page 231 of 354
Downloaded from www.Manualslib.com manuals search engine Automatic Transmission Fluid
When to Check and Change
A good time to check your automatic transmission fluid level is when the
engine oil is changed. Refer to the Maintenance Schedule to determine
when to change your fluid. See “Scheduled Maintenance Services” in the
Index.
How to Check
Because this operation can be a little difficult, you may choose to have this
done at your GM dealership Service Department.
If
you do it yourself, be sure to follow all the instructions here, or you could
get a false reading on the dipstick.
I NOTICE:
Too much or too little fluid can damage your transmission. Too
much can mean that some of the fluid could come out and fall\
on
hot engine parts or exhaust system parts, starting a fire. Be sure
to get an accurate reading if you check your transmission fluid.
Wait at least 30 minutes before checking the transmission fluid level if you
have been driving:
When outside temperatures are above 90°F (32°C).
0 At high speed for quite a while.
0 In heavy traffic - especially in hot weather.
0 While pulling a trailer.
To get the right reading, the fluid should be at normal operating
temperature, which
is 180°F to 200°F (82°C to 93°C).
To check transmission fluid hot: Get the vehicle warmed up by driving
about
15 miles (24 krn) when outside temperatures are above 50°F ( 1 0°C).
If it’s colder than 50°F (lO”C), drive the vehicle in THIRD GEAR (D) until
the engine temperature gage moves and then remains steady for ten minutes.
Then follow the hot check procedures.
6- 14